In my previous blog post, we learned that there were two ways to unit test Angular pipes:
- Isolated tests (without TestBed)
- Integrated tests (with TestBed)
But we put the focus on isolated tests. I this article, we are going to switch our focus on how to write integrated unit tests for Angular pipes.
We talk about integrated unit testing when we are testing the pipe in the same condition that it will be used at runtime. This means that we will test it when used inside an Angular component's template.
The Pipe Under Test
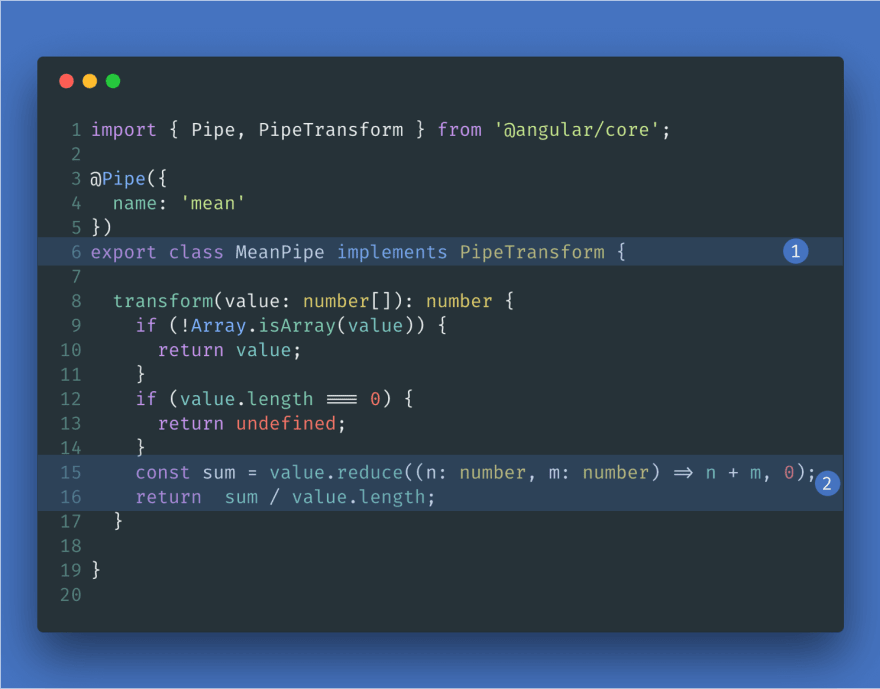
In case, you didn't read my previous blog post, here is the code of the pipe we are going to test. It is a simple pipe that transforms an array to its mean.
- Implement the
PipeTransforminterface. - Return the mean of the array of numbers.
The full source code of this pipe can be found at the end of the article or here.
We Need a Host Component
Because we want to write integrated tests for our pipe, we need a component that hosts our pipe. A host component is like any other Angular component. There is nothing specific about it. It is just a way to use the pipe in an Angular component's template.
The code for the host component is straightforward:
- Define property that holds the values to be passed to the pipe
- Display the result of the transformation of those values through the pipe.
Setting Up the Integrated Tests!
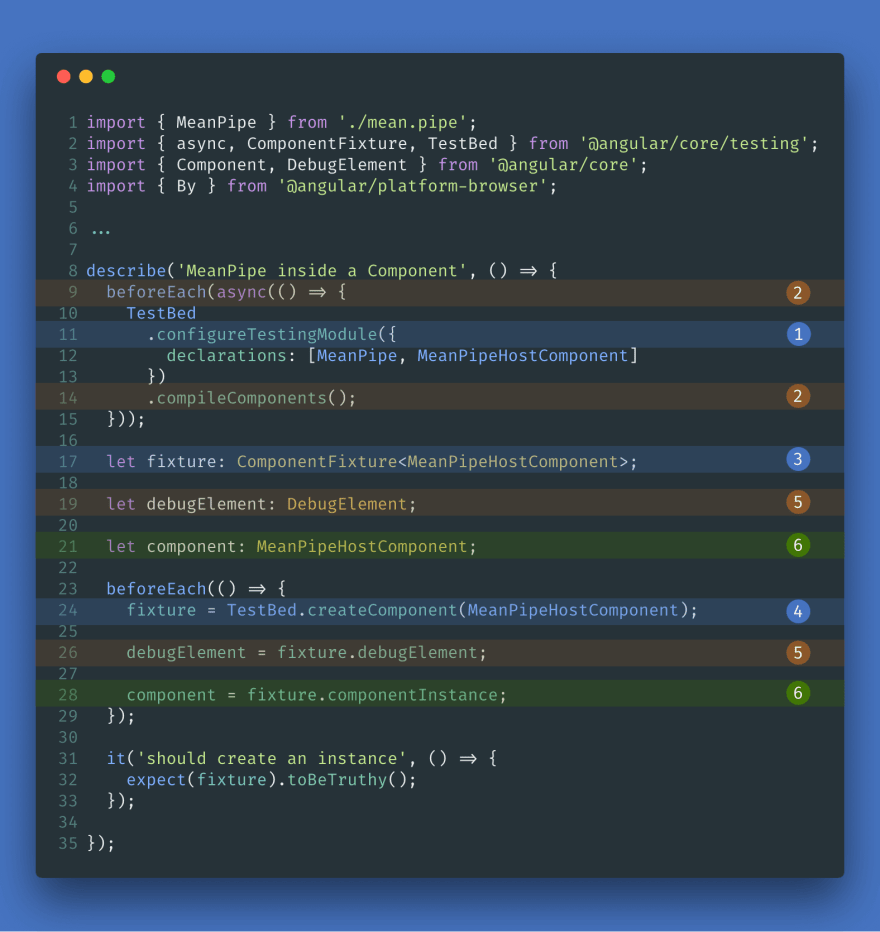
-
TestBed.configureTestingModule, as its name implies, allows us to create a specific Angular module for testing purposes. It accepts pretty much the same parameters as theNgModuledecorator. - Notice that we wrap the body of our first
beforeEachinside a special Angular zone. We do so by calling theasyncfunction, one of the many Angular testing utilities. We need this becauseTestBet.compileComponentsis asynchronous. So this ensures that our component's template is compiled beforehand (although technically this is not necessary in this example because our template is inlined). - A
ComponentFixtureis a wrapper around our host component. It allows us to interact with the environment of our component like its change detection or its injector. - The fixture is returned by
TestBed.createComponent. - From the fixture, we can get the
DebugElement. TheDebugElementis a wrapper around our component's HTML element. It provides more functionality than the nativeHTMLElement. - We can also get the real instance of our component from the fixture.
We made sure that our fixture can be properly instantiated. Now we can start writing real expectations.
The Actual Tests
- We start by updating the
valuesproperty of our component and we callfixture.detectChanges.fixture.detectChangeskicks off change detection for our component. It is necessary if we want our template to reflect the changes we made to the component class. - Next, we use
debugElement.querypassing it a predicateBy.css('div'). This allows us to target the div element by using its CSS selector. - From there, we can get the native
HTMLDivElement. - Then we can write our expectations.
The full source code of this pipe can be found at the end of the article or here
In this article, we learned how to write integrated unit tests for our Angular pipes. The setup for this kind of is more complicated than for isolated unit tests. There are also more concepts involved because we need to use Angular testing utilities. But the effort is forth it as integrated unit tests can help us detect bugs that isolated tests cannot reveal.
Thank you very much for reading!
Listing
mean.pipe.ts
import { Pipe, PipeTransform } from '@angular/core';

@Pipe({
  name: 'mean'
})
export class MeanPipe implements PipeTransform {

  transform(value: number[]): number {
    if (!Array.isArray(value)) {
      return value;
    }
    if (value.length === 0) {
      return undefined;
    }
    const sum = value.reduce((n: number, m: number) => n + m, 0);
    return  sum / value.length;
  }
}
mean.pipe.integrated.spec.ts
import { MeanPipe } from './mean.pipe';
import { async, ComponentFixture, TestBed } from '@angular/core/testing';
import { Component, DebugElement } from '@angular/core';
import { By } from '@angular/platform-browser';


@Component({
  template: '<div> {{ values | mean }}</div>'
})
export class MeanPipeHostComponent {
  values: number[];
}

describe('MeanPipe inside a Component', () => {
  beforeEach(async(() => {
    TestBed
      .configureTestingModule({
        declarations: [MeanPipe, MeanPipeHostComponent]
      })
      .compileComponents();
  }));

  let fixture: ComponentFixture<MeanPipeHostComponent>;
  let debugElement: DebugElement;

  let component: MeanPipeHostComponent;

  beforeEach(() => {
    fixture = TestBed.createComponent(MeanPipeHostComponent);
    debugElement = fixture.debugElement;
    component = fixture.componentInstance;
  });

  it('should create an instance', () => {
    expect(fixture).toBeTruthy();
  });

  it('should display 1', () => {
    component.values = [1, 1];
    fixture.detectChanges();

    const div: HTMLDivElement = debugElement
      .query(By.css('div'))
      .nativeElement;

    expect(div.textContent.trim()).toEqual('1');
  });

  it('should display 0', () => {
    component.values = [1, -1];
    fixture.detectChanges();

    const div: HTMLDivElement = debugElement
      .query(By.css('div'))
      .nativeElement;

    expect(div.textContent.trim()).toEqual('0');
  });

  it('should display nothing', () => {
    component.values = [];
    fixture.detectChanges();

    const div: HTMLDivElement = debugElement
      .query(By.css('div'))
      .nativeElement;

    expect(div.textContent.trim()).toEqual('');
  });
});


Top comments (2)
Thanks a lot for sharing! Keep it up!
In your experience, is it recommended to have different spec files depending on which type of test you are working on (i.e *.integrated.spec.ts) or to put everything in a single file?
Thank you for your time!
Hello Andrei,
Thanks for your kind comment.
I usually don't use
*.integrated.spec.tsto make the distinction. I tend to put everything in the same file.But it doesn't hurt if the file is named
mean.pipe.integrated.spec.tsin my opinion.