Hi everyone,
I know that today there is a js library for (almost) everything and you can be fine even if you don't know exactly what's going on on your page. But if the day comes when you have to customise the code for yours needs... math can be very tricky.
And IMO it's always cool to know how things work anyway.
Starting from the basics:
const M = Math

const DEFAULT_DECIMALS = 4

const round = (n, d = DEFAULT_DECIMALS) => {
  const m = d ? M.pow(10, d) : 1
  return M.round(n * m) / m
}

const getPercOf = (value, total, decimals = DEFAULT_DECIMALS) =>
  round(!total ? value : value * 100 / total, decimals)

const percValueOf = (perc, total, decimals = DEFAULT_DECIMALS) =>
  round(!total ? perc : perc * total / 100, decimals)

const getRandomNumber = (max, float = false, decimals = DEFAULT_DECIMALS) =>
  float ? round(M.random() * max, decimals) : M.random() * max | 0

// fastest way I found to put a value between a Min and a Max
const arrayOrderNumberUp = (a, b) => a - b
const getNumberInBetween = (a, b, c) => [a, b, c].sort(arrayOrderNumberUp)[1]

// USAGE
round(12.3456789)     // ==> 12.3457
round(12.3456789, 2)  // ==> 12.35
round(12.3456789, 0)  // ==> 12

getPercOf(10, 20)             // ==> 50
getPercOf(10.1234567, 20)     // ==> 50.6173
getPercOf(10.1234567, 20, 8)  // ==> 50.6172835

percValueOf(50, 20)          // ==> 10
percValueOf(12.345678, 100)  // ==> 12.3457
percValueOf(13.566, 33, 5)   // ==> 4.47678

getRandomNumber(255)  // ==> between 0 and 255, integer
getRandomNumber(1)    // ==> always 0
getRandomNumber(255, true)  // ==> between 0 and 255, float, 4 decimals

const MIN = 10
const MAX = 100
getNumberInBetween(50, MIN, MAX)  // ==> 50
getNumberInBetween(150, MIN, MAX) // ==> 100
getNumberInBetween(1, MIN, MAX)   // ==> 10
I know there is nothing special here, but the point for now is to have your values with a default number of decimals. I found this very useful for multiple reasons while I was working on a React video editor.
I had different resolutions to consider (720p 1080p 4k) edited in a small 480p preview. There were drag and drop elements, and all positions were in % (to be able to export at any resolution). Just setting the number of decimals (to 4) fixed some alignment bugs, and allowed me to had a pixel-level precision.
On top of that, there is the rounding problem.
In js 10 / 3 = 3.3333333333333335. FFMPEG disagreed. Other bugs fixed just by setting the number of decimals.
(If your values are in pixels, just 1 decimal is enough. Anyway I suggest not to use just integer numbers, even for pixels)
Moving on, cartesian coordinate system. Probably you too, like me, studied that at school and then never heard of it again for years. Until it turns out you need it in order to edit an image on your webpage.
Crop, resize, drag and drop, scale, rotation, lines intersections, point projection on line, get a line between two points... Here is all I needed until now:
const translateCoords = (x, y, dx, dy) => ([x + dx, y + dy])

const getDistanceBetweenTwoPoints = (x1, y1, x2, y2, decimals = 0) =>
  round(M.sqrt(M.pow(x2 - x1, 2) + M.pow(y2 - y1, 2)), decimals)

const getMiddlePointCoords = (x1, y1, x2, y2, decimals = DEFAULT_DECIMALS) =>
  ([
    round((x1 + x2) / 2, decimals),  // middle point x
    round((y1 + y2) / 2, decimals),  // middle point y
  ])

const rotatePointCoords = (x, y, angle, decimals = DEFAULT_DECIMALS) =>
  ([
    round(x * M.cos(angle) - y * M.sin(angle)),  // new point x
    round(x * M.sin(angle) + y * M.cos(angle)),  // new point y
  ])

const convertAngleRadToDeg = (rad) => rad * 180 / M.PI
const convertAngleDegToRad = (deg) => deg * M.PI / 180

const getAngleDegBetweenTwoPoints = (x1, y1, x2, y2) =>
  convertAngleRadToDeg(getAngleRadBetweenTwoPoints(x1, y1, x2, y2))

const getAngleRadBetweenTwoPoints = (x1, y1, x2, y2) => {
  const m1 = x2 - x1
  const m2 = y2 - y1
  if (m1 > 0 && m2 > 0) { // first quadrant
    return (M.atan(m2 / m1))
  } else if (m1 < 0 && m2 > 0) { // second quadrant
    return (M.atan(m2 / m1) + PI)
  } else if (m1 < 0 && m2 < 0) { // third quadrant
    return (M.atan(m2 / m1) + PI)
  } else if (m1 > 0 && m2 < 0) { // fourth quadrant
    return (M.atan(m2 / m1) + PI * 2)
  } else {
    // multiples of 90
    if (m1 === 0) {
      if (m2 > 0) {
        return PI / 2
      } else {
        return PI * 1.5
      }
    } else {
      if (m1 > 0) {
        return 0
      } else {
        return PI
      }
    }
  }
}

const getSlopeCoefficientBetweenTwoPoints = (x1, y1, x2, y2) => (y2 - y1) / (x2 - x1)

const getLineFunctionBetweenTwoPoints = (x1, y1, x2, y2) => (x) =>
  (((x - x1) * (y2 - y1)) / (x2 - x1)) + y1

const getPerpendicularLineFunctionPassingByPoint = (slope, x1, y1) =>
  (x) => (-1 / slope) * (x - x1) + y1

const getIntersectionBetween4Points = (x1, y1, x2, y2, x3, y3, x4, y4, decimals = DEFAULT_DECIMALS) => {
  // points {x1, y1} and {x2, y2} define the first line
  // points {x3, y3} and {x4, y4} define the second line
  let ua, denom = (y4 - y3) * (x2 - x1) - (x4 - x3) * (y2 - y1)
  if (denom === 0) {
    return [false, false]
  }
  ua = ((x4 - x3) * (y1 - y3) - (y4 - y3) * (x1 - x3)) / denom
  return [
    round(x1 + ua * (x2 - x1), decimals),
    round(y1 + ua * (y2 - y1), decimals),
  ]
}

const getPointProjectionOnLine = (x1, y1, x2, y2, x3, y3) => {
  // points {x1, y1} and {x2, y2} define the line
  // point {x3, y3} is the point to project on the line
  let x4, y4
  const slopeLine1 = getSlopeCoefficientBetweenTwoPoints(x1, y1, x2, y2)
  if (slopeLine1 === 0) {
    x4 = x3
    y4 = y1
  } else if (isFinite(slopeLine1)) {
    const line2 = getPerpendicularLineFunctionPassingByPoint(slopeLine1, x3, y3)
    if (x3 === x1) {
      x4 = x2
    } else {
      x4 = x1
    }
    y4 = line2(x4)
  } else {
    x4 = x1
    y4 = y3
  }
  return getIntersectionBetween4Points(x1, y1, x2, y2, x3, y3, x4, y4)
}
I won't go into the complex details of what I wrote above. When you need this you'll know it.
But I can show a few examples of how I used some of it:
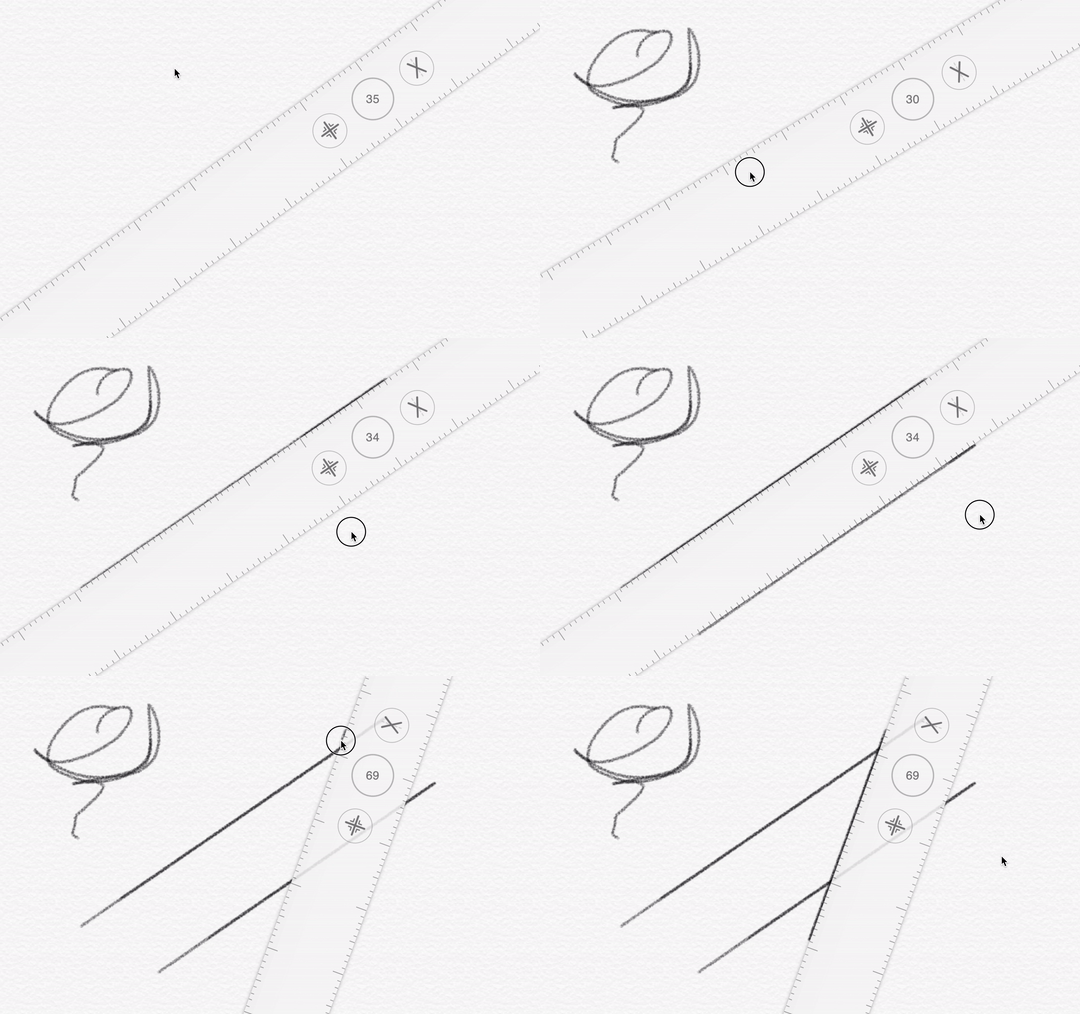
This free resize is quite simple:

This ratio + rotation resize is not:

For this one I projected mouse coords on the line defined by the two opposite image corners.
Same principle allowed me to do this too:

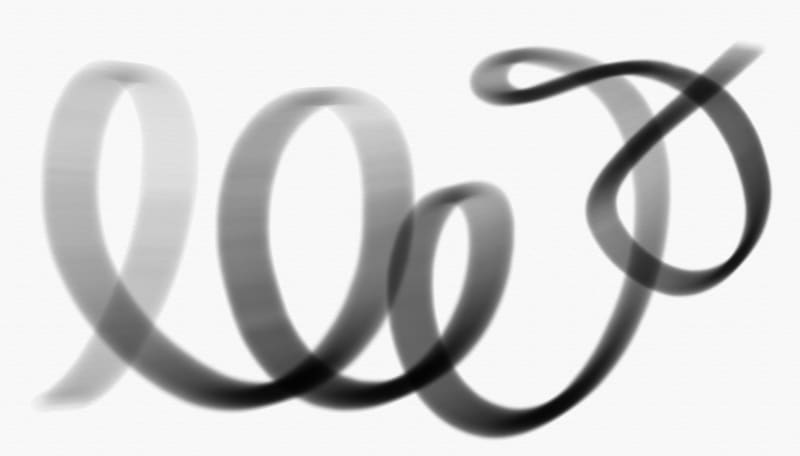
Last but not least, what about drawing a complex custom line on a canvas?
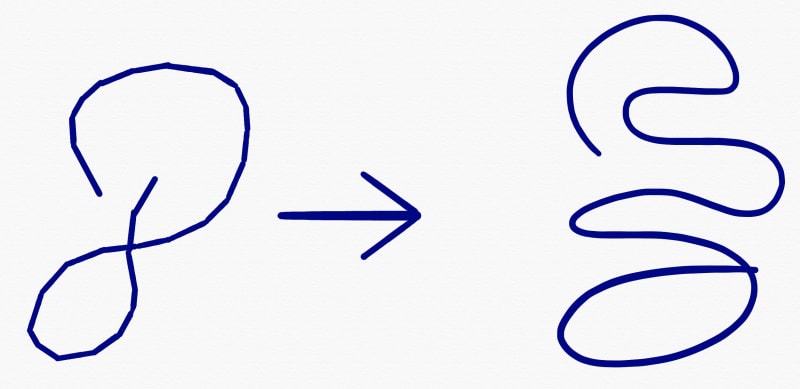
I already wrote the first of a series of articles about the complexity of drawing a really realistic line on a canvas. Simply put, there is no simple way to draw a realistic line.
The first obstacle is going from a series of lines drawn between mousemoves, to a nice curved line.

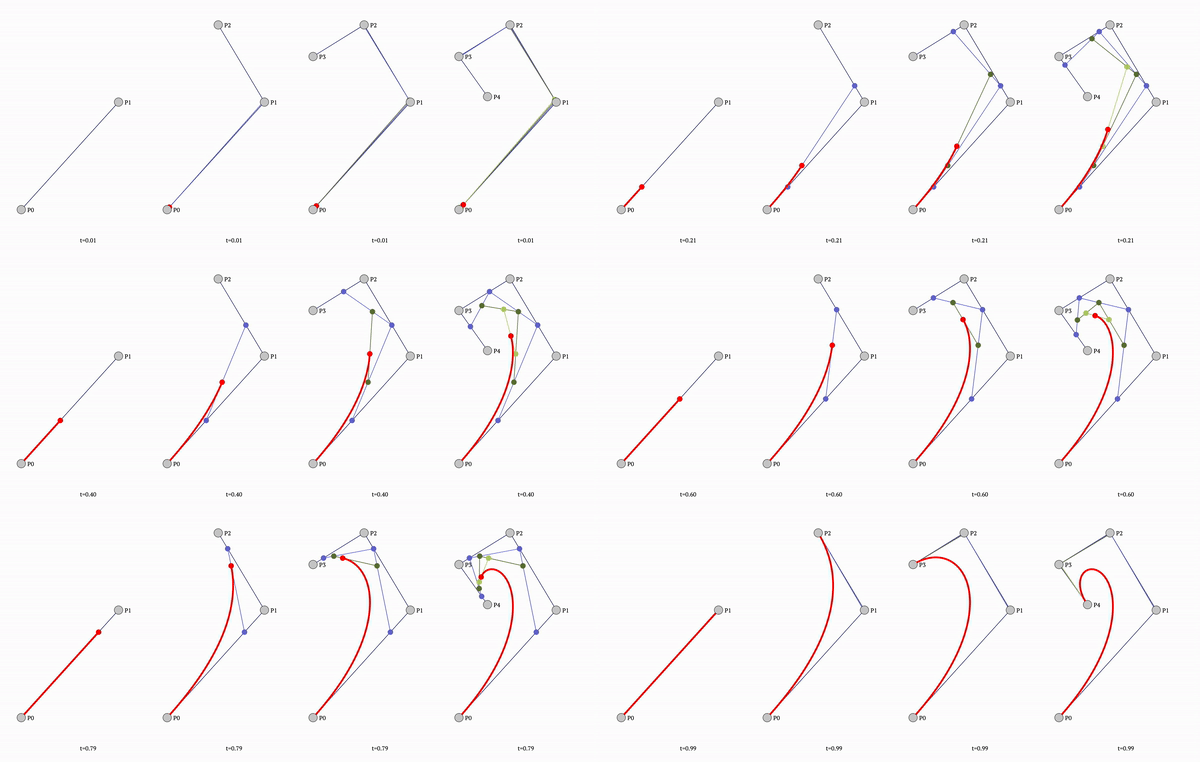
To fix that we need to stop using simple straight lines and use bezier curved lines instead.
Since ctx.quadraticCurveTo only allows simple flat line (and no custom tools), we need to calculate the bezier curve by hand:
const getQuadraticBezierCurvePointAtTime = (t, x1, y1, x2, y2, x3, y3, decimals = DEFAULT_DECIMALS) => ([
  round((1 - t) * (1 - t) * x1 + 2 * (1 - t) * t * x2 + t * t * x3, decimals), // curve x at time t
  round((1 - t) * (1 - t) * y1 + 2 * (1 - t) * t * y2 + t * t * y3, decimals), // curve y at time t
])

export const getQuadraticBezierCurveLength = (() => {
  let a, b, A, B, C, Sabc, A_2, A_32, C_2, BA
  return (x1, y1, x2, y2, x3, y3, decimals = DEFAULT_DECIMALS) => {
    a = {
      x: x1 - 2 * x2 + x3,
      y: y1 - 2 * y2 + y3,
    }
    b = {
      x: 2 * x2 - 2 * x1,
      y: 2 * y2 - 2 * y1,
    }
    A = 4 * (a.x * a.x + a.y * a.y)
    B = 4 * (a.x * b.x + a.y * b.y)
    C = b.x * b.x + b.y * b.y
    Sabc = 2 * M.sqrt(A+B+C)
    A_2 = M.sqrt(A)
    A_32 = 2 * A * A_2
    C_2 = 2 * M.sqrt(C)
    BA = B / A_2
    if (BA === -C_2 && a.x !=0 && a.y != 0 && b.x != 0 && b.y != 0) {
      BA += 1
    }
    return round((A_32 * Sabc + A_2 * B * (Sabc - C_2) + (4 * C * A - B * B) * M.log((2 * A_2 + BA + Sabc) / (BA + C_2))) / (4 * A_32), decimals)
  }
})()
With that you'll be able to draw a perfectly homogeneous line, adapting its size and alpha continuously.
And that's it, I shared with you all I have used until now in my previous projects.
I know not everyone needs this level of math in his/her code, but I hope some of you can put it to good use.
Please leave a comment if you liked it or If you have some more math functions to share!
See you


Top comments (0)