Hello, Dear developers 👩💻👨💻, sorry to belated a Happy New year to you! So after a long break & time, we'll work on the making of another responsive landing page using fundamental front-end technology like HTML, CSS, Javascript & much more.
Another Responsive?
Yes, We have created various blogs on creating responsive landing page whose links are given below ⤵️

👨💻 Create a Responsive Landing Page using HTML CSS & JS 🔥
Aniket ・ Oct 13 '21 ・ 12 min read

Create a Responsive Landing Page Using HTML CSS & JS 🔥
Aniket ・ Sep 8 '21 ・ 9 min read
if you are interested in watching code tutorial instead of reading the complete blog post make sure you watch the video below :
If you want to see more web design tutorials just like these ! Please consider subscribing to our Youtube Channel.
Source Code for this post is available on Github with all images and much more so please visit the below-given link to get source code
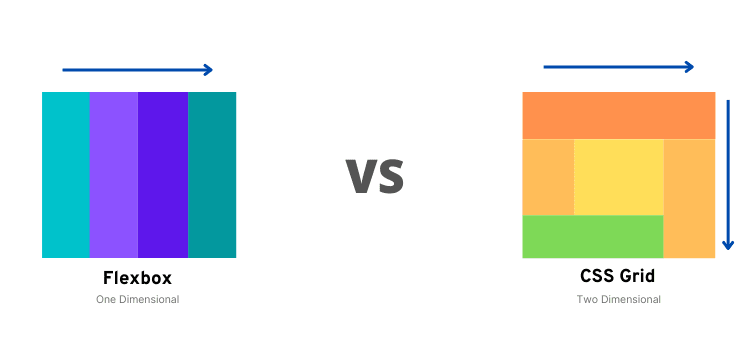
So once again in this coding blog post, we cover the two most fundamental & modern layout building systems which are CSS Flexbox & CSS Grid.
Did you know that what is the main difference between?
If you know already you are absolute genius ! if no don't worry below given is the image which simply describes What the hell is CSS Flexbox VS CSS Grid.
Okay 😆, that's it for now! Let's get into the coding part for which we are here !!!
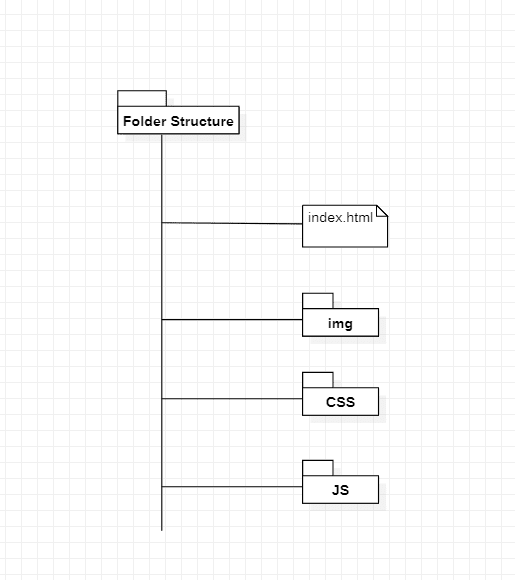
Starting with our project folder structure first 👇
Typically we have used 3 external libraries which includes 👇
- Boxicons - An Open Source icons library.
- Google Fonts - A font embedding library.
- GSAP by GreenSock - Create Professional-grade JavaScript animation for the modern web.
So from the above project folder structure, we required index.html, style.css, script.js & IMG folder where a all image files are stored.
So after creating those files let's jump into your favorite code editor.
First of all, we will look at making some basic changes in our CSS file which includes resets of the root, HTML & CSS variables & some basic styles.
Style.css
/* ===== GOOGLE FONTS : www.fonts.google.com ======  */
@import url("https://fonts.googleapis.com/css2?family=Poppins:wght@300;400;500;600&family=Rubik:wght@300;400;500&display=swap");
/* ==== ROOT ==== */
* {
 margin: 0;
 padding: 0;
 box-sizing: border-box;
 font-family: "Poppins", sans-serif;
}
/* ==== CSS VARIABLES ==== */
:root {
 --logo-text-color: #23241f;
 --lg-text-color: #000000;
 --sm-text-color: #828282;
 --md-light-text: #353534;
 --light-text: #959188;
 --text-color: #80b801;
 --light-border: #d9eab3;
 --gradient-start: #f0fff1;
 --gradient-middle: #fefefa;
 --gradient-end: #fff;
}
/* ==== HTML RESET ==== */
html,
body {
 scroll-behavior: smooth;
}
body {
 height: 100vh;
 width: 100%;
 background: linear-gradient(
  124deg,
  var(--gradient-start) 0%,
  var(--gradient-middle) 50%,
  var(--gradient-end) 100%
 );
}
a {
 text-decoration: none;
}
button {
 border: none;
 outline: none;
 cursor: pointer;
}
ul li {
 list-style-type: none;
}

/* ==== CONTAINER ==== */
.container {
    max-width: 1028px;
    margin: 0 auto;
    padding: 0rem;
}
.grid {
    display: grid;
}

@media screen and (min-width: 64em) {
    .container {
        width: 100%;
        padding: 1rem;
    }
}
Great! As you can see we have imported Google fonts in our project which namely includes Poppins and Rubik, according to their font weights.
we are moving further to add a skeleton that is to add HTML.
so come inside in our index.html file to make add basic Markup.
index.html
<!DOCTYPE html>
<html lang="en">
    <head>
        <meta charset="UTF-8" />
        <meta http-equiv="X-UA-Compatible" content="IE=edge" />
        <meta name="viewport" content="width=device-width, initial-scale=1.0" />
        <title>Medme Landing Page - Responsive Landing Page</title>
        <!-- ======= STYLE ====== -->
        <link rel="stylesheet" href="./CSS/style.css" />
        <!-- ======= BOXICONS CDN ====== -->
        <link
            href="https://unpkg.com/boxicons@2.1.1/css/boxicons.min.css"
            rel="stylesheet"
        />
        <!-- ======= GSAP CDN ====== -->
        <script src="https://cdnjs.cloudflare.com/ajax/libs/gsap/3.8.0/gsap.min.js"></script>
    </head>
    <body>


        <!-- ======= Script.js ====== -->
        <script src="./JS/script.js"></script>
    </body>
</html>
So, Here are our blank results 😆 =>
Okay! Now Let's make our very first component and most important that is navigation bar or Navbar.
index.html
<header class="header container">
<nav class="navbar">
<div class="logo">
<h2 class="logo-name">
<a href="#">Med<span>me</span> </a>
</h2>
</div>
<div class="nav_menu">
<div class="close-nav">
<button class="close_btn">✕</button>
</div>
<ul class="nav-link-list">
<li class="nav-link-list-item">
<a class="nav-link active" href="#">home</a>
</li>
<li class="nav-link-list-item">
<a class="nav-link" href="#">product</a>
</li>
<li class="nav-link-list-item">
<a class="nav-link" href="#">contact</a>
</li>
<li class="nav-link-list-item">
<a class="nav-link" href="#">about</a>
</li>
</ul>
</div>
<button class="toggle_btn">
<i class="bx bx-menu"></i>
</button>
</nav>
</header>
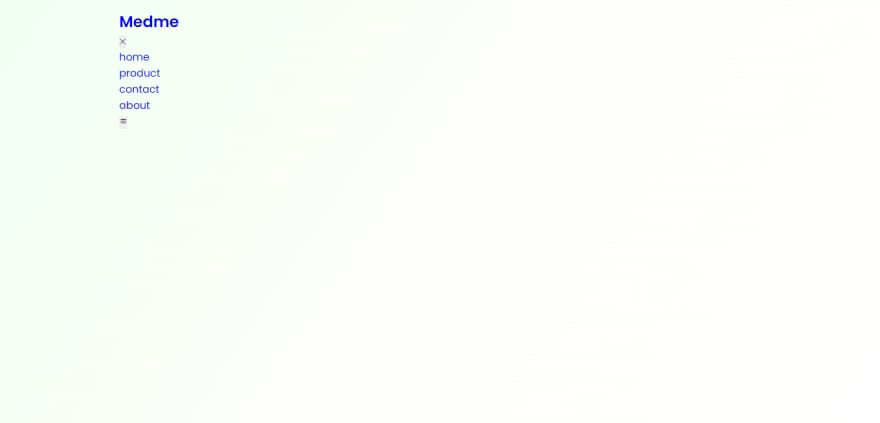
Result =>
Adding Styles in it in our style.css file
Style.css
/* ==== ROOT RESET ==== */
/* ==== HTML RESET ==== */
/* ==== CSS VARIABLES ==== */
/* ==== CONTAINER ==== */
/* ==== HEADER ==== */
.header {
    width: 100%;
    height: 4rem;
    margin-bottom: 3rem;
}
.navbar {
    width: 100%;
    height: 100%;
    padding: 0 0.5rem;
    display: flex;
    align-items: center;
    justify-content: space-between;
}
.logo {
    min-width: 100px;
}
.logo-name a {
    font-family: "Rubik", sans-serif;
    letter-spacing: 0.7px;
    font-size: 1.5rem;
    color: var(--logo-text-color);
}
.logo-name a span {
    font-family: "Rubik", sans-serif;
    color: var(--text-color);
    font-weight: 400;
}

.close-nav {
    display: none;
}
.close-nav {
    display: none;
}

.close_btn {
    background-color: #f3f4f6;
    font-size: 1rem;
    width: 2.5rem;
    height: 2.5rem;
    border-radius: 50%;
    font-weight: 600;
}
.close_btn:hover {
    background-color: #ffffff;
}

.nav-link-list {
    display: flex;
}
.nav-link-list-item {
    margin: 0 1.5rem;
}
.nav-link-list-item .nav-link {
    font-family: "Rubik", sans-serif;
    font-size: 1.05rem;
    letter-spacing: 0.3px;
    text-transform: capitalize;
    color: var(--logo-text-color);
}
.nav-link.active {
    font-weight: 600;
}
.nav-link:hover {
    color: var(--text-color);
}

.toggle_btn {
    background-color: transparent;
    display: none;
}
.toggle_btn i {
    font-size: 1.5rem;
}

.show {
    right: 0 !important;
}

.no-scroll {
    overflow-y: hidden;
}
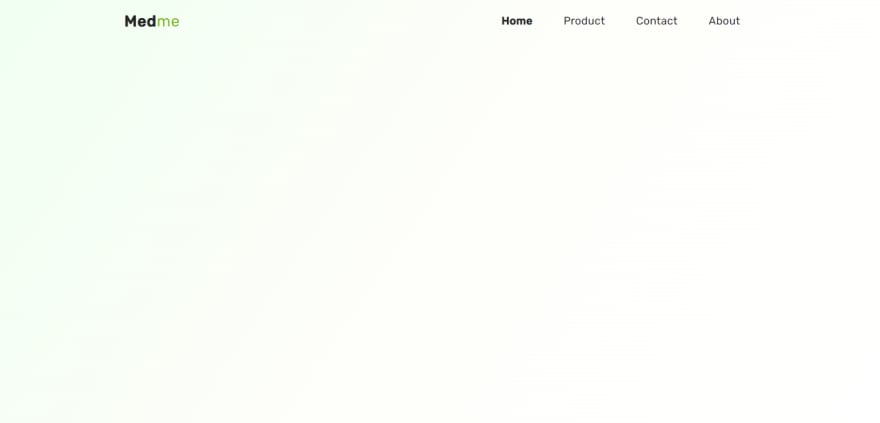
Result =>
So until this we created our navbar and added style for ease of navigation 🎉
but wait we are not finished yet...!
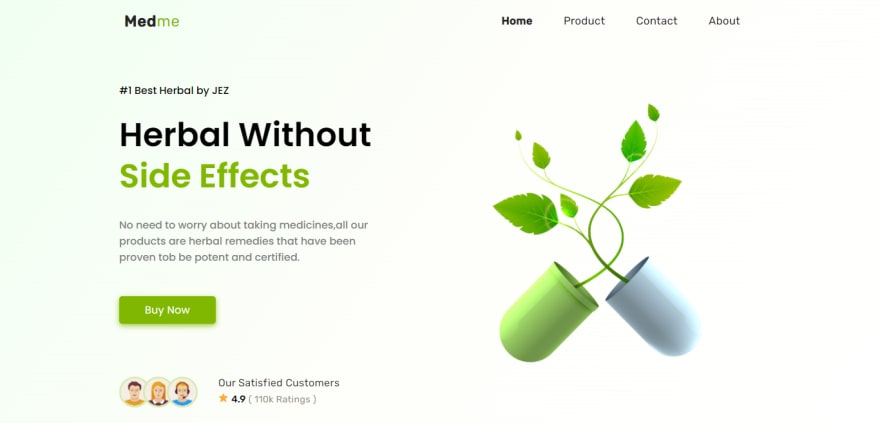
HERO SECTION 😎
Oh Yes, A Hero Section 😎 which defines a glimpse of your company and offers.
Let's add markup for our hero section in our index.html file
index.html
<!-- ====== HEADER ====== -->
<!-- ====== HERO SECTION ====== -->
<div class="container">
   <section class="grid grid-cols-2">
      <!-- ===== GRID-ITEM-1 ===== -->
      <div class="grid-item-1">
         <div class="flex-item-1">
            <p class="product-intro">#1 Best Herbal by JEZ</p>
            <h1 class="product-tagline">
               herbal without <span>side effects</span>
            </h1>
            <p class="product-desc">
               No need to worry about taking medicines,all our products are
               herbal remedies that have been proven tob be potent and certified.
            </p>
            <a href="#" class="cta-btn">buy now</a>
         </div>
         <div class="flex-item-2">
            <ul class="customer-list">
               <li class="customer-list-item">
                  <img class="customer-img" src="./img/01.png" alt="cusomtor-1" />
               </li>
               <li class="customer-list-item">
                  <img class="customer-img" src="./img/02.png" alt="cusomtor-2" />
               </li>
               <li class="customer-list-item">
                  <img class="customer-img" src="./img/03.png" alt="cusomtor-3" />
               </li>
            </ul>
            <div class="customer-related-desc">
               <p>our satisfied customers</p>
               <span class="rating-star">
               <i class="bx bxs-star"></i>
               </span>
               <span class="rating-count">4.9</span>
               <span class="ratings">( 110k Ratings )</span>
            </div>
         </div>
      </div>
      <!-- ===== GRID-ITEM-2 ===== -->
      <div class="grid-item-2">
         <div class="plant-img">
            <img src="./img/plant-img.png" alt="plant-img" />
         </div>
      </div>
   </section>
</div>
Result =>
I guess it might be taking some shape. Okay Let's add style to it.
Style.css
 .grid-cols-2 {
    grid-template-columns: repeat(2, 1fr);
}

.grid-item-1 {
    display: flex;
    flex-direction: column;
    justify-content: space-between;
    height: 100%;
}

.flex-item-1 {
    width: 80%;
}
.product-intro {
    font-size: 1rem;
    color: var(--lg-text-color);
    font-weight: 500;
}
.product-tagline {
    font-size: 3.2rem;
    color: var(--lg-text-color);
    line-height: 1.25;
    text-transform: capitalize;
    margin-top: 1.5rem;
}
.product-tagline span {
    color: var(--text-color);
}

.product-desc {
    color: var(--sm-text-color);
    font-weight: 500;
    margin-top: 2rem;
    font-size: 1rem;
}

.cta-btn:active,
.cta-btn:visited {
    color: var(--gradient-end);
}
.cta-btn {
    display: block;
    width: 150px;
    height: 43px;
    background-color: var(--text-color);
    font-size: 1rem;
    letter-spacing: 0.3px;
    display: flex;
    align-items: center;
    justify-content: center;
    text-transform: capitalize;
    border-radius: 5px;
    margin-top: 3rem;
    transition: 0.5s;
    color: var(--gradient-end);
    box-shadow: 0px 3px 10px 0px rgba(128, 184, 1, 0.75);
}
.cta-btn:hover {
    background-color: #73a601;
}
.cta-btn:active {
    transform: scale(0.85);
}

.flex-item-2 {
    display: flex;
    gap: 2rem;
    padding-left: 0.7rem;
}

.customer-list {
    display: flex;
}
.customer-list-item {
    width: 3rem;
    height: 3rem;
}
.customer-list-item .customer-img {
    width: 100%;
    height: 100%;
    border-radius: 50%;
    object-fit: cover;
}
.customer-img {
    border: 3px solid var(--light-border);
}
.customer-list-item {
    margin-left: -0.7rem;
}

.customer-related-desc p {
    font-size: 1rem;
    font-weight: 400;
    text-transform: capitalize;
    letter-spacing: 0.3px;
    font-family: "Rubik", sans-serif;
    color: var(--md-light-text);
    margin-bottom: 0.2rem;
}
.rating-star {
    color: #ffac37;
}
.rating-count {
    color: var(--lg-text-color);
    font-weight: 500;
    font-size: 0.95rem;
    font-family: "Rubik", sans-serif;
}
.ratings {
    color: var(--light-text);
    letter-spacing: 0.3px;
    font-size: 0.9rem;
    font-family: "Rubik", sans-serif;
    font-weight: 400;
}

.plant-img {
    width: 100%;
    height: 100%;
}
.plant-img img {
    width: 100%;
    height: 100%;
}
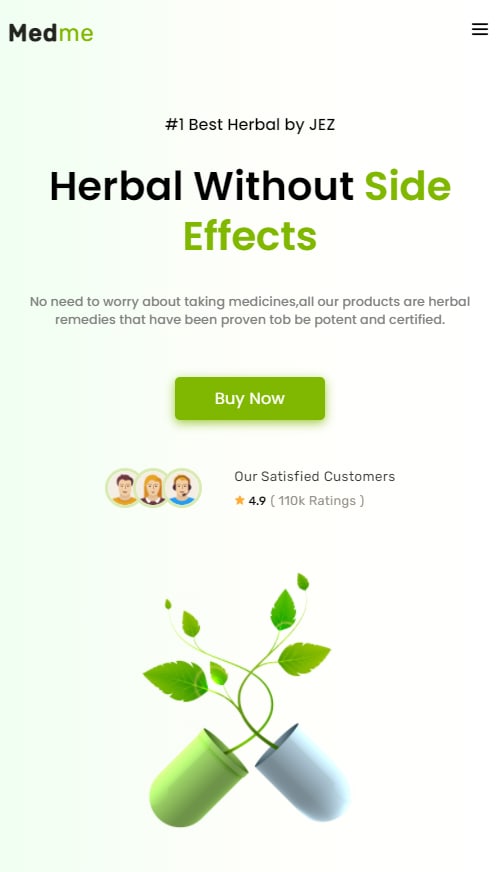
Now Let's make it responsive on smaller screen devices like mobile and tablet, by adding responsive media query.
Style.css
/* ===== HEADER ===== */
/* ===== HERO  ===== */
/* ===== RESPONSIVE MEDIA QUERIES  ===== */
@media screen and (max-width: 991px) {
body {
background: linear-gradient(
90deg,
var(--gradient-start) 0%,
var(--gradient-middle) 50%,
var(--gradient-end) 100%
);
}
.close-nav {
width: 100%;
display: flex;
justify-content: flex-end;
}
.nav_menu {
position: fixed;
top: 0;
right: -100%;
height: 100vh;
width: 100%;
padding: 2rem;
background: rgba(215, 215, 215, 0.6);
backdrop-filter: blur(7px);
z-index: 50;
transition: 0.5s ease;
opacity: 1;
}
.nav-link-list {
flex-direction: column;
align-items: center;
margin-top: 2rem;
}
.nav-link-list-item {
margin: 1.4rem 0;
}
.nav-link-list-item .nav-link {
font-size: 1.2rem;
}
.nav-link:hover {
color: #fff;
}
.toggle_btn {
display: block;
}
.grid-cols-2 {
grid-template-columns: 1fr;
gap: 2.5rem;
}
.grid-item-1 {
gap: 3rem;
}
.flex-item-1 {
width: 100%;
text-align: center;
display: flex;
flex-direction: column;
align-items: center;
}
.product-tagline {
font-size: 2.5rem;
}
.product-desc {
font-size: 0.8rem;
padding: 0 1.25rem;
}
.flex-item-2 {
width: 100%;
justify-content: center;
}
.customer-list-item {
width: 2.5rem;
height: 2.5rem;
}
.customer-related-desc p {
font-size: 0.85rem;
}
.rating-star {
font-size: 0.7rem;
}
.rating-count {
font-size: 0.75rem;
}
.ratings {
font-size: 0.8rem;
}
.plant-img {
width: 100%;
display: flex;
align-items: center;
justify-content: center;
}
.plant-img img {
width: 20rem;
}
}
Now here, we make our navbar responsive on smaller screen to look diffrent than other screen.
here we go, we observe that nav-links were hidden on mobile screen while they were visible on desktop screen. so here we add some little Javascript to make nav-links visible after clicking on toggle menu button.
Now come inside our script.js file to add logic 🧠
Script.js
const navMenu = document.querySelector(".nav_menu"),
    ToggleBtn = document.querySelector(".toggle_btn"),
    CloseBtn = document.querySelector(".close_btn");

// ==== SHOW MENU ==== //
ToggleBtn.addEventListener("click", () => {
    navMenu.classList.add("show");
    document.querySelector("body").classList.add("no-scroll");
});

// ==== HIDE MENU ==== //
CloseBtn.addEventListener("click", () => {
    navMenu.classList.remove("show");
    document.querySelector("body").classList.remove("no-scroll");
});
So here in our .js file we grab the elements on which we want to perform action which includes navMenu, toggleBtn, closeBtn and added eventlistener on toggleBtn and CloseBtn to show & hide the navbar.
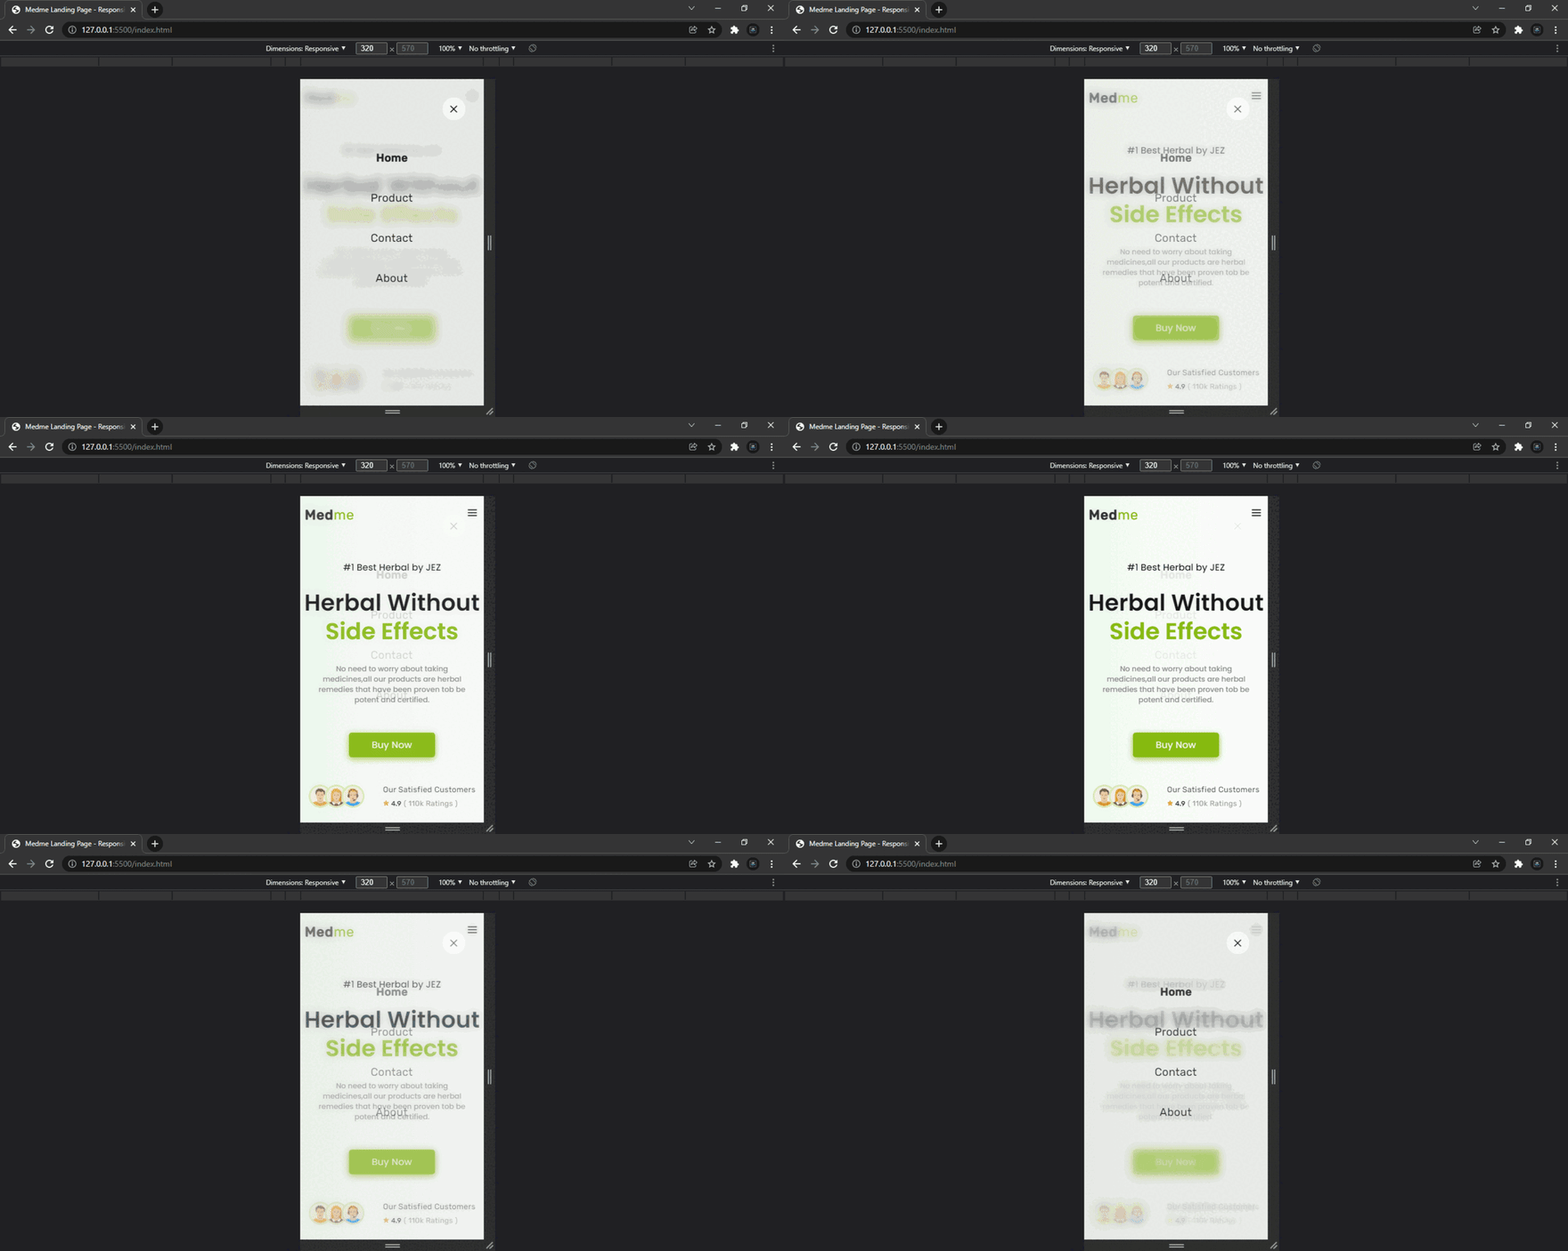
Please see the below given output in GIF Format for better understanding.
Result in GIF Format ⤵️
So onclick toggleBtn that is three bar at top right corner we can see the navlinks. ( for the creation of toggle button is used the icon from the boxicons library or website ).
so after clicking on it a new div is open where we see the navlinks and on that div at top right corner we again see a close button in order to close that div.
Absolutely Fantastic!
Thank you so much for reading this till end where we created our medme responsive landing page.
Now inorder to make our landing page way more interesting let's add some animations to it by using GSAP Library.
So Let's come inside our Script.js file.
// ==== TOGGLE MENI ==== //
// ==== GSAP Animations ==== //
// ==== LOGO  ==== //
gsap.from(".logo", {
    opacity: 0,
    y: 10,
    delay: 1,
    duration: 0.5,
});
// ==== NAV-MENU ==== //
gsap.from("ul li", {
    opacity: 0,
    y: 10,
    delay: 1.4,
    duration: 0.5,
    stagger: 0.3,
});
// ==== TOGGLE BTN ==== //
gsap.from(".toggle_btn", {
    opacity: 0,
    y: 10,
    delay: 1.2,
    duration: 0.5,
});

// ==== FLEX ITEM ==== //
gsap.from(".flex-item-1", {
    opacity: 0,
    y: 20,
    delay: 2.8,
    duration: 1,
});

gsap.from(".customer-related-desc p", {
    opacity: 0,
    y: 20,
    delay: 2.8,
    duration: 0.8,
});

gsap.from(".rating-star i", {
    opacity: 0,
    y: 20,
    delay: 3,
    duration: 1,
});

gsap.from(".rating-count", {
    opacity: 0,
    y: 20,
    delay: 3,
    duration: 1,
});

gsap.from(".ratings", {
    opacity: 0,
    y: 20,
    delay: 3,
    duration: 1,
});

// ==== PLANT IMAGE ==== //
gsap.from(".plant-img img", {
    opacity: 0,
    y: 20,
    delay: 3,
    duration: 1,
});
And that's it guys here we end our project! Thank you so much for reading the post till the end !!! Please Make sure you check out my Youtube Channel where I post this kind of coding tutorial.







Top comments (0)