What is Virtual Machine?
Virtual machine is a virtual environment over your a system. Assume you have a Linux OS on your system, but you want to use Windows for some specific functionality, but you don't want to install it over your system. What you can do is, just create a VM (Virtual Machine) with Windows OS and use in whatever way you want virtually over your system.
So basically, a virtual machine (VM) is a virtual environment that functions as a virtual computer system with its own CPU, memory, network interface, and storage, created on a physical hardware system.
So, let's create a VM on Azure.
Move to the Azure Portal, and tap on the + icon with text Create a resource.

You will get similar interface show below. Choose the Virtual machine from the given option.

Let's now examine each option given.
Let the Subscription be as it is. And in Resource group, let's create a new one using the Create new option shown in blue below the input bar.

I am creating a Resource group named as VM_RG.
Now the question arise that, What is a Resource group?
So, a resource group is a container that holds related resources for an Azure solution. The resource group can include all the resources for the solution, or only those resources that you want to manage as a group.
The time to give our Virtual Machine a name.

- In the Virtual machine name, I am giving the VM a name as VMonPortal.
- Under Region, choose the region which is nearest to you. I am choose the region as Central India as it's nearest to me.
- Keep the Availability option as No infrastructure redundance required.
- Let the Security type remain as Standard.
- Under Image choose the operating system which you want in your virtual machine. I am choosing Windows 11 Pro.
- Leave the Azure Spot instance as unchecked.
- Under Size, choose the size which suites your pocket. I am choosing the lowest one, i.e, Standard_D2s_v3.
Time to set the username and password of our VM.

You can see that there are some criteria related to the username and password, so choose the username and password accordingly.
And do remember this username and password, because this will help you to signin to your VM.
Leave the Inbound port rules section as it is.

Check mark the licensing confirmation.

Now your interface should look similar to this, with similar values.

Now tap on Next: Disks > button below.

Now this interface will open up which basically ask for the data disks you want in your VM.

I am keeping the OS disk type as Standard SSD, leaving the other items same.

If you want you add a data disk, but I am not adding any, leaving the other items as it is.

Now tap on the Next: Networking > tab below.

I am keeping all the items as it is, in the Networking tab.

Now directly tap on Review + Create button below.

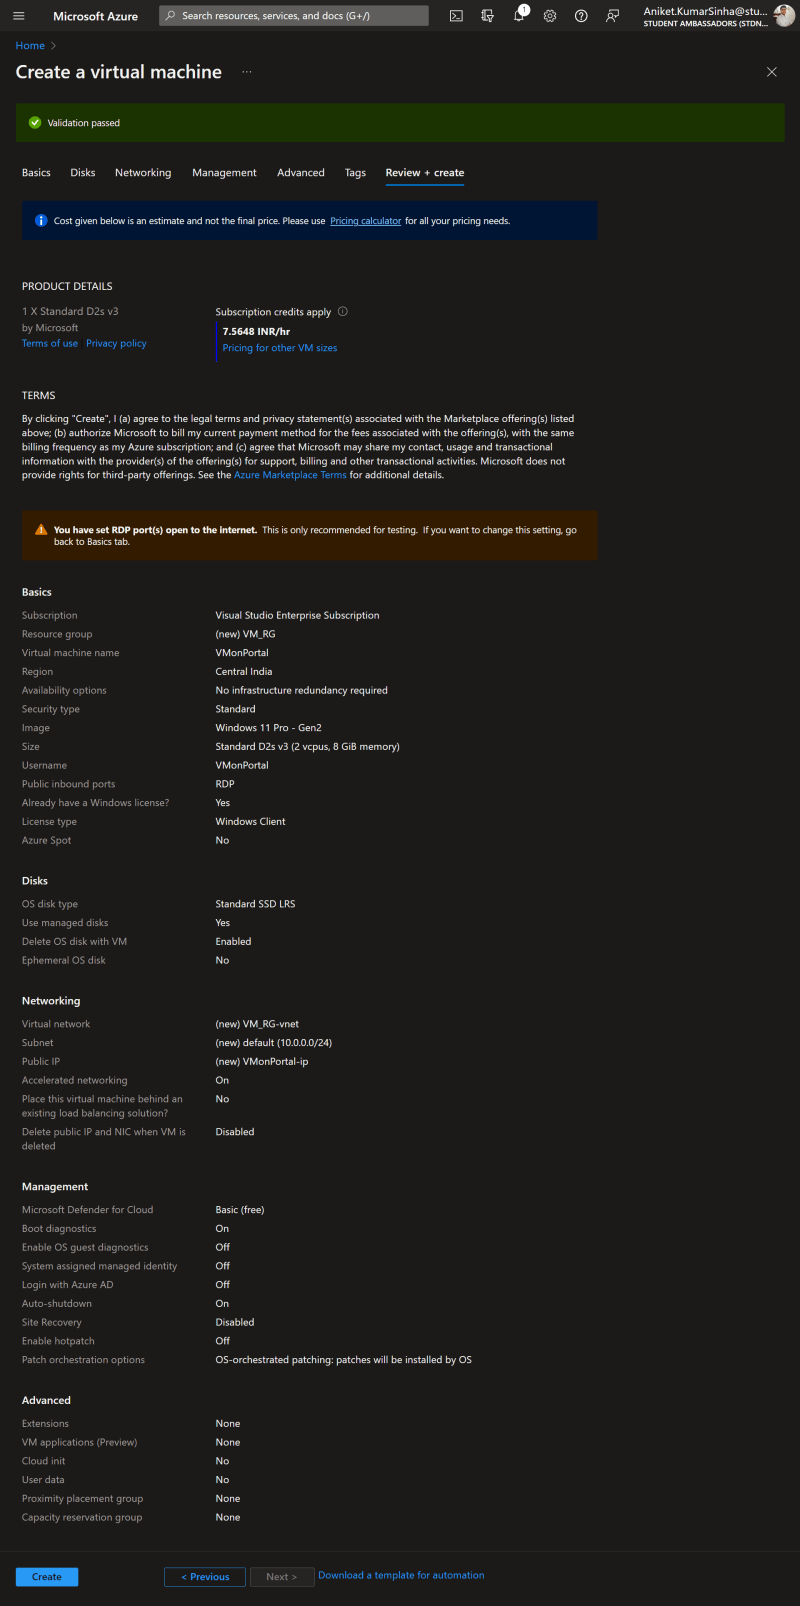
The Review + create tab will open up with some information and costing of your VM.

Now just tap on the Create button below.

This will create the VM with the configurations you mentioned.
The creation process may take some time.
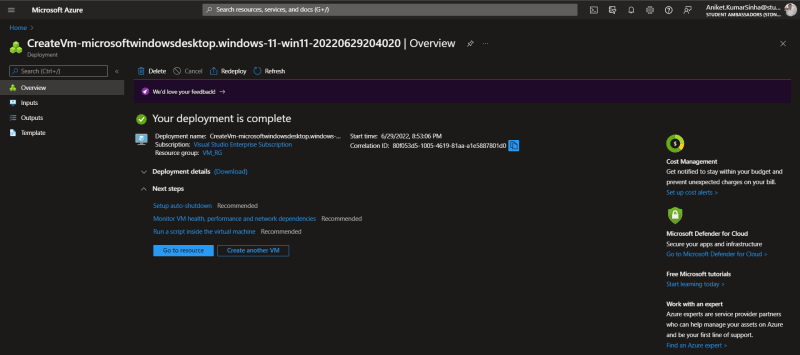
This kind of message can come up on your screen that the deployment is complete.

Now tap on Go to resource button.

The portal for the virtual machine will open up.

Awesome!!
We just now created our Virtual Machine on Azure Portal.
But wait!!!!
How to use the Virtual Machine now.
Let's see how we can start our Virtual Machine.
Here you have the option of Connect. So, you need to tap on the arrow with Connect and choose the RDP option from the dropdown menu.

Connect with RDP interface will open up, and now we need to download the RDP file using the Download RDP File button.

Now in your downloads folder, you can see a .rdp file with the name of your VM.

Just open that file.
Remote Desktop Connection interface will open up, and you need to tap on the Connect button to connect to your VM.

Windows Security interface will open up. But you need to tap on More choices option given below. And there you need to choose Use a different account option.

Now on the new interface, you need to add the username and password which you set while creating the VM. And then tap on OK button below.

If this kind of interface comes up, just tap Yes below.

Now you can see the Virtual Machine is opening up.

You can enlarge the VM and make it full screen and use it like your own system.
Yayy!
Now finally you have created your own Virtual Machine on Azure Portal and used it too.
Enjoy your new system 🎉


Top comments (0)