I recently presented at an Open Mic event hosted by AWS for the AWS community members. After my presentation, one of the attendees suggested that I develop a Cloudfront utility like the one I developed for SQS.
This post explains how to use the AWS Cloudfront Manager application I developed for Windows based on the request. It enables anyone to interact with Cloudfront without needing to be familiar with the CLI/SDK or access the console on a frequent basis. An engineer can use this tool to Invalidate, Enable, Disable, or Delete a Cloudfront distribution. This tool is great for anyone who isn't particularly tech-savvy but wants to use Cloudfront services.
Download
The AWS Cloudfront Manager executable can be found at this link. When you start the Cloudfront Manager exe after unzipping, you will be presented with the Config screen.

Configuration Tab
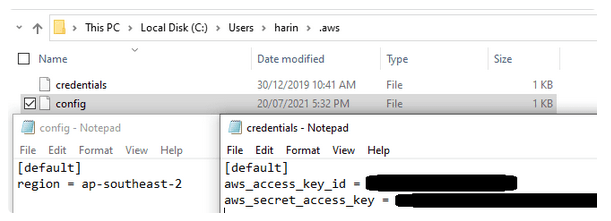
In the Cloudfront Manager, you have two options for connecting to AWS services using credentials. The first step is to enter credentials on the configuration tab. Another option is to keep your credentials in the following location on your Windows PC.
/Users/[username]/.aws
For the article, we'll enter our credentials into the text box and connect.

Once the connection has been established, select the Cloudfront tab. This is where all of the magic takes place.
Cloudfront Tab
You have two ways for accessing a distribution on the Cloudfront tab. One can list distributions by distribution ID or by selecting the Show all option.

You can use the first option if you know the distribution id. If not, you can use the "Show All" button on the screen to view all the account's distributions. Currently, the tool only allows for the visualization of 100 distributions. More than 100 will be possible in the future.

Describe Distribution
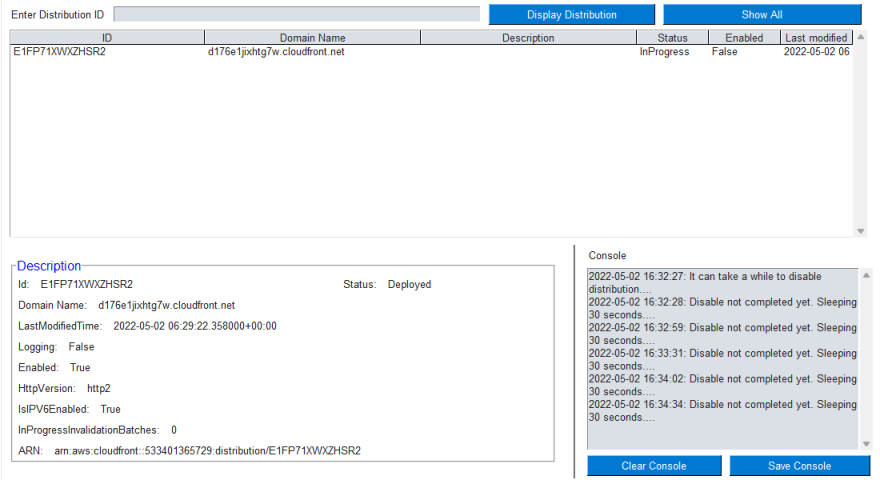
Pick the correct row in the table to acquire more information about the distribution. More information about the distribution is shown in the description section.

Invalidate Distribution
Select the distribution ID row and right-click on it to invalidate the distribution. This will show a dropdown menu with the option to Invalidate. When you select the Invalidate option, the Invalidation procedure will begin. The Invalidation ID will be displayed on the console screen.


Enable Distribution
Select the distribution ID row and right-click on it to enable the distribution. This will open a dropdown menu with the Enable option. When you select the Enable option, the enable process will begin. To check the status, select Refresh from the dropdown menu. The output of the action will be displayed on the console.
Disable Distribution
Select the distribution ID row and right-click on it to disable the distribution. This will open a dropdown menu with the Disable option. When you select the Disable option, the disabled process will begin. To check the status, select Refresh from the dropdown menu. The output of the action will be displayed on the console.

Delete Distribution
To delete a distribution, right-click on the distribution ID row and select Delete. If the distribution is switched on, the process will disable it before deleting it. The distribution will be deleted if it isn't. To see the update in action, refresh the screen. The status of the deletion process will be displayed every 30 seconds on the console screen. The deletion process has timeout of 30minutes. If after 30minutes, the distribution is still not deleted, the process exists.


If you like the tool, please leave a star on the github repo. Also if you find a bug, do let me know.
Thanks for reading!
If you enjoyed this article feel free to share it on social media 🙂
Say Hello on: Linkedin | Twitter | Polywork
Github: hseera


Top comments (0)