Integrating payments in android applications is pretty common nowadays but it can sometimes be an headache doing this as an app developer. I will be showing you how to use Paystack in your android application, if you are uncertain of which to use or you've decided to use Paystack, well you've come to the right place. This is by no means an air-tight approach, it is just to show the basics and get your app running.
Some preliminaries, I'm using Gradle Build Tools 3.6.3, Kotlin 1.3.71 and Android API level 29.
Alright let's get going.
First we gonna put the Paystack dependencies in our build.gradle file in our app directory and sync, like so.
    // Paystack
    implementation 'co.paystack.android.design.widget:pinpad:1.0.4'
    implementation 'co.paystack.android:paystack:3.0.17'
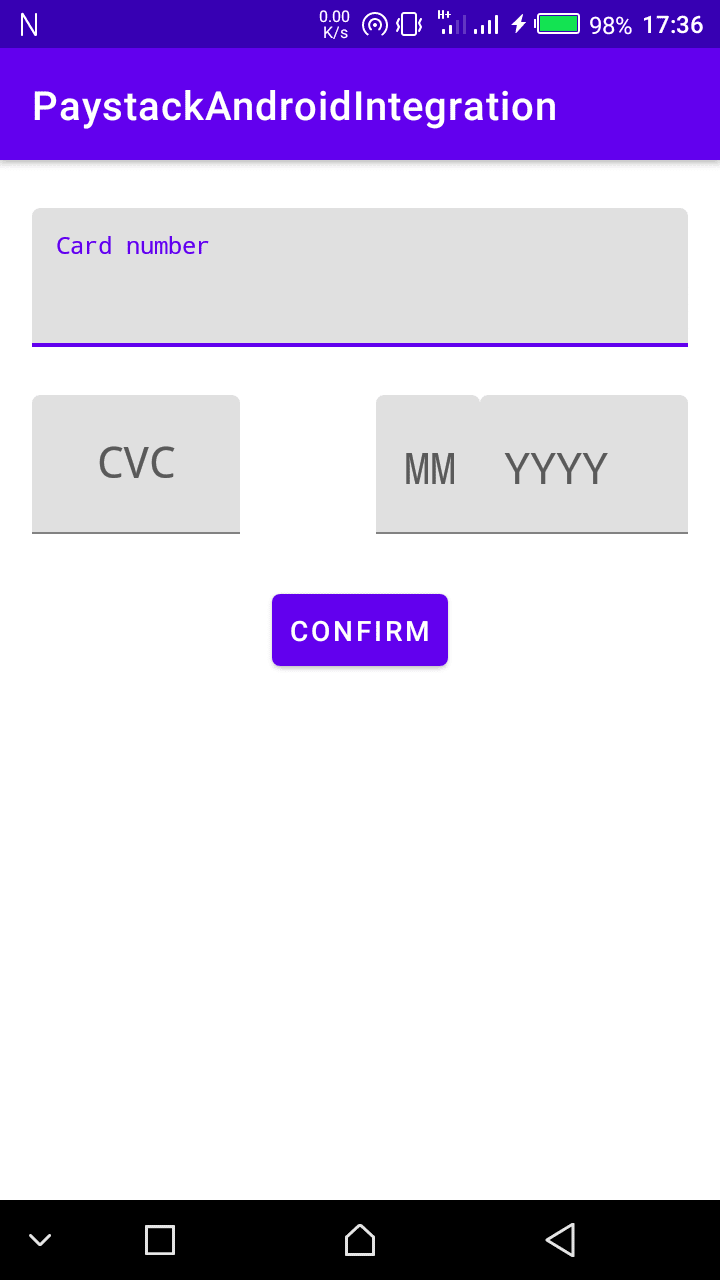
Next we are gonna edit our layout file to accept input from the user, now this can be styled to your heart's content or your application's need. But I am just gonna use a very simple layout with EditTexts and a Button to accept input and for the user to submit.
Our layout should look like this,
Alright now. Before we continue, you should already have a public test key from Paystack, this is gotten when you register. If you don't already, you can click here to register on Paystack.
After getting the key, go to your AndroidManifest.xml file and paste this there. Note: this should be within the <application> tag.
<meta-data
    android:name="co.paystack.android.PublicKey"
    android:value="YOUR PUBLIC KEY" />
Then at the top-level of your app (this could be your Application class if you extended it or the Activity that is gonna implement the payment), we gonna add this here. This is important and should be called before we do any transaction.
PaystackSdk.setPublicKey("YOUR PUBLIC KEY GOES HERE")

PaystackSdk.initialize(applicationContext)
Next we do we create a function that would validate our user input, I am just gonna write a simple validation function. I wouldn't advise you use this in a production environment, this is just to get you started, it is entirely up to you on how you implement validation for the user card details.
Once we are done with that we create a function that builds a Card object. The Card object is what stores the information from the user's card and we would eventually use it to make a transaction.
Next, we create a function to charge the card and perform the transaction
Looks like we are almost done but before running the function there is one more thing we must do. The Paystack Android SDK uses Retrofit2 and Retrofit2 GSON Converter. Let's navigate straight away to our build.gradle file in our app directory and add these dependencies
  // Retrofit
  implementation 'com.squareup.retrofit2:converter-gson:2.8.1'
  implementation 'com.squareup.retrofit2:retrofit:2.8.1'
We finally call our function in the click listener of the button.
button_perform_transaction.setOnClickListener {
   performCharge()
}
That should be all. Now to test our code, Paystack provides test details we can use. For the card number use 50606 66666 66666 6666, the CVC use 123 and the month and year can be any date in the future and things should go fine.
Once the button is clicked, if everything goes well you should see a small dark screen asking you to input the PIN, use 1234 and click DONE.
Next on the small dark screen you should see it request for the OTP, use 123456. You should get a Toast telling you the transaction was successful.
I am gonna leave the link to the entire project on Github.
 ayevbeosa
/
PaystackAndroidIntegration
Integrate Paystack in your native Android Application
Paystack Android SDK
 PaystackHQ
/
paystack-android
Paystack SDK for Android. Accept payments on Android
I also found a repo that could help you in card validation.


Top comments (7)
Any idea how to integrate Flutter with Paystack, by sending card details to Paystack and initiating transactions from the backend server outside of Flutter
Not sure of that. But I think there is Flutter Paystack plugin you can use.
Yes sure, but it was too verbose the way I saw people doing it. But I have implemented it though, just as I wanted. Thanks.
Wonderful content I have been searching for a way to implement this in my app thsnks
I'm glad it helped. 😀
I love this, but is there any idea how to use a webview on android for the integration?
Here's a library for that.
medium.com/@victorrebuka/how-to-in...