Hi, automation testing is now becoming the norm for QA engineer.
Especially if you want to deliver your product fast, you need to have CI/CI pipeline along with automation test.
For QA manual tester who just get started in automation world, doing automation test with any programming languages might be hard.
If that’s the case, you can start doing automation test for UI or mobile app with robotframework.
You can checkout more details about robotframework in their official page
Below is the detailed to get started with robotframework with the case is create a user account in amazon web site.
1.Install Python
2.Setup new project for doing robotframework test
3.Install robotframework seleniumlibrary
4.Find the url, locator for elements in amazon website
5.Define the steps, keywords in the scenario robot file
6.Run and view the result
— — — — — — — — — — — — — — — — — — — — — — — — — — — — — —
I. Install Python:
Please install Python version 3 for more stable and support from Python community.
I’m currently using Python 3.7.5, so you might started with this from here
II. Setup new project for doing robotframework test
I usually develop Python project with Pycharm.
You can download Pycharm from here.
You might choose another IDE for working with Python like Visual Studio Code.
We should create new virtual environment, to separate dependencies for each project in our local machine.
I’m currently working with pipenv. You can check more about pipenv from here
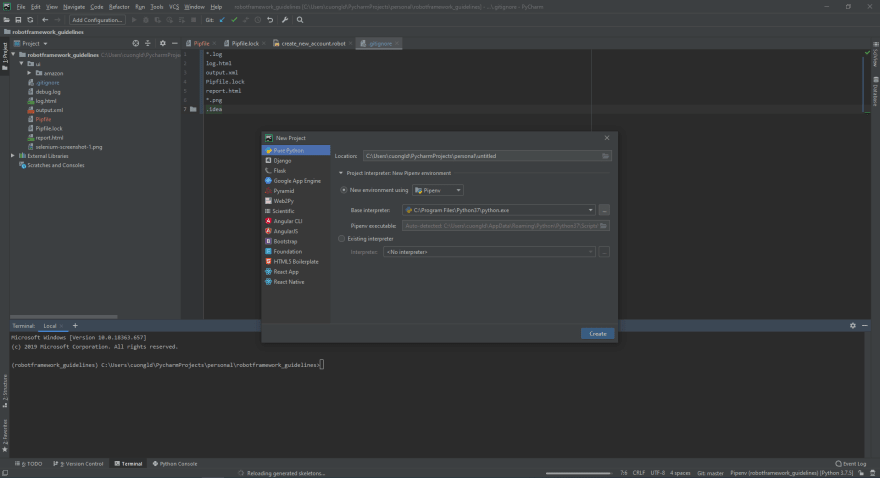
Create new Python project with pipenv using Pycharm
III. Install robotframework selenium
You can install robotframework selenium library in pienv project using:
pipenv install robotframework-seleniumlibrary
After this, robotframework and selenium will be installed too
IV. Find the url or element locator in amazon web site:
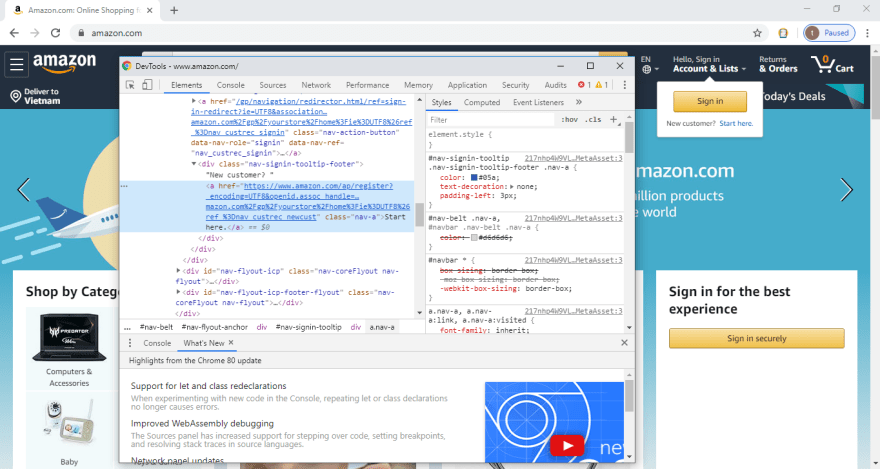
You can find element/attributes from the amazon web site using chrome developer tools.
Just right click -> Inspect element on any element you want to find out more information in html page.
Find elements using chrome developer tool
V. Define the steps and key-words:
For the list of supported keywords in robotframework seleniumlibrary, please check out from here
Below is the code for scripting our scenario in robotframework:
*** Settings ***
Library    SeleniumLibrary

*** Variables ***
${URL}          https://www.amazon.com/
${BROWSER}      Chrome
${HELLO_SIGN_IN_BUTTON}    //*[@id="nav-link-accountList"]
${START_HERE_BUTTON}    //*[@id="nav-flyout-ya-newCust"]/a
${YOUR_NAME_TEXT_BOX}    //*[@id="ap_customer_name"]
${EMAIL_TEXT_BOX}    //*[@id="ap_email"]
${PASSWORD_TEXT_BOX}    //*[@id="ap_password"]
${RE_ENTER_PASSWORD_TEXT_BOX}    //*[@id="ap_password_check"]
${CREATE_AMAZON_ACCOUNT_BUTTON}    //*[@id="continue"]
${ENTER_OTP_TEXT_BOX}    //input[@name="code"]

*** Test Cases ***
User can create new account in amazon
    [Tags]    CREATE_ACCOUNT
    Navigate to the site
    Go to create user page
    Fill in create account form
    Verify navigated to otp page
    Close current browser

*** Keywords ***
Navigate to the site
    Open Browser    ${URL}    ${BROWSER}

Go to create user page
    Mouse Over    ${HELLO_SIGN_IN_BUTTON}
    Wait Until Element Is Visible    ${START_HERE_BUTTON}
    Click Element    ${START_HERE_BUTTON}

Fill in create account form
    Click Element    ${YOUR_NAME_TEXT_BOX}
    Clear Element Text    ${YOUR_NAME_TEXT_BOX}
    Input Text    ${YOUR_NAME_TEXT_BOX}    Donald
    Click Element    ${EMAIL_TEXT_BOX}
    Clear Element Text    ${EMAIL_TEXT_BOX}
    Input Text    ${EMAIL_TEXT_BOX}    testingrobot@gmail.com
    Click Element    ${PASSWORD_TEXT_BOX}
    Clear Element Text    ${PASSWORD_TEXT_BOX}
    Input Password    ${PASSWORD_TEXT_BOX}    abcxyz@123
    Click Element    ${RE_ENTER_PASSWORD_TEXT_BOX}
    Clear Element Text    ${RE_ENTER_PASSWORD_TEXT_BOX}
    Input Password    ${RE_ENTER_PASSWORD_TEXT_BOX}    abcxyz@123
    Click Element    ${CREATE_AMAZON_ACCOUNT_BUTTON}

Verify navigated to otp page
    Element Should Be Visible    ${ENTER_OTP_TEXT_BOX}

Close current browser
    Close Browser
First, you need to declare the library you want to use (in this case is Selenium Library)
Then you need to declare some variables to reuse (might be locators, browser_name).
Or you might want to declare new keyword for reuse ( Fill in the create account form, Verify navigated to otp page..)
VI.Run and view the result
To run the robot test, simply from terminal type:
robot path_to_the_robot_file\robot_test_file
→ robot ui\amazon\create_new_account.robot
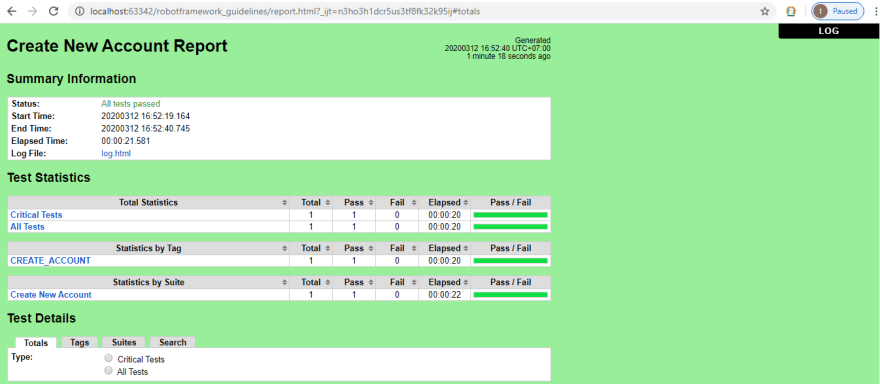
Below will be the html report result
Html report for from robotframework
That’s it. For full source code, please checkout from github
Happy coding~~
Notes: I will have more guidelines for how to do mobile test with robotframework soon. So stay tuned…


Top comments (0)