Introduction
Hello there!
Last week i introduced you to Flutter and the 30 Days of Flutter Event. And even if i learned a lot of cool new stuff the post was more of an introduction to Flutter and Dart.
In this post i will dive more into the technically part and show some code and concepts when it comes to working with Flutter.
There are 2 topics that i want to cover today and they are fundamentally when you want to build an App. So dont let us waste any more time and start right away!
Layout
This is one of the most important things when you start to build your app. Where you want your cards, buttons and texts to display on the screen? Do you have a list of items that you want do list vertically or horizontally?
In Flutter there are many prebuild Widgets that we can use to build our Layout. First we have to distinct them in two different types.
Single Layout Widgets
These are Widgets that are contains exactly one child and are used to edit the child Widget. Maybe add some margins and paddings.
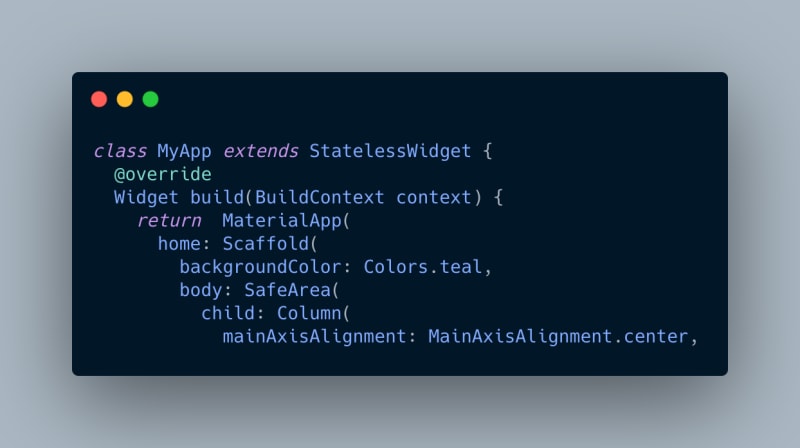
In this example the Single Layout Widget is a SafeArea Widget. This is a really cool widget as it will ensure that the child Widget will be displayed within the Screen and do not overlap or be inside the Notch:
Multi Layout Widgets
Now it gets interesting. Often we have lists of items and want to display them. How we can achieve this within Flutter?
Row and Column Widgets are the answer. They are used heavily in Flutter and are very useful.
In this example we used a Column to display each xylophone button. The crossAxisAlignment property is used to align the children widgets in the cross axis (for a column the cross axis is horizontally and for a row vertically. The main axis are the exact opposite.
This is how it looks like:
Here you can read about Layouts in Flutter more in-depth:
Layout in Flutter
Stateful and Stateless Widgets
If you come from web development im pretty sure you heard about state in any form. In Flutter we also need some form of states that can change and on this state change the App will do something. Maybe add a new item to a list. Then Flutter will re-draw the UI to display this new item to the user.
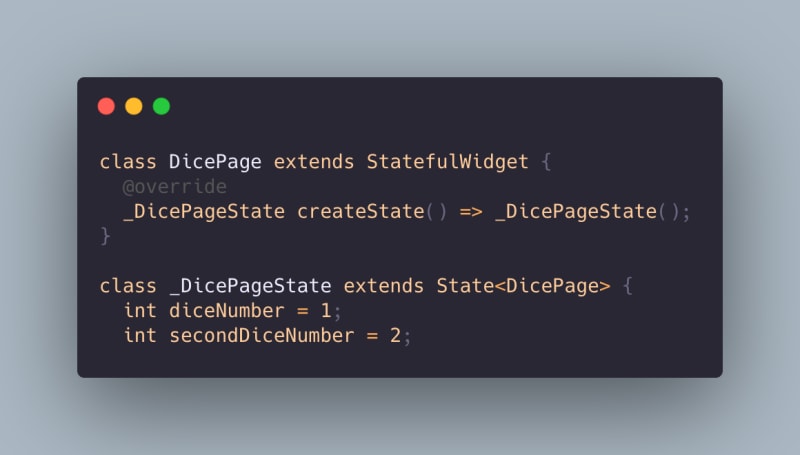
In Flutter we have stateful and stateless widgets. A stateless widget wont change during its lifetime. This could be a button for example. A stateful widget on the other hand will change. The widget has a state. Imagine you have a dice and want to shuffle it in your app. It needs to change during the lifetime of the app.
Lets see this in action:
In this app we use a function where we call setState to change the state of our app in this case the dice number. And based on this dice number another dice image is displayed to the user.
You may wonder why the class name has a _ in the beginning and why it extends State. This is how you declare a stateful widget in Flutter. You have one Stateful Widget class and one state class that belongs to that widget:
This is how the app looks like:
And by one click on either one of the dices the state changes and different dice images will be displayed.
Here is some knowledge about stateful widgets where you can read more about is:
Flutter Interactive UI
Conclusion
I hope you learned something today. I surely did this week! If you interested into Flutter please give it a try. Its a lot of fun and you can use it to code mobile apps (iOS AND Android), Web and even Desktop! One Framework to rule them all.
Stay connected to me and my content on Twitter.
I love to improve myself every single day even if its just a tiny bit!
Stay save and healthy guys!
And as always: develop yourself!


Top comments (0)