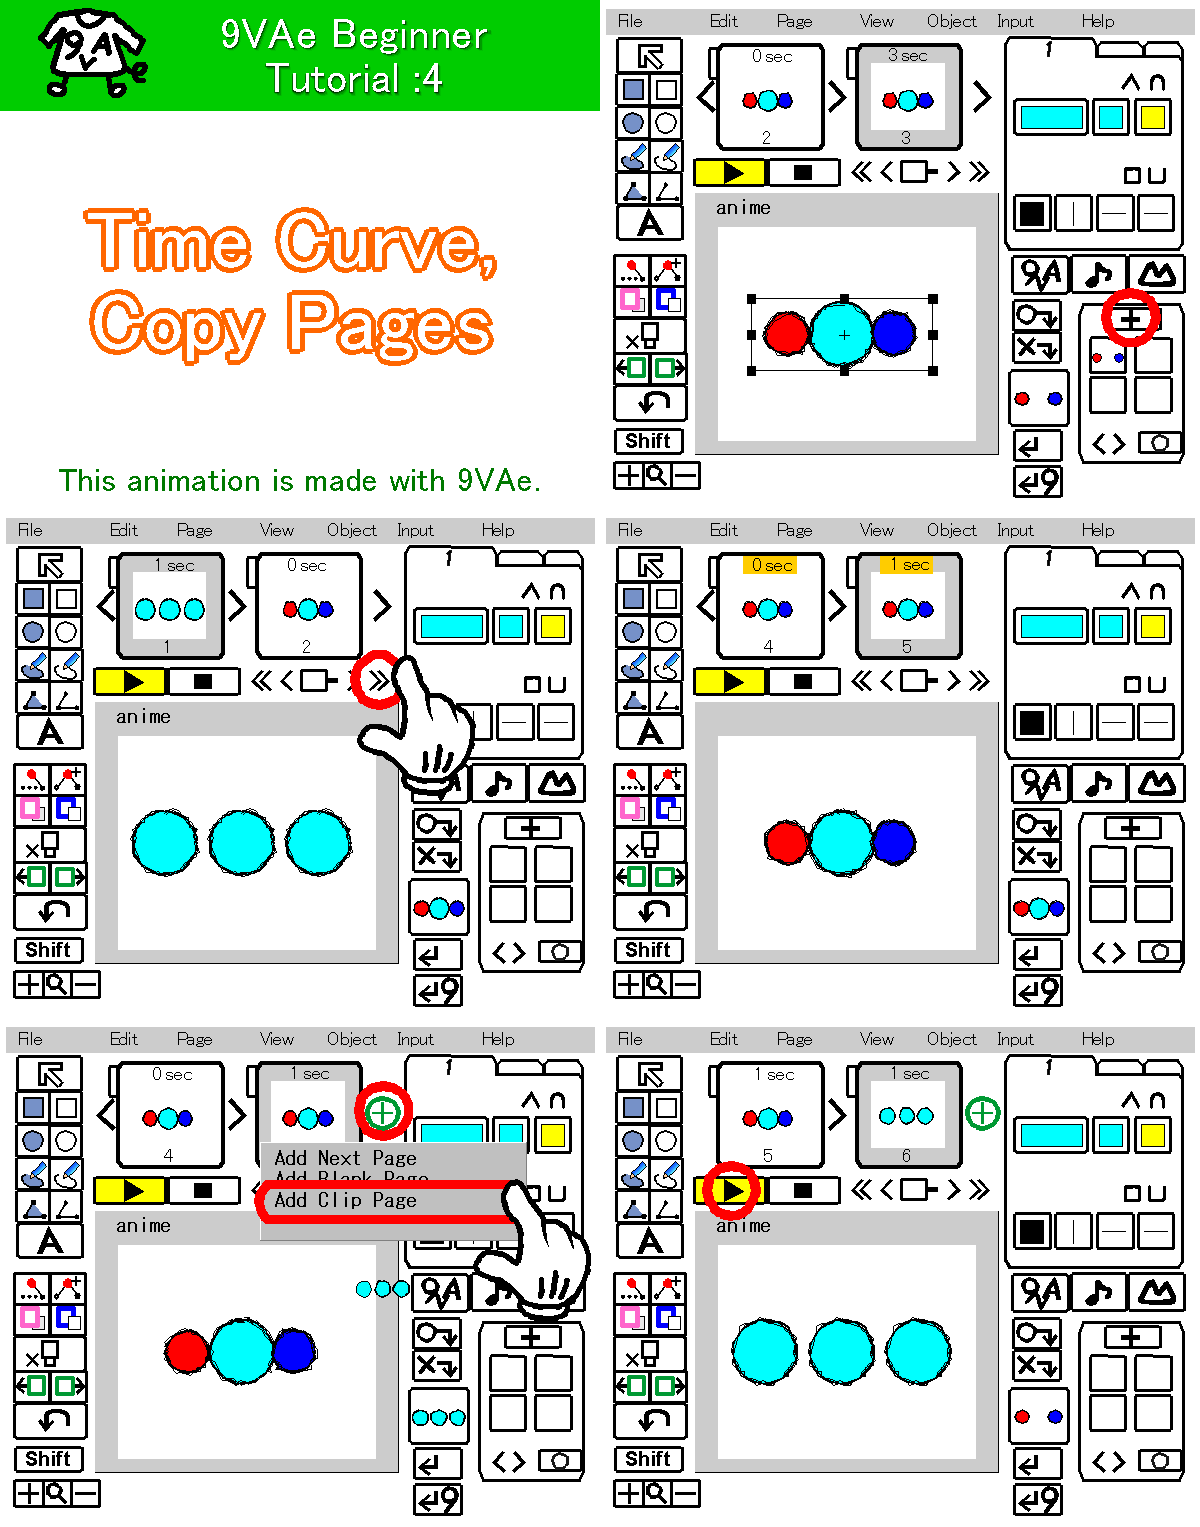
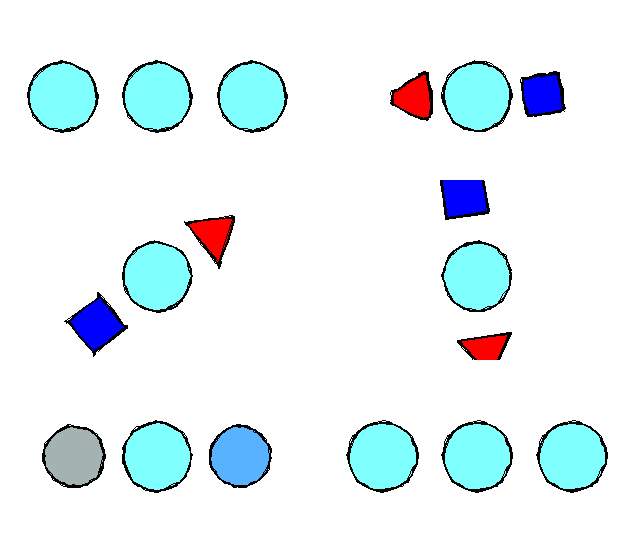
This tutorial is a continuation of the tutorial "9VAe Beginner Tutorial 3". This tutorial describes 'Time Curve' and 'Copy Page'.
Time Curve, Copy Pages
This tutorial is a continuation. It may be better to get started with "9VAe Beginner Tutorial 1".
Now, let's learn how to add complex movement to the animation by using 'Time Curve' , and the make the animation repeating smoothly by copying pages.
The steps we'll take are:
- Jump to the third page of the parent animation.
- Select AnimeCast.
- Register the AnimeCast to the Time Control Box .
- Add 'Random Time Curve' to the AnimeCast.
- Click [Play] button to see the animation.
- Make the fifth page by copying the second page.
- Make the sixth page by copying the first page.
- Change the time duration of the fifth page to 1 sec.
- Change the time duration of the fourth page to 0 sec.
- Click [Play] button to see the animation.
- Export animated GIF.
1. Add 'Time Curve'
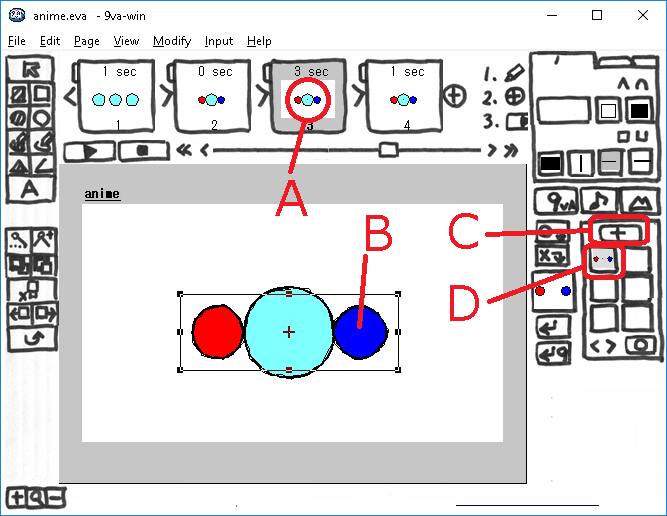
- Click the third page (A) shown above. Now the third page will appear.
- Click the AnimeCast (B) and select it.
- Click [+] button of the Time Control panel (C). Now the AnimeCast will be registered to the box (D).
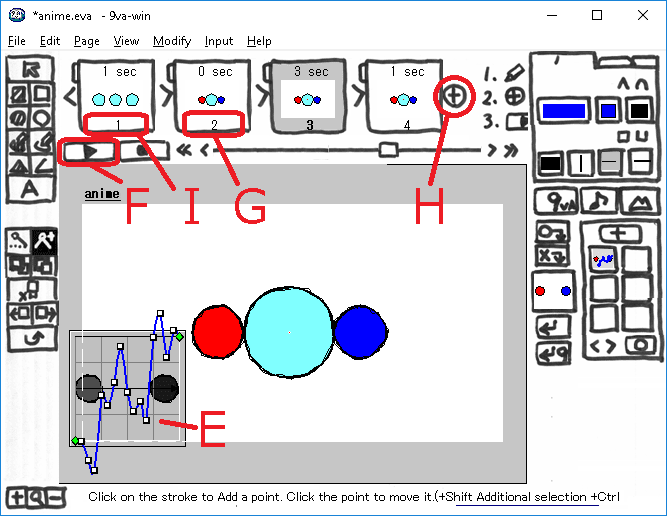
- Click on the registered box (D) > Click 'Random Time Curve'. Now the Random Time Curve will appear as follows.
- Click [Play] button(F) to see the animation.
- Time Curve (E)is a time vs. progress graph. The horizontal axis represents time, the left side is the current page and the right side is the next page. The vertical axis represents progress , the bottom is the current page and the top is the next page. You can drag and move the points on the graph freely.
Click [Play] button (F) to see the animation after changing the shape of the graph.
2. Copy pages
Let's make the animation repeating smoothly by copying pages.
- Click the second page number (G) shown above. > Click 'Copy Page'. Now the second page will be copied to the Clip memory.
- Click [+] button on the right side of the end page(H). > Click 'Add Clip Page'. Now the second page will be copied to the fifth page.
- Click the first page number (I). > Click 'Copy Page'. Now the first page will be copied to the Clip memory.
- Click [+] button on the right side of the end page(H). > Click 'Add Clip Page'. Now the first page will be copied to the sixth page.
3. Adjust time duration
- Click the time duration of the fifth page(A). > Click '+1 second' to change the duration to 1 sec.
- Click the time duration of the fourth page(B). > Click '-1 second' to change the duration to 0 sec.
- Click [Play] button (C) to see the animation. Try to adjust the time duration and the shape of the 'Time Curve' on the third page if you want.
4. Make animated GIF
Let's export an animated GIF.
- Click [File] on the menu bar > Click 'Animated GIF Export'.
- Enter the name of GIF file. Click [Save]. Now the GIF setting panel will appear. Input setting as follows and click [OK] button.
- Picture Size : You can change the GIF picture size here.
- Frame/sec : You can define frames per second here.
- Time Length : Input time duration as 1 second.
- Transparent GIF : Check here, if you want transparent GIF.
- Smoothing : Don't check here, if you want transparent GIF.
Final Words
This is the final article of '9VAe Beginner Tutorials'. The basic operation of 9VAe were explained such as Input figures, Resize, Move, Change shape, AnimeCast. Adjust time duration, Time Curve, Copy pages... You can redo this tutorial again from here.
Please enjoy making animation by using 9VAe.
Related article
9VAe Introduction
- 9VAe Free SVG/GIF Animation editor: Introduction
- 9VAe Download and Install
- 9VAe's Frequently Asked Questions


Top comments (0)