Introduction
This tutorial gives a brief information on how to run a test case in multiple browsers. Katalon makes easier to do grid option in automation testing without downloading any external resources. With Katalon multiple browser testing can be done with simple steps.
Requirements
Tool: Katalon Studio
Free download: https://www.katalon.com/download
Tutorials: https://www.katalon.com/resources-center/tutorials/
How to implement multiple browser testing using Katalon Studio?
Step 1:
To start Katalon Studio, double-click on the katalon.exe.
Step 2:
After launching Katalon Studio, provide your registered username and password to activate your Katalon Studio.
Step 3:
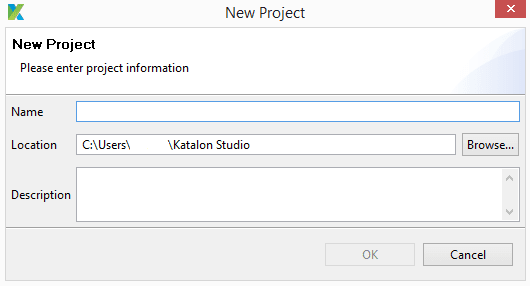
Once Katalon Studio is activated enter the Project name and its description.
Step 4:
Create a new test case and enter the name and description of the test case.
Step 5:
Click on the Record Web icon and continue with the created test case.
Step 6:
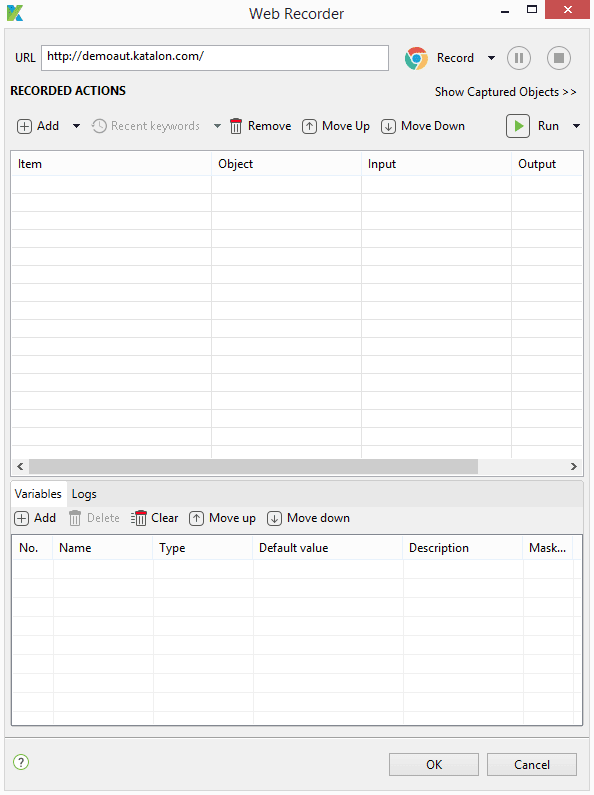
Enter the URL in the dialog box opened after clicking the Record Web icon in case need to pause or stop the recording option in between is available in the same dialog box which travels throughout the recording.
Step 7:
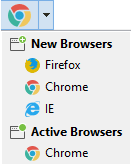
Select the browser you need to record the UI elements from the drop down.
Step 8:
Once the browser is selected browser will be initiated and the selected browser with URL will be opened once the page is completely loaded user can interact with the page and record the necessary action of the web page and the UI elements will be recorded whenever the action is performed by the user.
Step 9:
Once after the stop button is clicked the record will be finished the action, action data and the Element will be saved and displayed.
Step 10:
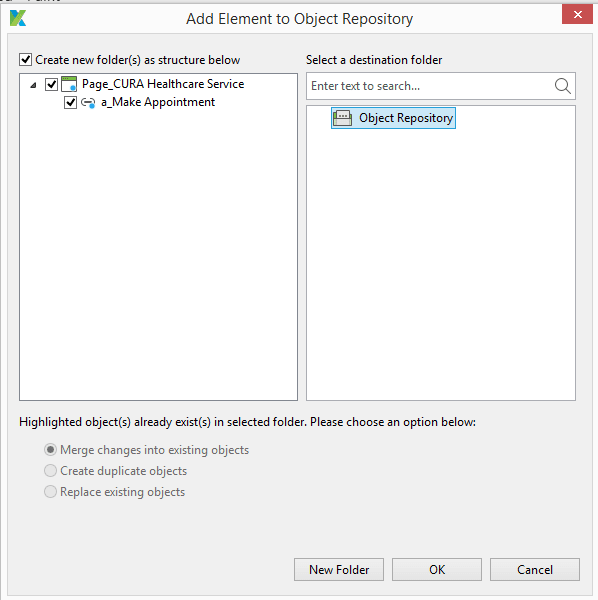
After clicking OK the Object Repository dialog will be opened and the user had to make a new folder and save the Object Repository.
Step 11:
Once the above step is completed the created object repository folder will be displayed under Object Repository. (Note: My Object Repository is named as GUI)
Step 12:
While clicking the Object Repository folder the captured element will be displayed.
Step 13:
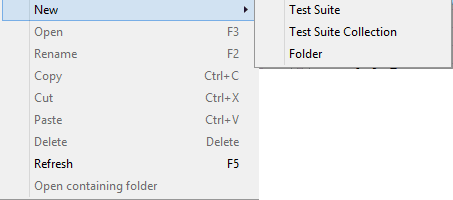
To run the test case in multiple browsers right-click the test suite option.
Step 14:
Select the new option and create a new Test Suite and give an appropriate test suite name and description.
Step 15:
Now the user had to integrate the test case with the test suite. Click the add button once the test suite is created successfully will open the test suite page and click the add option.
Step 16:
Once the add button is pressed a dialog box will be opened to add the test case to the test suite. Now select the check box and click OK. The test case will be integrated into the test Suite.
Note: If there are multiple test case select the test cases according to the order.
My test case is named as GUI_Automation.
Step 17:
Select the new option and create a new Test Suite collection and give an appropriate test suite collection name and description.
Step 18:
Now the user must integrate the test suite with the test suite collection. Click the add button once the test suite collection is created successfully will open the test suite collection page and click the add option.
Step 19:
Now select the added test suite to the test suite collection to run the test case in multiple browsers.
Note: Add the same test suite for more than two times to run the test suite in different browsers.
I have name my test suite as GUI_Multiplebrowser.
Step 20:
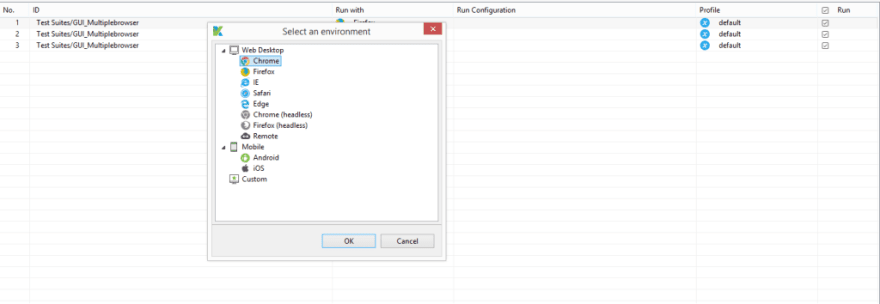
Once the test suite is selected use the “Run with” option to select the browser to run the test suite in different browsers.
Step 21:
Once the test suite is selected with the appropriate browser the test suite collection is ready to execute.
Step 22:
The test suite collection can be executed in two different ways
1. Sequential: the test suites will be executed one after another.
2. Parallel: the test suites will be executed at the same time.

Step 23:
I will run my test suite collection in Parallel mode and will execute the test suite collection.

Step 24:
The test suite execution will run the test cases in three different browsers and log can be viewed in the log.
Full Source Code:
import static com.kms.katalon.core.checkpoint.CheckpointFactory.findCheckpoint
import static com.kms.katalon.core.testcase.TestCaseFactory.findTestCase
import static com.kms.katalon.core.testdata.TestDataFactory.findTestData
import static com.kms.katalon.core.testobject.ObjectRepository.findTestObject
import com.kms.katalon.core.checkpoint.Checkpoint as Checkpoint
import com.kms.katalon.core.checkpoint.CheckpointFactory as CheckpointFactory
import com.kms.katalon.core.mobile.keyword.MobileBuiltInKeywords as MobileBuiltInKeywords
import com.kms.katalon.core.mobile.keyword.MobileBuiltInKeywords as Mobile
import com.kms.katalon.core.model.FailureHandling as FailureHandling
import com.kms.katalon.core.testcase.TestCase as TestCase
import com.kms.katalon.core.testcase.TestCaseFactory as TestCaseFactory
import com.kms.katalon.core.testdata.TestData as TestData
import com.kms.katalon.core.testdata.TestDataFactory as TestDataFactory
import com.kms.katalon.core.testobject.ObjectRepository as ObjectRepository
import com.kms.katalon.core.testobject.TestObject as TestObject
import com.kms.katalon.core.webservice.keyword.WSBuiltInKeywords as WSBuiltInKeywords
import com.kms.katalon.core.webservice.keyword.WSBuiltInKeywords as WS
import com.kms.katalon.core.webui.keyword.WebUiBuiltInKeywords as WebUiBuiltInKeywords
import com.kms.katalon.core.webui.keyword.WebUiBuiltInKeywords as WebUI
import internal.GlobalVariable as GlobalVariable
WebUI.openBrowser('')
WebUI.navigateToUrl('http://www.practiceselenium.com/')
WebUI.click(findTestObject('Object Repository/GUI/Page_Welcome/span_See Collection'))
WebUI.click(findTestObject('Object Repository/GUI/Page_Menu/span_Check Out'))
WebUI.setText(findTestObject('Object Repository/GUI/Page_Check Out/input_email'), 'test@yopmail.com')
WebUI.setText(findTestObject('Object Repository/GUI/Page_Check Out/input_name'), 'Testing')
WebUI.click(findTestObject('Object Repository/GUI/Page_Check Out/div_Address'))
WebUI.setText(findTestObject('Object Repository/GUI/Page_Check Out/textarea_address'), 'New Testing , Katalon')
WebUI.selectOptionByValue(findTestObject('Object Repository/GUI/Page_Check Out/select_Visa              Maste'), 'American Express', true)
WebUI.setText(findTestObject('Object Repository/GUI/Page_Check Out/input_card_number'), '65656565656')
WebUI.setText(findTestObject('Object Repository/GUI/Page_Check Out/input_cardholder_name'), 'TESTING')
WebUI.setText(findTestObject('Object Repository/GUI/Page_Check Out/input_verification_code'), '6565656')
WebUI.click(findTestObject('Object Repository/GUI/Page_Check Out/button_Place Order'))
WebUI.closeBrowser()
The tutorial is orginally posted at Test Automation Resources












Top comments (0)