Angular is the most trending js frameworks for the single page App and front end development, now I am here to explain how the login/authentication functionality works in angular.
Here are some basic concepts of authentication:
How the authentication works
In angular if a user enters the email and password on the login page then the email/password should be validated from the backend server, so we should call a login API and the API will validate the passed email/password at the server and return the response.
so for calling the server we use the HTTP client module
a. How to call the backend API
Here in the code, we created a login function and we are passing login form data(email and password).
this function sends a request to the server and receives the response from the server.
  // Sample code to call the server API
  login(formData:any):Observable<HttpResponse<any>>{

    return this.http.post<any>("Server API URL", formData,  { observe: 'response' })
    .pipe(
      tap((resp: HttpResponse<CommonResponse>) => {
        if(resp.headers.get('x-auth')){
        // Here we are checking the x-auth in header, if x-auth is present it means user is logged in
          this.cookieService.set("currentUser",resp.headers.get('x-auth'));
          // Storing the token in cookie
          this.loginStatus.next(true);
        }
        return resp;
      }),
      catchError(this.handleError)
    );
  }
b. How to manage the authentication
To manage the authentication, angular provides the route guards , by using the guard we can restrict the end-user to open the page which one we don't want to open the page without login.
After getting the response from the server, we store the token in the cookie
  if(resp.headers.get('x-auth')){
    this.cookieService.set("currentUser",resp.headers.get('x-auth'));
    this.loginStatus.next(true);
  }
c. How auth guard works
Angular provides route guards to prevent users from navigating to parts of an app without authorization. The following route guards are available in Angular:
- CanActivate
- CanActivateChild
- CanDeactivate
- Resolve
- CanLoad
Here in the below code, we are checking the cookie is there or not, if there is a cookie that we have put in the login function then the user is logged in.
  canActivate(
    next: ActivatedRouteSnapshot,
    state: RouterStateSnapshot): Observable<boolean | UrlTree> | Promise<boolean | UrlTree> | boolean | UrlTree {

    if (this.cookieService.get('currentUser')) {
        // logged in so return true
        return true;
    }

    // not logged in so redirect to login page with the return url
    this.router.navigate(['/login']);
    return false;
  }
This is the basic concept of authentication in angular, now times to build a login app in angular.
Installation Guide of angular App:
You can use angular CLI to create the project, install the Angular CLI, open the terminal and run the following command
npm install -g @angular/cli- Run
ng new login-in-angularcommand to create the angular project, whiling running the command , the terminal will ask for some features details, by pressing enter you can choose the default settings.
You will see below the settings
ng new login-in-angular
? Do you want to enforce stricter type checking and stricter bundle budgets in the workspace?
  This setting helps improve maintainability and catch bugs ahead of time.
  For more information, see https://angular.io/strict No

? Would you like to add Angular routing? No

? Which stylesheet format would you like to use? CSS
CREATE login-in-angular/angular.json (3639 bytes)
CREATE login-in-angular/package.json (1209 bytes)
CREATE login-in-angular/README.md (1026 bytes)
CREATE login-in-angular/tsconfig.json (538 bytes)
CREATE login-in-angular/tslint.json (3185 bytes)
CREATE login-in-angular/.editorconfig (274 bytes)
CREATE login-in-angular/.gitignore (631 bytes)
CREATE login-in-angular/.browserslistrc (703 bytes)
CREATE login-in-angular/karma.conf.js (1436 bytes)
CREATE login-in-angular/tsconfig.app.json (287 bytes)
CREATE login-in-angular/tsconfig.spec.json (333 bytes)
CREATE login-in-angular/src/favicon.ico (948 bytes)
CREATE login-in-angular/src/index.html (303 bytes)
CREATE login-in-angular/src/main.ts (372 bytes)
CREATE login-in-angular/src/polyfills.ts (2830 bytes)
CREATE login-in-angular/src/styles.css (80 bytes)
CREATE login-in-angular/src/test.ts (753 bytes)
CREATE login-in-angular/src/assets/.gitkeep (0 bytes)
CREATE login-in-angular/src/environments/environment.prod.ts (51 bytes)
CREATE login-in-angular/src/environments/environment.ts (662 bytes)
CREATE login-in-angular/src/app/app.module.ts (314 bytes)
CREATE login-in-angular/src/app/app.component.html (25725 bytes)
CREATE login-in-angular/src/app/app.component.spec.ts (979 bytes)
CREATE login-in-angular/src/app/app.component.ts (223 bytes)
CREATE login-in-angular/src/app/app.component.css (0 bytes)
CREATE login-in-angular/e2e/protractor.conf.js (904 bytes)
CREATE login-in-angular/e2e/tsconfig.json (274 bytes)
CREATE login-in-angular/e2e/src/app.e2e-spec.ts (670 bytes)
CREATE login-in-angular/e2e/src/app.po.ts (274 bytes)
√ Packages installed successfully.
cd login-in-angular- Run
npm startorng servecommand to run the angular App
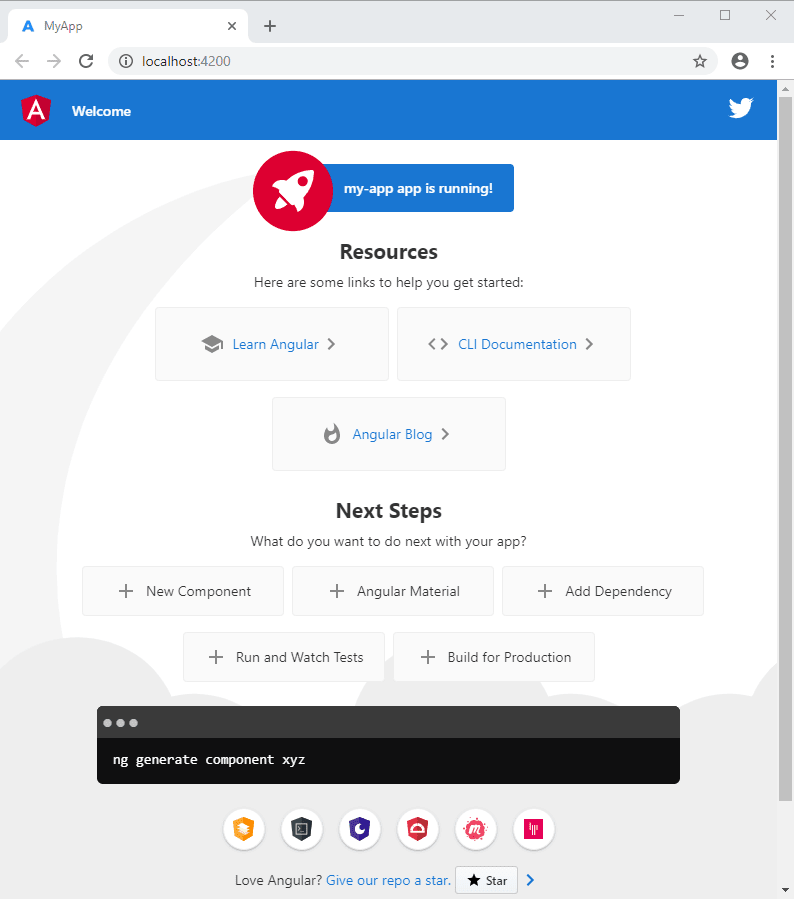
Now you will see the below screen in your browser
Installation of required modules
npm i ngx-cookie-service
1. Create the login component
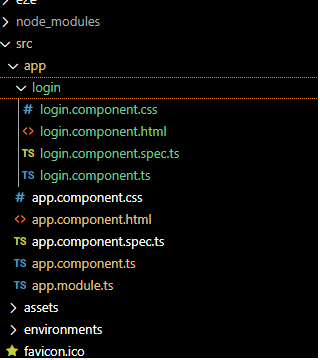
We will generate the login component so run ng g c login, this command will generate the login components and its file.
your login component file structure will look like this
- You can use the below code for your login component
  //File location in login folder and file name login.component.ts
    import { Component, OnInit } from '@angular/core';
    import {FormGroup, FormControl, Validators} from '@angular/forms';
    import { Router } from '@angular/router';
    import { CommonResponse } from "../common-response";
    import { ApiService } from "../auth/api.service";
    @Component({
      selector: 'app-login',
      templateUrl: './login.component.html',
      styleUrls: ['./login.component.css']
    })
    export class LoginComponent implements OnInit {

      loginForm = new FormGroup({
        email: new FormControl('', [Validators.required, Validators.email]),
        password: new FormControl('', [Validators.required])
      })

      public loginError:String;
      constructor(private apiService:ApiService,private router: Router) { }

      ngOnInit() {}

      onSubmit(){
        if(this.loginForm.valid){
          this.apiService.login(this.loginForm.value)
          .subscribe((data) => {
            console.log(data);
            if(data.status === 200 && !data.body.ErrorCode){
              this.router.navigate(['/dashboard']);
            }else{
              this.loginError = data.body.message;
            }
          },
          error => this.loginError = error
          )
        }
      }
    }
- You can use the below code in your login.component.html file
  <!-- File location in login folder and file name login.component.html -->
<div class="form-signin">
    <form [formGroup]="loginForm" (ngSubmit)="onSubmit()">
        <h1 class="h3 mb-3 font-weight-normal">Please sign in</h1>
        <p *ngIf="loginError">{{loginError}}</p>
        <mat-form-field>
            <input matInput placeholder="Enter your email" formControlName="email" required>
            <mat-error *ngIf="!loginForm.controls.email.valid">Please enter valid email id</mat-error>
        </mat-form-field>
        <mat-form-field>
            <input matInput placeholder="Enter your password" type="password" formControlName="password" required>
            <mat-error *ngIf="!loginForm.controls.password.valid">Please enter password</mat-error>
        </mat-form-field><br />
        <button type="submit" mat-raised-button color="warn">Login</button>
    </form>
</div>
2. Create the API service
We are creating the API service to manage all backend API calls, you can create all your API here.
Run ng g service api to generate the API service file.
You can copy the below code in your API service file
    import { Injectable } from '@angular/core';
    import { HttpClient, HttpResponse, HttpErrorResponse } from '@angular/common/http';
    import { CookieService } from 'ngx-cookie-service';
    import { Observable, throwError, BehaviorSubject } from 'rxjs';
    import { catchError, map, tap } from 'rxjs/operators';
    import { Router } from '@angular/router';

    import { CommonResponse } from "./common-response";
    @Injectable({
      providedIn: 'root'
    })
    export class ApiService {
      private endPoint: string = "/api/";
      loginStatus = new BehaviorSubject<boolean>(this.hasToken());
      constructor(private http: HttpClient, private cookieService: CookieService, private router: Router) { }
      /**
       *
       * @param formData as the login form data
       */
      login(formData: any): Observable<HttpResponse<CommonResponse>> {
        return this.http.post<CommonResponse>(this.endPoint + "login", formData, { observe: 'response' })
          .pipe(
            tap((resp: HttpResponse<CommonResponse>) => {
              if (resp.headers.get('x-auth')) {
                this.cookieService.set("currentUser", resp.headers.get('x-auth'));
                this.loginStatus.next(true);
              }
              return resp;
            }),
            catchError(this.handleError)
          );
      }
      /**
       *
       * @param error error
       */
      private handleError(error: HttpErrorResponse) {
        if (error.error instanceof ErrorEvent) {
          // A client-side or network error occurred. Handle it accordingly.
          console.error('An error occurred:', error.error.message);
        } else {
          // The backend returned an unsuccessful response code.
          // The response body may contain clues as to what went wrong,
          console.error(
            `Backend returned code ${error.status}, ` +
            `body was: ${error.error}`);
        }
        // return an observable with a user-facing error message
        return throwError(
          'Something bad happened; please try again later.');
      };

      logout() {
        this.loginStatus.next(false);

        this.cookieService.deleteAll();
        this.router.navigate(['/login']);
      }

      /**
      *
      * @returns {Observable<T>}
      */
      isLoggedIn(): Observable<boolean> {
        return this.loginStatus.asObservable();
      }
      /**
       * if we have token the user is loggedIn
       * @returns {boolean}
       */
      private hasToken(): boolean {
        return this.cookieService.check('currentUser');
      }
    }
3. Create the response interface
Now we need to create a response interface that will be mapped with your returned data from the Server.
in the ApiService file we used import { CommonResponse } from "./common-response";
create common-response.ts file
    export interface CommonResponse {
        ErrorCode: number,
        message:String,
        data:Object
    }
### 4. Create the auth guard
As we already know guard is used to preventing users from navigating to parts of an app without authorization.
Please run ng g guard auth to generate to auth guard. you will see the newly created file auth.guard.ts
The command will ask for some settings, please enter for default settings.
    ng g guard auth
    ? Which interfaces would you like to implement? (Press <space> to select, <a> to
    ? Which interfaces would you like to implement? CanActivate
    CREATE src/app/auth.guard.spec.ts (331 bytes)
    CREATE src/app/auth.guard.ts (457 bytes)
You can use the below code in your auth guard file.
  import { Injectable } from '@angular/core';
  import { CanActivate, ActivatedRouteSnapshot, RouterStateSnapshot, UrlTree, Router } from '@angular/router';
  import { Observable } from 'rxjs';
  import { CookieService } from 'ngx-cookie-service';

  @Injectable({
    providedIn: 'root'
  })
  export class AuthGuard implements CanActivate {
    constructor(private cookieService: CookieService, private router: Router) { }

    canActivate(
      next: ActivatedRouteSnapshot,
      state: RouterStateSnapshot): Observable<boolean | UrlTree> | Promise<boolean | UrlTree> | boolean | UrlTree {

      if (this.cookieService.get('currentUser')) {
          // logged in so return true
          return true;
      }

      // not logged in so redirect to login page with the return url
      this.router.navigate(['/login']);
      return false;
    }
  }
5. Create profile component
Now times to create a profile component that will only accessible if the user is logged in.
Run npm g c profile to generate the profile component
- Plese use below code for profile.component.ts
import { Component, OnInit } from '@angular/core';
import { ApiService } from "../api.service";

@Component({
  selector: 'app-profile',
  templateUrl: './profile.component.html',
  styleUrls: ['./profile.component.css']
})
export class ProfileComponent implements OnInit {


  constructor(private apiService:ApiService) { }

  ngOnInit() {
  }
  logout(){
    this.apiService.logout();
  }

}
- Please use below code in profile.component.html
<p>Welcome to Dashboard</p>
<button mat-raised-button color="warn" (click)="logout()">Logout</button>
6. Routing & service implementation
We have created 2 components, ApiService & guard files not time to implement it in the AppModule.ts file
create app-routing.module.ts file to manage all pages. Please use the below code in your app-routing.module.ts file
import { NgModule } from '@angular/core';
import { Routes, RouterModule } from '@angular/router';
import { LoginComponent } from './login/login.component';
import { ProfileComponent } from './profile/profile.component';
import { AuthGuard } from "./auth.guard";

const routes: Routes = [
  { path: '', component: LoginComponent },
  { path: 'login', component: LoginComponent },
  { path: 'dashboard', component: ProfileComponent,canActivate: [AuthGuard]}
];

@NgModule({
  imports: [RouterModule,RouterModule.forRoot(routes)],
  exports: [RouterModule]
})

export class AppRoutingModule { }
Import the AppModule file in your
Your app.module.ts file will look like this
import { BrowserModule } from '@angular/platform-browser';
import { NgModule } from '@angular/core';
import {FormsModule, ReactiveFormsModule} from '@angular/forms';
import { HttpClientModule, HTTP_INTERCEPTORS  } from "@angular/common/http";
import { AppRoutingModule } from './app-routing.module';
import { AppComponent } from './app.component';
import { BrowserAnimationsModule } from '@angular/platform-browser/animations';
import { environment } from '../environments/environment';
import { LoginComponent } from './login/login.component';
import { ProfileComponent } from './profile/profile.component';
import { ApiService } from './api.service';
import { CookieService } from 'ngx-cookie-service';

@NgModule({
  declarations: [
    AppComponent,
    LoginComponent,
    ProfileComponent
  ],
  imports: [
    BrowserModule,
    FormsModule,
    HttpClientModule,
    ReactiveFormsModule,
    AppRoutingModule,
    BrowserAnimationsModule,
  ],
  providers: [ApiService, CookieService],
  bootstrap: [AppComponent]
})
export class AppModule { }
Add router-outlet in your app.component.ts file
<router-outlet></router-outlet>
Conclustion
So we have implemented the code in the angular app, and I hope you are able to run it.
- Run
npm startto check run the app-login -
http://localhost4200Hit the URL in the browser If you want to accessible
http://localhost4200/dashboard, you will be redirected tohttp://localhost4200/loginpage, you can't access it without authorization.Run
npm startto run the server and test it.
Demo
After implementing the code now time to check the demo, so you can check the angular-login-demo
Please give it a try and I will be happy to answer your queries on my Twitter handle Twitter


Top comments (0)