This article was originally posted on EverythingDevOps
Pulumi is an open source infrastructure as code (IaC) tool that allows you to define and manage cloud resources using popular languages such as Golang, Python, Typescript, and a few others.
Pulumi is often compared to Terraform, which is another infrastructure as code tool that allows users to declaratively manage infrastructure using HashiCorp Configuration Language(HCL). The key difference here Is Pulumi allows you to manage your infrastructure using one of their supported SDKs in your language of choice.
In this guide, you would be using Typescript to deploy a PostgreSQL database cluster on DigitalOcean, as such, this guide assumes some familiarity with Typescript.
Why Pulumi?
Unlike most infrastructure as code tools, Pulumi allows you to define your infrastructure using a general-purpose programming language, this allows your code to be tested much more easily. If you are familiar with Terraform you’d agree that not many testing frameworks exist for it. In comparison to a language like Python, where numerous testing frameworks exist.
Another advantage lies in the use of a general-purpose programming language, most developers would find using their favorite language more intuitive than a DSL (Domain-Specific Language*)* such as HCL.
Prerequisites
To follow along in this tutorial you would need the following:
- A DigitalOcean account
- DigitalOcean API token
- Pulumi CLI
- Node.js. ## Initializing a Pulumi project
The Pulumi CLI provides a command for scaffolding new projects. To do this, run the following commands:
mkdir postgres-db && cd postgres-db
Note: It’s important the directory is empty else, the next command will return an error.
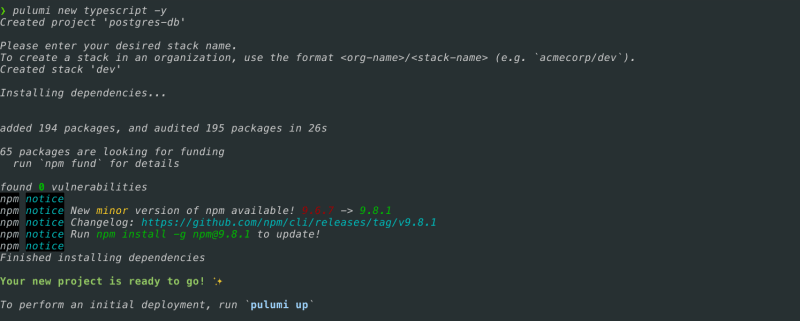
pulumi new typescript -y
The above command will show an output showing Pulumi initialization, as shown in the image below.
This generates a new Pulumi project along with a stack, a stack is an Independent instance of a Pulumi program, and each stack is usually used to represent a separate environment (production, development, or staging). This is similar to workspaces if you are familiar with Terraform.
Installing Dependencies
To interact with DigitalOcean resources you would need to install the DigitalOcean Pulumi package:
$ npm install @pulumi/digitalocean
Next, set your DigitalOcean API key:
$ pulumi config set digitalocean:token YOUR_DO_API_KEY --secret
This would store your API key so Pulumi can authenticate against the DigitalOcean API, the --secretflag ensures the value passed in is encrypted.
You could also set your token using an environment variable:
$ export DIGITALOCEAN_TOKEN=YOUR-DO-API-KEY
Provisioning a Database Cluster
To get started open index.ts and follow along with the code below:
import * as pulumi from "@pulumi/pulumi";
import * as digitalocean from "@pulumi/digitalocean";

const pg_cluster = new digitalocean.DatabaseCluster("pulumi-experiments", {
    engine: "pg",
    nodeCount: 2,
    region: "nyc1",
    size: "db-s-2vcpu-4gb",
    version: "12",
});

export const db_uri = pg_cluster.uri;
The above code creates a PostgreSQL database cluster with 2 nodes:
-
engineallows you to specify the database cluster you want to create. In this case, it’s PostgreSQL. However, DigitalOcean supports a few other database types, see this section of the Pulumi documentation for more information. - Another important field to note is
size, this allows you to configure the size of each node, see this section of the Pulumi documentation for all valid database slugs. -
versionallows you to specify what version of PostgreSQL you would like to run. Here is a list of all supported PostgreSQL versions on DigitalOcean. - Finally, you export the database connection URI so you can connect to it using your client of choice.
To deploy the cluster, run the following:
$ pulumi up
In a few minutes, you should have a cluster up and running.
Notice how db_uri is marked as “secret”, this is because it is a sensitive value, to output your database URI run the following command:
$ pulumi stack output db_uri --show-secrets > pass.db
The above would write the database URI to a file called pass.db.
Updating your Infrastructure
Now that you have a database cluster, chances are you are not going to stop here, and you would want to update your infrastructure. You can do this by adding a user to the newly created cluster.
It's good practice to create a separate user to avoid using the admin user, update index.ts with the following code:
import * as pulumi from "@pulumi/pulumi";
import * as digitalocean from "@pulumi/digitalocean";

const pg_cluster = new digitalocean.DatabaseCluster("pulumi-experiments", {
    engine: "pg",
    nodeCount: 2,
    region: "nyc1",
    size: "db-s-2vcpu-4gb",
    version: "12",
});

const pg_user = new digitalocean.DatabaseUser("non-admin",{clusterId:pg_cluster.id})

export const db_uri = pg_cluster.uri;
export const pg_user_pass = pg_user.password
Here you create a new instance of digitalocean.DatabaseUser, pass in the clusterId of pg_cluster and export the new user’s password as we did with the database URI.
To see what changes would be applied, run the following command:
$ pulumi preview
The output should look something like this:
Once you are satisfied with the changes, go ahead and apply the changes.
$ pulumi up
Once this completes, you should have a new database user called non-admin, you can output the password by running.
$ pulumi stack output pg_user_pass --show-secrets
Clean up (Optional)
To tear down the resources you just created, run the following command:
$ pulumi destroy
Conclusion
In this post, you deployed a PostgreSQL database cluster using Pulumi and updated it with a non-admin user. However, this is one of several services that you could potentially deploy using Pulumi. Hopefully, this was enough to get you started with Pulumi.
Next Steps
- Check out this guide on how to deploy a Kubernetes cluster using Pulumi
- Take a look at this section of the Pulumi registry for a full list of supported services


Top comments (0)