In this article, I am going to show you how to implement Azure AD Authentication in ASP.NET Core 5.0 Web application. I will create ASP.NET Core 5.0 project and show you step by step how to use it for authentication and authorization against Azure AD Authentication.
Prerequisites
Before you start to follow steps given in this article, you will need an Azure Account, and Visual Studio 2019 with .NET 5.0 development environment step.
Creating ASP.NET Core 5.0 web application
Open visual studio and click on Create a new project in the right and select “Asp.net core web app” as shown in below image and click next.
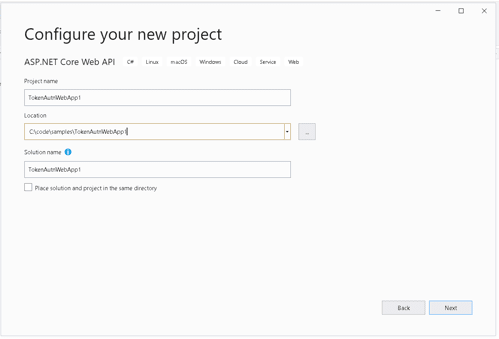
In the configure your new project section enter name and location of your project as shown in below image and click next
In the additional information step, select .NET 5.0 in the target framework, Authentication Type to none and check Configure HTTPS checkbox and click on create.
Once the project is created, run the project and copy the url of the project from the browser. We will need this url in the Azure AD app registration and setup.
Setting up your App in Azure AD
Sign in to the Azure portal using an account with administrator permission. Once login, click on Azure Active Directory as shown in below image.
From the left navigation, select App Registrations.
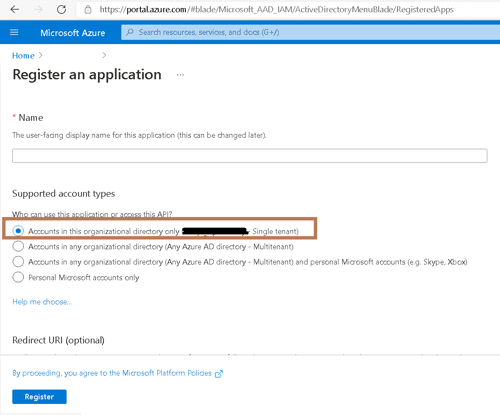
And then click on New registration from the toolbar in the top. That will open a dialog “Register and app”.
In the Name input field, enter the name that you want to use for the app. This name will be shown in the login page when user will be redirected to Azure Active Directory for Login.
In the supported account types, select first option. This will allow users from your own organization to login using this application.
For now, leave Redirect URI to blank and click on Register.
After the app is created, open the app by clicking on its name and copy ClientID and TenantID and keep it with you.
Next, click on API Permissions. Click on Add a permission from the toolbar, then click on Microsoft graph, and then delegated permissions. That will show you list of permission to select. select and add profile and opendid permissions from the list.
Next, click on Authentication from the left navigation and in the platforms section, add Web if it does not exist. In the web section, go to Redirect URL and click on Add URI in the bottom. Enter {your-app-url}/signin-oidc. For example, enter https://localhost:44332/signin-oidc if your local project is running on port 44332.
Configuring ASP.NET Core 5.0 App for Azure AD Authentication
Open appsettings.json of your web application and add following lines of code.
Replace your-client-id and your-tenant-id with the actual values that you copied while doing app registration in azure ad
Next, add package manager console and add following two package references to your web application.
Install-package Microsoft.AspNetCore.Authentication.OpenIdConnect
install-package Microsoft.Identity.Web
Next, open startup.cs in your project and paste following code in the ConfigureServices method before services.AddRazorPages(); line.
Next, in the Startup.cs, go to Configure method and add app.UseAuthentication(); line before app.UseAuthorization(); line.
Next, open index.cshtml in the views folder and enter following lines of code
Save all files and run your project.
You will notice that once you run the project, the browser will redirect to Microsoft login page and upon return, you will see your email address on the page.
Conclusion
We just learned how to implement an Azure AD authentication in ASP.NET 5.0 web application.


Top comments (0)