Have you ever wondered: “Can we, and if so, how do we make our Word and Excel templates available under the 'Files' tab and 'New' button inside all Teams channels?”?
The answer is YES and no, you don’t need to go into every single channel and do it manually 😅 Imagine having to distribute templates to hundreds of Teams channels across your organization… Yeah, no thanks.
That’s where Power Automate comes in and saves the day.
But before... let’s talk a bit about Microsoft Teams
Every time a team is created in Microsoft Teams, a corresponding SharePoint site is also created in the background. The Files tab in each channel is simply a document library in that SharePoint site. So when you click “New” in Teams to create a new Word or Excel file, it’s actually pulling from a folder in SharePoint and that’s exactly where your custom templates need to live.
Knowing this, we can use Power Automate to target the SharePoint library directly and automate the process of uploading templates to the correct location.
Prerequisites
- Be a member: The service account running the flow must have access to each Teams channel
- SharePoint admin permissions: since we’ll be creating a custom content type and managing it from the SharePoint Admin Center
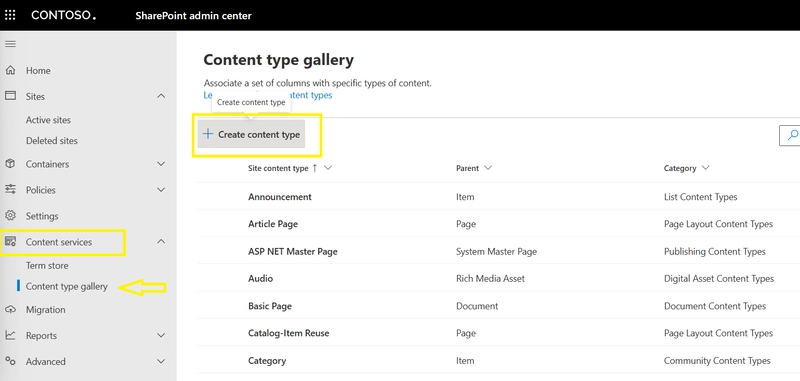
Step 1:Content type
Start by creating the content type from the SharePoint Admin Center. In the SharePoint Admin Center, go to
Content services > Content type gallery > Create content type.
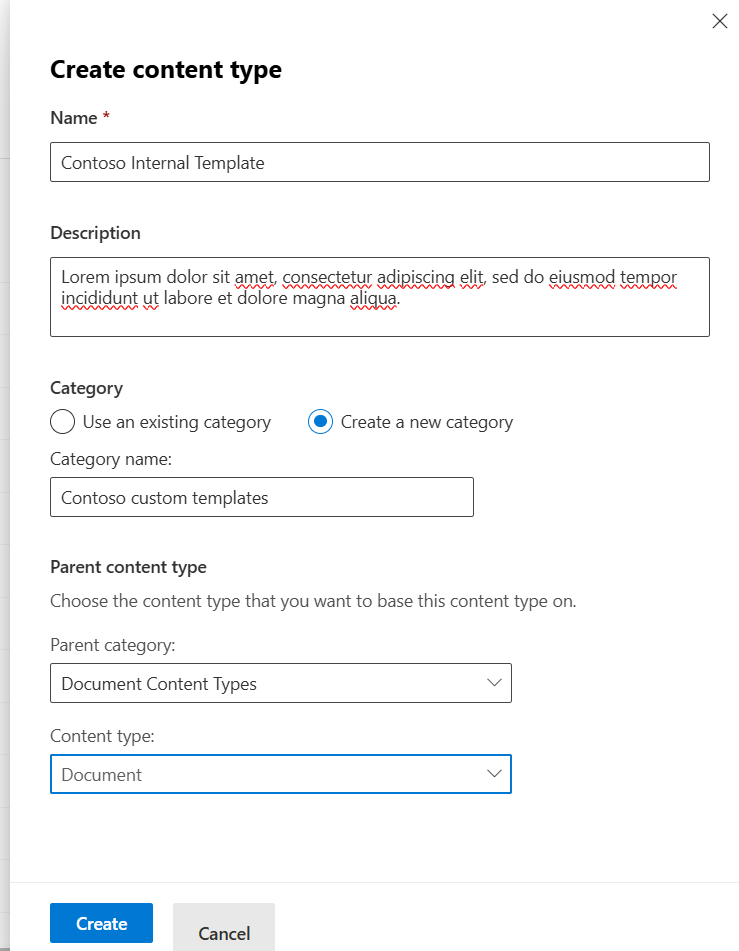
Fill in the following fields:
Name: Something meaningful like Contoso Internal Template
Description: Optional, but great for keeping track of what the template is for
Parent content type: Select “Document Content Types”
Content type: Document. Create
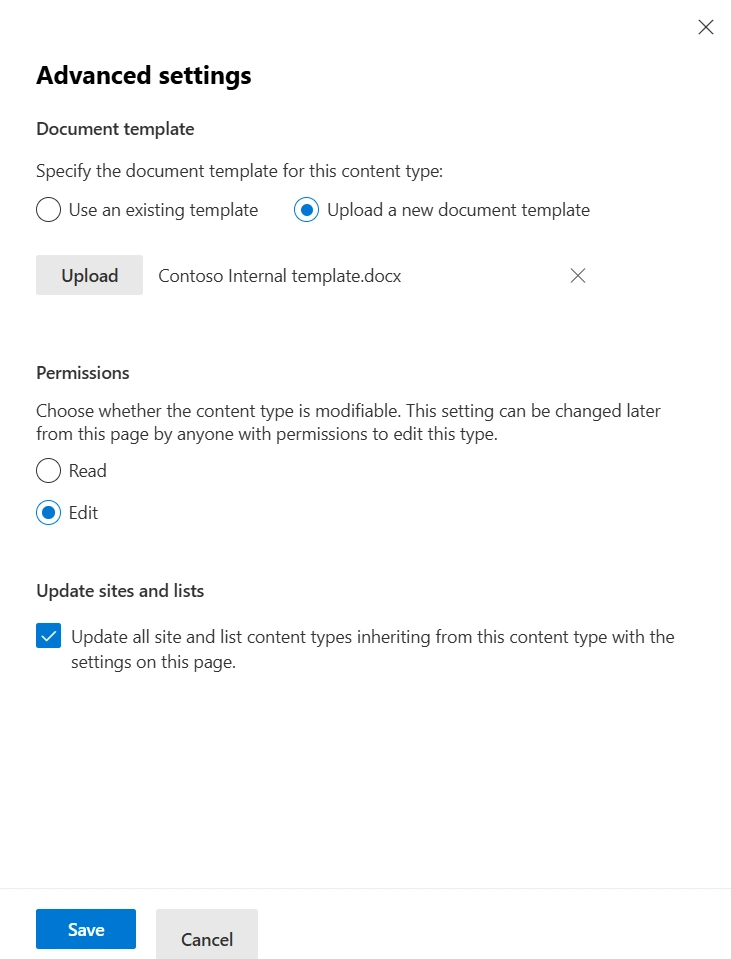
Once created:
Open your Content type and select Settings > Advanced settings
Select “Upload a new template” and upload the template. Save.
Now that your content type linked to a specific document template, it’s time to publish it so it becomes available across all SharePoint sites including the ones behind your Teams channels.
This process can take a few minutes to propagate, especially in larger tenants.
Once published, the content type will be available to add in any SharePoint document library.
Checking in a random site collection
Before publishing

After publishing
Step 2: Enable Content type
Before we can add our custom content type to each Teams library, we first need to enable content types in those libraries because by default, SharePoint document libraries (including the ones behind Teams) don’t allow multiple content types.

In our case, we created a manually triggered Power Automate flow that retrieves all Teams and loops through them.
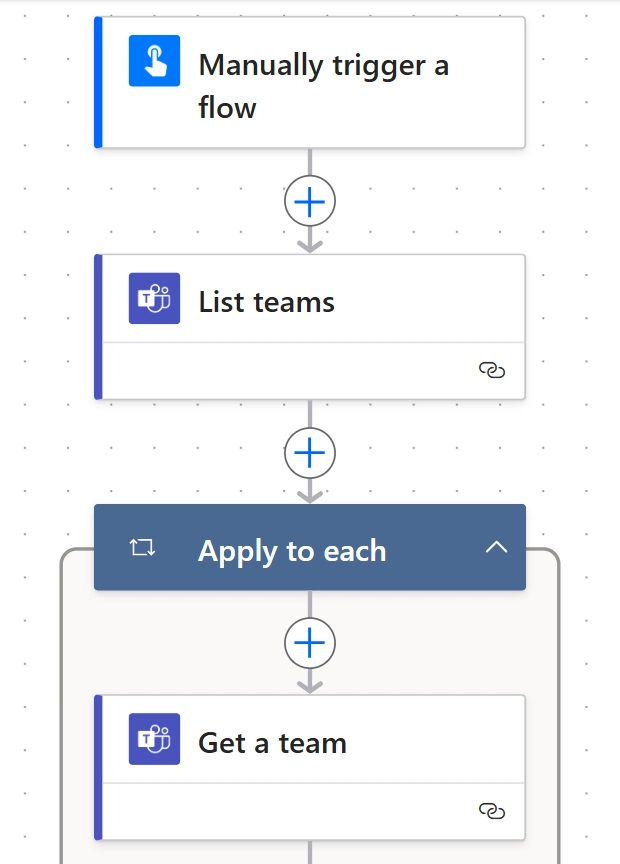
Inside our loop, we send a HTTP request to SharePoint to enable content types in the Documents library (or the correct library path).
Method: POST
URI:
/_api/web/lists/GetByTitle('Your library name')
Headers:
{
  "Accept": "application/json;odata=verbose",
  "Content-Type": "application/json;odata=verbose"
}
Body:
{
  "__metadata": { "type": "SP.List" },
  "ContentTypesEnabled": true
}
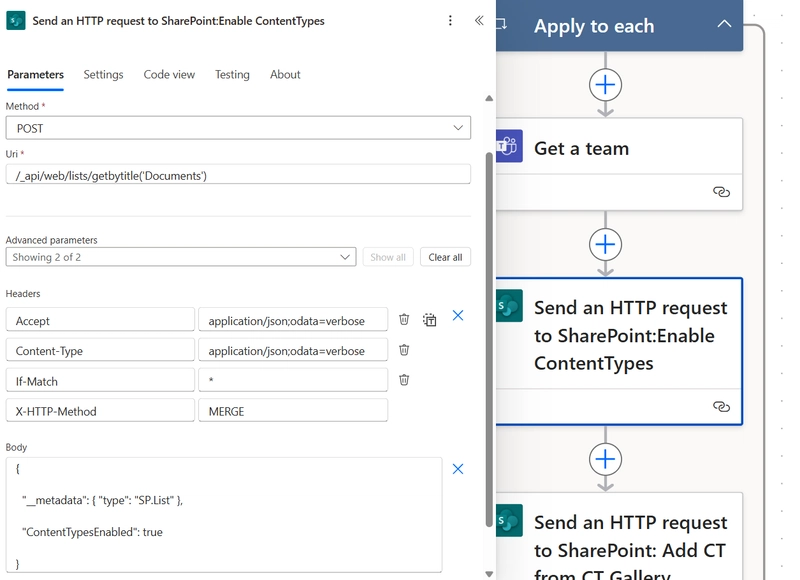
This will modify the document library to allow content types, which is required before you can attach the custom content type we published earlier.
Step 3: Add the custom content type to the site
Now we’ll add the custom content type to each site using another a couple of API request and make sure that our template appear in Teams!
Add a new 'Send an HTTP request to SharePoint'-action inside our loop and configure as bellow.
This will add a copy of our published content type from the content type hub to a target site.

Method: POST
URI:
/_api/v2.0/sites/TEAMNAME/ContentTypes/addCopyFromContentTypeHub
Headers:
{
  "Content-Type": "application/json;odata=verbose"
}
Body:
{
"contentTypeId": "0x010100 YOUR CTID"
}
Get the CTID: By going back to the Content Type > Gallery in the SharePoint Admin Center > Clicking on your content type > Copying the Content Type ID from the details page
Step 4: Add the custom content type to each library
Now that content types are enabled in the libraries and available in the site, the next step is to add our custom content type to each SharePoint document library connected to a Teams channel.
We will use another 'Send an HTTP request to SharePoint'-action inside our loop, as bellow.
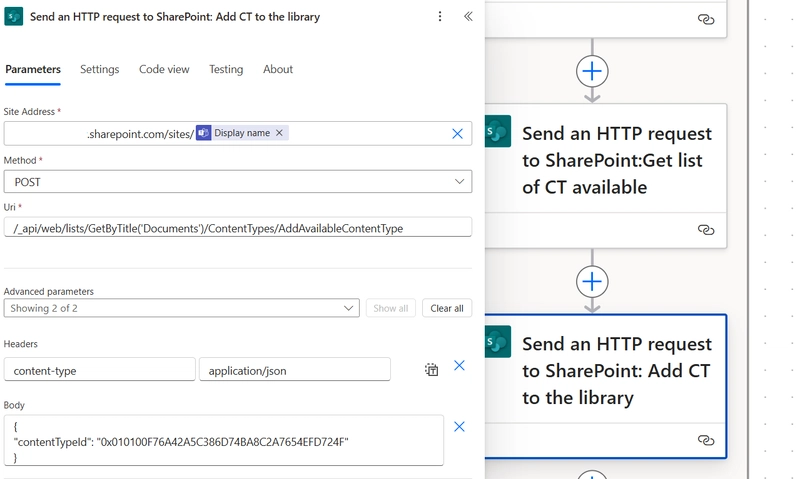
Method: POST
URI:
/_api/web/lists/GetByTitle('Documents')/ContentTypes/AddAvailableContentType
Headers:
{
  "Content-Type": "application/json;odata=verbose"
}
Body:
{
"contentTypeId": "0x010100 YOUR CTID"
}
📌 Replace "0x010100 YOUR CTID" with the actual Content Type ID from the Content type gallery.
Run the flow
After the flow runs successfully across your selected Teams channels, you can validate the outcome in two places:
SharePoint library

Teams
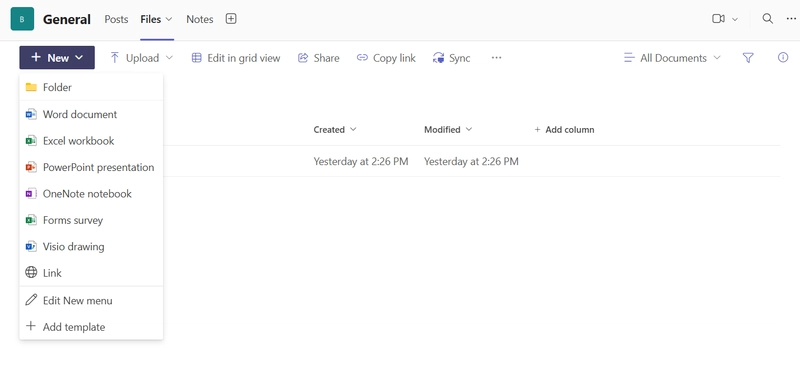
Voilà
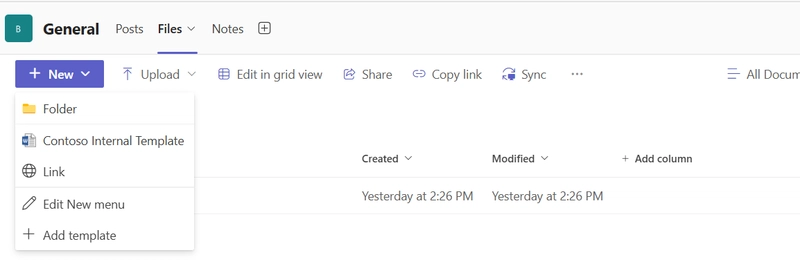
And there you have it, your custom document templates are now available under the New button in the Files tab of every Teams channel in your organization.

Top comments (0)