This will be a quick one. I won't explain how you should import a font in iOS. There are plenty of great resources in the internet.
Here are two :
- The Apple documentation: nicely explained. You can follow the guide and you won't have problems with it 99% of the times.
- Common Mistakes With Adding Custom Fonts to Your iOS App: by Chris Chang, this has been my go-to guide when importing custom fonts since the beginning.
So I won't talk about it. I won't repeat what brilliant people in the internet have already said.
Today I had to import a custom font in a project. I imported the font as I have already done. Well, I imported 4 fonts to be clear. However, only two of them appeared when I run this code to log the fonts in the console:
for familyName in UIFont.familyNames {
    print("-------------")
    print("FAMILY: \(familyName)")
    for fontName in UIFont.fontNames(forFamilyName: familyName) {
        print("- \(fontName)")
    }
}
The other two were completely missing! I was doing something that haven't done in the past: I imported .woff fonts. So the first things I thought was obvious, this format isn't completely supported in iOS. However, while the Apple documentation recommends using .otf or .ttf formats, .woff is still supported since iOS 10.
So, what was the problem?
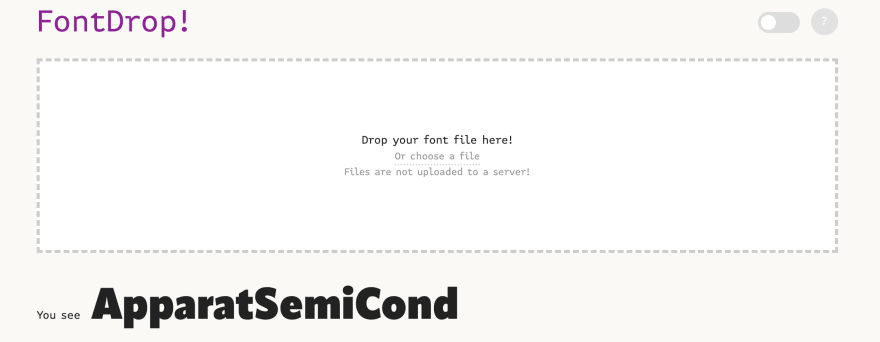
Let me tell you how I found it. I used https fontdrop. This is an incredible resource: https://fontdrop.info/
Using fontdrop, you can just drag and drop your font, regardless of its format, and discover many metadata about the font, including its name, and guess what? The font I was trying to import had a completely random name. Big facepalm for me.
The fix for this could have included asking the designer to fix it for me. However, I tried to do it myself.
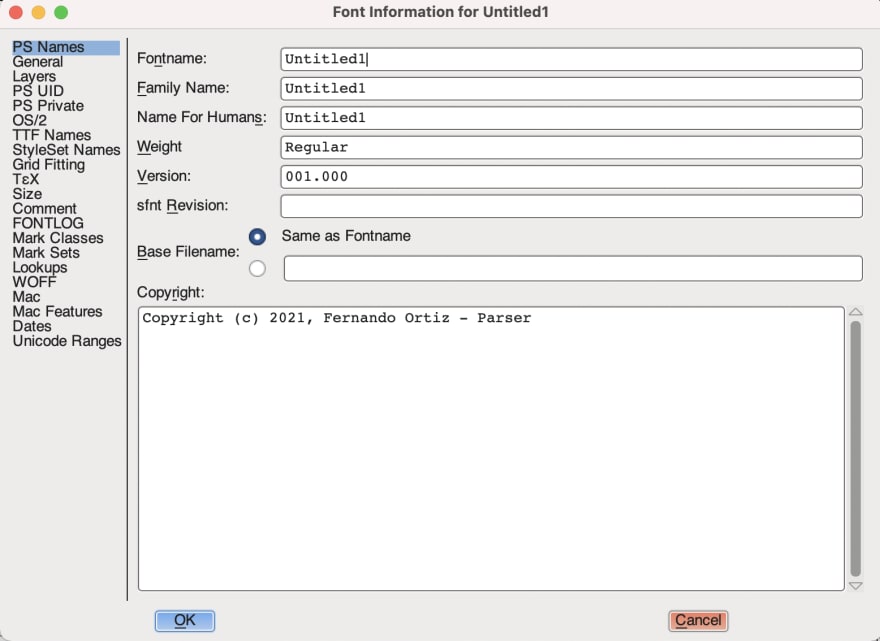
Surprisingly, changing a font name is not very difficult. Using FontForge for instance, you can download the open source tool, import your font, being patient with its Java-like UI, and you can select Element > Font Info..., and change three parameters: Fontname, Family Name and Name For Humans (which I suspect is the name you get when you are selecting the font from the interface builder).
After editing those parameters, you can choose File > Generate Fonts..., and export the font as True Type Font (i.e. ttf format).
After that, I finally got to show the font in the console in my project!
Now that you've read until here, let me show how to use the font in SwiftUI.
// In a new file...

import SwiftUI

// The SwiftUI font type
extension Font {
    static func customSemibold(ofSize size: CGFloat) -> Font {
        return .custom("SomeCustomFont-Semibold", size: size)
    }
}
And you can add as many static functions as needed depending on the number of custom font types.
Inside your views, you can use this font using something as simple as this:
struct ACustomView: View {
    var body: some View {
        Text("Some Text")
            .font(.customSemibold(ofSize: 14.0))
    }
}
I sincerely hope this can help anyone at some point.


Top comments (0)