In this post I am going to go over how to get started setting up tooling to use open-wc. Open Web Components is a way to create boilerplate web components that can expanded to your needs.
Download all dependences
In order to use Open-WC you will need to download Node.js and npm. Node.js is an open source javascript runtime environment and can be download here. Npm (Node package module) is a package manager which will allows you to install dependencies necessary to your projects. You can also download yarn which is an alternative package manager. Installing node.js and a package manager are absolutely necessary to being able to create an open-wc web component.
Use the command prompt to create a web component
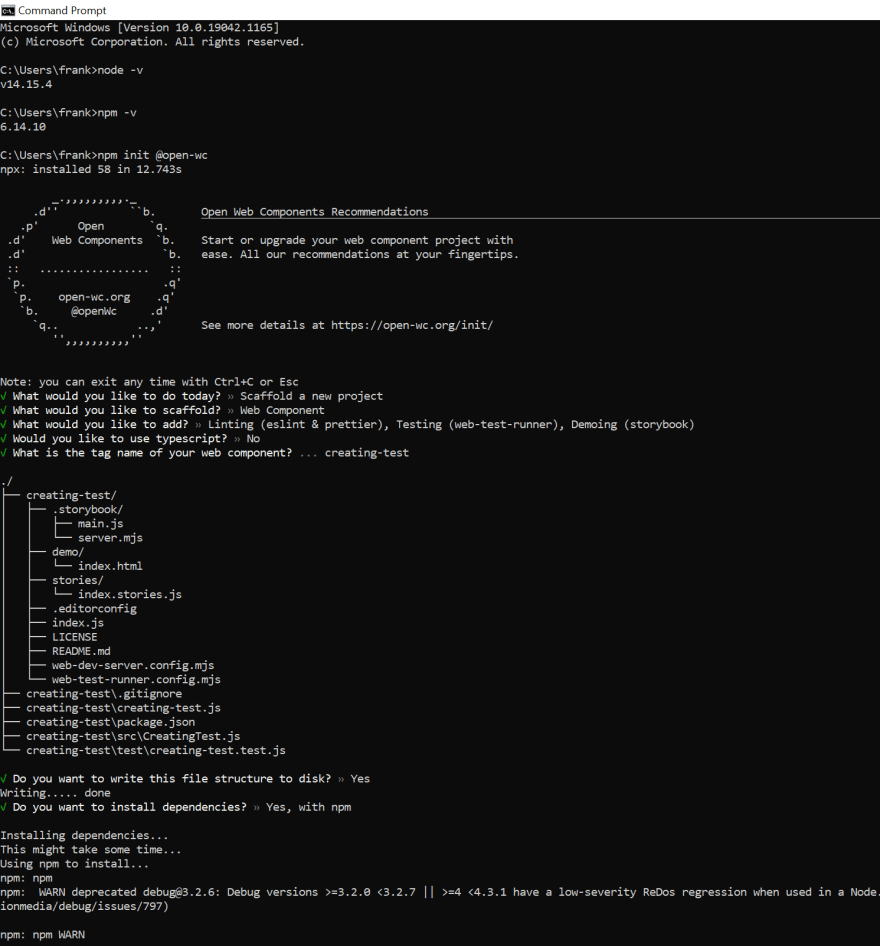
Once you have downloaded the necessary software you can verify by running the following lines in your command prompt node -v and npm -v. If you get a version number back you are in good shape. Next create a project by running npm init @open-wc. You can select options using the arrow keys and the space bar. To create a new webcomponents choose to scaffold a new project, and webcomponent. I choose to add linting, testing, and demo capabilities as well. Next choose whether or no to run typescript, I do not use typescript. Choose the tag name of your webcomponent. The name should contain a hyphen so it is apparent it is not a native tag.
Open-wc will display the proposed file structure and you should choose to write it to the your disk. Finally install dependencies using npm.
Thanks it! Now you have your very own web components. To open and run this web component run cd projectName and npm start in the command prompt. In order to edit the webcomponent you will need to use an IDE such a VS code.


Top comments (0)