If just like me you like to know how things works under the hood, so come with me and i'll show you how to make a server with Node.js free of dependencies.
First of all, is fully recommended that you have already know some JavaScript and how to use Node.js, here we won't cover that principles.
Let's start by the package.json file, you can create this file normally, isn't necessary to run npm init on terminal, just if you want.
This is the necessary for us in the package.json:
{
  "private": true,
  "scripts": {}
}
But you can add any field you want.
Now you might be thinking, why a package.json file if it's a zero dependency project? It's just because we will use the scripts option and dev dependencies.
Now let's create our first folder and JS file. Create src folder in the root directory and an index.js inside it.
src--
   \- index.js
package.json
Lets install nodemon as a development dependency:
npm i -D nodemon
And set a new script option in the package.json:
{
    "private": true,
    "scripts": {
        "start": "nodemon src/."
    }
}
Now we’ll need the http core module of node.js, in the index.js file:
const http = require('http')
With the http module, we’ll use the createServer method to initialize the server. This method receive a function as it's first argument and that function receives two arguments, commonly called request and response.
const http = require('http')
http.createServer((request, response) => {})
- request: is for the incoming request, where is the data about what is requested
- response: which is used to set the data that we’ll send back This is just a summary, if you want to learn more about those two arguments, see in the docs: https://nodejs.org/dist/latest-v14.x/docs/api/http.html#http_http_createserver_options_requestlistener
The createServer method returns a Server instance, lets set it in a constant and then call the listen method to actually start our server.
const http = require('http')
const server = http.createServer((request, response) => {})
server.listen(3100)
The listen method can receive two arguments. First is the port, the second is optional and is a listener function that runs when the server is actually listening to requests. This function is commonly used to write something on console when the server's start.
const http = require('http')
const port = 3100

const server = http.createServer((request, response) => {})

server.listen(port, () => {
  console.log(`Server started in port ${port}`)
})
Within the createServer function, we will start make the server’s logic. With the request object we’ll get the current request method and the path.
const http = require('http')
const port = 3100

const server = http.createServer((request, response) => {
  console.log(request.url, request.method)
})

server.listen(port, () => {
  console.log(`Server started in port ${port}`)
})
Now to start the server we type in terminal node src/index.js, but we've already set it in the package.json file a script with nodemon, so you can type npm start instead.
By typing npm start on terminal we run that script, which runs nodemon src/index.js.
To test it, open your browser and enter http://localhost:3100 and than you will see this in the terminal.
/ GET
And the browser will be in an infinite load, but why this is happening? It’s because we receive the request but doesn’t send a response back. To change it let’s change our server listener code.
const http = require('http')
const port = 3100

const server = http.createServer((request, response) => {
  response.end(request.url + ' ' + request.method)
  // or response.end(`${request.url} ${request.method}`)
})

server.listen(port, () => {
  console.log(`Server started in port ${port}`)
})
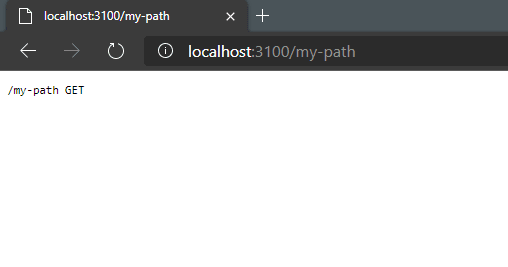
Now you must see / GET in the browser not in the terminal.

And if you type a different path in the url it will be shown too.

Let’s start the good part. Now that you know how to create the server, let’s see some interesting methods and properties:
response.write: this method will write something to the response payload and will be sended all together when method response.end is called. And how you could see the response.end itself can do it too, but can only be called once per request.
const http = require('http')
const port = 3100

const server = http.createServer((request, response) => {
  response.write('On write method\n')
  response.end('On end method')
})

server.listen(port, () => {
  console.log(`Server started in port ${port}`)
})
response.statusCode: this is a property which we can set the status code for our response, if you don't know about HTTP Status Codes go check it out: https://developer.mozilla.org/pt-BR/docs/Web/HTTP/Status
response.setHeader: this is a method used to set any header to the response. It receives two arguments, first is the header's name and the second is its value, a header can be simply see as a key and value pair, but if don't know much about go check it out: https://developer.mozilla.org/en-US/docs/Web/HTTP/Headers
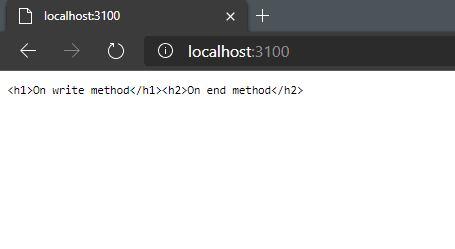
A common header we’ll use is the Content-Type which show to client what is the type of the content we're sending back, for example:
const server = http.createServer((request, response) => {
  response.setHeader('Content-Type', 'text/html')
  response.write('<h1>On write method</h1>')
  response.end('<h2>On end method</h2>')
})

In code above we’re saying that the response content is a text of type HTML and it could be a just a simply text setting the header to:
const server = http.createServer((request, response) => {
  response.setHeader('Content-Type', 'text/plain')
  response.write('<h1>On write method</h1>')
  response.end('<h2>On end method</h2>')
})
That kind of value we set on Content-Type header is called MIME Type and if you don't know much about you can see here: https://developer.mozilla.org/en-US/docs/Web/HTTP/Basics_of_HTTP/MIME_types
response.writeHead: that method its kind a fusion of response.statusCode and response.setHeader but in that case we set the header as an object:
const server = http.createServer((request, response) => {
  response.writeHead(200, { 'Content-Type': 'text/html' })
  response.write('<h1>On write method</h1>')
  response.end('<h2>On end method</h2>')
})
And will produce the same result as using the two methods separated.
request.url: has the value of the current requested path, for example:
- http://localhost/ = /
- http://localhost/about = /about
- http://localhost/index.html = /index.html
request.method: has the value of the current requested method, like GET, POST, PUT, DELETE, etc...
request.headers: has the value of the headers sended in the request, like:
{
   'user-agent': 'curl/7.22.0',
   host: '127.0.0.1:8000',
   accept: '*/*'
}
Now that we see how all of those things works, we can make some routing in the server.
An example for a simple routing, is using if statements:
const http = require('http')
const port = 3100

const server = http.createServer((request, response) => {
    response.setHeader('Content-Type', 'text/html')

    if(request.url === '/') {
        response.end(`
           <h1>Home</h1>
           <p>This is the home page</p>
        `)
    } else if(request.url === '/about') {
        response.end(`
           <h1>About</h1>
               <p>This is the about page</p>
        `)
    } else {
        response.statusCode = 404
        response.end(`
           <h1>Not Found</h1>
           <p>This page was not found</p>
        `)
    }
})

server.listen(port, () => {
  console.log(`Server started in port ${port}`)
}))
You can go to the browser and type the urls and see the magic.
Conclusion
This tutorial shows only an introduction to the subject, there is much more things you can learn when doing a server like this, but let’s put them in another tutorials. I hope you could understand everything and if you any questions just leave a comment below and see you!


Top comments (0)