Read this article and find out how to create a bootable USB drive for installing Windows 10, 8 or 7. There are many ways of doing it (and even dedicated apps), but we are going to cover only the methods which are both the easiest and officially approved.
This procedure is necessary when your PC, laptop or netbook lacks a DVD drive or it doesn’t work properly, if you have no system installation disk, or you just don’t like working with DVDs.
YouTube:
Method One: for a UEFI Computer
All you need to create a bootable flash drive is a computer with UEFI instead of BIOS and the system image itself. It should be noted that almost all modern computers support UEFI.
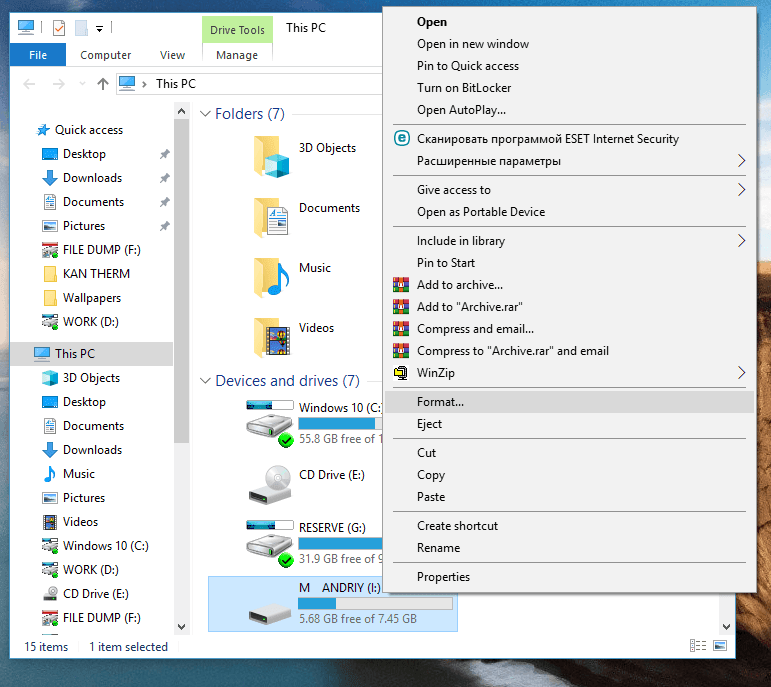
So, format the flash drive you want to make bootable. Make sure you select the necessary file system – FAT32. Choose Quick format and click Start.
You will see a warning that all data will be deleted. Click Ok and wait for the process to finish.
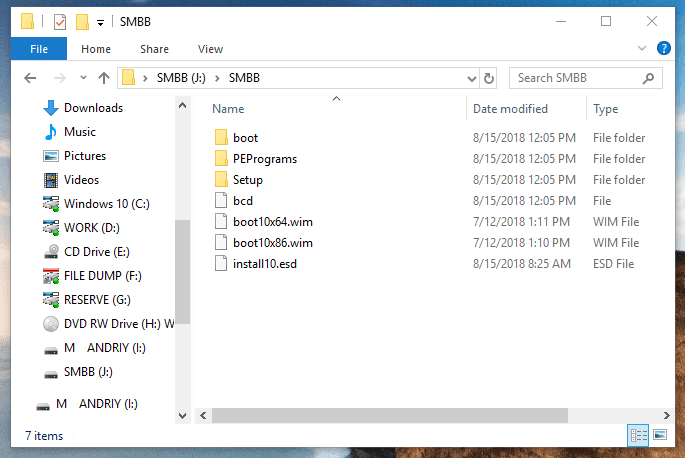
After that, use the File Explorer to open the disk or .ISO image containing the installation package, copy image files to the flash drive and wait until it is over.
When the copying process is complete, your bootable flash drive is ready.
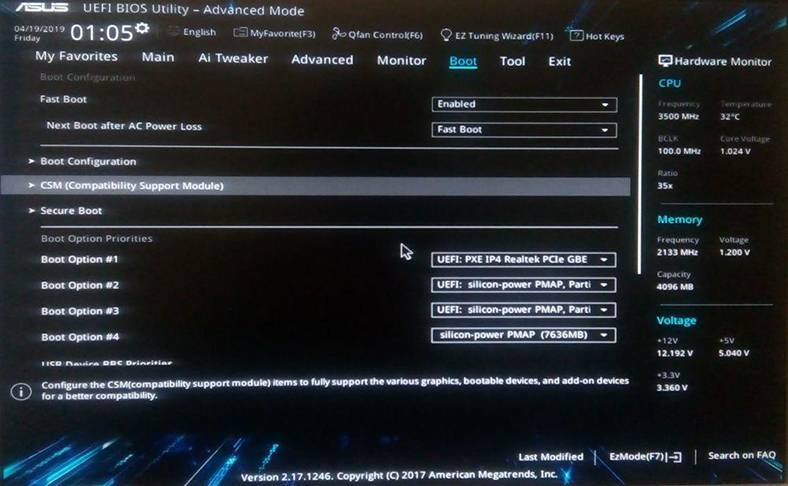
Then restart your PC, go to UEFI, set the computer to boot from the flash drive and install the operating system you need.
Method Two: Windows 7 USB/DVD Download Tool
The second method will be relevant if your computer has BIOS instead of UEFI.
In that case, creating a bootable flash drive requires official software by Microsoft – Windows 7 USB/DVD Download Tool. It is free of charge and you can download it from the Microsoft official website.
Don’t let the words Windows 7 worry you. This app is also good for Windows 8 and 10.
Now, download and install it.
Select a suitable system image file and click Next.
Now choose the media type, in this case USB-device. Select the necessary flash drive from the list of all devices in your computer (in my case, it is disk I) and click Begin copying.
You will see a warning that all data in this flash drive will be deleted. If you don’t have any important files on this drive, click Erase USB Device. Confirm your decision to delete all files and wait until the files are copied to your USB drive.
Method Three: Command Prompt
The third method is to create a bootable drive with the Command Prompt started by administrator. The advantage of this method is that you don’t have to download and use any additional software – for example, if you can’t access the Internet, and your device will work with both BIOS and UEFI.
For starters, launch the Command Prompt as Administrator. Then enter the command Diskpart and then List disk.
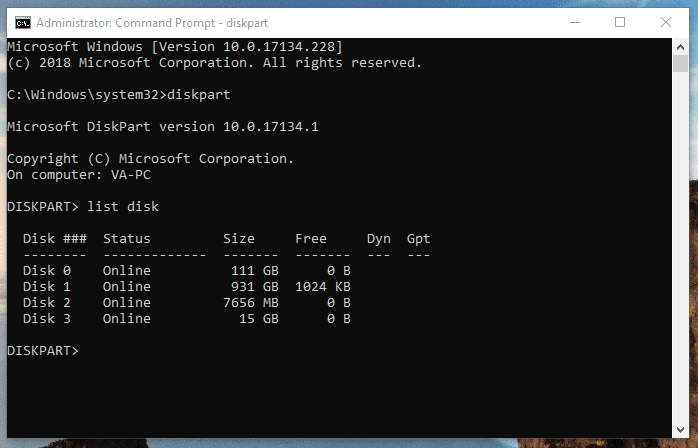
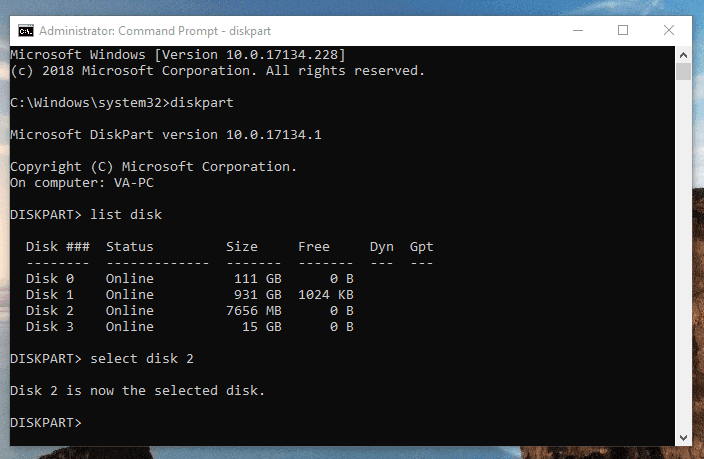
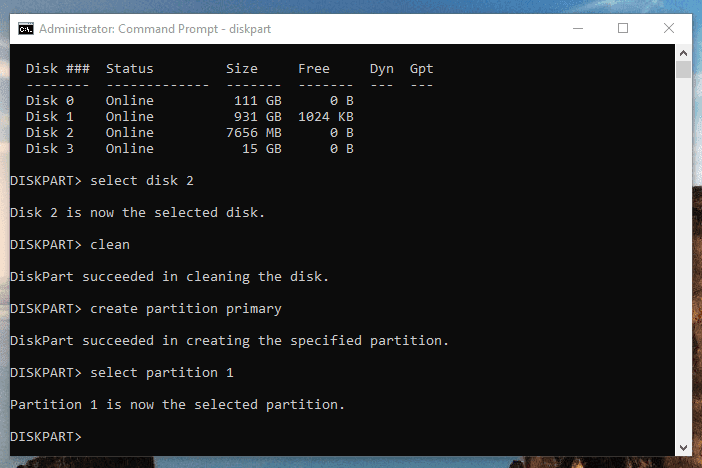
Check the list of all disks installed in the computer to find the flash drive (in my case, that is Disk 2) and enter the command select disk 2. Now all actions will affect this particular disk. At this stage, you have to be very careful, because all data will be deleted from the disk you have selected.
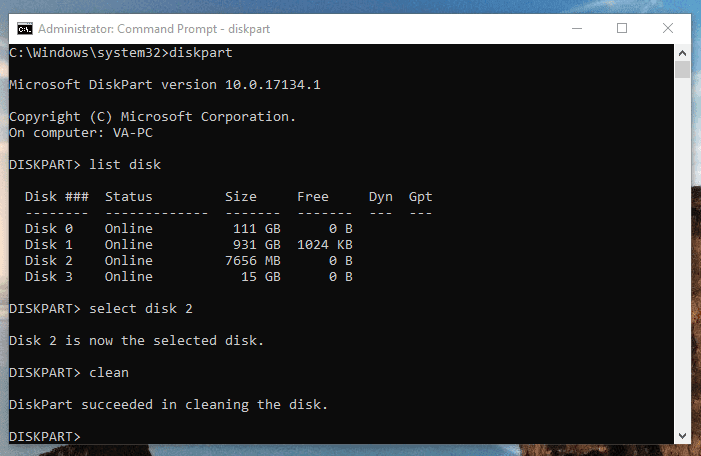
Then enter the command clean, which cleans the flash drive’s partition table. You can see a report saying that disk cleanup was successful.
Now create a partition on this flash drive with the command create partition primary and enter select partition 1 (that is, select this partition).
Make it active with the command active and format the flash drive in NTFS format with the command format fs=ntfs quick, and wait until the formatting process is 100% complete.
Assign a drive letter (for example, Х) using the command assign letter=X and finish the work of Diskpart with the command exit.
Now close the Command Prompt and copy files from the image onto the flash drive as in the first method. When the copying process is over, your bootable flash drive is ready.







Top comments (0)