Oh, how time flies. A little over 2 years ago, we had the first Super Silly Hackathon, and yesterday we had our third one. In case you’re unfamiliar with the concept, it is a hackathon for people who want to build anything for no good reason.
It’s a spin-off the original “SF stupid shit no one needs and terrible ideas hackathon” but totally local, i.e. maxed-out Singlish. I had been a participant for the first one back in 2017 and somehow emcee-d the second one in 2018.
The only friend I have who is as interested in 90s computing is Kheng Meng, with whom I’ve collaborated for various retro-computing related projects over the years. We were “Team 486” back in 2017 and in 2019 we became “3.1”.
The idea
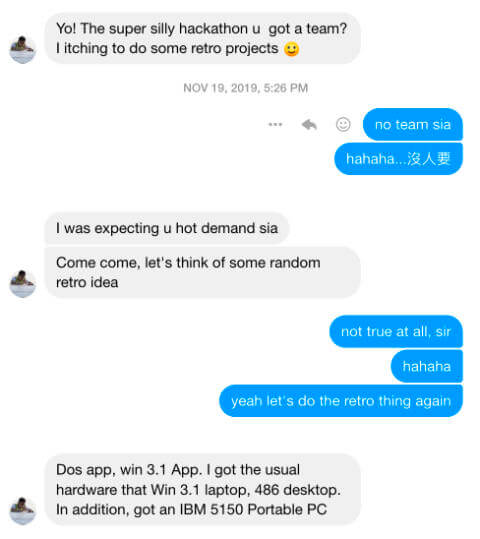
So Kheng Meng pinged me about doing something together for this year’s Super Silly Hackathon around DOS or Windows 3.1, since we already had the hardware for it. Yes, you heard right. In 2019, we have actual hardware running those OSes. 😎
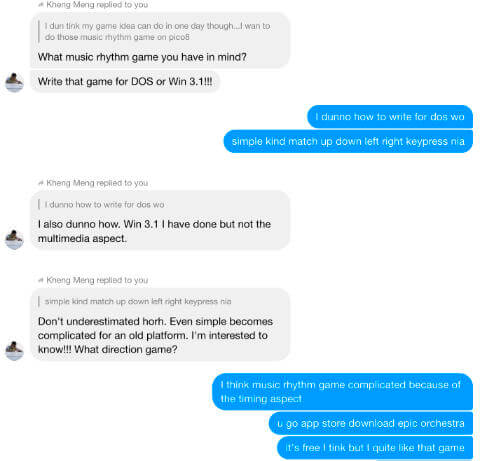
At the time, I was still on the road a lot so I didn’t really think too hard about it. But I happened to download a game called Epic Orchestra and had the hare-brained idea to try building it on PICO8 and getting it to run on The Magic Machine.
But after a bit of thought, we figured that it would be a bit too ambitious.
The idea to develop a Windows 3.1 application was still do-able though, so we went with that instead. Keeping in mind that I had zero prior knowledge about building anything for Windows 3.1, but Kheng Meng had already built a Slack client on Windows 3.1. So it's clear who is the reliable one here.
The AH-MAZ-ING workflow
If you asked me, I thought the app itself was nothing special. It was just matching up, down, left and right when their respective characters showed up on the screen. But the process and hardware setup was most fun and interesting.
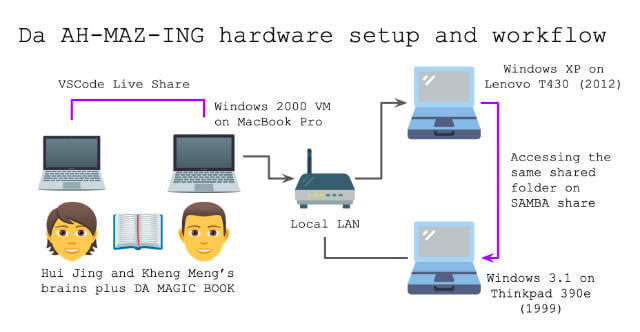
The setup involved 4 PCs, a router and DA BOOK. Our end goal was to write an application that would run on an actual Windows 3.1 system, which was running on Kheng Meng’s Thinkpad 390e (AKA The Magic Machine)
We would be writing the code on our modern MacBook Pros. Both Kheng Meng and I used VS Code as our editor, and a bit later into the day I suggested we use the Live Share extension to work on the same file. This worked out really nicely.
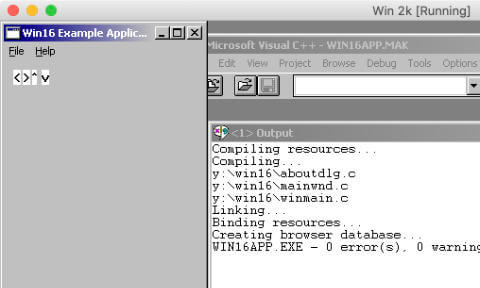
Windows 3.1 is a 16-bit operating system, so our compiler needs to be able to compile to 16-bit. Kheng Meng decided to go with Microsoft Visual C++ on a Windows 2000 system on VirtualBox to compile the application.
Modern Macs are unable to communicate with the Windows 3.1 system directly, hence we needed the Windows XP system as a go-between. The Windows XP machine was linked up to the Mac via Samba.
We also had a local LAN (that’s why the router is there), which allowed the Windows XP system and Windows 3.1 system to access the same shared folder. That’s how we got the compiled executable from the Mac through to the Windows 3.1 machine.
Refer to this handy diagram for a visual overview of what we were doing:
The application development process
Even though I haven’t written a lot of code with Kheng Meng before, turns out we pair program really well. Zero arguments about variable names (because I heard that’s a thing people argue about) at all. I don’t know how rare that is but I cherish it.
So the original end goal was a music rhythm game, where you would match key strokes to falling arrows on the screen in time with music. That was a fairly grand end goal, given neither of us were familiar with building games or Windows 3.1 applications.
Instead, we started with the very basic of basics. Okay, maybe one little step beyond the basics. Kheng Meng had cloned a scaffold starter, Win16-Example-Application, that came with a tutorial on how to build a Win16 GUI application in C.
Because of the 16-bit nature of our application, we wrote it with the C89 flavour of C. Fun times, my friends. Also, Google was only nominally helpful because this style of application development was literally years before Google and StackOverflow.
Also, it’s hackathon code, so don’t judge… ¯\_(ツ)_/¯
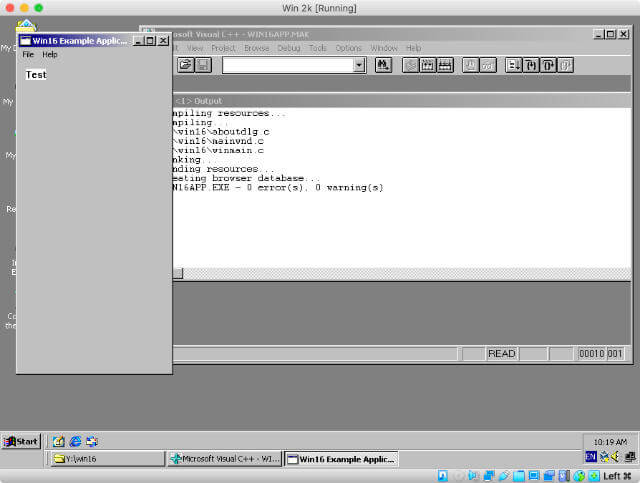
Step 1: Render a character on the application window
There was no version control during much of the process so this is really based on my sketchy memory, but I think the first thing we did was try to render some test text on the screen. There are 2 ways to do that, TextOut() and DrawText(), and we used TextOut() first.
TextOut(hdc, 10, 10, "Test", 4);
The first parameter hdc refers to device context, that holds state information for GDI (graphics device interface) drawing tools. The next 2 are x and y coordinates of the starting position of the string respectively.
Then we have the pointer to the string, and finally the number of characters in the string. This has to go into the WM_PAINT label for things to work. Also, the return 0 is required for the program not to crash. I think.
LRESULT CALLBACK MainWndProc(HWND hWnd, UINT msg, WPARAM wParam, LPARAM lParam)
{
    HDC hdc;
    PAINTSTRUCT ps;

    switch (msg)
    {
        case WM_PAINT:
        {
            hdc = BeginPaint(hWnd, &ps);
            TextOut(hdc, 10, 10, "Test", 4);
            return 0;
        }
    }
    return DefWindowProc(hWnd, msg, wParam, lParam);
}
Step 2: Render 4 arrow characters on the screen
To be fair I was supposed to prepare assets like the music file and sprites, but I did not. Life happens. But no matter, because we epitomise the minimal in minimal viable product. Same code, different position.
TextOut(hdc, 10, 10, "<", 1);
TextOut(hdc, 20, 10, ">", 1);
TextOut(hdc, 30, 10, "^", 1);
TextOut(hdc, 40, 10, "v", 1);
If you squint hard at my screenshot, you’ll notice that the up character, which is a caret is tinier than the others. We never did figure out how to change the font size. Oh well.
Step 3: Detect keypress in application
It’s supposed to be a matching game, right? So the first step to any actual matching is for the application to detect keypresses. Cue DA BOOK.
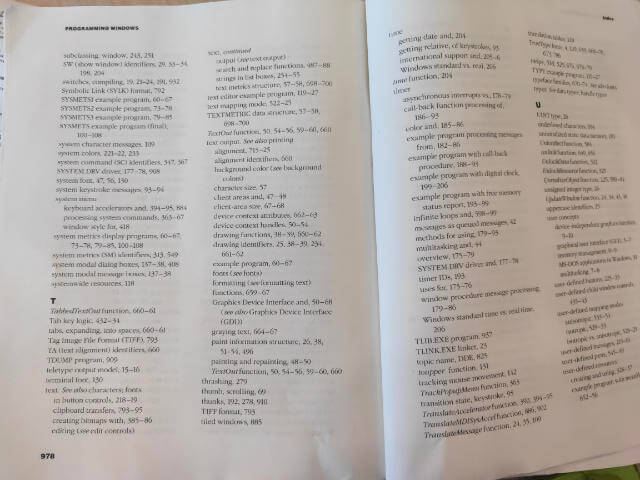
I’m generally neutral about using reference books, except that I’ve been so spoiled by search functions in digital that when I flip the index to locate my topic of interest and find the entry labeled as see THIS_OTHER_THING, I’m like (╯°□°)╯︵ ┻━┻
Kheng Meng had set up the application with some debugging functionality by adding a smprintf.h file, modified from Small printf source code by Georges Menie to include putDebugChar.
The idiot that I am, instead of running the application via Debug > Go, I chose to run the executable instead, which means none of my printf statements got printed anywhere. It took a good extra 45 minutes with Kheng Meng a couple days after the hackathon to figure this out.
The code to detect a keypress is not too complicated, for example, to detect the left arrow key you need something like this:
case WM_KEYDOWN:
{
    if (wParam == VK_LEFT)
    {
        printf("Pressed left\n");
    }
    return 0;
}
And we repeated this for the other 3 arrow keys, so we had all four directions covered.
Step 4: Render a character every second
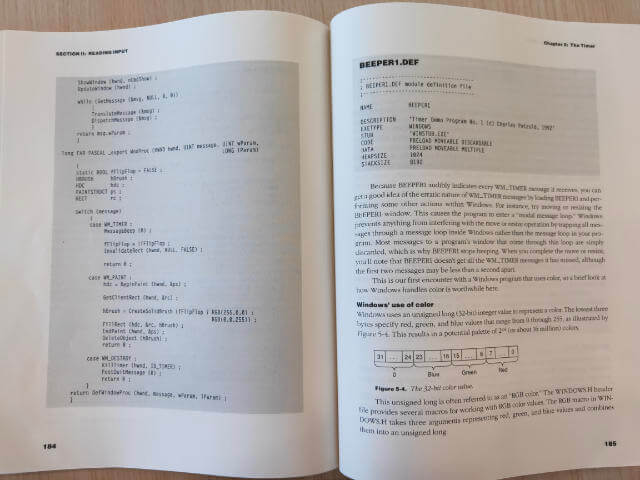
This next bit required a timer. Here’s where DA BOOK came in handy because we literally copied the relevant function out of it, like how kids used to write games back in the 80s.
But first, we need to run a timer in our application. DA BOOK had a chapter dedicated to timers, and the gist of things looks something like so (the following just prints the word “Timer” to output every second):
case WM_CREATE:
{
    printf("Created\n");
    SetTimer(hWnd, DROP_SPEED_TIMER, DROP_SPEED, NULL);
    return 0;
}

case WM_TIMER:
{
    switch(wParam)
    {
        case DROP_SPEED_TIMER:
        {
            printf("Timer\n");
        }
    }
}
We arbitrarily set the timer to 1000ms so it ticked every second. Then, we wanted to try to render stuff every second, so in this case, we tried it with an arrow every second by updating the position of the character per tick.
case WM_TIMER:
{
    printf("Timer\n");
    position += 20;
    InvalidateRect(hWnd, NULL, FALSE);

    return 0;
}
The variable position was declared somewhere near the top of the file, but anyway, InvalidateRect() is what triggers WM_PAINT to run every interval of the timer, thus painting a new arrow at a new position on the screen per tick.
Step 5: Render a single different character every second
The next thing to try was to make a different arrow show up per tick. For that, we created another variable to hold a number that would loop around from 0 to 3. Then wrote a switch statement such that a different arrow character would be painted per tick.
case WM_TIMER:
{
    printf("Timer\n");
    arrow = (arrow + 1) % 4;
    InvalidateRect(hWnd, NULL, FALSE);
    return 0;
}

case WM_PAINT:
{
    hdc = BeginPaint(hWnd, &ps);
    SetRect(&targetRect, position, 50, 110, 440);

    switch (arrow)
    {
        case 0:
        {
            DrawText(hdc, "<", 1, &targetRect, DT_CENTER | DT_NOCLIP);
            break;
        }
        case 1:
        {
            DrawText(hdc, ">", 1, &targetRect, DT_CENTER | DT_NOCLIP);
            break;
        }
        case 2:
        {
            DrawText(hdc, "^", 1, &targetRect, DT_CENTER | DT_NOCLIP);
            break;
        }
        case 3:
        {
            DrawText(hdc, "v", 1, &targetRect, DT_CENTER | DT_NOCLIP);
            break;
        }
    }
    EndPaint(hWnd, &ps);
    return 0;
}
At some point we added a random number generator so the arrow characters were printed at random, as well as at random time intervals, but refactored that out because it wasn’t relevant to our end goal of falling arrows.
Step 6: Render characters falling down the screen
Speaking of falling arrows, once we figured out most of the painting bits, the next thing was to create the effect of falling arrows down the window.
We’re not sure if this is the correct way to do things, but we decided to go with having a fixed array of rectangles evenly distributed down the window.
int fallingArrows[ARROW_COORD] = {0};
int arrowPositionForIndex[ARROW_COORD] = {380, 360, 340, 320, 300, 280, 260, 240, 220, 200, 180, 160, 140, 120, 100, 80, 60, 40, 20};
The arrows in these rectangles would be repainted per tick of the timer. And we would generate a new character at the top of the array and shift the rest of the values up the index. The index of each character would be tied to their y-coordinates on the window.
case WM_PAINT:
{
    hdc = BeginPaint(hWnd, &ps);

    for (i = 0; i < ARROW_COORD; i++)
    {
        yCoord = arrowPositionForIndex[i];
        SetRect(&targetRect, 90, yCoord, 110, 440);

        switch(fallingArrows[i])
        {
            case 0:
            {
                DrawText(hdc, "<", 1, &targetRect, DT_CENTER | DT_NOCLIP);
                break;
            }

            case 1:
            {
                DrawText(hdc, ">", 1, &targetRect, DT_CENTER | DT_NOCLIP);
                break;
            }

            case 2:
            {
                DrawText(hdc, "^", 1, &targetRect, DT_CENTER | DT_NOCLIP);
                break;
            }

            case 3:
            {
                DrawText(hdc, "V", 1, &targetRect, DT_CENTER | DT_NOCLIP);
                break;
            }

            default:
            {
                DrawText(hdc, " ", 3, &targetRect, DT_CENTER | DT_NOCLIP);
                break;
            }
        }
    }
    return 0;
}
It’s quite hacky, but this IS a hackathon, so…
There was also the issue of how we were unable to get the application to play audio, so the hopes of building a music-backed rhythm game went right out the window, and we had to be content with just the keypress matching part of things.
To make things less boring and predictable, we didn’t want arrows to be generated every second. There would be instances where no arrows were generated, i.e. blank rectangle, so you wouldn’t press any keys then.
for (i = 0; i < ARROW_COORD - 1; i++)
{
    fallingArrows[i] = fallingArrows[i + 1];
}

fallingArrows[ARROW_COORD - 1] = rand() % 8;
After some trial and error, we figured that a modulo of 8 generated just enough blanks to keep things interesting.
Step 7: Match keypress to character at specific position
The new point of our game was to press the appropriate arrow key when the character appeared in a specific rectangle near the bottom of the window.
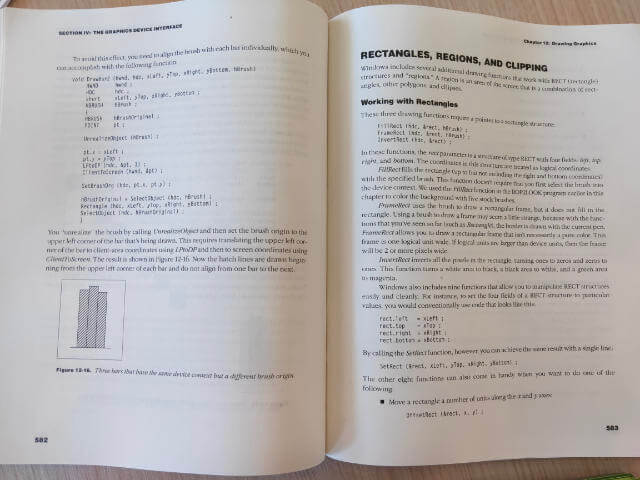
For that, we needed to draw a “target” rectangle to indicate when the player ought to press the respectively keys. Back to DA BOOK for advice on how to do that.
We needed to add an hBrush and use the FrameRect() function to draw the target rectangle. These were added to the WM_PAINT section of the application.
case WM_PAINT:
{
    hBrush = CreateSolidBrush(RGB(255, 0, 0));
    SetRect(&targetRect, 90, 358, 110, 378);
    FrameRect(hdc, &targetRect, hBrush);
}
The fallingArrows array would also come in handy for this particular functionality we wanted of keypress matching.
case WM_KEYDOWN:
{
    if (wParam == VK_LEFT)
    {
        if (fallingArrows[1] == 0)
        {
            printf("Left Hit");
        }
        else
        {
            printf("Left Miss");
        }
    }
    else if (wParam == VK_RIGHT)
    {
        if (fallingArrows[1] == 1)
        {
            printf("Right Hit");
        }
        else
        {
            printf("Right Miss");
        }
    }
    else if (wParam == VK_UP)
    {
        if (fallingArrows[1] == 2)
        {
            printf("Up Hit");
        }
        else {
            printf("Up Miss");
        }
    }
    else if (wParam == VK_DOWN)
    {
        if(fallingArrows[1] == 3){
            printf("Down Hit");
        } else {
            printf("Down Miss");
        }
    }
    else {
        printf("Arrow keys only la");
    }
}
You’d think most of the work would be done by now, but no, because every game needs a scoring mechanism and this turned out to be a bit more tricky than we anticipated.
Step 8: Add scoring mechanism
If you think about it, there are 2 possible results from a keypress. You either “Hit” or “Miss”. So at first, we figured a boolean would do, 1 for Hit, 0 for Miss. Easy.
Wrong.
There is also the case of if you were supposed to press something, but you did not. Then that registers as a “Miss” as well.
The third situation is when the rectangle was blank and you didn’t press anything. That is a correct situation, but it is neither a “Hit” nor “Miss”.
It got to a point where just talking about it made me confused, so we fell back to the trusty logic table. Originally drawn on a random piece of A4 paper Kheng Meng used as a mouse pad, I didn’t think to snap a photo of it.
Press key | Matches Arrow | Score
    ✓ ✓ 1
    ✓ x 0
    x x 0
    x ✓ 0
Something like that.
So we introduced a new variable called stateOfLastAction. Kheng Meng mentioned that we should have used enumeration for this, but again, hackathon. And it was late in the day, our brain cells were depleted. This was added to the WM_TIMER section of the application:
if (stateOfLastAction == 2 || (stateOfLastAction == 0 && (fallingArrows[1] < 4)))
{
    hitMissBlank = 2;
    if (score > 0)
    {
        score--;
    }
}

if (stateOfLastAction == 1)
{
    score += 2;
    hitMissBlank = 1;
}

if (stateOfLastAction == 0 && (fallingArrows[1] > 3))
{
    hitMissBlank = 0;
}

stateOfLastAction = 0;
Step 9: Add game start, stop and timer
Lastly, we tossed in some user experience enhancements (actually, these are probably the most basic things one needs to include in a game), like a start and stop trigger, as well as a timer to indicate when the game was over.
There were also some instructions to tell people which keys to press to start the game, and an indicator to show if you hit or missed the target. Plus a count-down timer. By then, we were too tired to draw more rectangles, so TextOut() for everything!
If you’re really interested in our hacky code, the source is on GitHub.
Presentation time
The application itself really isn’t anything exciting. But I really enjoyed working with Kheng Meng. It’s kind of like when you travel with a friend for the first time, spend more than a week together almost 24-7 and at the end of it, still haven’t killed each other.
Then you know that your friendship has passed the test.
Same thing.
Wrapping up
Videos for all the presentations are on Engineers.SG, our local archive of tech talks in Singapore. I have a bunch of personal favourites from this edition.
Firstly, Thai Pangsakulyanont’s (team name dtinth, with a lower-case d) Super Silly Vortex, which is the most amazing thing in the world. Thai is THE BEST.
Also, Special Password by team Mr Chia who is not here (made up of Gao Wei, Shawn Wang and See Yishu), and the video contains swearing because of me, so you have been warned.
And, Magic Wand by Vanessa Cassandra (team name Magical Girl). So magic, much win.
Every hack was fantastic in their own right though, so go check out the nonsense everyone had a lot of fun building. If you steal anybody’s idea and become rich, do the right thing and credit them back, ok?





Top comments (3)
Great project and it's also good to hear that you haven't killed each other at the end of the day! :D I'm about to attend my first hackathon next month.. are there any tips you can give me?
I'm not sure if this would apply to your hackathon, given ours was very very casual, but I think it worked for us that we didn't take ourselves too seriously and had fun working with each other (I'm assuming you have a team here) :)
Thanks, thanks, thanks!