Introduction
Graph databases are gaining popularity due to their inherent design of storing and managing data using graph structures and being able to model and query complex relationships intuitively. There are several graph database technologies available in the market, and one of the technologies we will see today is Apache AGE.
PostgreSQL is one of the most popular and powerful open-source Relational Database Management Systems (RDMS), built upon it is an extension of Apache AGE which is an open-source project that supports the property graph model and provides a native graph storage and processing engine for managing large-scale graph data. Today we will see a step-by-step guide on installing and setting up Apache AGE and PostgreSQL.
Prerequisite before Installation
Before starting the installation you should have WSL enabled and installed on your system. If you don't have WSL installed you can consider the official docs here or you can also take help from this blog. After installing WSL you should also have git installed and if not take help from here and follow the guidelines of installing on Linux.
I have used ubuntu on WSL and below are the steps for installing Apache AGE and PostgreSQL from the source.
Installation:
First lets make a new directory so as to making up the installation clean.
mkdir apache
cd apache
We also need some important libraries which can be downloaded by using the below command.
sudo apt-get install build-essential libreadline-dev zlib1g-dev flex bison
1. Installing Postgres from Source:
For installing Postgres you need to install a compatible version of Postgres and currently AGE supports only Postgres version 11 and 12.
Here I am using version 11.18.
To install postgresql:
- Download the postgresql using the following command:
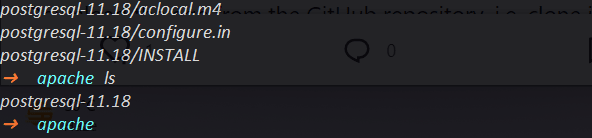
wget https://ftp.postgresql.org/pub/source/v11.18/postgresql-11.18.tar.gz && tar -xvf postgresql-11.18.tar.gz && rm -f postgresql-11.18.tar.gz
The above command would download and extract the postgresql-11.18.
You would see the following output:
- Configuring and installing postgresql using the following commands:
cd postgresql-11.18

# configuring
./configure --prefix=$(pwd) --enable-debug --enable-cassert CFLAGS="-ggdb -Og -fno-omit-frame-pointer"

# installing
make install

# moving back to apache folder
cd ..
This would take a while to complete and after completion you would see the following output after the make install command:

NOTE: If the make install command gives you error, try
sudo make installas sometimes the home directory in windows is a protected folder and you need admin permissions to add files to it.Also in the above command the prefix flag contains the path where PSQL would install you can either replace the path to your custom or this would install in the
postgresql-11.18directory.
2. Installing Apache AGE:
Follow the following commands to install and setup AGE.
git clone https://github.com/apache/age.git
# configuring AGE with PostgreSQL.
sudo make PG_CONFIG=/home/aditya/apache/postgresql-11.18/bin/pg_config install
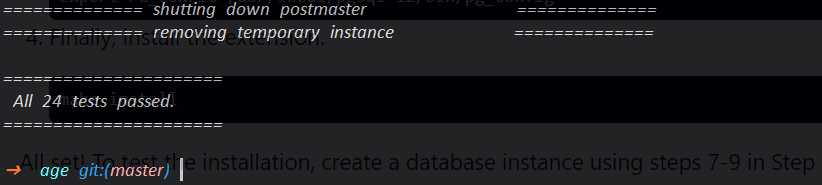
# checking if everything is alright
make PG_CONFIG=/home/aditya/Apache/postgresql-11.18/bin/pg_config installcheck
In the above command PG_CONFIG would point to the
pg_configfile which is stored in thebinfolder. Also theinstallcheckcommand would check if the installation has been successful.
After the above commands you would see the following output:
References:
You can check the following for more info on installation and setup:
Installation on other OS:
For installation on other operating systems you can check out the following blogs:
- MacOS
- Windows (This covers a different approach which you can use).
- Linux - Although the steps for Linux might be same this blog also has a part-2 which contains instruction for testing.
Video tutorials
You can also check the following video tutorials:
For a detailed tutorial you can check out this blog too!
You can also visit Apache AGE Github repository to start contributing or can visit their website for more info.
That's it for today guys. I hope this would help you in getting started with Apache AGE.


Top comments (0)