Last week, I got a new task that I need to make thumbnails for images and videos. It is quite easy task with Python. But as a Solutions Architect, I noticed that calling videos all the time to be shown and no one is taking any extra advantage from the calls makes me worried about the billing (S3 call, Data transfer, and other small things). Yes, you can cache links on the browser or with CloudFront, if you’re using one. But these are APIs and it follows Serverless structure. Hmm, another set of scenarios that I can reduce the billing of retrieving these media. One of them is to make a shorter version of the uploaded media if its a video! COOL, But, HOW?
I used FFMPEG a lot previously, I liked it and the much of the benefits that I got from. I used it in a basic way to make smaller versions of the uploaded videos. FFMPEG is a binary-based tool, which means, it needs to be compiled in the right way to let the OS of the hosted server understand how to deal with it.
All of us know Lambda limitations and how it could be painful. So, we will use Layers!
I know that I talked a lot, let’s start:
Compile Resources:
First thing first, compile your resources.
If you’re not familiar with this process, please jump to my previous article and have a look.
I’ll be using some of the steps here to make the article makes sense in terms of steps.
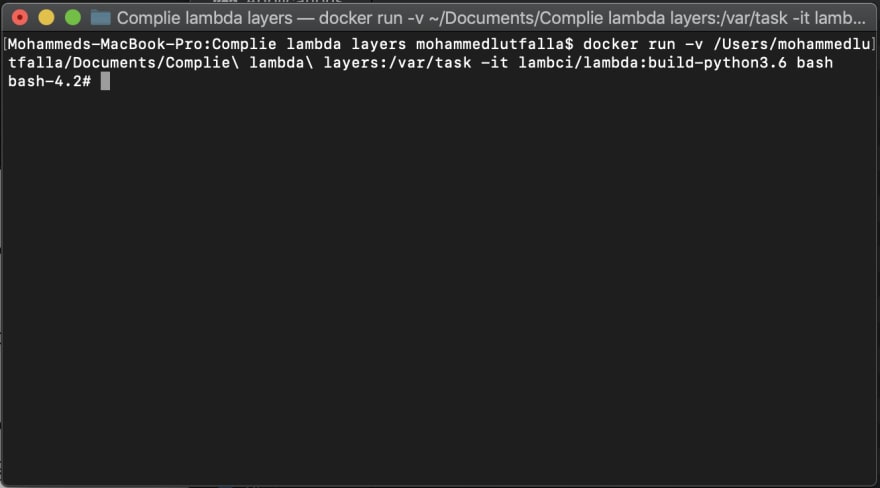
Connect to Docker template that has Lambda environment. It’s almost like a clone to its OS.
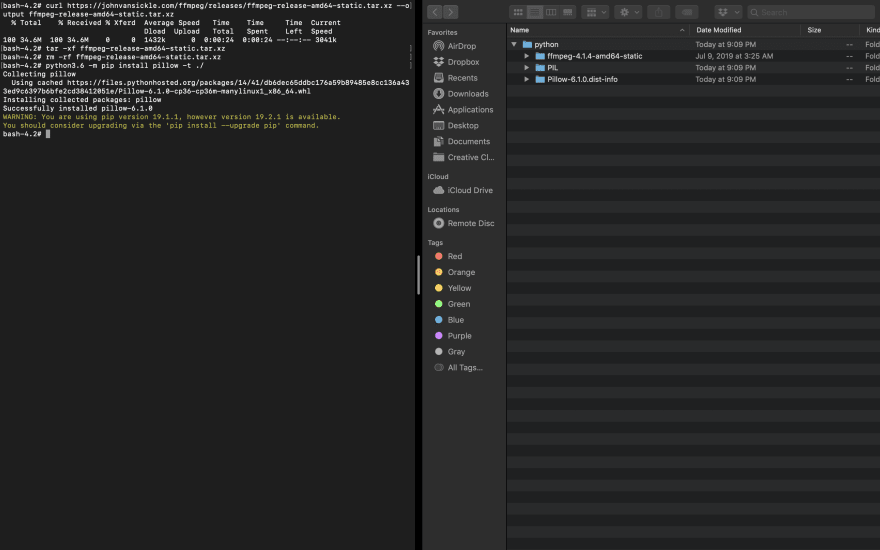
Based on the image, let me describe what I did:
1- I accessed Docker image.
2- I made a directory and called it python (this is the name that AWS layers recommend to name your python layer)
3- Enter Python directory.
4- I downloaded ffmpeg as an executable version. you can find it on this link.
5- Untar the file and get ffmpeg and ffprobe to the main directory ( to python root file).
4- Install the needed resources.
As you can see, I compiled Pillow (Python Image Library) that you can use to process images with. The reason for that is to show you that its recommend that all Lambda resources have to be compiled for it, some dependencies could be binary-based and could cause an error in the function.
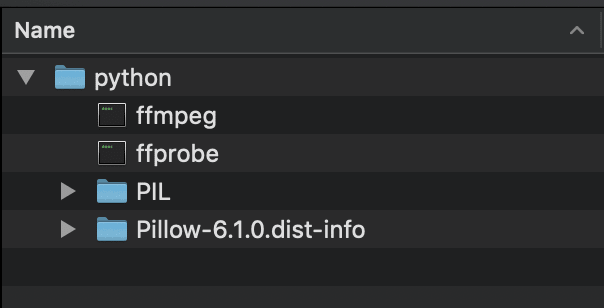
After doing these steps, you should have the following files:
Zip the directory and be prepared for the next step, which is making The layer.
Start preparing resources on the cloud:
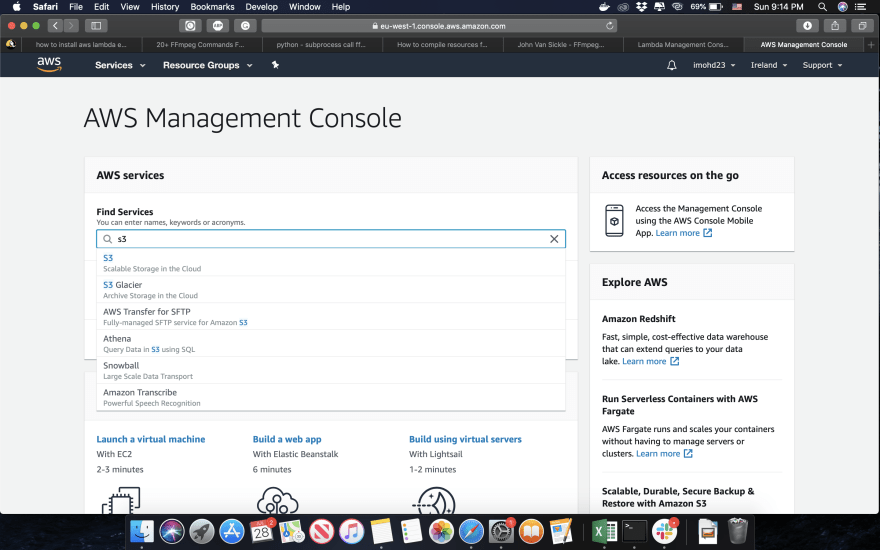
Access AWS Console and navigate to S3:
You should have a bucket so you can upload the layer.
NOTES:
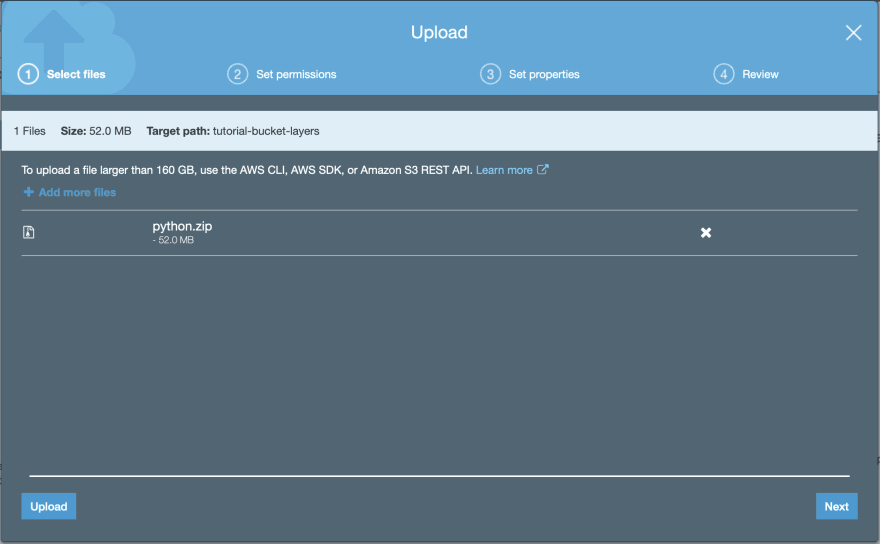
Any layer bigger than 50mb must be uploaded to S3, Copy the link, we will need it.
Any layer must be less than 250mb when it’s unzipped, otherwise, the layer won’t be created.
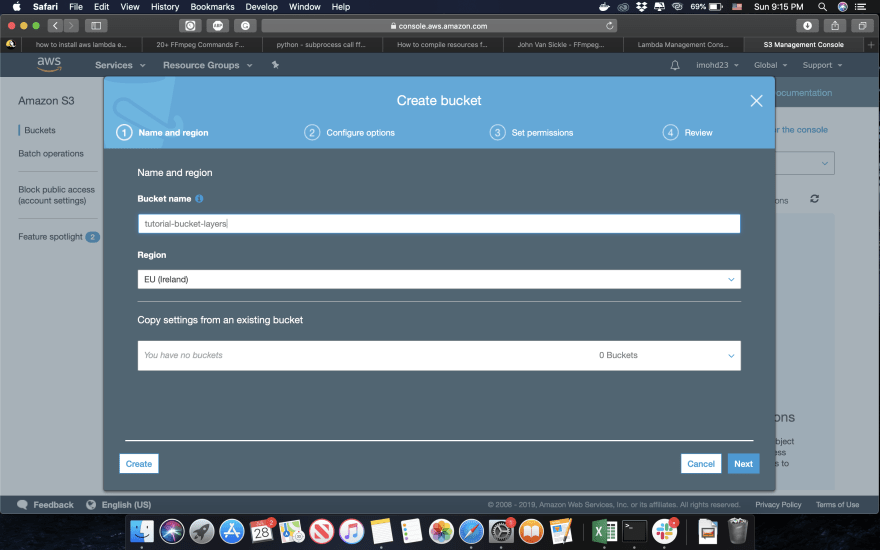
Let’s create a bucket:
Next step, Upload the layer:
NOTES:
File should not be public, If the IAM user have the permission to access these features\tools (S3, Lambda), then, you’re in a good spot.
Once the file is uploaded, copy the link.
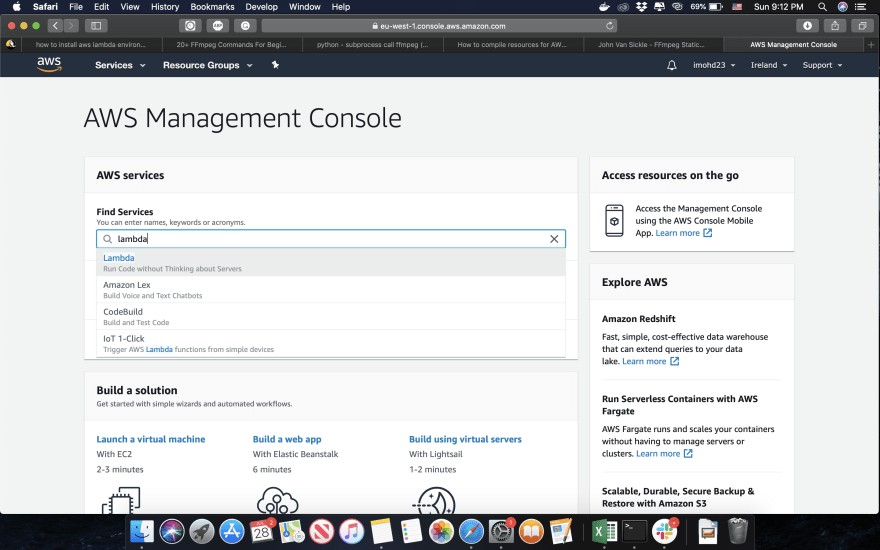
Navigate to Lambda:
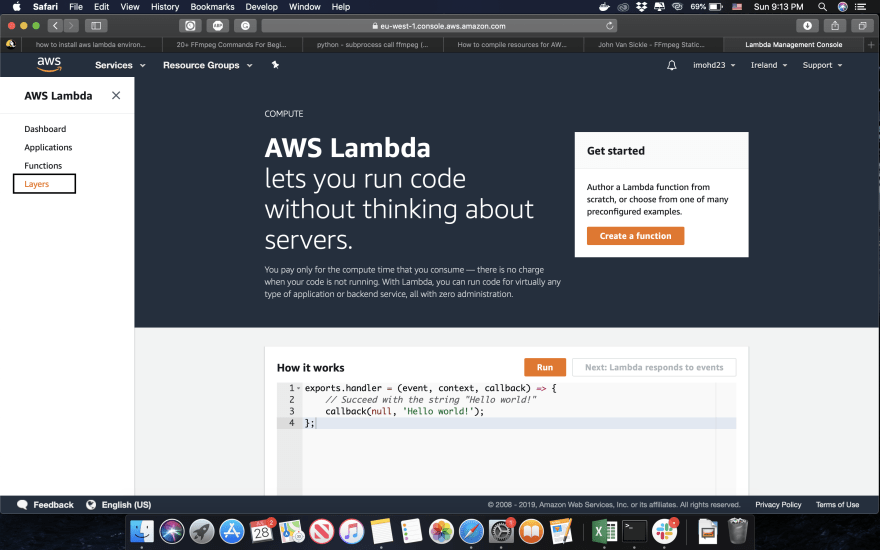
On the left of the screen, click on layers:
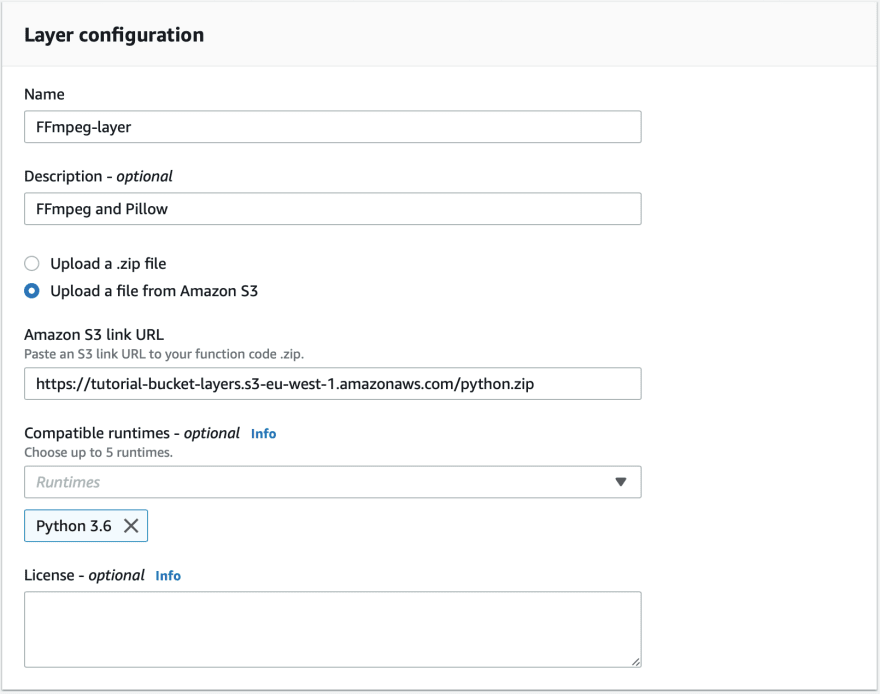
Click on create a new layer and fill the following form:
1- Give it a name
2- It is highly recommended to write a description for your layer, because you can have different versions of the same layer.
3- Click on the second option and paste the link.
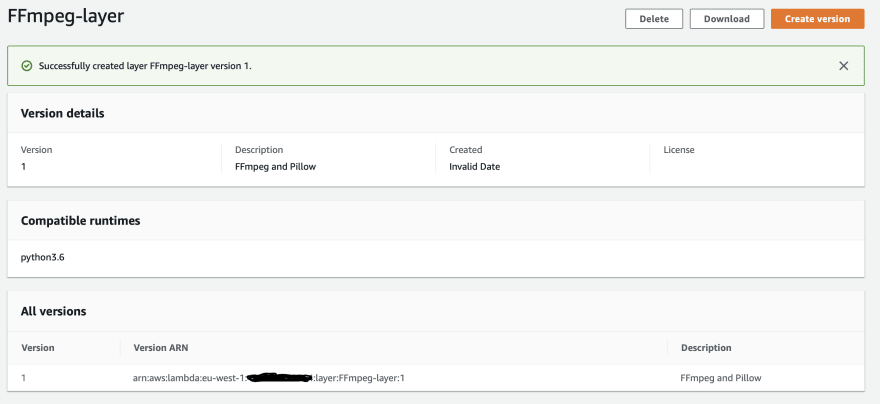
4- Specify the compatible runtime, as its important for you to track the versions.
Cool, We’re ready to start coding:
Disclaimer:
I know that the following code is not the perfect code or might people will argue about it, the reason for this only to showcase that the process is valid and working.
Let’s go to Lambda functions and start coding:
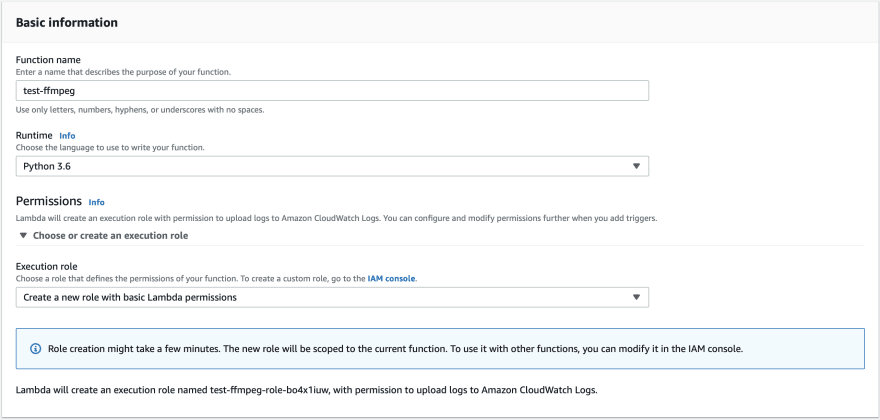
I’ve created the function and chose the runtime for it, I use Python3.6.
NOTE:
when you’re processing media and even files, you need to make sure that your function has the right set of permissions, I updated this function’s role to have the ability to read and write to S3.
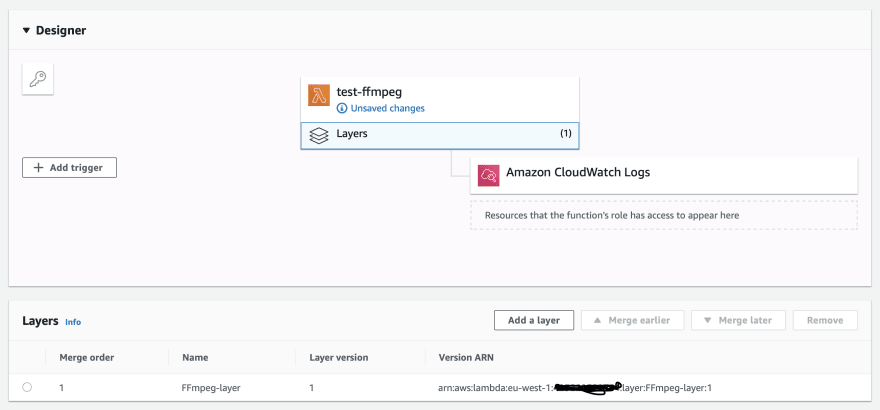
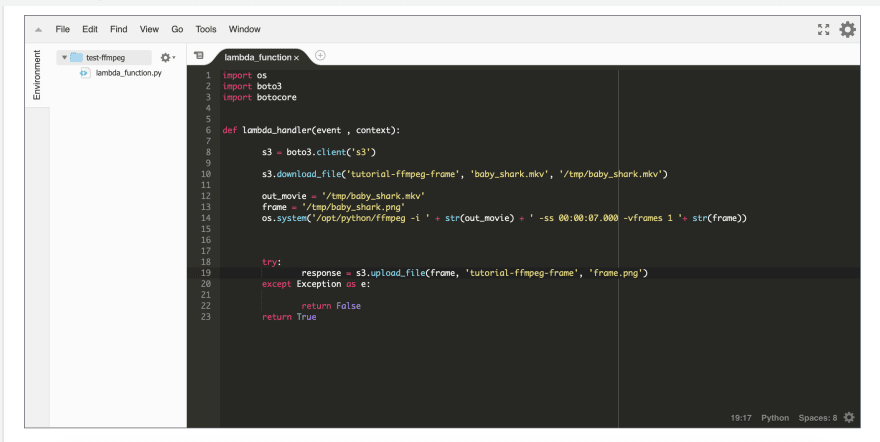
First thing I did as you’ll notice in the below image, that I linked the layer to the function.
This is the code snippet I made to download a video from S3, take a frame from the video at the 7th second and save it as png, then upload it to S3.
NOTE:
If you’re new to Lambda, _/tmp__ is the writable directory in Lambda._
As you’ve guessed, yes it worked!
Conclusion and some tips:
This way worked perfectly with me, yes you can enhance it but its a good start point for the newcomers to Lambda and serverless world.
I have some notes and recommendations for you:
1- give the function all the resources that are available (timeout and Memory), test it on your scenarios and then optimize it, the reason is to see how much actually it used to process your media. You have different scenarios. So, different timeout and CPU/GPU/Internet usage would be applied.
2- If you’re like me and you used libraries that uses ffmpeg link imageio, You have to declare ffmpeg path in your code, otherwise, lambda won’t see it, in this case, its in /opt/python.
3- Also, if you will use these libraries, make sure to make ffmpeg and ffprobe executable before you zip them and upload it. I faced this issue.
4- Use S3 to download/upload media, try not to return it as a file, data transfer between services within the same region is zero dollars.
Happy Serverless processing!




Top comments (0)