An important consideration when architecting a solution on AWS is minimizing the potential attack surface and limiting the opportunities for an attacker to target your application through a layered approach. In today's cloud landscape, ensuring privacy and security is critical during deployment. Many applications are exposed to the public internet, which inherently increases the risk of attacks. To address this, AWS has introduced CloudFront Virtual Private Cloud (VPC) Origins, a new feature that enables users to deliver content securely from applications hosted within a private VPC subnet, keeping origin servers hidden from direct internet exposure.
In this guide, I’ll explain:
- What is CloudFront VPC Origin
- Why you should deploy Fider as a private application
- Create an Internal Application Load Balancer
- Create CloudFront VPC origin
- Create a CloudFront Distribution
- Create Secrets manager secret and Lambda function
- Create a Custom Header rule in AWS WAF
- Why Implement Zero Trust Principle
- Spin up ECS and RDS
- Monitor CloudFront and WAF logs
- Caveats to consider
- Final thoughts
1. What is CloudFront VPC Origin
Traditionally, when using CloudFront with an origin resource (such as an ALB or EC2 instance), the origin needs to be in a public subnet with a public IP address, implementing Access Control Lists (ACLs) and other controls to restrict access effectively. Users needed to invest ongoing effort to implement and maintain these solutions, resulting in undifferentiated heavy lifting.
However, With CloudFront VPC Origins, users can host their applications in a private VPC, without requiring any direct route to the internet and make sure CloudFront is the only entry point to their applications. When CloudFront VPC Origin is set up as an origin for the CloudFront distribution, traffic stays on the high-throughput AWS Backbone network all the way to your AWS origin, making sure of optimized performance and low latency.
This is designed to prevent end users from discovering or bypassing CloudFront to access web applications directly. As a result, the origin servers remain hidden on the internet (Obfuscating AWS resources), significantly reducing the attack surface (attack surface reduction) and enhancing the overall security posture. At the same time, users continue to benefit from the CloudFront global scale and high-performance capabilities.
2. Why you should deploy Fider as a private application
Alright, here’s the deal: With this setup, even your ALB can be internal, and it'll route traffic straight to your ECS instances in those private subnets. You heard that right, no public access. This keeps your backend services completely hidden from the internet, which is exactly what you want for security.
Now, with CloudFront VPC origin, you can stick that ALB in a private subnet where nobody can get to it directly. CloudFront is the only way in, so you can rest easy knowing the attack surface is way smaller. Plus, that ALB? The DNS name only resolves to private IPs, so no internet users can mess with it.
And if you’re really serious about security, you can slap on Origin Custom Headers to make sure only your CloudFront distribution is allowed to talk to the ALB. It’s like building a fortress around your infrastructure. But wait, it gets better, those custom headers can be dynamically rotated using AWS Secrets Manager and a Lambda function automation, keeping everything secure without manual intervention.
3. Create an Internal Application Load Balancer
Login to management console and navigate to EC2, under Load Balancing section choose Load Balancers,

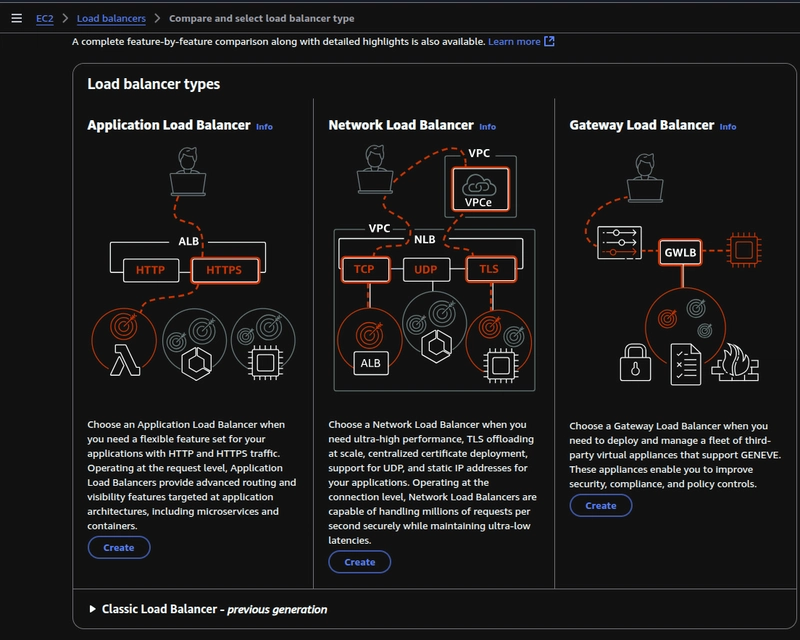
Click on create load balancer, and choose Application Load Balancer
Under Basic Configuration choose Internal as scheme,
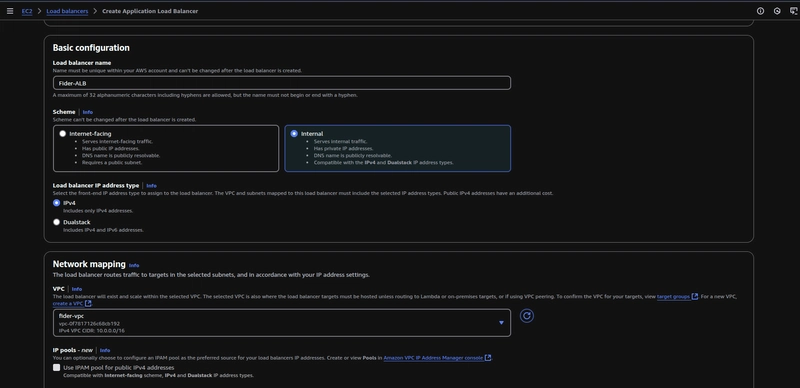
Under Network Mapping choose the VPC you created or refer this guide to create a VPC, creating a single public subnet should suffice this time (for placing NAT gateway).
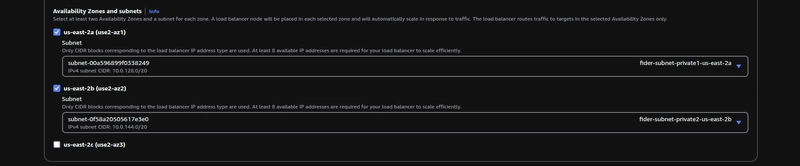
Choose to launch the Application Load Balancer in at least 2 Azs, in private subnets.

Choose the Security group for your internal ALB and create an HTTPS listener,
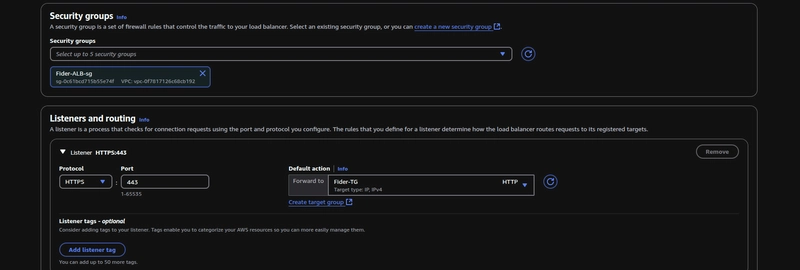
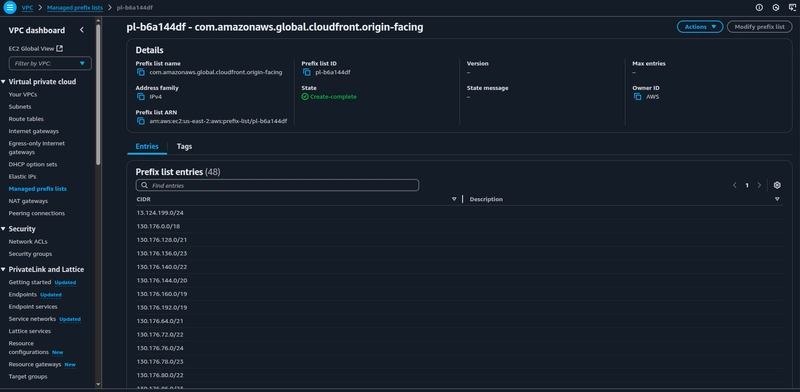
Navigate to the VPC console and click on the Managed prefix lists, choose pl-b6a144df and map this to your ALB's inbound SG rules(HTTPS), by doing so you are only letting the CloudFront's IP ranges to communicate with your ALB. This is the recommended approach according to AWS Best Practices for DDoS Resiliency.
Under Secure listener settings choose the certificate you created from ACM, if not you can refer this guide and forward to Step 3.
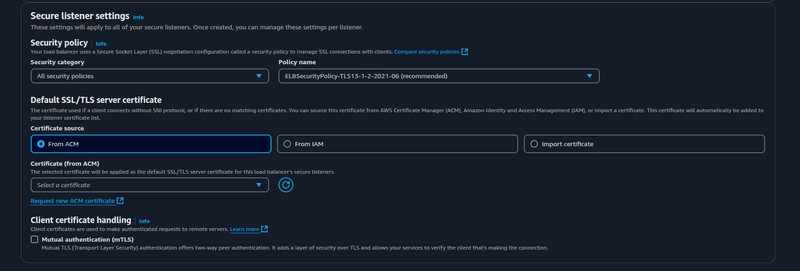
Once you are done with requesting the public certificate in ACM, your certificate will appear in the drop-down select it, scroll down, and click on create load balancer.
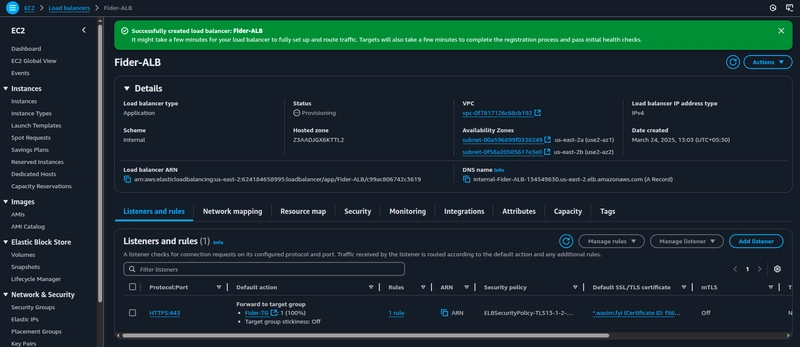
The internal ALB is now created with the traffic originating from the CloudFront IP ranges.
4. Create CloudFront VPC origin
Now that you are done with the internal ALB creation, Navigate to the CloudFront service console and choose VPC origins from the navigation pane.

Click on VPC origins and create a VPC origin,

Provide a Name and choose internal ALB's ARN from the Origin ARN drop-down,
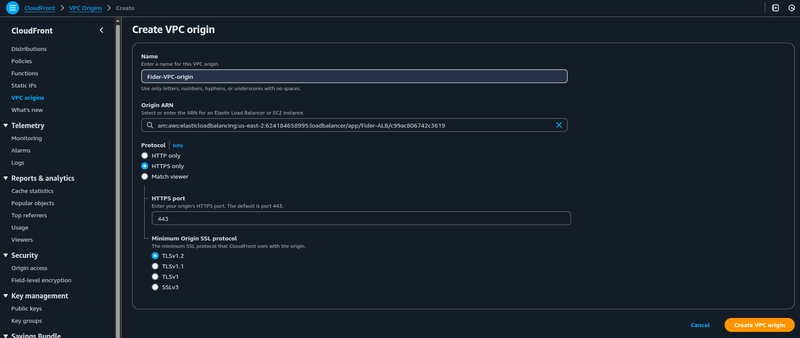
Choose the protocol to HTTPS only and click on create VPC origin.
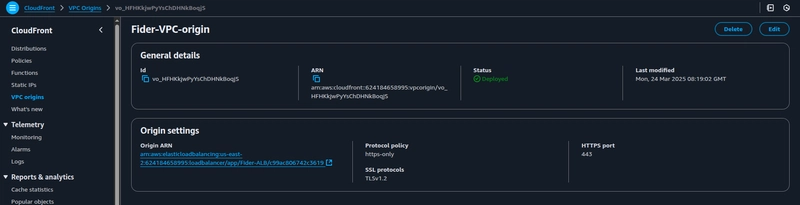
The VPC origin creation is now complete.
5. Create a CloudFront Distribution
Navigate to the CloudFront service console and click on Create a CloudFront distribution,
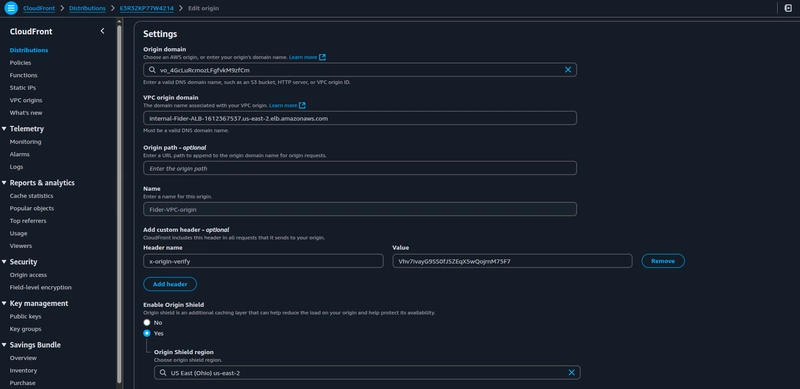
Under the Origin section, select the VPC origin you created. Enable Origin Shield for an additional layer of caching, and don't forget to add the custom header, name it x-origin-verify.
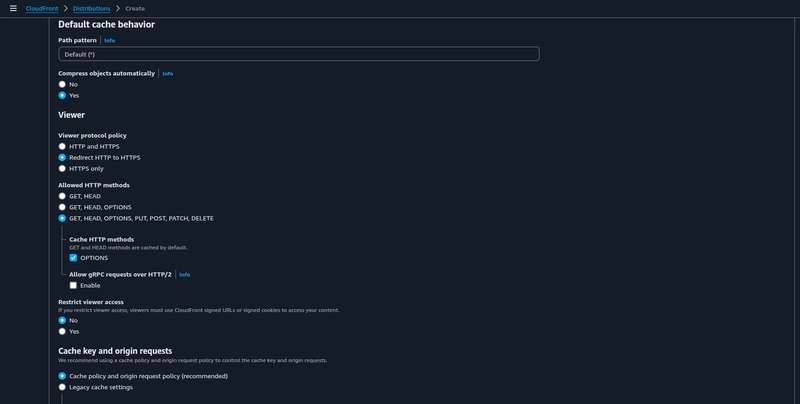
Under Default cache behaviour choose the following settings, under Allowed HTTP methods choose the third option, if you want to know why then check out this guide for reason.
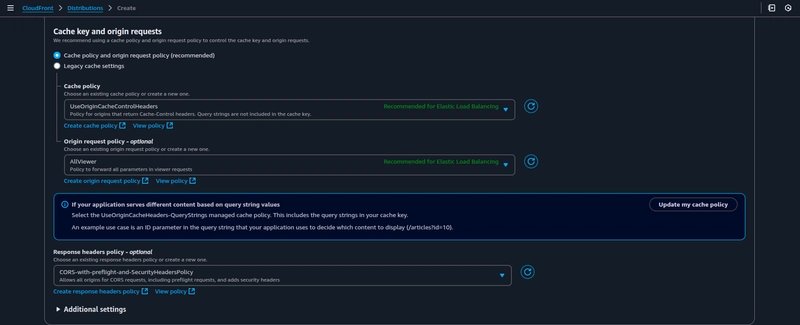
Under Cache key and origin requests choose Cache policy and origin request policy (recommended). Choose the default cache policy and origin request policy. Under Response headers policy choose CORS-with-preflight-and-SecurityHeadersPolicy, it is an AWS-managed response header policy. Use this policy to specify security-related HTTP response headers that CloudFront adds to HTTP responses that it sends to viewers.
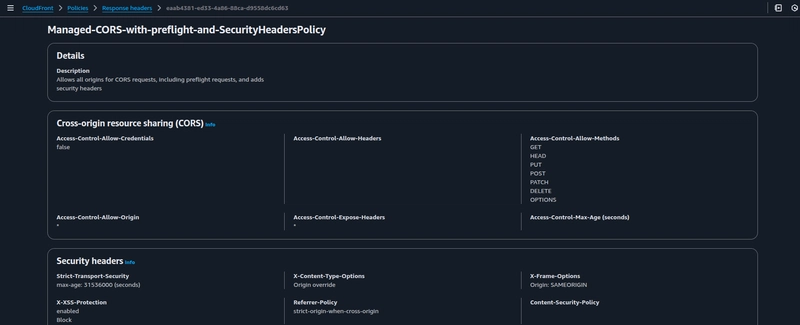
The AWS-managed policy provides the following security headers, it ultimately narrows down to your use case, you can also create a Custom policy and attach it under Response headers policy.
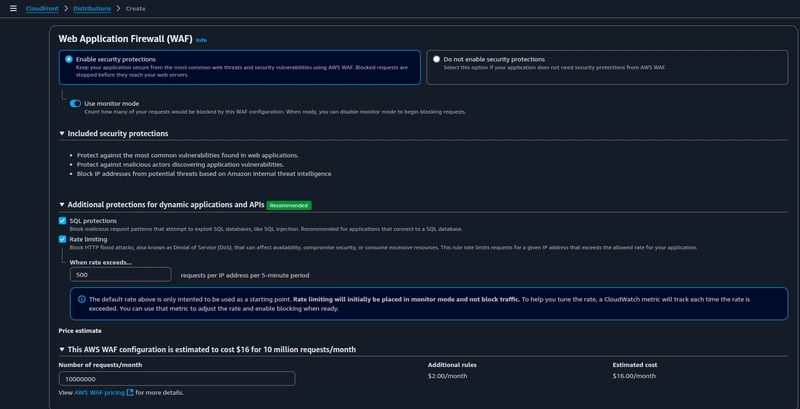
Enable Web Application Firewall for your CloudFront distribution, toggle on use monitor mode you can later disable it once you get know how much of your requests are being blocked by this WAF configuration(False positives and red herrings).
Check SQL protections and Rate limiting(DDoS protection) and take a note of price estimation.
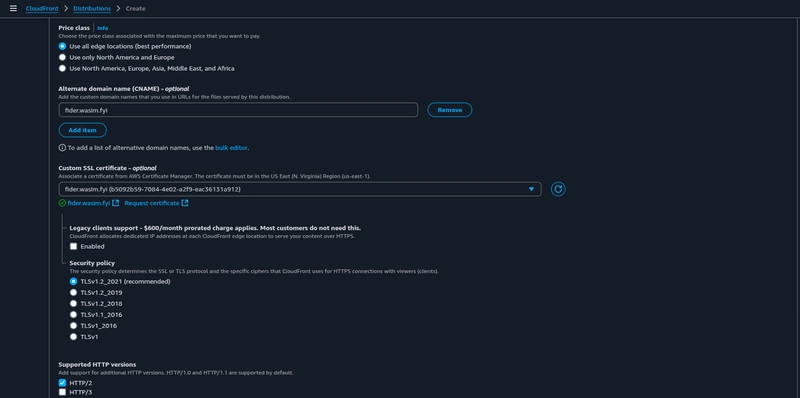
Add the CNAME through which you would like to access your application publicly and choose the custom SSL certificate for your CNAME.
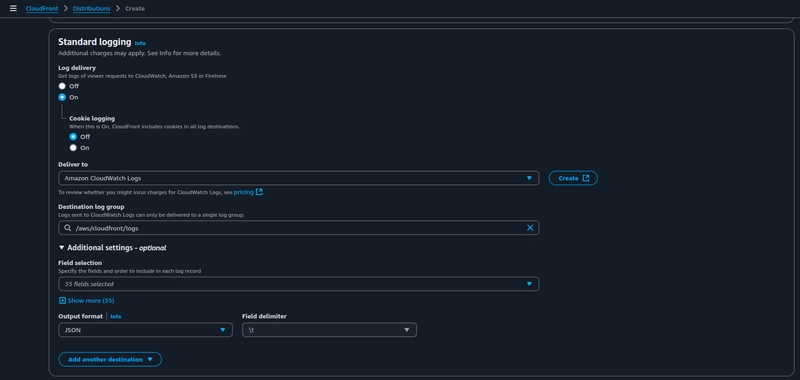
Configure standard logging for your CloudFront distribution to monitor the performance and usage metrics.
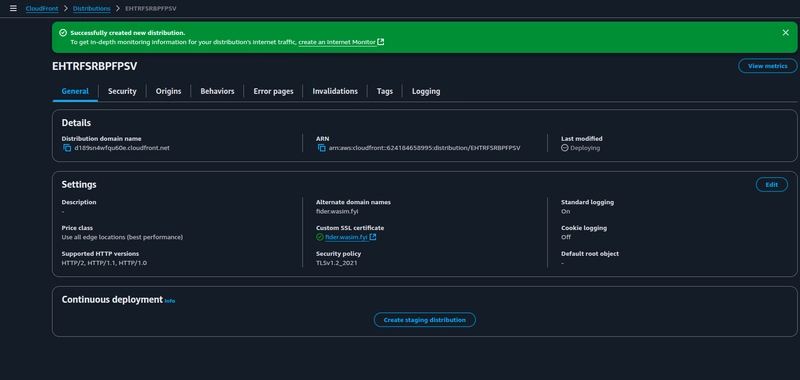
The CloudFront distribution creation is now complete.
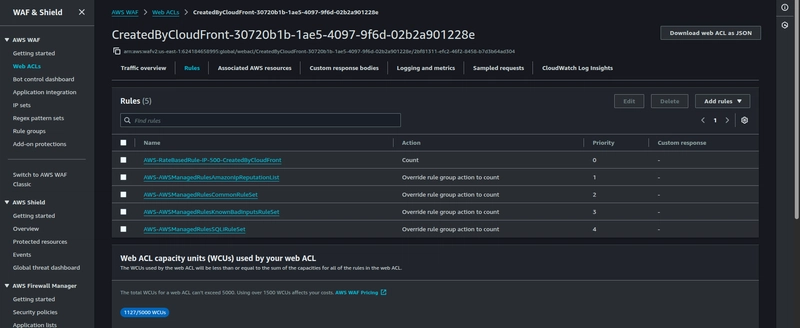
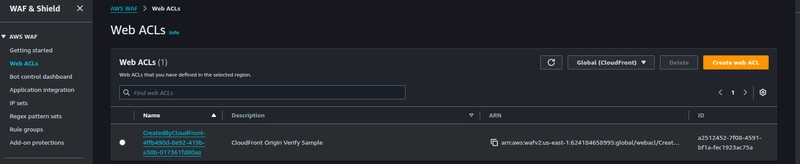
Navigate to the WAF & Shield console, click on Web ACLs and choose Global(CloudFront) in the region drop-down. Click on the Web ACL and make a note of the rules and WCUs.
6. Create Secrets manager secret and Lambda function
- Choose secret type:
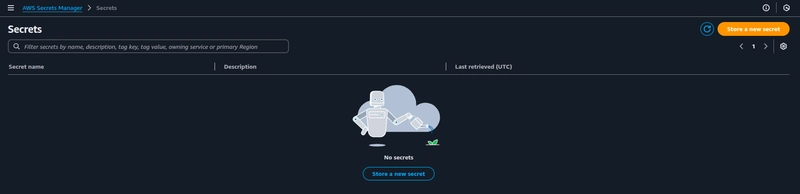
Navigate to the Secrets manager service console, and click on Store a new secret.
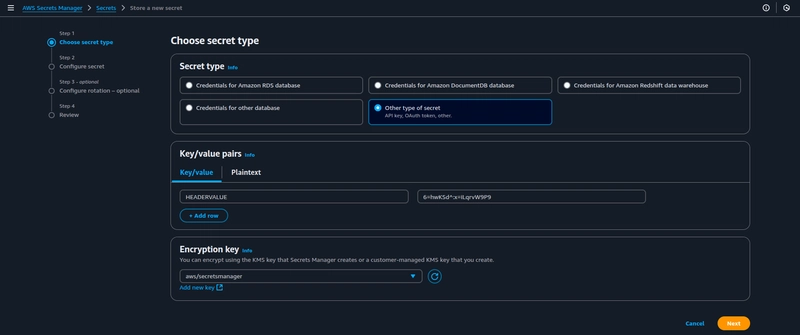
Under Secret type choose Other type of secret, and provide HEADERVALUE as a Key and paste the same header value you used in the CloudFront distribution. Click on next.
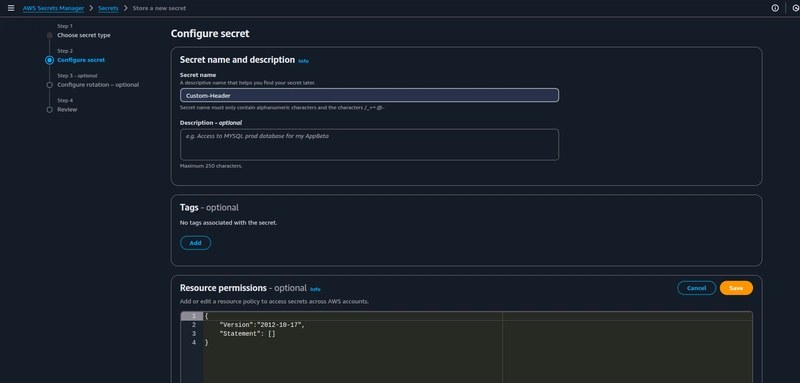
- Configure secret:
Choose the secret name and click on next, take a note of Resource permissions step, we will come back to this step once we are done creating the lambda function.
- Review:
Skip to the review section leaving behind the configure rotation step, as we will configure that once we create and configure the lambda function.
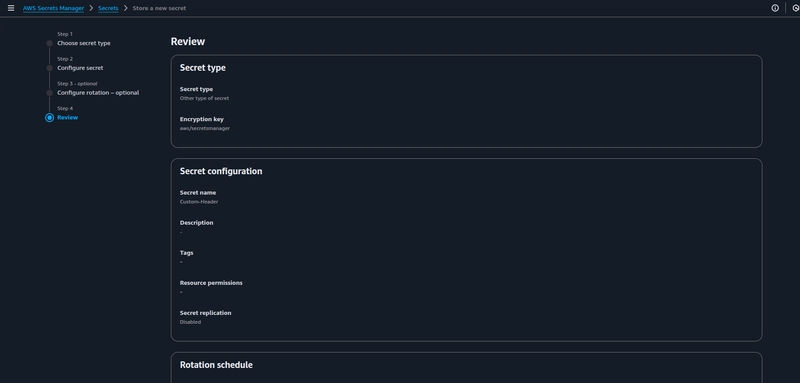
The secret creation is now complete.

- Create a rotator lambda function:
Navigate to the lambda console and click on Create function,
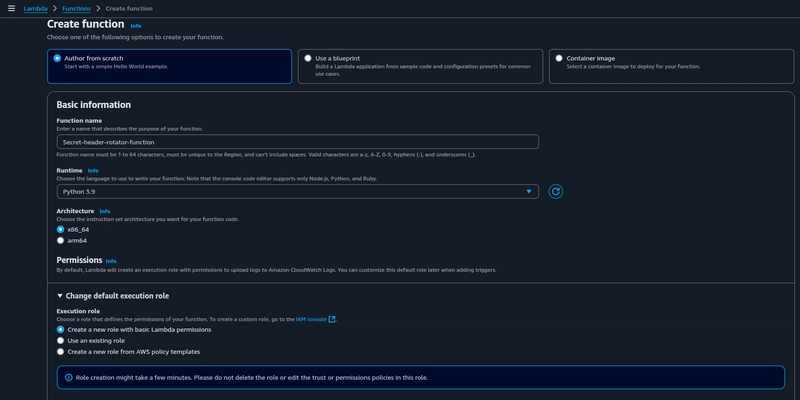
Choose Author from scratch and choose Python 3.9 as runtime with architecture as x86_64. Under Execution role choose create a new role, this creates a new service role for the function.
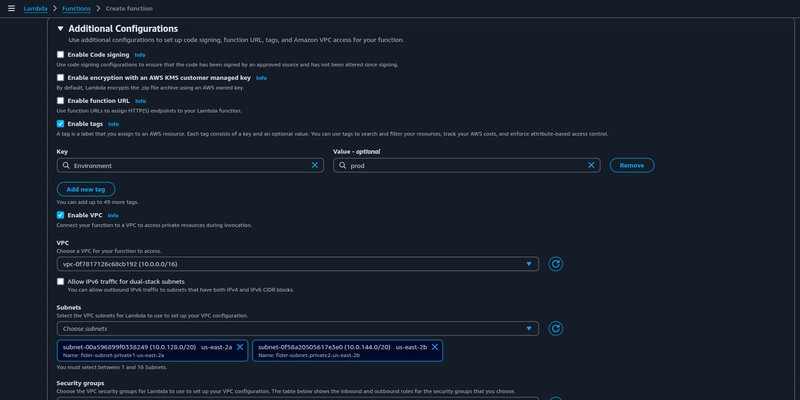
Under Additional Configurations enable tags and VPC, i am placing lambda function inside VPC to enable VPC flow logs to monitor network traffic, which is critical for auditing and incident response. Before moving onto choosing the security group create a new one in the EC2 console and then revert back here.
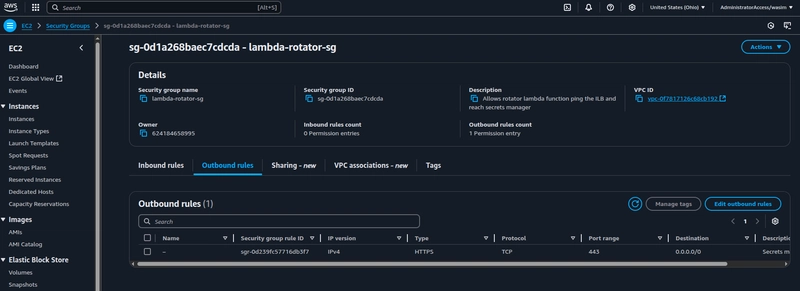
Since this rotator Lambda function will be triggered by Secrets Manager, it won't be needing any inbound rules, as it's event-driven. It still needs one outbound rule, to reach out to the Secrets manager endpoint via HTTPS protocol, as the traffic (for HTTPS) will be routed through public internet via a NAT-gateway.
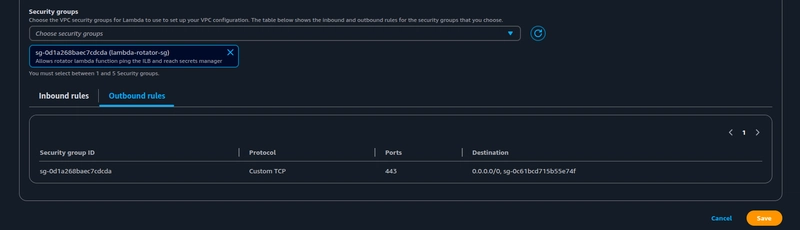
Now, reference the created SG under the lambda's configuration parameters drop-down and click on Create function.
The rotator-lambda function is now created.
- Configuration parameters - rotator lambda function:
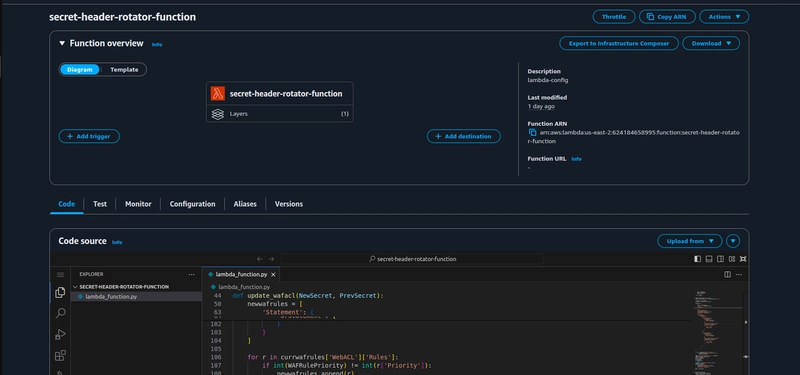
Use the python code https://gist.github.com/WasimTTY/ff092402d09c56f6496b359036e42aa0 from this gist to deploy the code onto the lambda function.
This code was modified to work with the CloudFront WAF configuration.
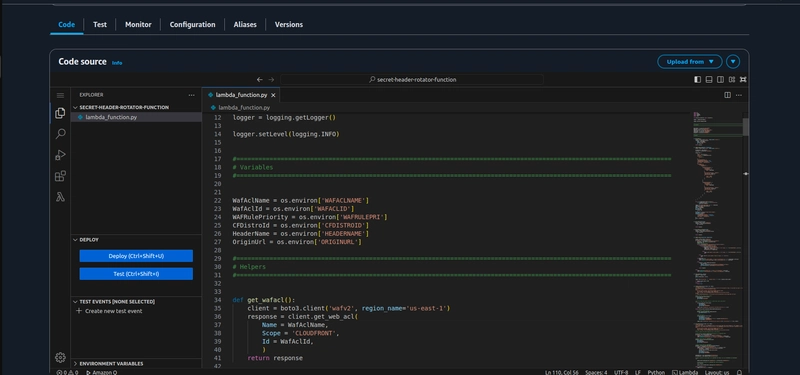
Once pasted, click on deploy to deploy the code to the lambda function. Additionally, this code does come with an external dependency, so create a lambda layer and attach it to the rotator-lambda function.
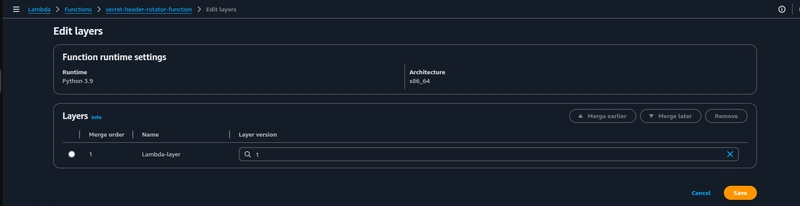
You can find the artifact in this repository: https://github.com/aws-samples/amazon-cloudfront-waf-secretsmanager/tree/master/artifacts
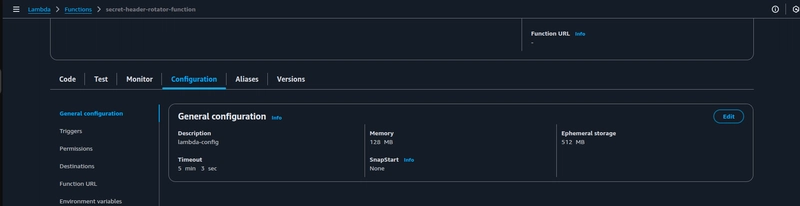
Now, under the Configuration tab choose the Timeout for the rotator-lambda function, i have set it to 5 mins 3 sec with the memory and the Ephemeral storage left to defaults.
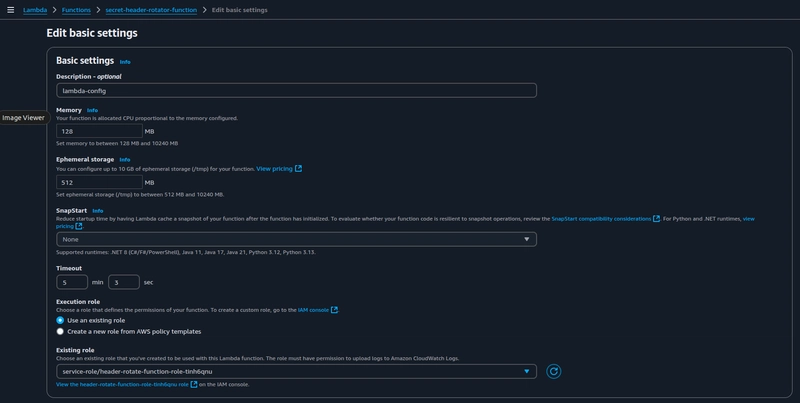
Take a note of the Existing role attached to the lambda function. we will be needing it attach the policies to let the lambda function interact with the CloudFront distribution and WAF for rotating the secret-custom-header.
Navigate to the IAM console and under Roles tab search for the service role created by the rotator-lambda function.
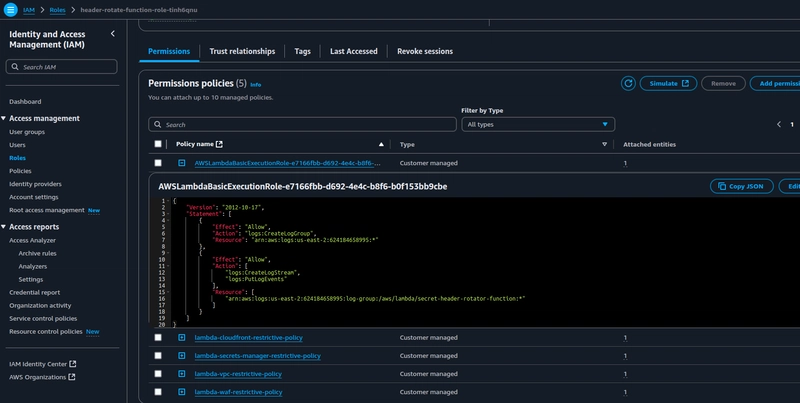
Create an inline policy for accessing the CloudFront distribution, I have only provided a very limited permissions. This inline policy grants the rotator Lambda function the minimal permissions required to make API calls to the CloudFront distribution for modifying the Secret-Custom-Header.
  {
    "Version": "2012-10-17",
    "Statement": [
        {
            "Sid": "VisualEditor0",
            "Effect": "Allow",
            "Action": [
                "cloudfront:GetDistribution",
                "cloudfront:UpdateDistribution",
                "cloudfront:GetDistributionConfig"
            ],
            "Resource": "arn:aws:cloudfront::<AWS ACCOUNT ID>:distribution/E3R3ZKP77W4214",
            "Condition": {
                "StringEquals": {
                    "aws:PrincipalArn": "arn:aws:iam::<AWS ACCOUNT ID>:role/service-role/header-rotate-function-role-tinh6qnu"
                }
            }
        }
    ]
}
I have done the same for Secrets manager, CloudFront WAF and lambda-VPC policies.
  {
    "Version": "2012-10-17",
    "Statement": [
        {
            "Sid": "VisualEditor0",
            "Effect": "Allow",
            "Action": [
                "secretsmanager:GetSecretValue",
                "secretsmanager:DescribeSecret",
                "secretsmanager:PutSecretValue",
                "secretsmanager:UpdateSecretVersionStage"
            ],
            "Resource": "arn:aws:secretsmanager:us-east-2:<AWS ACCOUNT ID>:secret:Custom-Header-lQWRrQ",
            "Condition": {
                "StringEquals": {
                    "aws:PrincipalArn": "arn:aws:iam::<AWS ACCOUNT ID>:role/service-role/header-rotate-function-role-tinh6qnu"
                }
            }
        },
        {
            "Sid": "VisualEditor1",
            "Effect": "Allow",
            "Action": "secretsmanager:GetRandomPassword",
            "Resource": "*",
            "Condition": {
                "StringEquals": {
                    "aws:PrincipalArn": "arn:aws:iam::<AWS ACCOUNT ID>:role/service-role/header-rotate-function-role-tinh6qnu"
                }
            }
        }
    ]
}
  {
    "Version": "2012-10-17",
    "Statement": [
        {
            "Sid": "VisualEditor0",
            "Effect": "Allow",
            "Action": [
                "ec2:CreateNetworkInterface",
                "ec2:DescribeNetworkInterfaces",
                "ec2:DeleteNetworkInterface",
                "ec2:UnassignPrivateIpAddresses",
                "ec2:DescribeSubnets",
                "ec2:AssignPrivateIpAddresses"
            ],
            "Resource": "*",
            "Condition": {
                "StringEquals": {
                    "aws:PrincipalArn": "arn:aws:iam::<AWS ACCOUNT ID>:role/service-role/header-rotate-function-role-tinh6qnu"
                }
            }
        }
    ]
}
  {
    "Version": "2012-10-17",
    "Statement": [
        {
            "Sid": "VisualEditor0",
            "Effect": "Allow",
            "Action": [
                "wafv2:UpdateWebACL",
                "wafv2:GetWebACL"
            ],
            "Resource": [
                "arn:aws:wafv2:*:<AWS ACCOUNT ID>:*/regexpatternset/*/*",
                "arn:aws:wafv2:*:<AWS ACCOUNT ID>:*/managedruleset/*/*",
                "arn:aws:wafv2:*:<AWS ACCOUNT ID>:*/rulegroup/*/*",
                "arn:aws:wafv2:us-east-1:<AWS ACCOUNT ID>:global/webacl/CreatedByCloudFront-4ffb490d-8e92-419b-a38b-017361fd80aa/a2512452-7f08-4591-bf1a-fec1923ac75a",
                "arn:aws:wafv2:*:<AWS ACCOUNT ID>:*/ipset/*/*"
            ],
            "Condition": {
                "StringEquals": {
                    "aws:PrincipalArn": "arn:aws:iam::<AWS ACCOUNT ID>:role/service-role/header-rotate-function-role-tinh6qnu"
                }
            }
        }
    ]
}
The IAM policies crafted above are identity-based policies scoped down to a specific IAM role using a PrincipalArn condition, enforcing least privilege.
The rotator-lambda function also needs a resource-based policy in order for the Secrets manager to invoke the function. I have used AWS CLI to add this policy to the lambda function.
  aws lambda add-permission \
  --function-name secret-header-rotator-function \
  --statement-id AllowSecretsManagerInvoke \
  --action lambda:InvokeFunction \
  --principal secretsmanager.amazonaws.com \
  --source-account <AWS ACCOUNT ID> \
  --source-arn arn:aws:secretsmanager:us-east-2:<AWS ACCOUNT ID>:secret:Custom-Header-lQWRrQ
The resultant policy will look like this,
  {
  "Version": "2012-10-17",
  "Id": "default",
  "Statement": [
    {
      "Sid": "AllowSecretsManagerInvoke",
      "Effect": "Allow",
      "Principal": {
        "Service": "secretsmanager.amazonaws.com"
      },
      "Action": "lambda:InvokeFunction",
      "Resource": "arn:aws:lambda:us-east-2:<AWS ACCOUNT ID>:function:secret-header-rotator-function",
      "Condition": {
        "StringEquals": {
          "AWS:SourceAccount": "<AWS ACCOUNT ID>"
         },
        "ArnLike": {
          "AWS:SourceArn": "arn:aws:secretsmanager:us-east-2:<AWS ACCOUNT ID>:secret:Custom-Header-lQWRrQ"
        }
      }
    }
  ]
}
The resource-based policy above follows the Zero Trust principle by minimizing trust ensuring access is explicitly verified through conditions like Source Account and Source ARN before granting permissions.
- Configure secrets manager - resource policy:
Now, navigate to the Secrets manager service console and under the Resource permissions paste the resource-based policy for invoking the rotator-lambda function.
  {
  "Version" : "2012-10-17",
  "Statement" : [ {
    "Sid" : "AllowLambdaAccess",
    "Effect" : "Allow",
    "Principal" : {
      "AWS" : "arn:aws:iam::<AWS ACCOUNT ID>:role/service-role/header-rotate-function-role-tinh6qnu"
    },
    "Action" : [ "secretsmanager:GetSecretValue", "secretsmanager:PutSecretValue", "secretsmanager:UpdateSecretVersionStage", "secretsmanager:DescribeSecret" ],
    "Resource" : "arn:aws:secretsmanager:us-east-2:<AWS ACCOUNT ID>:secret:Custom-Header-lQWRrQ",
    "Condition" : {
      "StringEquals" : {
        "aws:ResourceTag/Environment" : "production",
        "aws:SourceAccount" : "<AWS ACCOUNT ID>",
        "aws:SourceArn" : "arn:aws:lambda:us-east-2:<AWS ACCOUNT ID>:function:secret-header-rotator-function"
      }
    }
  } ]
}
This policy also aligns with the Zero Trust principle, Even though the request is coming from the rotator-lambda function (which could be considered a trusted service), the policy does not allow access by default. It enforces strict conditions including ABAC (Attribute Based Access Control) using resource tags to validate the request’s origin and ensure the caller is explicitly authorized.
Taking this approach tightens security by enforcing stringent, context-aware access controls.
7. Create a Custom Header rule in AWS WAF
Navigate to the WAF & Shield service console and look-up for Web ACLs created under the Global(CloudFront).
Create a new rule named XOriginVerify, and configure the same secret-custom-header value that was set in the CloudFront distribution and the Secrets manager.
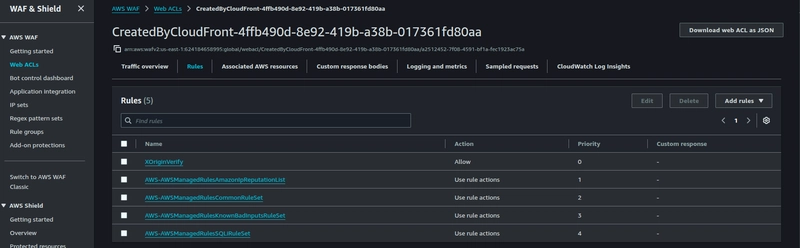
The rotator-lambda function looks Explicitly for this rule name as it is hard-coded in the python code. You can modify it according to your use case.
Once the rotator-lambda function updates the secret-custom-header in both the CloudFront distribution and in WAF, it tests the secret by pinging your domain-name, in this case the request has to propagate through the CloudFront, and WAF will let the request through only if that header matches, it should result in 200 OK. You have to check CloudWatch logs for this.
8. Why Implement Zero Trust Principle
Before you slap on Zero Trust policies like they’re the new fad, you gotta do threat modeling first. It’s like doing a security audit before you buy a new lock. You gotta figure out:
- What you’re protecting ?
- Who’s trying to break in ?
- How they might do it ?
That last part? That’s basically recon and attackers do it all the time. They scan your public IPs, poke at your APIs, look for leaky S3 buckets or overly permissive roles. So when you threat model, you're doing a defensive version of recon: identifying what an attacker might see and how they'd try to exploit it.
Threat modeling helps you spot risks like this, Once you know that, you can set up your Zero Trust stuff, like least privilege access, network segmentation, and strong authentication all tailored to the actual threats, not just random paranoia.
Although this Lambda function is small, its capabilities are significant. In cloud environments, Lambda can be a double-edged sword and powerful for automation, but dangerous if misconfigured.
This strict posture isn't just theoretical. Tools like AWSRedirector demonstrates how serverless components can be exploited in real-world attacks . That's why we lock down even the smallest moving parts.
Without threat modeling, you’d be like, ‘Oh, I’ll just block everything!’ but that’s like building a fortress with no doors. You gotta know who’s allowed in, and under what conditions. That’s how Zero Trust works it’s not about ‘trust no one’ for the sake of it, it’s about verifying every request based on real risks. You should understand the balance between security and usability.
If you’re curious about how AWS approaches Zero Trust in detail, you can check out their Zero Trust Security Model and AWS Zero Trust Architecture principles.
9. Spin up ECS and RDS
You can refer to this guide for spinning up the ECS and RDS infrastructure.
10. Monitor CloudFront and WAF logs
Monitoring CloudFront and AWS WAF logs is a crucial part of incident response in any secure AWS setup, especially when you're running a public-facing app.
In a Zero Trust setup, security doesn’t stop at blocking threats, you need visibility into what’s happening at your edge and app layers. That’s where CloudFront and AWS WAF logs come in.
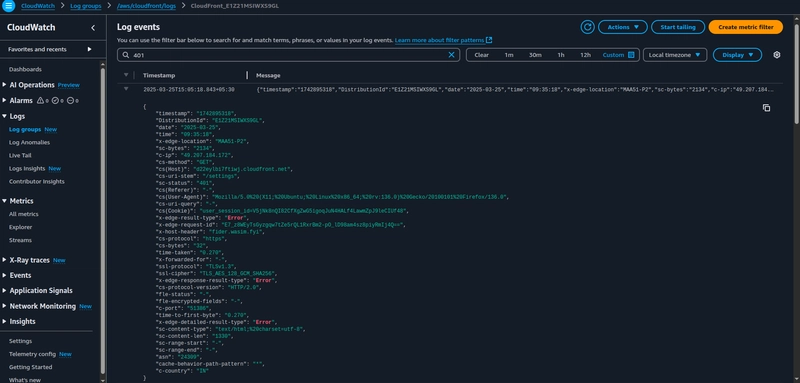
In the AWS management console under the region drop-down choose us-east-1, this is where CloudFront delivers logs to in the CloudWatch log-group.

Each log contains information such as the time the request was received, the processing time, request paths,client-IP and server responses. You can use these access logs to analyze response times and to troubleshoot issues.
When you're absolutely done observing the false positives for WAF rules, navigate to the WAF console and adjust the actions for the rules according to your use case. You can choose whether to set actions such as Allow, Block, Captcha, or Count based on your specific needs. It ultimately narrows down to your requirements and the level of protection you wish to enforce.
It’s important to note that when you set a rule group action to 'Count,' it will override any Allow, Block, or Captcha actions that were originally specified for the rules within that group. As a result, all rules in the group will only count matching requests, regardless of their original action.
By default, the action is set to 'Count' during testing and monitoring of the rule group’s behavior, which allows you to observe how the rules perform before deploying them to production.
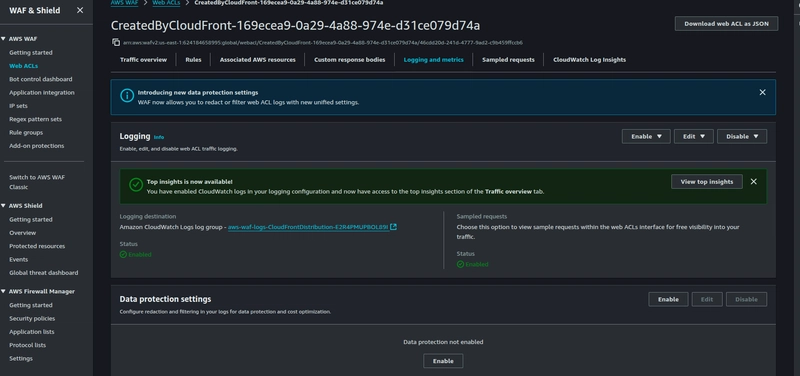
AWS WAF now supports sending logs to CloudWatch logs, Hover over to the Logging and metrics tab and click on Enable drop-down and choose Logging destination.
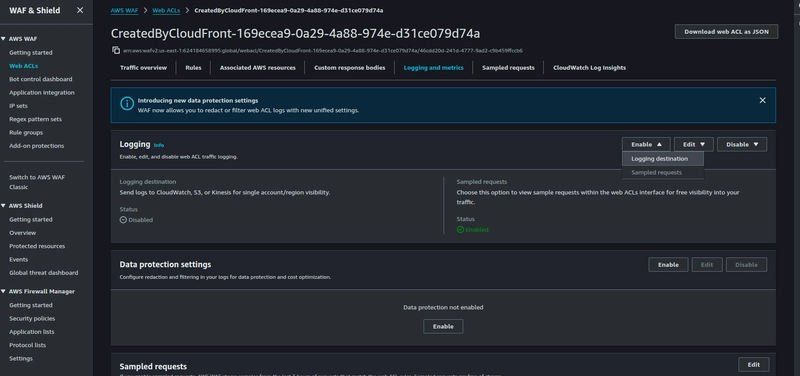
Choose the CloudWatch logs log group as destination and click on save,
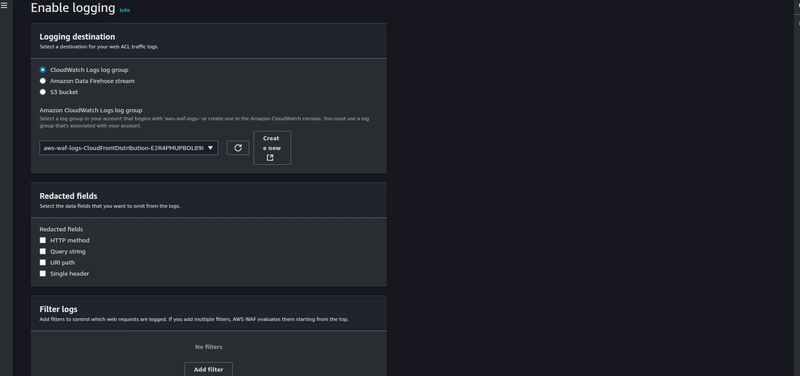
Logging is now enabled for AWS WAF.
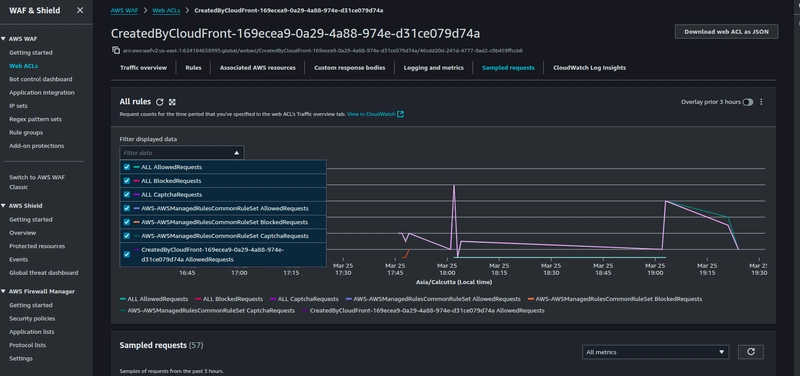
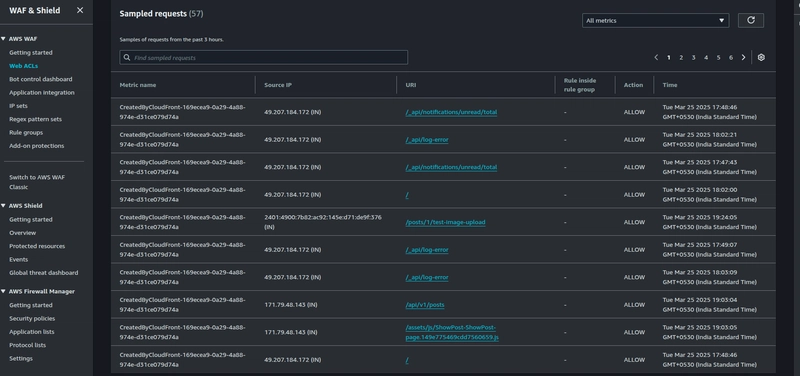
Hover over to the Sampled requests tab to help you analyze how your AWS WAF rules are evaluating traffic. Each sampled request shows details like the IP address, headers, URI, country, and rule evaluation outcome. Sampled requests are free.
In addition to this, you can also use the default queries provided by WAF to query the number of requests that come from an IP address. Under the Cloudwatch logs insight tab in the WAF console.

11. Caveats to consider
- VPC Endpoints:
You can still choose to go with VPC interface endpoints (Powered by AWS PrivateLink) if you haven't integrated external OAuth providers (like Google, GitHub, etc.) because these services are not available via AWS PrivateLink.
When you configure OAuth providers with Fider, the authentication requests go to the OAuth provider's endpoints over the internet. This involves external APIs that cannot be routed through VPC Interface Endpoints directly, since these OAuth services are external to your AWS infrastructure and not hosted within your VPC or private AWS environment.
It will also cost you more than the NAT gateway, you can checkout this post from the official AWS forum for even more clarification. Only choose this method if you consider security as paramount.
- Potential Attack Vector: CloudFront and ALB
If you choose to ignore Secret-Custom-Header validation & rotation in your setup, relying solely on CloudFront IP ranges in the ALB security group introduces a potential attack vector.
Your ALB cannot differentiate between requests from your CloudFront distribution and requests from any other CloudFront customer. it is absolutely possible for an attacker to bypass CloudFront and access your internal ALB. Since all CloudFront traffic uses the same IP address ranges, an attacker could spin up their own CloudFront distribution and point it at your ALB, bypassing IP-based restrictions alone.
- Staged Header Rotation in WAF
Because the custom header is only validated by your XOriginVerify rule in AWS WAF at the internal ALB, the Lambda function stages the new header value alongside the existing one in the WAF rule. This ensures that during rotation, origin requests bearing either the old or new header are accepted, preventing 403 Forbidden errors. Once you’re confident the new header is in use, the old value can be safely removed from the WAF rule (This is a manual step).
12. Final thoughts
Let’s be real no system is made of adamantium. Given enough time, resources, or misconfigurations, even the most locked-down architecture can be poked at. But this setup doesn’t aim for invincibility, it aims to minimize exposure, limit blast radius, and make exploitation significantly harder and riskier.
This architecture trades convenience for control, reducing your attack surface, slowing down adversaries, and giving you time and telemetry to respond.

Top comments (0)