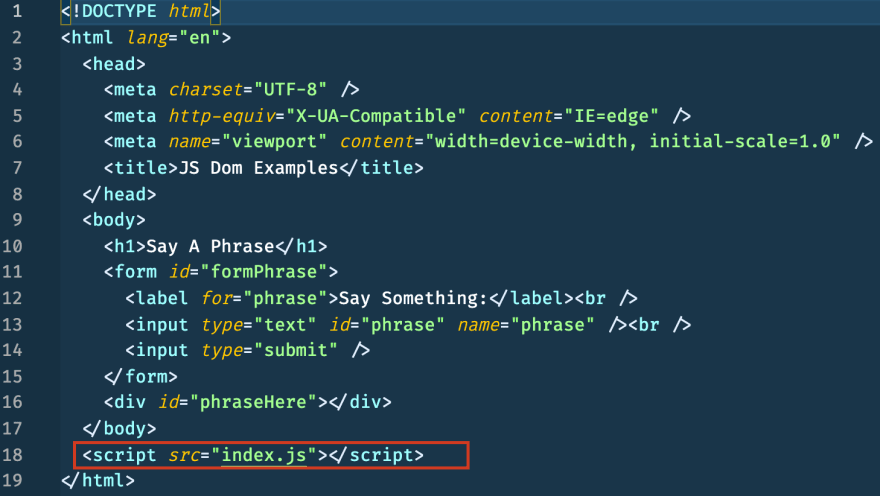
Hey! Welcome back.
The last time we talked a bit about the DOM(document object model) and how we can manipulate, or make changes to it, without affecting the original HTML document. I made mention of using a method called .addEventListener() that contributes to this automated action but in order to talk about that, we have to clear up a few more things beforehand. So this post will be a bit of a detour on the way to learn about the ‘magic’ of the .addEventListener() function.
You see...simply typing text inside of a text box and pressing submit won’t really do much if you don’t tell JavaScript how to interact with the given HTML. This is done through the use of script tags. Continuing with the same example from the last blog, if we look at the original HTML file we have a script tag that’s “connecting” the HTML file(what the user will see on the screen) with the script.JS file(how the page will be expected to act depending on user actions) as the value of the source attribute.
So now that they’re “connected” how does JS know what to do with the HTML? Let’s remember what we were working to accomplish the last time. We type a phrase into the input field, click the submit button and that phrase should appear on the page. Got it? Cool!
Inside of our HTML file, we have elements with ID attributes. These attributes allow us to select particular elements through the use of the .getElementByID() function. Personally, I like to assign these selectors to variables. Doing so allows me the ease of not having to type out 'document.getElementById('formPhrase')' every time I need to reference a certain HTML element. There are three types of variables you could use in JavaScript and those types are var, let, and const. In this example, we will only be using let and/or const. We set up our variables using the keywords, giving the variable itself a name and then setting it equal to something. In this case, we’re getting the HTML elements by the ID, we use the method named.....getElementById. Need an example?
These two lines are both using the const keyword
Giving our variables a name
Finally, setting our variables equal to what we need to be selected in order to proceed with our intended DOM manipulation.
This is an example of basic variable assignment, something commonly used in JS. This added ability will bring us one step closer to accomplishing our goal of understanding basic DOM Manipulation. We need to discuss one more thing before we get to the route that we were on originally and that's functions.


Top comments (0)