TLDR
Custom Protected Route Component + Custom Hook + React Context API = Protected Route ❤️
Github Repo: https://github.com/edmondso006/react-protected-routes
Oftentimes we want to restrict what the user can see depending on if they are currently logged in or not. It is a better user experience to hide a Profile Page with no data then displaying it to a user who is not authenticated. While most of the logic to restrict a user's permissions should be done on the server side we still need a way to hide pages on the frontend. This tutorial assumes that you already have the appropriate server side code implemented.
Hiding Authenticated Pages / Resources Behind Protected Routes in React
Protected routes to the rescue!
Protected routes or private routes are routes that are only accessible when a user is authorized (logged in, has the appropriate account permissions, etc) to visit them.
Setting up React with Routing
We will be using react-router-dom to create routes that will render different "pages" (react creates single page apps so each page is really just a component that is rendered). Make sure to install it in your project.
npm i react-router-dom
For the sake of this tutorial we will have 3 different pages:
Home - Public Page (Do not have to be authenticated to view it)
Profile - Protected Page (Have to be authenticated to view it)
About - Public Page (Do not have to be authenticated to view it)
We need to add the BrowserRouter component to the main entry file of our application.
// index.tsx or index.js
import reportWebVitals from "./reportWebVitals";
import { BrowserRouter } from "react-router-dom";

ReactDOM.render(
   <React.StrictMode>
      <BrowserRouter>
            <App />
      </BrowserRouter>
   </React.StrictMode>,
   document.getElementById("root")
);
Let's also create a Navbar component so that we can go to the other pages:
import React from "react";
import { Link } from "react-router-dom";

function Navbar() {
   return (
      <div>
         <Link to={"/"}>Home (Public)</Link>
         <Link to={"/about"}> About (Public) </Link>
         <Link to={"/profile"}>Profile (Protected)</Link>
      </div>
   );
}

export default Navbar;
After that we need to setup our routes in our App.tsx file
// App.tsx or App.js
import React from "react";
import "./App.css";
import { Switch, Route } from "react-router-dom";

import Navbar from "./components/Navbar";
import Home from "./Pages/Home";
import Profile from "./Pages/Profile";
import About from "./Pages/About";

function App() {

   return (
      <div className="App">
                 <Navbar />

         <Switch>
            <Route path="/" exact component={Home} />
            <Route path="/about" exact component={About} />
            <Route path="/profile" exact component={Profile} />
         </Switch>
      </div>
   );
}

export default App;
If we run our app now we can see that the navigation is working! Now we just need to know whether or not the user is authenticated.
Creating a Custom Auth Hook With the React Context API
In order to keep track of whether or not the user is authenticated we can create a custom hook in conjunction with the React context API. This will allow us to know if the user is authenticated no matter where are in the application.
Let's create a new file called useAuth.tsx and add the following code:
// /src/hooks/useAuth.tsx
import React, { useState, createContext, useContext, useEffect } from "react";

// Create the context
const AuthContext = createContext(null);

export const AuthProvider = ({ children }) => {

     // Using the useState hook to keep track of the value authed (if a
   // user is logged in)
   const [authed, setAuthed] = useState<boolean>(false);

   const login = async (): Promise<void> => {
      const result = await fakeAsyncLogin();

      if (result) {
         console.log("user has logged in");

         setAuthed(true);
      }
   };

   const logout = async (): Promise<void> => {
      const result = await fakeAsyncLogout();

      if (result) {
         console.log("The User has logged out");
         setAuthed(false);
      }
   };

   /// Mock Async Login API call.
   // TODO: Replace with your actual login API Call code
   const fakeAsyncLogin = async (): Promise<string> => {
      return new Promise((resolve, reject) => {
         setTimeout(() => {
            resolve("Logged In");
         }, 300);
      });
   };

   // Mock Async Logout API call.
   // TODO: Replace with your actual logout API Call code
   const fakeAsyncLogout = async (): Promise<string> => {
      return new Promise((resolve, reject) => {
         setTimeout(() => {
            resolve("The user has successfully logged on the server");
         }, 300);
      });
   };

   return (
            // Using the provider so that ANY component in our application can
            // use the values that we are sending.
      <AuthContext.Provider value={{ authed, setAuthed, login, logout }}>
         {children}
      </AuthContext.Provider>
   );
};

// Finally creating the custom hook
export const useAuth = () => useContext(AuthContext);
Now we need to make sure that we add this new AuthProvider component to our root entry point file just like we did with the BrowserRoute component. This is how all of our child components in the tree are able to see the values that we previously specified.
// index.tsx or index.js
import { BrowserRouter } from "react-router-dom";

import { AuthProvider } from "./hooks/useAuth";

ReactDOM.render(
   <React.StrictMode>
      <BrowserRouter>
         <AuthProvider>
            <App />
         </AuthProvider>
      </BrowserRouter>
   </React.StrictMode>,
   document.getElementById("root")
);
Let's take this new hook out for a spin. I have created a very basic Login & Logout component. They are as follows:
// Login.tsx
import React from "react";
import { useAuth } from "../hooks/useAuth";

function Login() {
   // Destructing our hook to get the `login` function
   const { login } = useAuth();

   return (
      <div>
         <button onClick={login}>Login</button>
      </div>
   );
}

export default Login;
// Logout.tsx
import React from "react";
import { useAuth } from "../hooks/useAuth";

function Logout() {
   // Destructing our hook to get the `logout` function
   const { logout } = useAuth();

   return <button onClick={logout}>Logout</button>;
}

export default Logout;
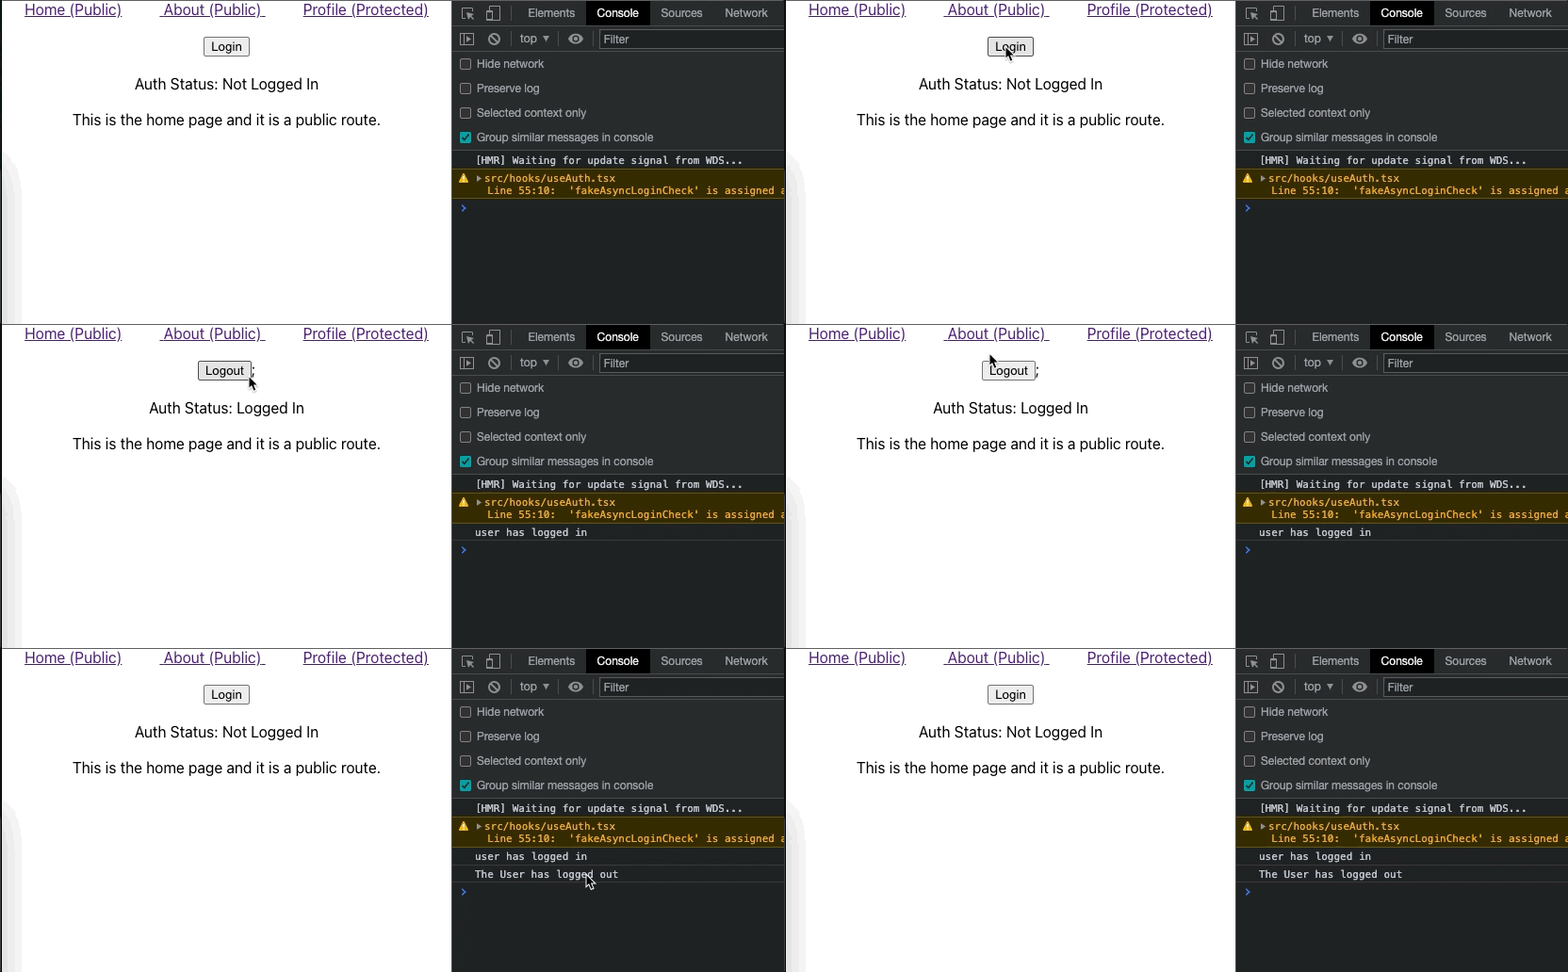
When we click on the Login button we will be doing a fake login API call and setting the state of authed to true and the inverse for the logout button. Pretty neat huh?
Now we need to create a protected route component that will consume our fancy new hook.
Creating a Protected Route Component
Unfortunately react-router-dom does not provide us with a <ProtectedRoute> component. But that won't stop us from creating our own. This component will basically check the authed value from the useAuth hook. If the user is authenticated then we will render the protected page, if the user is not authenticated then we will redirect back to a public page.
// ProtectedRoute.tsx
import React from "react";
import { Route, Redirect } from "react-router-dom";
import { useAuth } from "./../hooks/useAuth";

// We are taking in the component that should be rendered if the user is authed
// We are also passing the rest of the props to the <Route /> component such as
// exact & the path
const ProtectedRoute = ({ component: Component, ...rest }) => {
     // Getting the value from our cool custom hook
   const { authed } = useAuth();

   return (
      <Route
         {...rest}
         render={(props) => {
                        // If the user is authed render the component
            if (authed) {
               return <Component {...rest} {...props} />;
            } else {
                             // If they are not then we need to redirect to a public page
               return (
                  <Redirect
                     to={{
                        pathname: "/",
                        state: {
                           from: props.location,
                        },
                     }}
                  />
               );
            }
         }}
      />
   );
};

export default ProtectedRoute;
Now we can use this protected route and replace the regular route components for protected pages!
// App.tsx
import Login from "./components/Login";
import Logout from "./components/Logout";
import Navbar from "./components/Navbar";
import Home from "./Pages/Home";
import Profile from "./Pages/Profile";
import ProtectedRoute from "./components/ProtectedRoute";
import { useAuth } from "./hooks/useAuth";
import About from "./Pages/About";

function App() {
   const { authed } = useAuth();

   return (
      <div className="App">
         <Navbar />
         {authed ? <Logout /> : <Login />}

         <div style={{ margin: "20px" }}>
            <span>Auth Status: {authed ? "Logged In" : "Not Logged In"}</span>
         </div>

         <Switch>
            <Route path="/" exact component={Home} />
            <Route path="/about" exact component={About} />
            <ProtectedRoute path="/profile" exact component={Profile} />
         </Switch>
      </div>
   );
}
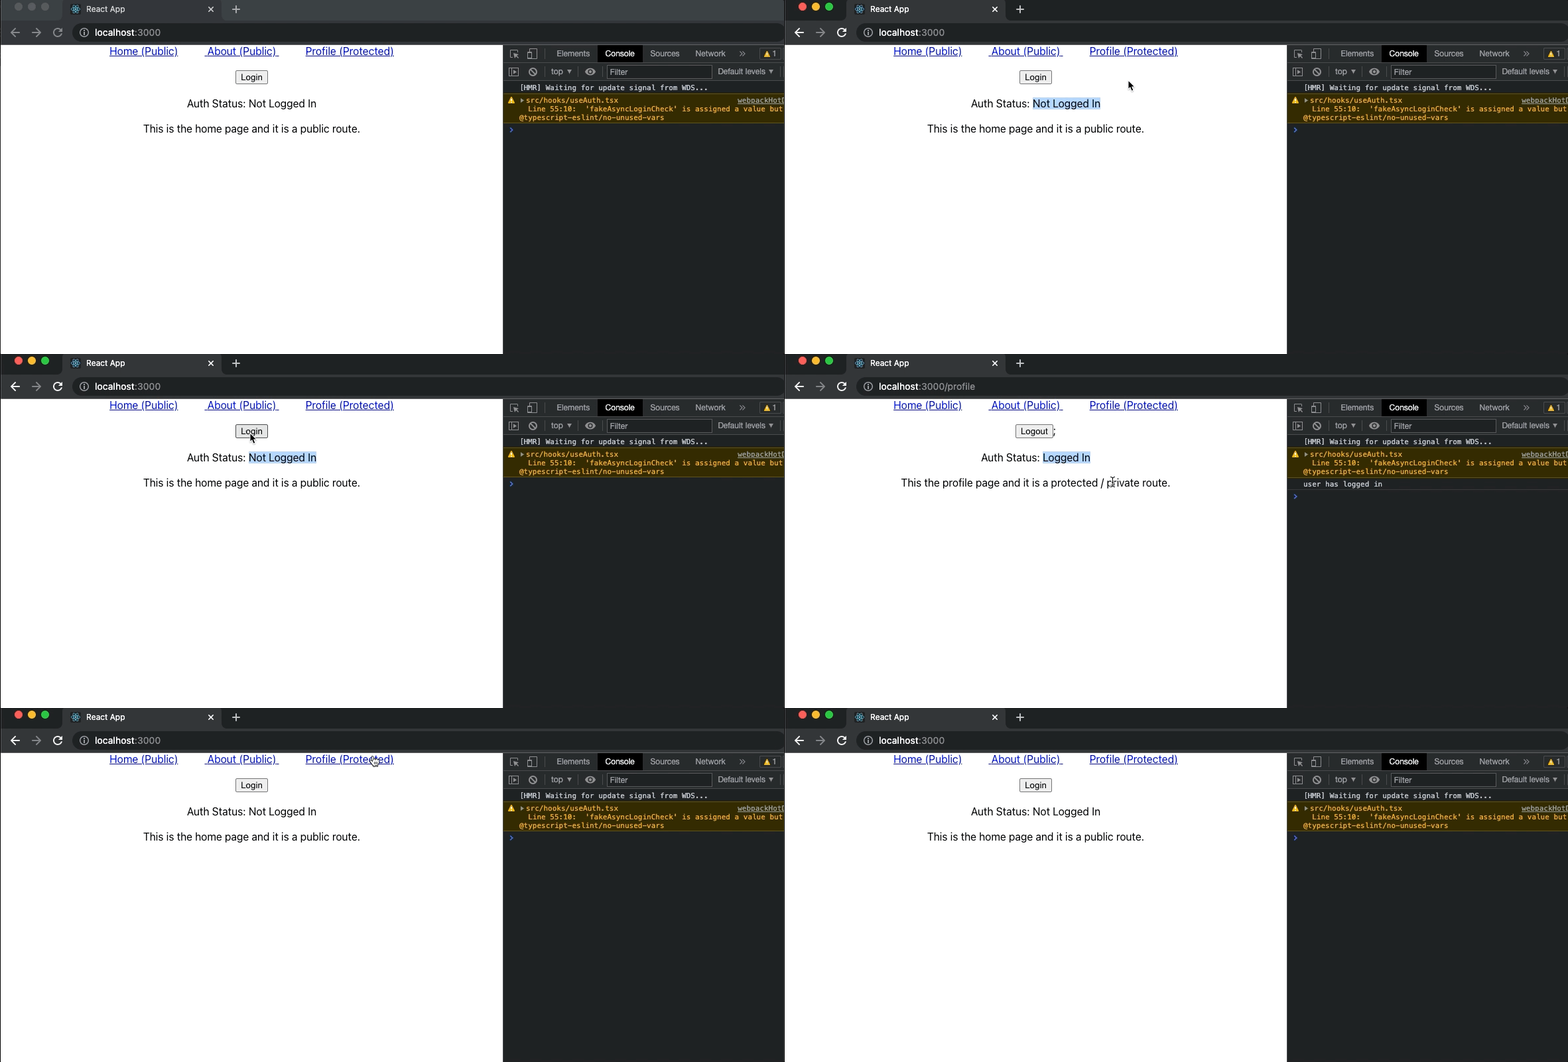
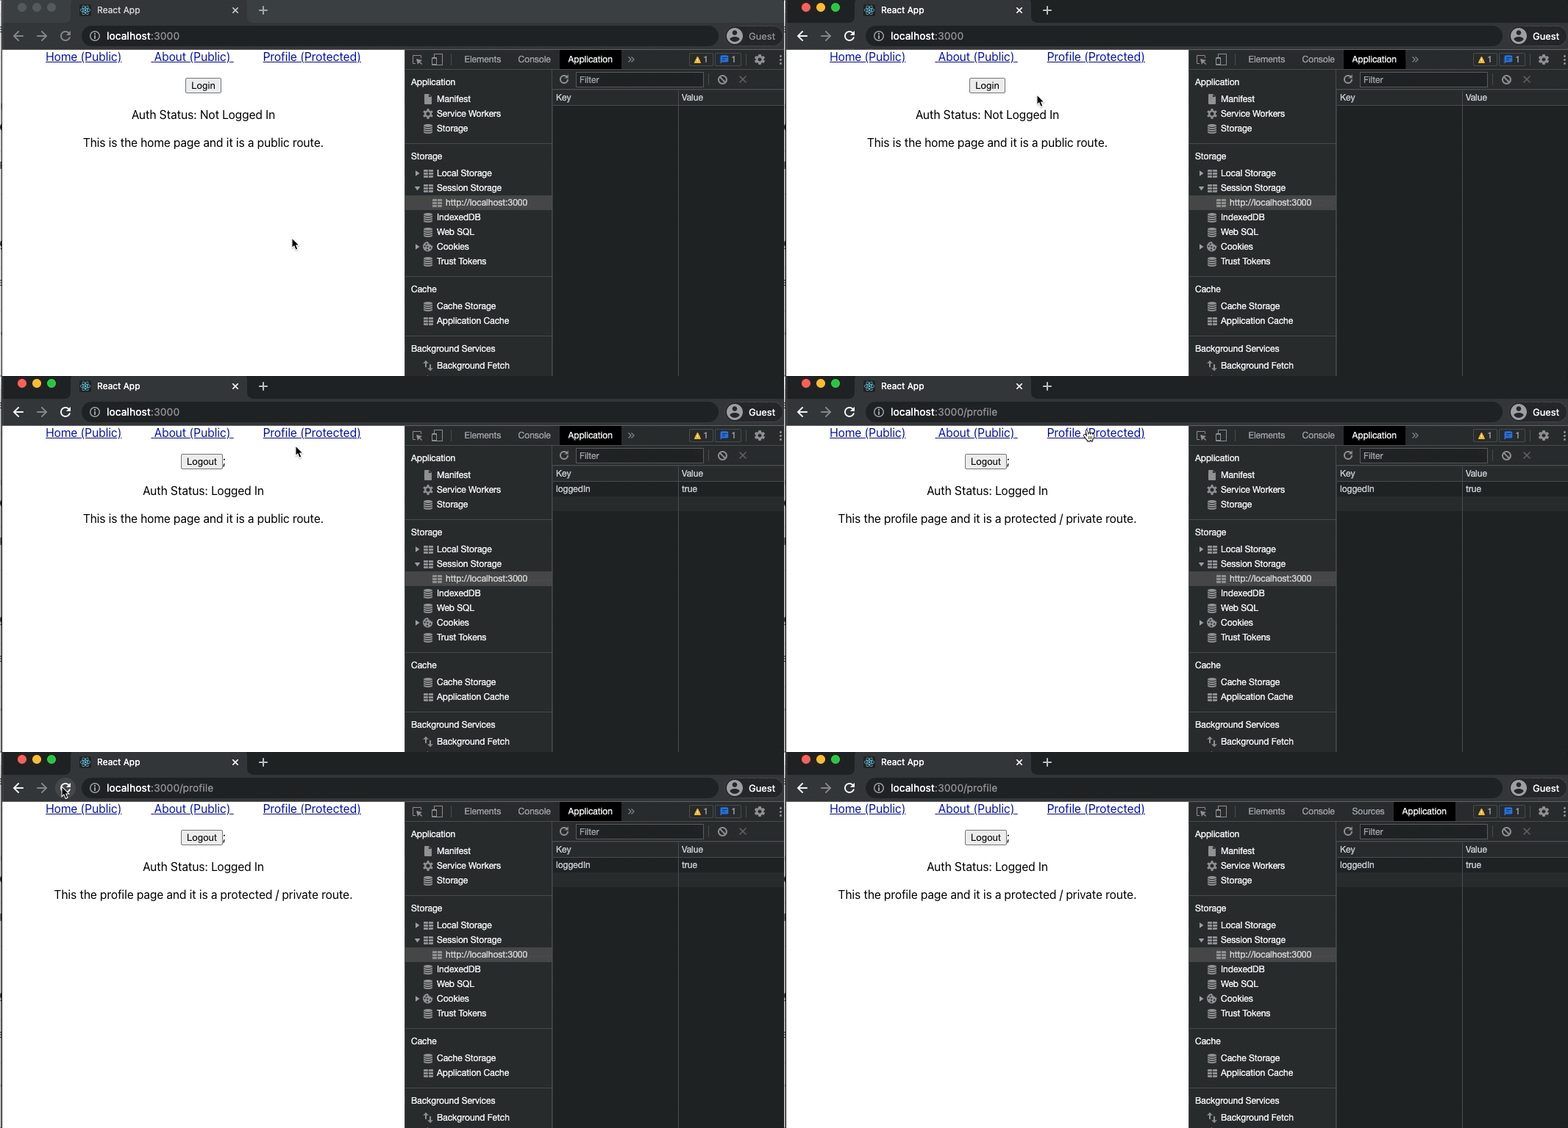
As you can see from the above gif it is working as expected. However there is a bug. When the user refresh the page while on a protected route they are redirected back to the / page. How can we fix this?...
Refresh Bug - Persisting the Authentication State
The reason that this bug is happening is because we are losing authed value when the user refreshes the page. Because this value is defaulted to false in the useAuth hook the redirect logic is happening and sending the user back to the / page. There are a couple of ways that we could resolve this.
Cookie
If your server is sending a cookie to the client after authentication you could use that cookie to verify that the user is logged in. However, if you are using the http only option on your cookie this will not be possible as the code won't be able to interact with the cookie. But don't fear there are two other ways that this could still be accomplished.
Session Storage
We could save a value into session storage so that we can keep this value on page refresh. However, a savvy user could go into the dev tools and change this value. This could pose a problem depending on your implementation. Here is how you would implement this in the useAuth hook.
//useAuth.tsx
...
export const AuthProvider = ({ children }) => {
   // Get the value from session sotrage.
   const sessionStorageValue = JSON.parse(sessionStorage.getItem("loggedIn"));
     // Use this value as the defalt value for the state
   const [authed, setAuthed] = useState<boolean>(sessionStorageValue);

     const login = async (): Promise<void> => {
      const result = await fakeAsyncLogin();

      if (result) {
         console.log("user has logged in");

         setAuthed(true);
         sessionStorage.setItem("loggedIn", "true");
      }
   };

   const logout = async (): Promise<void> => {
      const result = await fakeAsyncLogout();

      if (result) {
         console.log("The User has logged out");
         setAuthed(false);
         sessionStorage.setItem("loggedIn", "false");
      }
   };
  ...
Authentication Endpoint Check
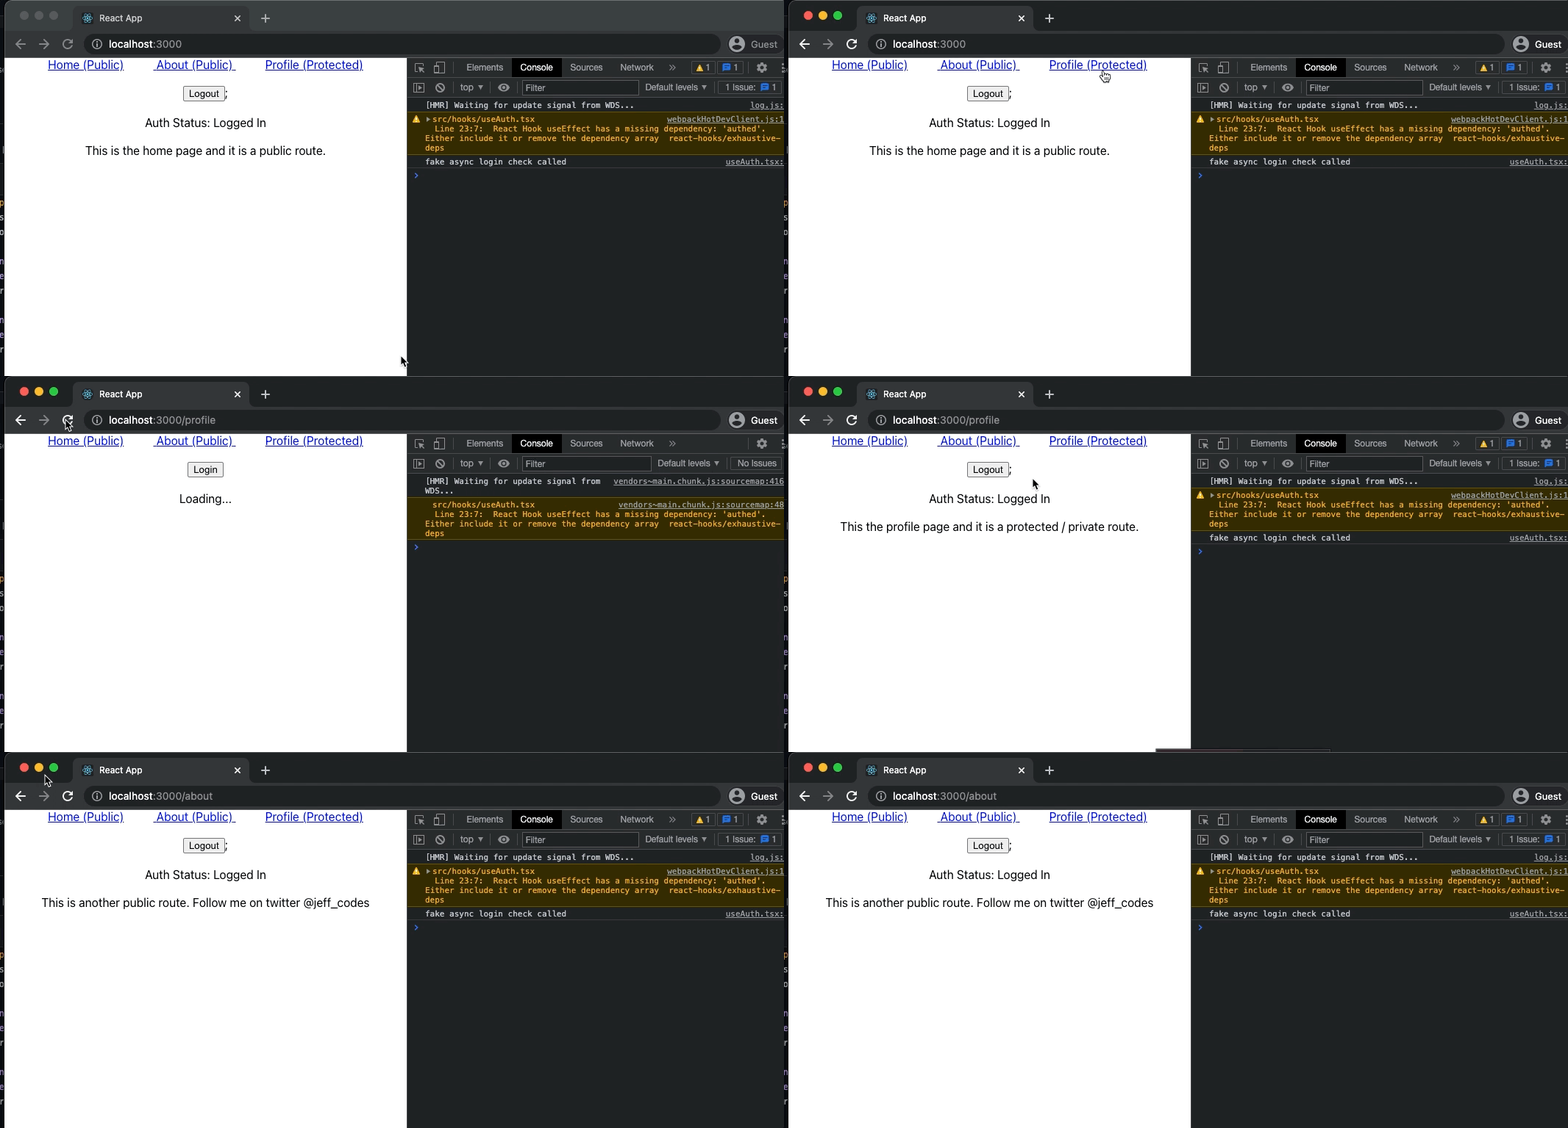
If session storage won't work for your implementation then you could do an API call to your server to an authentication endpoint that verifies if the current user is logged in. This is the most secure solution however it comes at the cost of having to do another API call. Here is how you would implement this solution.
// useAuth.tsx
...
export const AuthProvider = ({ children }) => {
   const [authed, setAuthed] = useState<boolean>(false);
     // Store new value to indicate the call has not finished. Default to true
   const [loading, setLoading] = useState<boolean>(true);

   // Runs once when the component first mounts
   useEffect(() => {
         fakeAsyncLoginCheck().then((activeUser) => {
            if (activeUser) {
               console.log("fake async login check called");
               setAuthed(true);
               setLoading(false);
            } else {
                             setAuthed(false);
               setLoading(false);
            }
         });
      }
   }, []);

     // Mock call to an authentication endpoint
   const fakeAsyncLogin = async (): Promise<string> => {
      return new Promise((resolve, reject) => {
         setTimeout(() => {
            resolve("Logged In");
         }, 300);
      });
   };

return (
      // Expose the new `loading` value so we can consume it in `App.tsx`
      <AuthContext.Provider
         value={{ authed, setAuthed, login, logout, loading }}
      >
         {children}
      </AuthContext.Provider>
   );
...
We also need to make changes to the App.tsx file. We will need to use the new loading value and only render the routes if it is false. This fixes the issue where the user would get redirected back to the home page because the authed value has not been updated yet. Because we aren't rendering the <ProtectedRoute> component until after loading is done we can be sure that the authed value is accurate.
// App.tsx
function App() {
   const { authed, loading } = useAuth();

   return (
      <div className="App">
         <Navbar />
         {authed ? <Logout /> : <Login />}

         {loading ? (
            <div> Loading... </div>
         ) : (
            <>
               <div style={{ margin: "20px" }}>
                  <span>
                     Auth Status: {authed ? "Logged In" : "Not Logged In"}
                  </span>
               </div>

               <Switch>
                  <Route path="/" exact component={Home} />
                  <Route path="/about" exact component={About} />
                  <ProtectedRoute path="/profile" exact component={Profile} />
               </Switch>
            </>
         )}
      </div>
   );
}
References
React Router Dom - https://reactrouter.com/web/guides/quick-start
React Custom Hooks - https://reactjs.org/docs/hooks-custom.html
React Context API - https://reactjs.org/docs/context.html
That's all folks
If you have any issues or questions feel free to reach out to me on twitter @jeff_codes. Thanks for reading!
Github Repo: https://github.com/edmondso006/react-protected-routes
This article was originally published at: https://www.jeffedmondson.dev/blog/react-protected-routes/. Head over there to see more articles like it


Top comments (2)
Great article
Good example and thorough. Interested what you think about using xstate, as in this example (although uses classes rather than hooks)