I am almost one year into my current relationship. It is hard to believe how fast time flies, until I look into our photo archive. Being an enthusiastic photographer, my partner captured moments of us together. However, the increasing stack of photos is accelerating the imminent explosion of my cloud storage. That’s when I started to look for alternative options, then I realized my workstation is not doing much despite being always-on. That began my exploration into self-hosting, by releasing a barely functional application with a weekend worth of work in October last year. And now, I am back with another release (keep reading for example setup later in the article). Keeping the design goal of simplicity, the photo album application can now do
- Easy to setup: Answer prompts to initialize the application. No database setup is required, and all generated configuration is in simple text files.
- Drag-and-drop photo management: A folder containing photos is considered an album, just drop them into the application, and leave the rest to the indexer
- Intuitive album visibility: Renaming album with specific suffixes changes the visibility
- Basic user privacy: album visibility and accessibility is ensured with a simple login-based access control

The current state of the album
Why Self-Hosting? A Journey Begins
The project was initially created for own use, and it was published to GitHub without much thought. It was done just as I concluded my previous project on legislative data and attended a meditation camp. I had also just returned from a trip to Thailand with my partner, bringing back a mountain of photos. The cloud storing was nearly full, so uploading them was not a viable option. On a more practical side, I just got out of a project and was still in search for opportunities (and still is), and thus budget was tight. Realizing the workstation remained idle most of the time, I figured it was a good opportunity to develop an application for the purpose.
If you host your domains on Cloudflare, setting this up in a Linux workstation is easy, read on to find out.
Aiming for simplicity, it was developed in a weekend, without a well-thought interface design (UX is still poor to this date). However, it was good enough to showcase collections of photos. While I need to re-run the indexer every time I drag folders of photos into the application, I find it acceptable for the scale of the project. If I were to deal with hundreds of gigabytes of photos, storing them to the cloud would be a more sensible choice.
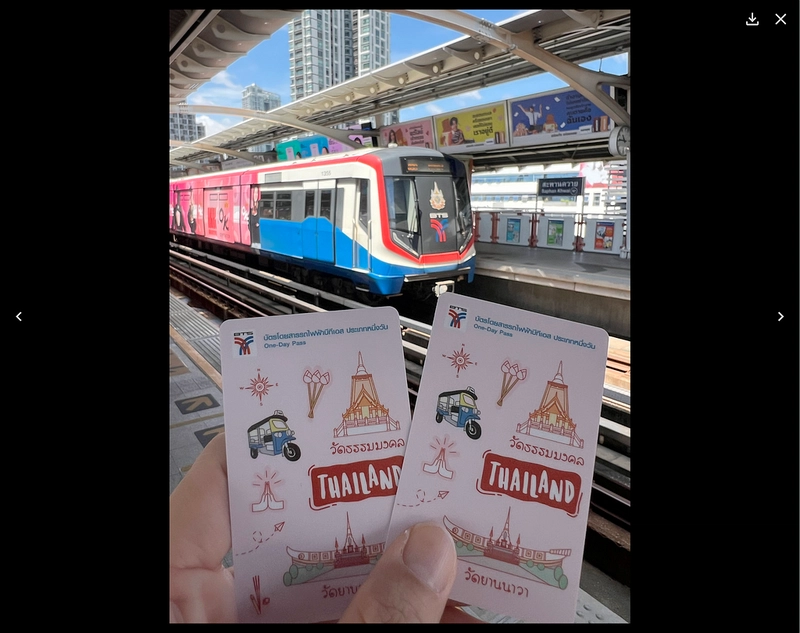
A photo I took in the Thailand trip
While the main users are just myself and my closer friends, some expressed interest in the project. If this were a product, this would be a perfect case of dogfooding my own product. This project is not meant to host thousands of photos, so it is an overkill to setup a database that is designed for scalability. Hence, the simplicity is perfect for people looking to try out self-hosting, with a spare machine lying around.
Implementing User Management and Visibility
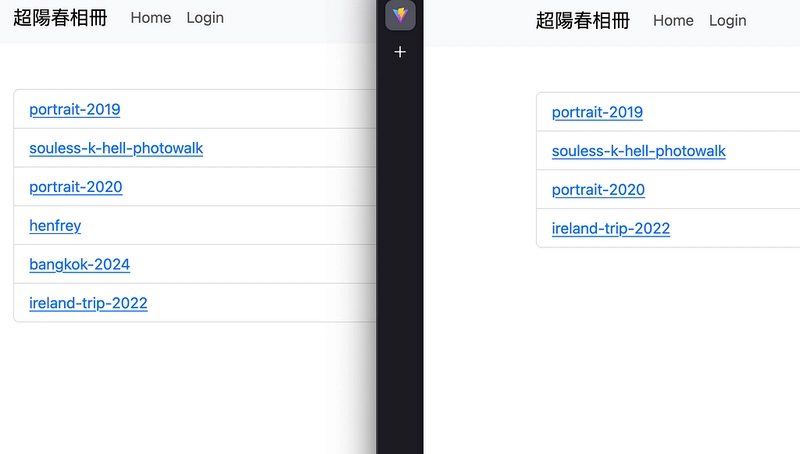
Difference in the list of albums before and after logging in
The involuntary transition into a freelancer in the past year wasn’t just a change in career; it was a crash course in frontend development. I mostly worked as a backend developer in the past, with a limited frontend skill. Now, instead of worrying only on database and API design, I suddenly need to put half my attention and effort into frontend development. In addition to that, the increased expectations in tech job openings also means an applicant is expected to be sufficiently productive as a full-stack developer. That reflects in a lot of my past interview take-home assignments. The photo album application, in a way is a cultivation of all the learning experience.
The projects and job applications led to new discoveries and relearning. In one of the job applications, I was given an opportunity to properly learn Ruby on Rails, and apply JSON Web Token (JWT) into it. Spoiler, I didn’t get picked for the job, but it was a good introductory to both Rails and JWT. While I submitted my best work given the time constraint, but the implementation was at best theoretical.
It was bad.
The implementation follows only the spec of the protocol, i.e. how to sign and verify the token, but I didn’t know what payload should it carry. Though I was reassured that it didn’t matter due to my lack of experience with it, but I knew it could be done better. Months later, in my current chatbot project, I get to properly revisit the topic.
How to write an AsyncIO Telegram bot in Python
JWT is mostly used for authorization purpose. After spending some time going through some documentation and chatting with Gemini, I realized there is some best practice on how it should be applied. For instance, in the photo album, users authenticate themselves to get a JWT token in return, consisting a payload with identification data, alongside expiration details. This, in turn, allows albums to be set as hidden and private. Unlike my initial attempt, it shouldn’t be used for authentication, and should not contain sensitive data, even though it is signed with an unpublished secret key.
I started the development to host photos taken by my partner and I. Then I figured why not just move more photos over from my cloud backup. As much as I like the accessibility, leaving everything publicly accessible is not exactly ideal. While it makes me smile whenever I browse the album featuring just us both, but I should probably keep silly photos of us making faces private.
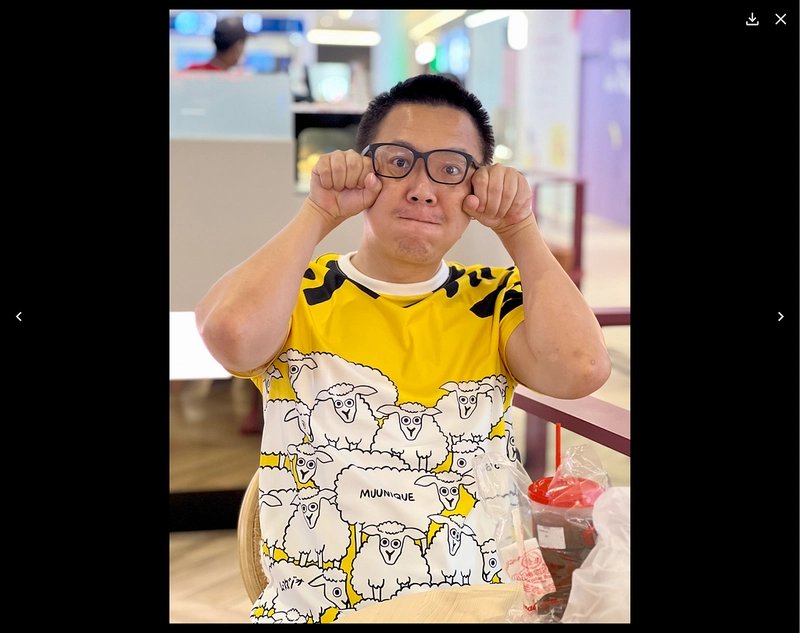
Yeap, definitely keep this in private!
With authorization in place, I start to look into visibility control without introducing much change to the code, both backend and frontend. Eventually, I settled with setting a naming convention to the albums, namely adding suffixes such as .hidden and .private. The backend returning the list of album now only selectively returns different lists of albums, depending on user login state, by checking the JWT token in the cookie. On the frontend part, I implemented an HTTP interceptor that redirects users to login page when they attempt to access private albums. I will probably write another post on the implementation in the future, on how to perform authorization with JWT referencing this web album application.
Setting Up Your Own Photo Album: A Step-by-Step Guide
It is exciting applying new learned knowledge into something I build and use personally. Which is a satisfaction I long for in my daily work. The web album sets out to fix a very tangible problem, make photos accessible online. As phone cameras improve in quality, the need for greater storage space also increased. Higher quality equals higher storage cost, and more people are moving their backups to the cloud through subscriptions.
On the other hand, as a software engineer, the quality of life in development also increases dramatically over the years. We used to require weeks of work to build an application like this web album. For example, I would have spent days figuring out how to arrange a grid of photo in masonry layout (in fact I attempted that in earlier iterations), but now all I needed is to import and use a React component to do the job.

A grid of photos in masonry layout, photos taken in EuroPython 2022
On deployment, tools like uv is also useful, as it would help pulling the right CPython to run the application. Gone are the days, where pages of guide is needed to teach how to install the right version of python, and how to pull the dependencies.
In my case, my photo album is made accessible online, through the use of Cloudflare tunnel. Setting it up is a breeze, here’s how to do it, and it is easily replicable if you run modern Linux distro.
- Install Cloudflare Tunnel by following the official installation and setup guide.
- Authenticate your Cloudflare account using the command cloudflared login.
- Create a new tunnel using the command cloudflared tunnel create .
- Navigate to the Cloudflare Zero Trust dashboard, then go to Network -> Tunnels.
- Locate the tunnel created in step 3, click the overflow menu (the three vertical dots), and select Configure.
- Go to the Public Hostname tab.
- Click Add a public hostname.
- Fill in the form: for Hostname , enter the desired subdomain (e.g., photos.yourdomain.com); for Service , select HTTP; for URL, enter http://localhost: (replace with the port your web album is running on).
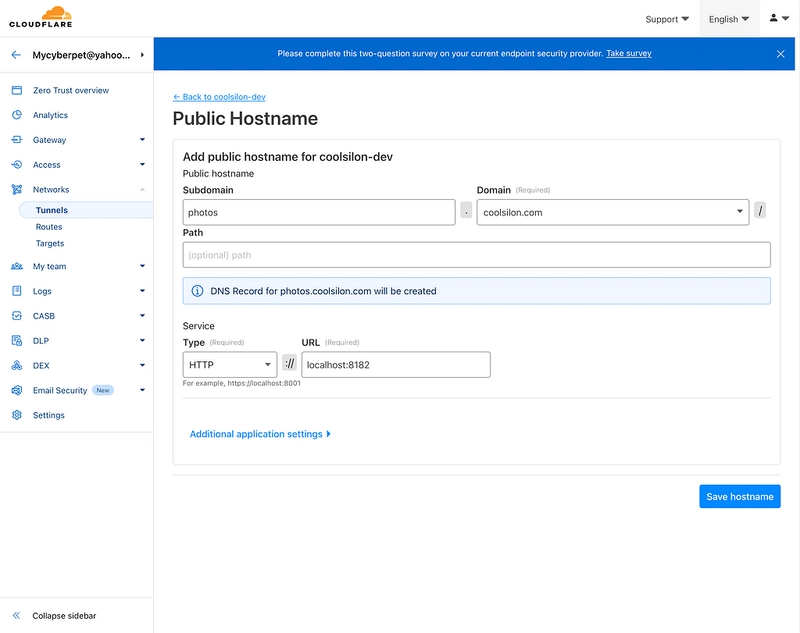
An example configuration
This setup creates a secure, publicly accessible endpoint for your photo album, without exposing your server directly to the internet.
Next, follow the instructions in the web album’s README file in the root directory to complete the setup. Albums suffixed with .hidden will not appear in the album listing, but can still be accessible with a direct link. On the other hand, albums suffixed with .private requires login before they can be accessed. The visibility setting allow sharing albums, but also offer some control such that semi-private photos are hidden.
In order to register a user, run the following command.
uv run python -m photos.main register $USERNAME
Follow the prompt to set up your login password. Finally ensure to specify the same port number as defined earlier while running the fastapi command
uv run fastapi - port $PORT - host 0.0.0.0 src/photos/web.py
If you are new to self-hosting, and have problems following the guide, feel free to reach out in the comments for help. Learning to prepare instructions to people of various levels of tech skill level is also a humbling experience.
Sharing My Story, Sharing the Love
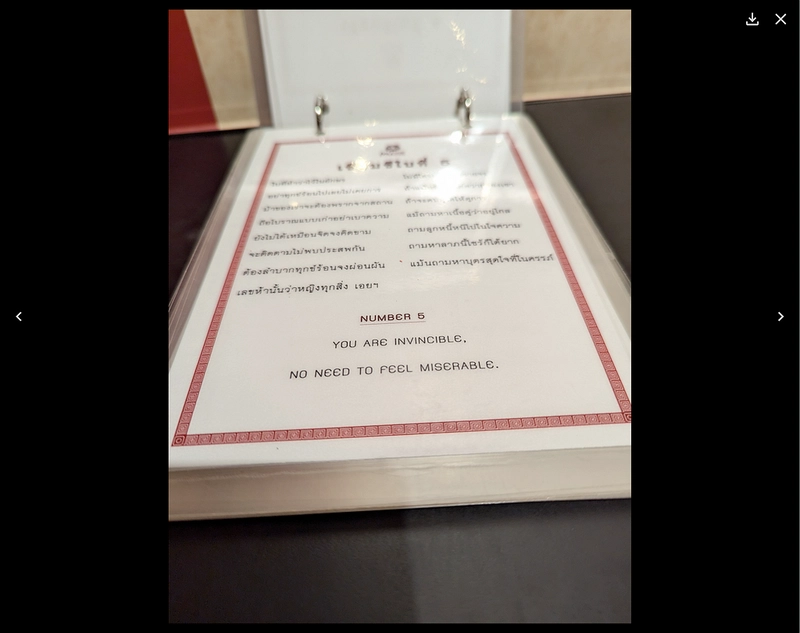
The result of a fortune-telling session. Photo taken in our Bangkok Trip last year.
Self-hosting your own data is becoming a trend these days, and it is really not hard to get started. There are even youtube creators that are creating content running self-host applications on used machines, for example Hardware Haven. I personally find their content entertaining, especially when seeing them giving older or less capable hardware a new life.
The project can be found at GitHub, and is in a very early stage of development. I am currently the only person using the script. The simplicity in design, is also intended as I wanted it to be easily adopted. Feel free to check out and clone the repository, give it a try by following the setup instructions. While I may not promise active development, I do appreciate feedbacks, both technical and non-technical ones.
GitHub - coolsilon/photos: Quick boring photo album
I am excited with the achievements in this release, and hopefully I get to put in more time into the project. It is a rare but fun experience building an application that is actually useful (still giving me smiles going through the photos taken by my partner). The project began with a love story, and hopefuly by sharing it to the world, it radiates.
This article was produced with the assistance of an AI editorial assistant to ensure clarity, reading flow, and language correctness. All opinions and experiences expressed are my own. If you’re interested in collaborating on a project or exploring job opportunities, please feel free to reach out to me here on Medium or connect with me on LinkedIn.

Top comments (0)