In previous article, we have used basic notations to create BPMN and learned about how to integrate REST API with BPMN. If you have not gone through yet, follow this link:
https://dev.to/jeyaauthithan/integrating-rest-api-with-bpmn-4mph
At the end of this article, you will be able to get a better understanding on more BPM notations and how to start the process instance.
Let’s get started!
Notations:
Send Task:
Implementation of Send task is same as service task, only difference is the way we want to represent the symbols in our BPMN. For ex. If we are making external system calls, to make it precise that request is being send, Send Task can be used.
Receive Task:
In this task, BPMN is expected to receive the data from external system. Hence, whenever execution reaches this task, it waits till someone invokes it with the response. We can have more than one ‘receive’ task in the BPMN file. Each receive task will have its own unique message name to differentiate it from each other. External system can invoke the task by correlating to its message name.
User Task:
This task specifies that we need some user inputs before proceeding with the workflow. When execution reaches this task, it waits till user completes the task with necessary inputs. This task can be completed via cockpit or internal REST API of Camunda engine.
Call Activity:
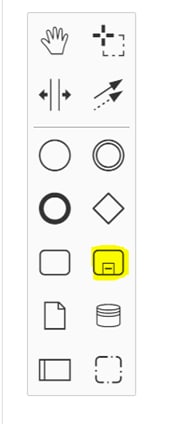
Call activity can be used to invoke a BPMN within a BPMN process. It is
same as calling a method inside another method. If there are some BPMN process
which can be reused inside another BPMN, this call activity can be configured
with the called BPMN process id.
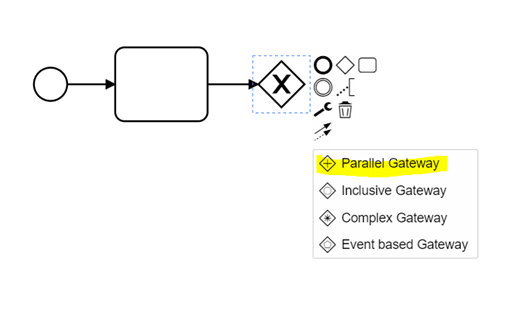
Parallel Gateway:
Using Parallel Gateway, we can have more than one sequence flows which
will be executed in parallel. This will split the flow into concurrent paths. The
paths are executed concurrently and independently.
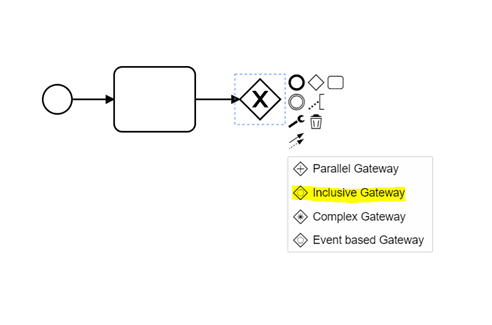
Inclusive Gateway:
This is combination of both exclusive and parallel gateway. The Inclusive Gateway represents the need to decide where all conditions must be evaluated. Whilst the Inclusive Gateway can be used to show that all paths must be taken, it should be used in such a way that at least one of the paths is taken.
Pool/Participant and Lanes:
Pool/Participant can be used for orchestrating the process. We can write BPMNs without Pools and lanes as well. In cases where we want to have clear view and step by step segregation of activities/tasks, we can make use of this. We can add as many lanes as we want in a pool.
Process using pools and lanes:

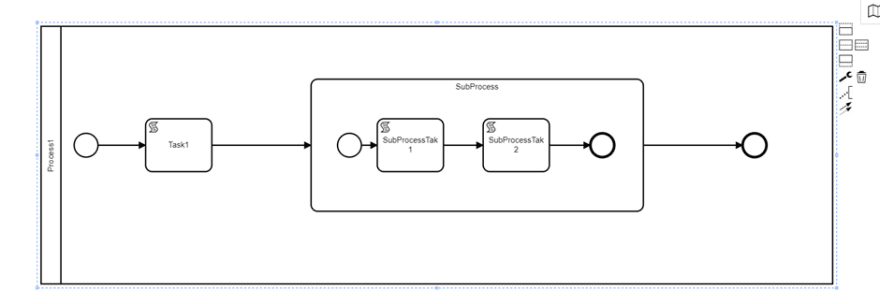
Embedded subprocess:
This allows us to group elements of the process. Few scenarios where we can make use of this:
• When we need to run set of tasks in loop
• When we need to use Boundary events (will see about Events in detail in next article).
Process using embedded subprocess:
How to start process instance:
As in previous article, we learnt how to deploy BPMN process, lets see how to start the process execution.
Find your process Id by opening the BPMN in the Camunda modeler and check “id” field in properties panel.
Start the spring boot application and call below end point with the process id. This is internal REST end point exposed by Camunda engine.
Method: POST
URL: http://localhost:8080/service/demo/rest/engine-rest/process-definition/key/ProcessId/start
Viola! This will create process instance for your process.
Once process instance started, all the tasks will be executed and if no failures, process instance will end.
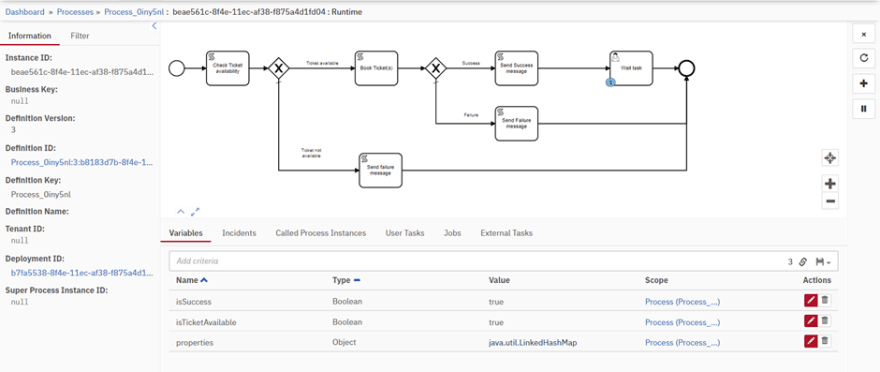
Let’s add wait task to our BPMN and check the process execution via cockpit:
Deploy this process in the engine and start the process instance.
In Cockpit, we can see the process instances which is waiting for user action.
On click of process instance id highlighted above, we can see variables stored in the process instance.
Let’s complete the wait task and progress the process instance.
In above screen, navigate to User Tasks tab, click on the taskId and it will get you to the Camunda tasklist screen.
In this screen, on click of Claim button, complete button will be enabled. Click on complete button and we can see process instance getting completed.
Hope you understood more notations used in BPMN and how to start the process instance in this article.
Try creating BPMN with the notations you have learned so far and start the process instance and check out the behaviour. Drop a comment in case of any queries.
Let’s learn about Events and error handling in next article.
Happy Learning! 😊







Top comments (0)