Intro
This is a basic tutorial on how to modify the default C++ Win32 application to run d3d11 code and get the screen to clear to a specific color, a good starting point for anyone learning computer graphics. I made this tutorial as a guide for my future self and also for anyone looking to start learning graphics programming with Direct X. I am a student studying Game Development and my first time setting up Direct X was a painful experience for me and I imagine a lot of people will feel the same way, it's just a daunting task to learn the D3D11 API and to understand the different components and how they work together when just setting up a project to clear the screen to a color requires so much effort.
IMPORTANT NOTES
Graphics Programming is very difficult to learn on it's own so I recommend getting fairly comfortable with C++ before attempting to do any programming with the Direct X API, if you are not confident with your programming skills then it will be difficult to diagnose errors with your graphics code. I will assume some basic C++ knowledge for the purposes of this tutorial.
Setup
Start by installing Visual Studio for Windows, during installation make sure you grab the c++ game development tools, this will come with the Direct X SDK, you need this for the tutorial. You can find the download here. This should be everything you need. If you already have Visual Studio 2019 installed you can still run the installer and make sure you have the C++ Game Development tools installed by modifying your installation.
Once Visual Studio 2019 is installed you will need to do a full restart to complete the installation, do that and you should be set to move forward.
Run Visual Studio 2019 and create a new project using the Windows Desktop Application C++ template. Once you have this project setup build and run it. You should get a window that looks like the one below.

Take a moment to look over the code and see if you can get the lay of the land and understand what's going on and how the code works to setup and update the application window. I won't be modifying this code too much, just adding my own code to get Direct X setup, however, if you wanna get more in depth with how this code works, check out the documentation on the C++ Win32 API here.
Now we need to do some basic modifications to the way this code so it works better for real-time graphics. This template was designed for more standard UI based windows programming, not games or graphics applications so we need to change the way it handles the window paint and the update loop. If you look at the code I'm pretty sure you can guess that the entry point is the function wWinMain. Let's change it to work better for us.
The first thing we're changing is the WndProc function. This function handles windows messages and responds to them accordingly. There is a case in the switch statement that handles WM_PAINT messages, this tells the application to repaint the window, the issue here is that we will not be painting anything so we need to remove this message, feel free to comment it out or just delete the case entirely. If you deleted the case like I did, the new WndProc function should look like mine below. More info on the WM_PAINT message here.
LRESULT CALLBACK WndProc(HWND hWnd, UINT message, WPARAM wParam, LPARAM lParam)
{
    switch (message)
    {
    case WM_COMMAND:
        {
            int wmId = LOWORD(wParam);
            // Parse the menu selections:
            switch (wmId)
            {
            case IDM_ABOUT:
                DialogBox(hInst, MAKEINTRESOURCE(IDD_ABOUTBOX), hWnd, About);
                break;
            case IDM_EXIT:
                DestroyWindow(hWnd);
                break;
            default:
                return DefWindowProc(hWnd, message, wParam, lParam);
            }
        }
        break;
    case WM_DESTROY:
        PostQuitMessage(0);
        break;
    default:
        return DefWindowProc(hWnd, message, wParam, lParam);
    }
    return 0;
}
The next thing we need to do is to change the update loop to be more friendly to real-time applications. Take a look at the update loop below:
    // Main message loop:
    while (GetMessage(&msg, nullptr, 0, 0))
    {
        if (!TranslateAccelerator(msg.hwnd, hAccelTable, &msg))
        {
            TranslateMessage(&msg);
            DispatchMessage(&msg);
        }
    }
See that little GetMessage function call in the update loop, that is a bit problematic for us because it waits for messages before continuing with the loop, this causes issues for graphics applications because we need the loop to always be running and we usually process messages as they arrive. Luckily for us Microsoft has given us a way to do just that by using a function called peekmessage that allows us to process messages every iteration of the loop if there are any, without stalling the main loop. I won't go into detail about how this works, but you can read more about it here. Update the Loop as follows:
    // Main message loop:
    while (true)
    {
        PeekMessage(&msg, NULL, 0, 0, PM_REMOVE);
        if (!TranslateAccelerator(msg.hwnd, hAccelTable, &msg))
        {
            TranslateMessage(&msg);
            DispatchMessage(&msg);
        }
    }
Okay this is getting better now, but there's still a problem here. Build and run the code, the app should run fine. On the surface it looks like there is nothing changed, until you hit the x on the app window to close it. You'll notice that the debugger doesn't stop, this is a problem. The window closes, but the app is still running the main loop, luckily this is an easy fix. Change the update loop to the code below to break the loop when receiving a WM_QUIT message, I also added a GetAsyncKeyState call to close the application if the user presses escape this is a feature that always comes in handy. The WM_QUIT message should be pretty straightforward, but if you want to know more check out the docs here.
    // Main message loop:
    while (true)
    {
        PeekMessage(&msg, NULL, 0, 0, PM_REMOVE);
        if (!TranslateAccelerator(msg.hwnd, hAccelTable, &msg))
        {
            TranslateMessage(&msg);
            DispatchMessage(&msg);
        }

        if (msg.message == WM_QUIT)
            break;

        // Break if user presses escape key
        if (GetAsyncKeyState(VK_ESCAPE)) break;
    }
Now if you build and run the project you should be able to close the application successfully by clicking the x on the window or by pressing the escape key.
Direct X Time
Hopefully the window setup wasn't too bad, I know my explanations were long winded, but I wanted to make sure I gave some kind of explanation about why things needed changing. Now it's time for some Direct x things. Woohoo!! I can't lie, if you're new to graphics programming this is gonna be rough. You might wanna put on your adult pants for the rest of this tutorial (or just any pants in general).
I decided that the best way to go about doing this was to give some code, tell you where to put it, then explain the super important parts and point to documentation for further reading if you need further clarification or want to learn more about the different bits of code. So let's do this thing.
The first thing I'm going to do is include the d3d11 libraries into the project. Right click the project in the solution explorer window, click properties and go to the linker section then click on the input section of the linker properties, then go to additional dependencies and add d3d11.lib. See snapshot below:

Now add some includes, you need the d3d11.h and the assert.h, usage of asserts is optional, but I recommend using it because it serves as an incredible debugging tool when learning graphics because it can immediately identify the culprit when something in your code brearrrrks. Add the includes next to your other includes like below:
// Already included
#include "framework.h"
#include "tutorial_1_d3d11_setup.h"
// New stuff needed for direct x
#include <d3d11.h>
#include <assert.h>
Build the project, if the code compiles without errors then you have successfully linked d3d11. Now it's time to create the device, device context and the swap chain. I'll give you the code to set these up then I'll go though and explain what I did afterwards, while looking at the code, try to figure out what it's doing and see if you can identify the function of a device or a swap chain.
First off you're gonna need the globals defined below. I put mine right after the includes so they're right at the top if I need to reference them.
// Globals
// For initialization and utility
ID3D11Device* g_Device;
IDXGISwapChain* g_Swapchain;
ID3D11DeviceContext* g_DeviceContext;
float g_aspectRatio;
Setup for the device and swapchain is placed inside of the InitInstance function since it needs to happen only once on initialization.
BOOL InitInstance(HINSTANCE hInstance, int nCmdShow)
{
   hInst = hInstance; // Store instance handle in our global variable

   HWND hWnd = CreateWindowW(szWindowClass, szTitle, WS_OVERLAPPEDWINDOW,
      CW_USEDEFAULT, 0, CW_USEDEFAULT, 0, nullptr, nullptr, hInstance, nullptr);

   if (!hWnd)
   {
      return FALSE;
   }

   ShowWindow(hWnd, nCmdShow);
   UpdateWindow(hWnd);

   // D3d11 code here
   RECT rect;
   GetClientRect(hWnd, &rect);

   // Attach d3d to the window
   D3D_FEATURE_LEVEL DX11 = D3D_FEATURE_LEVEL_11_0;
   DXGI_SWAP_CHAIN_DESC swap;
   ZeroMemory(&swap, sizeof(DXGI_SWAP_CHAIN_DESC));
   swap.BufferCount = 1;
   swap.OutputWindow = hWnd;
   swap.Windowed = true;
   swap.SwapEffect = DXGI_SWAP_EFFECT_DISCARD;
   swap.BufferDesc.Format = DXGI_FORMAT_R8G8B8A8_UNORM;
   swap.BufferDesc.Width = rect.right - rect.left;
   swap.BufferDesc.Height = rect.bottom - rect.top;
   swap.BufferUsage = DXGI_USAGE_RENDER_TARGET_OUTPUT;
   swap.SampleDesc.Count = 1;

   g_aspectRatio = swap.BufferDesc.Width / (float)swap.BufferDesc.Height;

   HRESULT result;

   result = D3D11CreateDeviceAndSwapChain(nullptr, D3D_DRIVER_TYPE_HARDWARE, NULL, D3D11_CREATE_DEVICE_DEBUG, &DX11, 1, D3D11_SDK_VERSION, &swap, &g_Swapchain, &g_Device, 0, &g_DeviceContext);
   assert(!FAILED(result));
   // D3d11 code here

   return TRUE;
}
Build the new code to make sure it is error free, if it builds, set a breakpoint right at the return of InitInstance and ensure that the value of result is S_OK, it should trigger the assert if it is anything else. If that runs successfully, then you can move forward, if you have errors, skip forward to the descriptions and explanations to get a better idea of what's going on then step through your code to see what causes the code to break. Now that this code runs, it's time to set up a back buffer. The back buffer setup needs on more global pointer and a viewport struct. Update the globals as follows:
// Globals
// For initialization and utility
ID3D11Device* g_Device;
IDXGISwapChain* g_Swapchain;
ID3D11DeviceContext* g_DeviceContext;
float g_aspectRatio;

// For drawing  -> New stuff right here
ID3D11RenderTargetView* g_RenderTargetView;
D3D11_VIEWPORT g_viewport;
After adding the new global variables the back buffer can be created with the following code placed after the swap chain creation:
   ID3D11Resource* backbuffer;
   result = g_Swapchain->GetBuffer(0, __uuidof(backbuffer), (void**)&backbuffer);
   result = g_Device->CreateRenderTargetView(backbuffer, NULL, &g_RenderTargetView);
   assert(!FAILED(result));

   // Release the resource to decrement the counter by one
   // This is necessary to keep the buffer from leaking memory
   backbuffer->Release();
Just like the device and swap chain code, build and run and make sure the result gets an S_OK message after running the CreateRenderTargetView function gets called to make sure it was created successfully. The next part is to configure the viewport struct. Set viewport struct to the following values after the backbuffer setup:
   // Setup viewport
   g_viewport.Width = swap.BufferDesc.Width;
   g_viewport.Height = swap.BufferDesc.Height;
   g_viewport.TopLeftY = g_viewport.TopLeftX = 0;
   g_viewport.MinDepth = 0;
   g_viewport.MaxDepth = 1;
Now that all the setup is done, the new InitInstance function should look something like the follwing:
BOOL InitInstance(HINSTANCE hInstance, int nCmdShow)
{
   hInst = hInstance; // Store instance handle in our global variable

   HWND hWnd = CreateWindowW(szWindowClass, szTitle, WS_OVERLAPPEDWINDOW,
      CW_USEDEFAULT, 0, CW_USEDEFAULT, 0, nullptr, nullptr, hInstance, nullptr);

   if (!hWnd)
   {
      return FALSE;
   }

   ShowWindow(hWnd, nCmdShow);
   UpdateWindow(hWnd);

   // D3d11 code here
   RECT rect;
   GetClientRect(hWnd, &rect);

   // Attach d3d to the window
   D3D_FEATURE_LEVEL DX11 = D3D_FEATURE_LEVEL_11_0;
   DXGI_SWAP_CHAIN_DESC swap;
   ZeroMemory(&swap, sizeof(DXGI_SWAP_CHAIN_DESC));
   swap.BufferCount = 1;
   swap.OutputWindow = hWnd;
   swap.Windowed = true;
   swap.SwapEffect = DXGI_SWAP_EFFECT_DISCARD;
   swap.BufferDesc.Format = DXGI_FORMAT_R8G8B8A8_UNORM;
   swap.BufferDesc.Width = rect.right - rect.left;
   swap.BufferDesc.Height = rect.bottom - rect.top;
   swap.BufferUsage = DXGI_USAGE_RENDER_TARGET_OUTPUT;
   swap.SampleDesc.Count = 1;

   g_aspectRatio = swap.BufferDesc.Width / (float)swap.BufferDesc.Height;

   HRESULT result;

   result = D3D11CreateDeviceAndSwapChain(nullptr, D3D_DRIVER_TYPE_HARDWARE, NULL, D3D11_CREATE_DEVICE_DEBUG, &DX11, 1, D3D11_SDK_VERSION, &swap, &g_Swapchain, &g_Device, 0, &g_DeviceContext);
   assert(!FAILED(result));

   ID3D11Resource* backbuffer;
   result = g_Swapchain->GetBuffer(0, __uuidof(backbuffer), (void**)&backbuffer);
   result = g_Device->CreateRenderTargetView(backbuffer, NULL, &g_RenderTargetView);
   assert(!FAILED(result));

   // Release the resource to decrement the counter by one
   // This is necessary to keep the buffer from leaking memory
   backbuffer->Release();

   // Setup viewport
   g_viewport.Width = swap.BufferDesc.Width;
   g_viewport.Height = swap.BufferDesc.Height;
   g_viewport.TopLeftY = g_viewport.TopLeftX = 0;
   g_viewport.MinDepth = 0;
   g_viewport.MaxDepth = 1;
   // D3d11 code here

   return TRUE;
}
Now it's time to unravel some of this code and learn what's actually going on. Firstly I will mention that, I am in no way an expert and I am still fairly new to Direct X myself, so I will try my best to explain what's going on here. I won't go too in depth about the API, I'll just give a brief overview about what each part of the API here is doing so that the setup kinda makes sense.
Device, Device Context & Swap Chain
These three parts of the API work together to communicate with the graphics card so that things can be rendered. The device is an object that allows users to create other necessary objects for communicating with the Direct X API, there are a lot of different parts of the API and typically when you need to create an object you will use the device to do so. Think of the device as the new keyword for creating objects on the graphics card, that's not quite how it works, but for the purposes of simplicity, this is a good analogy for knowing how to interact with the device. The Device Context is kind of like a wrapper object that allows users to configure the different settings in the API to affect how things will be rendered and how to configure the graphics card. The swap chain is an object that stores surfaces or textures that hold data that can then be rendered to the screen. When rendering, we will be outputting to a surface or texture and storing the data until all computation is complete then we render that texture to the screen every frame to present to the user. The swap chain's main job is to communicate with the Operating System's Desktop Window Manager to present the back buffer to the screen. This is just a super basic explanation of what these objects do for more details consult the Direct X Guide.
Back Buffer, Render Target View & Viewport
When I was explaining what I swap chain was, I said that it stores surfaces or textures that can then be rendered to the screen, well, in order to do that we need a surface or texture to actually write data to, this is the back buffer. It is essentially a texture that we write color data to and then when we have updated it every frame we present it to the user by setting the pixel colors on the screen using the texture colors. A render target view is essentially an object that gets associated with a surface and has data about how the graphics card should interact with the surface. For now we are only going to use it to clear the screen, but it can be used for other things if configured differently. A viewport is a struct that defines a section of the application window that can rendered to. For now we are just going to render to the entirety of the client area, but this can be used to render to small subsections of the screen for multiplayer gameplay or for minimaps.
Okay I know I didn't do a great job explaining what the different parts of the API are, but I hope I at least helped a little. Now let's go through the code and see what's happening.
Initialization Walk-through
The Swap Chain, Device, Device Context setup
   RECT rect;
   GetClientRect(hWnd, &rect);

   // Attach d3d to the window
   D3D_FEATURE_LEVEL DX11 = D3D_FEATURE_LEVEL_11_0;
   DXGI_SWAP_CHAIN_DESC swap;
   ZeroMemory(&swap, sizeof(DXGI_SWAP_CHAIN_DESC));
   swap.BufferCount = 1;
   swap.OutputWindow = hWnd;
   swap.Windowed = true;
   swap.SwapEffect = DXGI_SWAP_EFFECT_DISCARD;
   swap.BufferDesc.Format = DXGI_FORMAT_R8G8B8A8_UNORM;
   swap.BufferDesc.Width = rect.right - rect.left;
   swap.BufferDesc.Height = rect.bottom - rect.top;
   swap.BufferUsage = DXGI_USAGE_RENDER_TARGET_OUTPUT;
   swap.SampleDesc.Count = 1;

   g_aspectRatio = swap.BufferDesc.Width / (float)swap.BufferDesc.Height;

   HRESULT result;

   result = D3D11CreateDeviceAndSwapChain(nullptr, D3D_DRIVER_TYPE_HARDWARE, NULL, D3D11_CREATE_DEVICE_DEBUG, &DX11, 1, D3D11_SDK_VERSION, &swap, &g_Swapchain, &g_Device, 0, &g_DeviceContext);
   assert(!FAILED(result));
The following is the biggest block of code in our current initialization but it is the baseline for beginning the D3D11 setup. The first 2 lines basically get the size of the client portion of the window (the part below the toolbar where we can actually render to) so that we can configure our viewport and swap chain dimensions to match the exact size of the window. The D3D11_FEATURE_LEVEL basically defines a set of minimum functionality that we need from the graphics card in order for our application to function. If those features are not present there will be an error when the D3D11CreateDeviceAndSwapChain function gets called. We then set some basic window parameters like pointers to the window, window dimensions and the way we intend to use our swap chain gets set also. I'm not giving details about every aspect of how this gets configured because it would take forever, so I'll just link to some documentation.
While we're on the topic of documentation. I have a quick tip that helps quite a bit when programming in Visual Studio. If there's something you want more information about in Visual Studio such as a struct, data type or function, just click it and press the f1 key, it will usually link straight to the documentation, it doesn't always work, but it usually does for Windows specific things that are documented on MSDN. Shout out to Lari, the Graphics Professor from Full Sail that told me about this little trick.
The aspect ratio is actually not needed here, I included it because I plan on using this blog post as a starting point for other blog posts and having that already in the code will be helpful. The D3D11CreateDeviceAndSwapChain function has a ton of parameters and will not usually require you to fill out all parameters, however notice the way the function is designed, it takes in some structs and pointers by reference, many of the D3D11 functions behave this way so get used to seeing functions like this. Now you probably noticed the HRESULT variable and the assert, we used those earlier, it's a great pattern to use while learning D3D11 because it allows you to quickly know when something breaks rather than having to hunt for errors blindly. I won't go into the details of how the function works, you'll need to read the documentation for that.
The Back Buffer/ Viewport Setup
   ID3D11Resource* backbuffer;
   result = g_Swapchain->GetBuffer(0, __uuidof(backbuffer), (void**)&backbuffer);
   result = g_Device->CreateRenderTargetView(backbuffer, NULL, &g_RenderTargetView);
   assert(!FAILED(result));

   // Release the resource to decrement the counter by one
   // This is necessary to keep the thing from leaking memory
   backbuffer->Release();

   // Setup viewport
   g_viewport.Width = swap.BufferDesc.Width;
   g_viewport.Height = swap.BufferDesc.Height;
   g_viewport.TopLeftY = g_viewport.TopLeftX = 0;
   g_viewport.MinDepth = 0;
   g_viewport.MaxDepth = 1;
For the back buffer we need to create a resource and attach it to a render target view so that we can use to to present pixels to the screen. So we call some create functions and make sure the objects were created properly. The only odd thing about this code is the manual call of release on the back buffer, this needs to happen because the objects in d3d11 use refcounts to determine when to delete an object so calling GetBuffer added 1 to the ref count and we can fix that by calling release to decrement the ref count by 1. The viewport setup here is pretty straightforward, we hive it some dimensions and some depth values that we will ignore for now because we are not using it. Read the docs to learn more about the viewport configuration.
Time to See Some Output, Finally
Now that we have everything we need to render color to the screen let's do just that. Modify the main loop to add the following changes:
// Main message loop:
while (true)
{
PeekMessage(&msg, NULL, 0, 0, PM_REMOVE);
if (!TranslateAccelerator(msg.hwnd, hAccelTable, &msg))
{
TranslateMessage(&msg);
DispatchMessage(&msg);
}
if (msg.message == WM_QUIT)
break;
// Break if user presses escape key
if (GetAsyncKeyState(VK_ESCAPE)) break;
// Rendering Code
ID3D11RenderTargetView* tempRTV[] = { g_RenderTargetView };
g_DeviceContext->OMSetRenderTargets(1, tempRTV, nullptr);
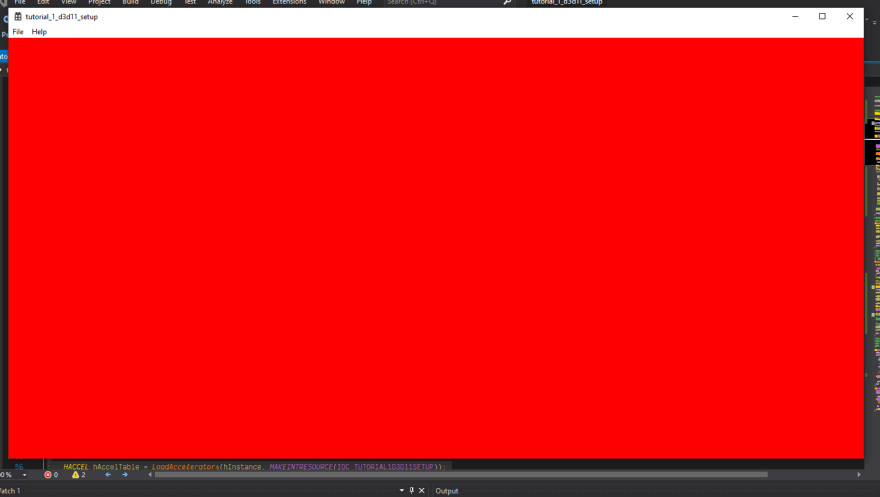
float color[4] = { 1, 0, 0, 1 };
g_DeviceContext->ClearRenderTargetView(g_RenderTargetView, color);
g_DeviceContext->RSSetViewports(1, &g_viewport);
g_Swapchain->Present(0, 0);
// Rendering Code
}
If you build and run the project after updating the main loop you should get a red screen.
The code is minimal, but this is where the magic is happening. Let's go over what's happening here. Here's the new code in isolation for discussion purposes:
    ID3D11RenderTargetView* tempRTV[] = { g_RenderTargetView };
    g_DeviceContext->OMSetRenderTargets(1, tempRTV, nullptr);

    float color[4] = { 1, 0, 0, 1 };
    g_DeviceContext->ClearRenderTargetView(g_RenderTargetView, color);

    g_DeviceContext->RSSetViewports(1, &g_viewport);

    g_Swapchain->Present(0, 0);
The first line is creating an array of render target views and then we're setting the render targets with the OMSetRenderTargets function call. Notice how it says targets, it can have more than one, therefore the function expects an array of render targets, you can just pass in one by reference, but I like to keep it as an array so I'm aware that the function expects an array.
Direct X uses 4 floats as color data each a different color channel with a range of 0 to 1. Here because we configured our renderer to do rgba color, we are effectively setting the channels of our color in that order. I always default my alpha channel to 1 because It will complicate things later if you don't, keep that in mind. Once you set the color variable you can change the screen by clearing the render target view. This essentially flushes the texture that is being rendered to to the default color that you set.
The next thing that needs to happen is setting the viewports. Like the OMSetRenderTargets function, the RSSetViewports function also expects an array of viewports, but here I passed the one in by reference to trick the function into thinking it's an array, Like I said earlier I don't recommend doing this, but I put it here to show that it works.
The last thing that needs to be done it to tell the swap chain to present the current surface to the screen by calling present on the swap chain. Run the code a few times and change the color, experiment and see how it affects the output.
Code Cleanup
Although we are currently clearing the screen, if you look at the output window, you should see some state creation errors, these are bad. It means that we are leaking memory on the GPU. This can cause issues if it happens enough, it will force a restart on the computer. That's pretty bad, let's not have our application do that. The OS will typically clean up the graphics memory after the program closes, but leaking memory is just bad programming so let's not do that. The way to fix this is by calling release on our objects like we did when we were setting up the buffer once we exit the main loop, we can do that by just adding the following code directly after the main loop:
g_Device->Release();
g_DeviceContext->Release();
g_RenderTargetView->Release();
g_Swapchain->Release();
You might wanna write a cleanup function to handle this, because the amount of pointers you're gonna need gets out of hand really fast. Adding that code should have gotten rid of the memory errors in the output window. The new winmain function should look like this:
int APIENTRY wWinMain(_In_ HINSTANCE hInstance,
                     _In_opt_ HINSTANCE hPrevInstance,
                     _In_ LPWSTR    lpCmdLine,
                     _In_ int       nCmdShow)
{
    UNREFERENCED_PARAMETER(hPrevInstance);
    UNREFERENCED_PARAMETER(lpCmdLine);

    // TODO: Place code here.

    // Initialize global strings
    LoadStringW(hInstance, IDS_APP_TITLE, szTitle, MAX_LOADSTRING);
    LoadStringW(hInstance, IDC_TUTORIAL1D3D11SETUP, szWindowClass, MAX_LOADSTRING);
    MyRegisterClass(hInstance);

    // Perform application initialization:
    if (!InitInstance (hInstance, nCmdShow))
    {
        return FALSE;
    }

    HACCEL hAccelTable = LoadAccelerators(hInstance, MAKEINTRESOURCE(IDC_TUTORIAL1D3D11SETUP));

    MSG msg;
    ZeroMemory(&msg, sizeof(MSG));

    // Main message loop:
    while (true)
    {
        PeekMessage(&msg, NULL, 0, 0, PM_REMOVE);
        if (!TranslateAccelerator(msg.hwnd, hAccelTable, &msg))
        {
            TranslateMessage(&msg);
            DispatchMessage(&msg);
        }

        if (msg.message == WM_QUIT)
            break;

        // Break if user presses escape key
        if (GetAsyncKeyState(VK_ESCAPE)) break;

        // Rendering Code
        ID3D11RenderTargetView* tempRTV[] = { g_RenderTargetView };
        g_DeviceContext->OMSetRenderTargets(1, tempRTV, nullptr);

        float color[4] = { 1, 0, 0, 1 };
        g_DeviceContext->ClearRenderTargetView(g_RenderTargetView, color);

        g_DeviceContext->RSSetViewports(1, &g_viewport);

        g_Swapchain->Present(0, 0);
        // Rendering Code
    }
    g_Device->Release();
    g_DeviceContext->Release();
    g_RenderTargetView->Release();
    g_Swapchain->Release();

    return (int) msg.wParam;
}
Some Considerations
This is just a bare bones tutorial for the most basic setup that can be done. Try experimenting with different ways to organize the code for a graphics app. It's important to experiment early when you have very little functionality set up because the more things you add the more difficult it will be to reorganize your project.
Now that you have some basic setup working, try to go through and see what functions are being called on the device, the device context and the swap chain. Does it make sense? You should start to see some patterns emerging about their usage.
If you used this post and found it useful/ helpful or have questions regarding this tutorial, feel free to bother me on twitter. It should be linked to my account. Also look out for more Direct X posts.
Check out the finished code here.


Top comments (7)
Why isnt this about D3D12????
DirectX 12 is an expert API it is usually recommended to start with 11. You can achieve the same things with both, 12 offers just more control and possibly more performance provided you know how to use it properly.
rastertek.com/choosing.html
In addition there are tons of projects still using DirectX 11, it's not because the number is big that it means lower versions are useless or irrelevant.
That will come later.
Cannot Wait to See, I am just learning C++ and want to work with directx12 as opposed to 11 and have not been able to get any tutorials working except yours, thks for this I would have been many more hours searching to get a screen working.
There is a bug in the sample when you try to resize the window, that's because of the way events are handled in the rendering loop you should do:
This will fix the cursor being stuck, however, there is more work to be done to properly handle the resizing of the DirectX buffers on resize events (which this sample does not do).
Since nothing is explained in this tutorial about setting up window with the Win32 API I suggest this read as:
docs.microsoft.com/en-us/windows/w...
As for a better sample of a minimal DirectX game loop the code below also handles window resizing of the DirectX buffers:
github.com/walbourn/directx-vs-tem...
Cheers
This tutorial slaps
Teach me Raytracing pls