Guide
Grayscale release, also known as canary release.
The term "canary" stems from the tradition of coal miners bringing caged canaries into mines. Miners use canaries to detect the concentration of carbon monoxide in the mine. The canaries would be poisoned by high concentration of carbon monoxide, in this case miners should evacute immediately. - DevOps Practice Guide
When we use "grayscale" or "canary" in software development. It refers to a small number of users' test before official release. So the problems can be detected earlier to prevent them from affecting most users.
Pipeline with grayscale release module is a very important tool and an efficient practice in DevOps, but I knew little about this when I was a student. After onboarding, I discovered the power of pipelines.
When faced with something new, it's an interesting path for us to get through all the key steps logically, and then complete a demo.
The article mainly focus on zero-to-one construction process practice rather then theoretical content, suitable for beginner front-end developers interested in engineering.
01 Server
Get a server
As mentioned above, the grayscale release requires a small number of users' test before official release.Therefore, we need to make sure that two groups of users can be divided to use different functions at the same time. So we need to prepare two servers, each with different code versions.
If you already have a server, you can emulate two servers by deploying services on different ports. If not, you can follow procedure below to purchase two cloud servers. The demo in this document will cost about 5 dollars on demand.
You can get a HUAWEI cloud server according to this: https://github.com/TerminatorSd/canaryUI/blob/master/HuaWeiCloudServer.md (written in Chinese)
Install tools
Git
First, make sure that git has been installed on your server. If not, run the following command to install it. After installation, generate an ssh public key and save it to your github, which is required for pulling code.
yum install git
Nginx
It is easy to install Nginx on Linux.
sudo yum install nginx
Run the command "nginx -t" on the terminal to check whether the installation is successful. If ok, it displays the status and location of the Nginx configuration file.

Then, run the command "nginx" or "nginx -s reload" to start Nginx. If the following Nginx processes are displayed, it indicates that Nginx is started successfully.

Open a browser and visit the public IP address of your server. If you can see a page like this, Nginx is working properly.
Jenkins
You may have many questions about Jenkins at first. Like what is Jenkins? What can Jenkins do? Why should I use Jenkins, etc. It's hard to say what Jenkins is, so just have a quick look at what Jenkins can do. Simply speaking, Jenkins can perform any operation on any server as you can. As long as you create a task on Jenkins in advance, specifing the task content and triggering time.
(1) Installation
Install the stable version: http://pkg.jenkins-ci.org/redhat-stable/
wget http://pkg.jenkins-ci.org/redhat-stable/jenkins-2.204.5-1.1.noarch.rpm
rpm -ivh jenkins-2.7.3-1.1.noarch.rpm
If the port used by Jenkins conflicts with other programs, edit the following file to modify the port:
// line 56 JENKINS_PORT
vi /etc/sysconfig/jenkins
(2) Start Jenkins
service jenkins start/stop/restart
// location of password
/var/lib/jenkins/secrets/initialAdminPassword
(3) Visit Jenkins
Access port 8080 of the server, enter the password obtained from the previous step, and click Continue.

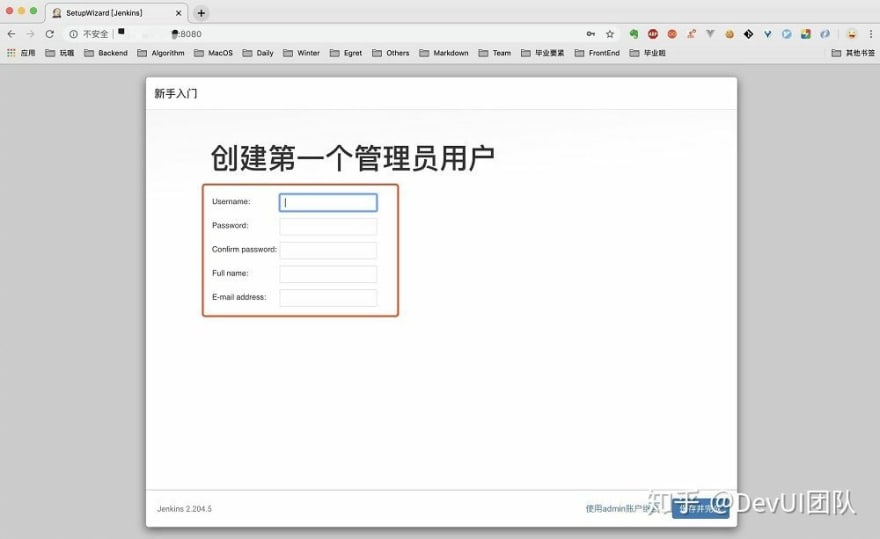
Create an account and do login.
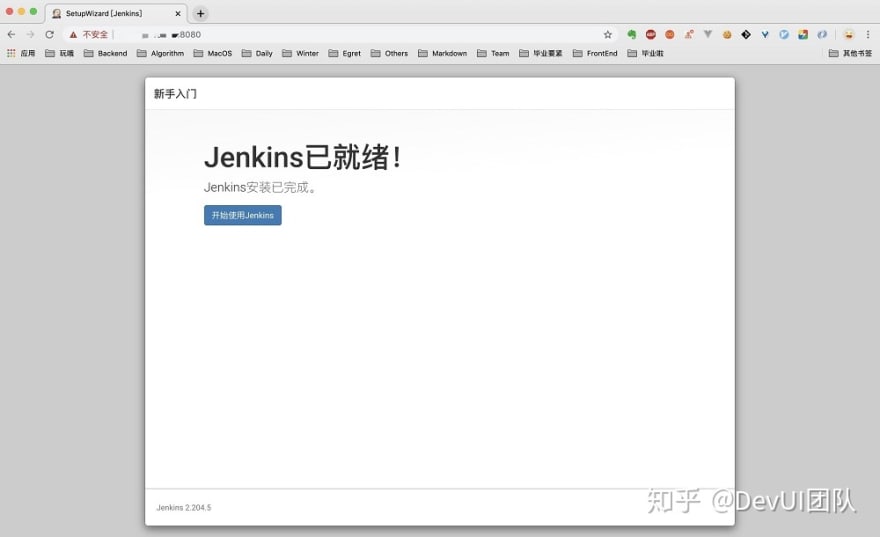
The Jenkins Ready page indicates this part has complete.
02 Code
Two copies of the code
We need to prepare two different pieces of code to verify whether the grayscale operation works. Here we choose Angular-CLI to create a project.
// install angular-cli
npm install -g @angular/cli
// create a new project, press enter all the way
ng new canaryDemo
cd canaryDemo
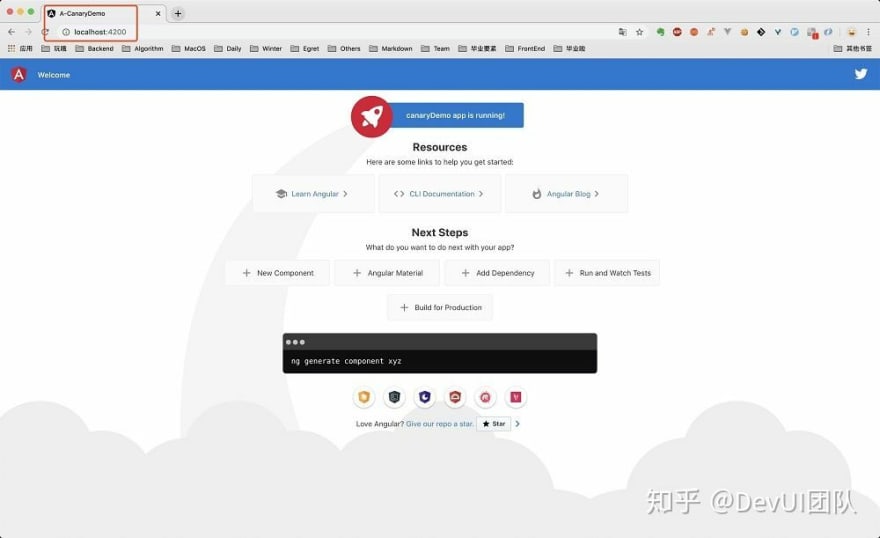
// after running this command, access http://localhost:4200 to view the page information
ng serve
Access port 4200 of localhost to view the page. The content will be refreshed in real time when we change the title of src/index.html in the root directory to A-CanaryDemo. In this example, we use title to distinguish the code to be deployed for different services during grayscale release.
Then, generate two packages. The titles of the two packages are A-CanaryDemo and B-CanaryDemo respectively. The two folders will be used as the old and new codes for grayscale release later.
ng build --prod
Config Nginx
At this point, the Nginx page is displayed when we access the IP address of the server. Now we want to access our own page, so we need to send the A-CanaryDemo package to certain location on the two servers. Here we put it in /var/canaryDemo.
// xxx stands for the ip of server
scp -r ./dist/A-CanaryDemo root@xx.xx.xx.xx:/var/canaryDemo
Go to the /var location on the server to see if the file already exists. If ok, modify the Nginx configuration to forward the request for accessing the server IP address to the uploaded page. As mentioned above, you can run the nginx -t command to view the location of the Nginx configuration file. In this step, you need to edit the file.
vi /etc/nginx/nginx.conf
Add the following information to lines 47 to 50. The traffic destined for the server IP address is forwarded to the index.html file in /var/canaryDemo.
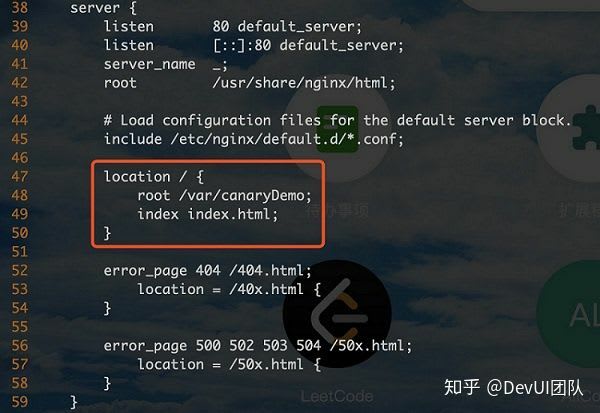
Save the modification and exit. Reload Nginx.
nginx -s reload
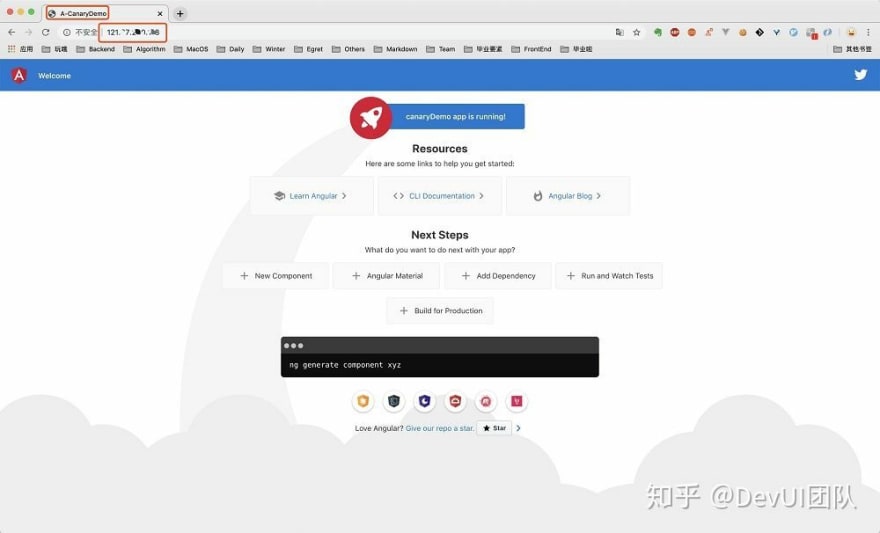
When you access the IP address of the server, you can see that the page has changed to the one we have just modified locally and the title is A-CanaryDemo. After the operations on both servers are complete, the page whose title is A-CanaryDemo can be accessed on both servers. Just like two machines that are already providing stable services in the production environment.
03 Defining a Grayscale Policy
In this part, we need to define a grayscale policy, describing the traffic will be routed to grayscale side or normal side.
For simplicity, a cookie named canary is used to distinguish between them. If the value of this cookie is devui, the grayscale edge machine is accessed; otherwise, the normal edge machine is accessed. The Nginx configuration result is as follows. In this example, 11.11.11.11 and 22.22.22.22 are the IP addresses of the two servers.
# Canary Deployment
map $COOKIE_canary $group {
# canary account
~*devui$ server_canary;
default server_default;
}

upstream server_canary {
# IP addresses of the two hosts. The port number of the first host is set to 8000 to prevent an infinite loop in Nginx forwarding.
server 11.11.11.11:8000 weight=1 max_fails=1 fail_timeout=30s;
server 22.22.22.22 weight=1 max_fails=1 fail_timeout=30s;
}

upstream server_default {
server 11.11.11.11:8000 weight=2 max_fails=1 fail_timeout=30s;
server 22.22.22.22 weight=2 max_fails=1 fail_timeout=30s;
}

# Correspondingly, configure a forwarding rule for port 8000, which is disabled by default, you need to add port 8000 to the ECS console security group
server {
listen 8000;
server_name _;
root /var/canaryDemo;

# Load configuration files for the default server block.
include /etc/nginx/default.d/*.conf;

location / {
root /var/canaryDemo;
index index.html;
}
}

server {
listen 80 default_server;
listen [::]:80 default_server;
server_name _;
# root /usr/share/nginx/html;
root /var/canaryDemo;

# Load configuration files for the default server block.
include /etc/nginx/default.d/*.conf;

location / {
proxy_pass http://$group;
# root /var/canaryDemo;
# index index.html;
}

error_page 404 /404.html;
location = /40x.html {
}

error_page 500 502 503 504 /50x.html;
location = /50x.html {
}
}
In this case, both grayscale traffic and normal traffic are randomly assigned to machines on sides of A and B. After this, we need to create a Jenkins task to modify the Nginx file to implement grayscale release.
04 Grayscale Release
Step Analysis
Before creating a Jenkins task for grayscale release, let's sort out which tasks are required to achieve grayscale release and what each task is responsible for. Grayscale release generally follows this steps. (Assume that we have two servers AB that provide services for the production environment, which we call AB Edge):
(1) Deploy new code to side A.
(2) A small portion of traffic that meets the grayscale policy is switched to side A, and most of the remaining traffic is still forwarded to side B.
(3) Manually verify whether the function of side A is ok.
(4) After the verification, most traffic is transferred to side A and grayscale traffic is transferred to side B.
(5) Manually verify whether the function of side B is ok.
(6) After the verification, the traffic is evenly distributed to side A and side B as usual.
Tasks Analysis
Based on the preceding analysis, we obtain the six steps of grayscale release, where (3) and (5) require manual verification. Therefore, we use the two tasks as the partition point to create three Jenkins tasks (Jenkins tasks are established on the A-side machine) as follows:
(1) Canary_A. This task includes two parts. Update the code of side A and modify the traffic distribution policy so that grayscale traffic reaches A and other traffic reaches B.
(2) Canary_AB . The code of side B is updated. The grayscale traffic reaches B and other traffic reaches A.
(3) Canary_B: All traffic is evenly distributed to A and B.
Create Tasks
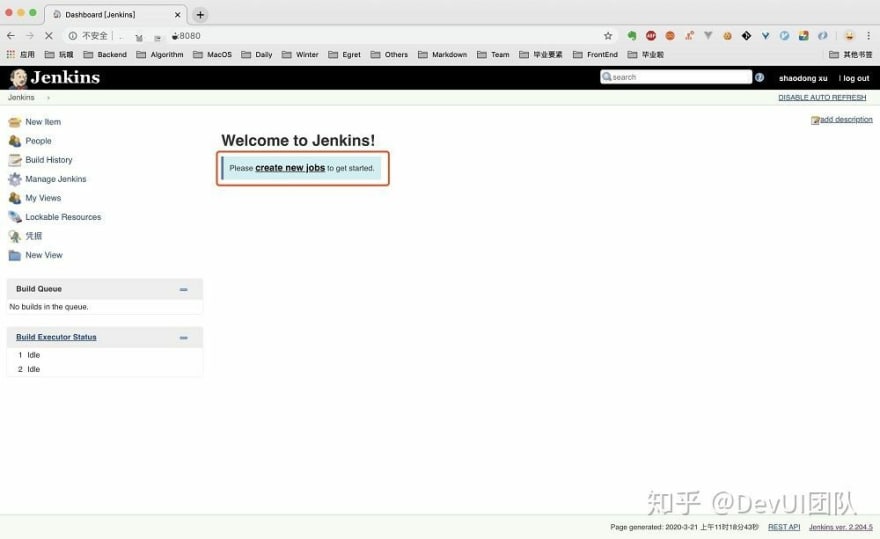
Create three Jenkins tasks of the FreeStyle type. Remember to use English names. It is difficult to create folders later with Chinese. Do not need to enter the task details, just save it. Then, we will config the detailed information about each task.
Config tasks
Click to enter each task and excute an empty build (Otherwise, the modified build task may fail to be started.) , and then we will config each task in detail.

Front-end projects need to be built and packaged. However, the low-cost 1-core 2 GB ECSs are unable to complete this step. Therefore, the generated production package is managed by Git. Each code update synchronizes the latest production package to GitHub. The Jenkins task pulls down the production package and places it in a specified location to complete deployment.
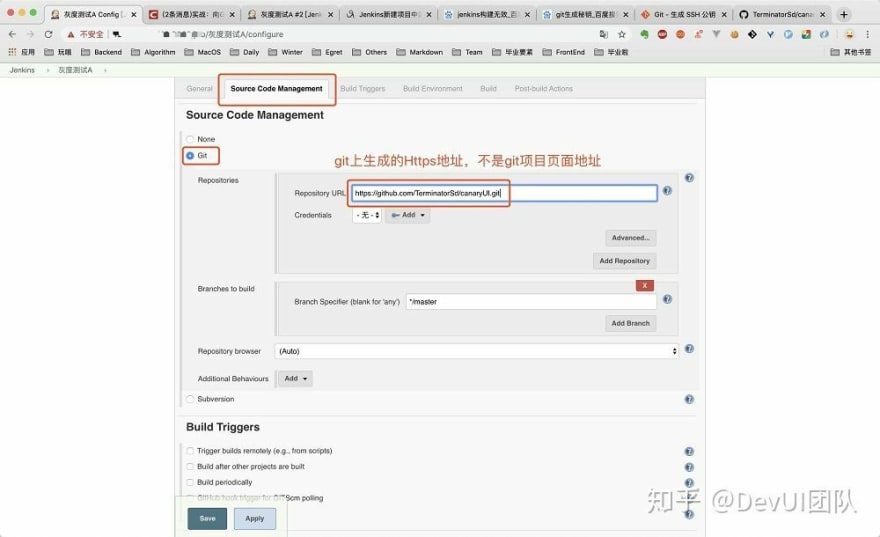
Now, config grayscale test A. As described above, we need to associate the task with the remote github repository. The github repository to be associated needs to be manually created to store the packaged B-CanaryDemo whic is named dist.
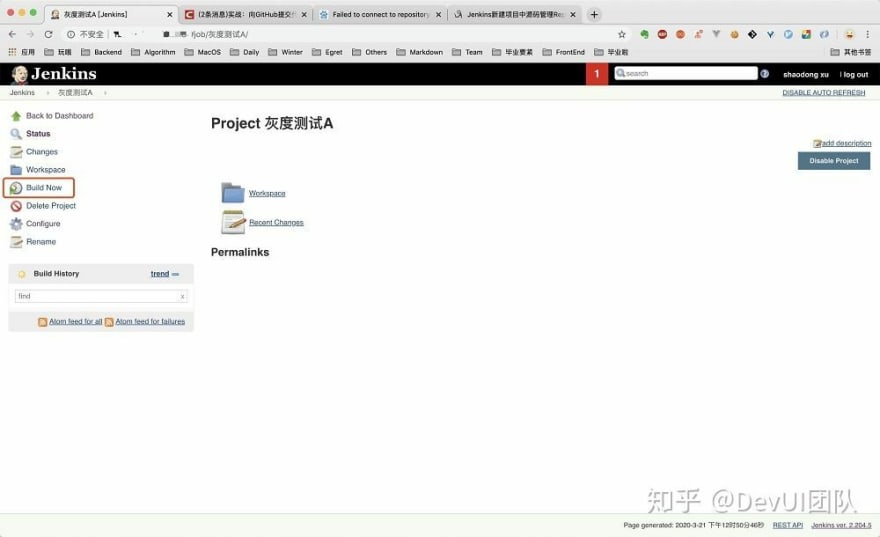
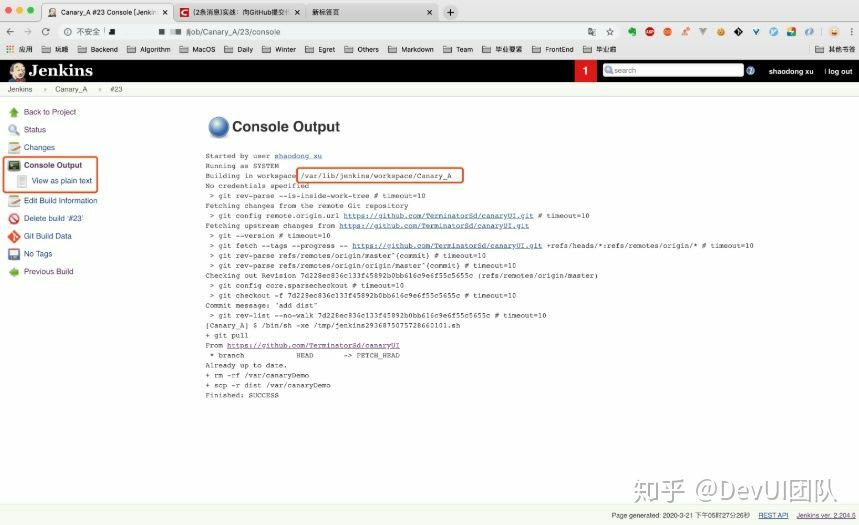
Run the build task command once. (The git fetch step is unstable and sometimes takes a long time) . Click into this build to view the Console Output. You can find that the Jenkins task is executed at /var/lib/jenkins/workspace/Canary_A on the server.
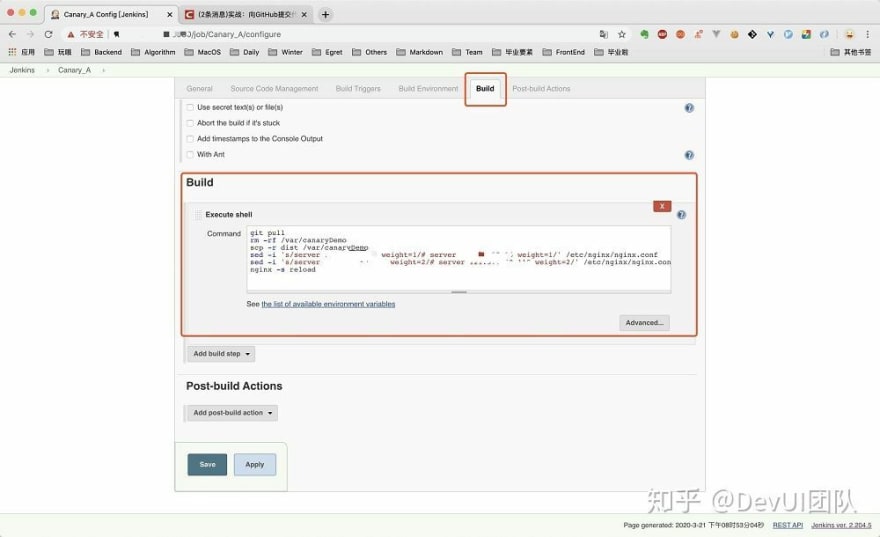
Continue to edit the grayscale test task A and add the build shell, including the command to be executed each time the task is executed.
(1) Pull the latest code first.
(2) Copy the dist directory in the root directory to the location where the code is deployed. In this article, the specified location is /var/canaryDemo.
(3) Modify the Nginx configuration so that grayscale traffic reach side A.
In step (3), the way of modifying the grayscale traffic is to selectively comment out content in the Nginx configuration file. A grayscale test A can be implemented as follows:
upstream server_canary {
# grayscale traffic reach side A
server 11.11.11.11:8080 weight=1 max_fails=1 fail_timeout=30s;
# server 22.22.22.22 weight=1 max_fails=1 fail_timeout=30s;
}

upstream server_default {
# normal traffic reach side B. To distinguish the configuration of this section from the server_canary configuration, set the weight to 2
# server 11.11.11.11:8080 weight=2 max_fails=1 fail_timeout=30s;
server 22.22.22.22 weight=2 max_fails=1 fail_timeout=30s;
}
User jenkins does not have sufficient permissions to execute commands. You can log in to the system as user root and change the ownership of the /var directory to user jenkins. Also remember to add the write permission on the /etc/nginx/ngix.conf file. The resulting shell command is as follows:
git pull
rm -rf /var/canaryDemo
scp -r dist /var/canaryDemo
sed -i 's/server 22.22.22.22 weight=1/# server 22.22.22.22 weight=1/' /etc/nginx/nginx.conf
sed -i 's/server 11.11.11.11:8000 weight=2/# server 11.11.11.11:8000 weight=2/' /etc/nginx/nginx.conf
nginx -s reload
Then, the grayscale test task A and grayscale test task B are configured in sequence.
The task of grayscale test B is to pull the latest code to side A. (Because our Jenkins tasks are based on side A) Copy the code in dist to the specified access location of Nginx on side B, and modify the Nginx configuration on side A so that grayscale traffic reaches side B.
git pull
rm -rf canaryDemo
mv dist canaryDemo
scp -r canaryDemo root@xx.xx.xx.xx:/var
sed -i 's/# server 22.22.22.22 weight=1/server 22.22.22.22 weight=1/' /etc/nginx/nginx.conf
sed -i 's/# server 11.11.11.11:8000 weight=2/server 11.11.11.11:8000 weight=2/' /etc/nginx/nginx.conf
sed -i 's/server 22.22.22.22 weight=2/# server 22.22.22.22 weight=2/' /etc/nginx/nginx.conf
sed -i 's/server 11.11.11.11:8000 weight=1/# server 11.11.11.11:8000 weight=1/' /etc/nginx/nginx.conf
nginx -s reload
The task in this step involves sending code from the A-side server to the B-side server, which generally requires the password of the B-side server. To implement password-free sending, you need to add the content in ~/.ssh/id_rsa.pub on server A to ~/.ssh/authorized_keys on server B.
When B goes online, the Nginx configuration on side A is uncommented so that all traffic is evenly distributed to side A and side B.
sed -i 's/# server 22.22.22.22 weight=2/server 22.22.22.22 weight=2/' /etc/nginx/nginx.conf
sed -i 's/# server 11.11.11.11:8000 weight=1/server 11.11.11.11:8000 weight=1/' /etc/nginx/nginx.conf
nginx -s reload
At this point, we have built a grayscale release environment from zero to one. After the code is updated, you can manually execute Jenkins tasks to implement grayscale deployment and manual tests to ensure smooth rollout of new functions.
Conclusion
The article introduces the necessary process of building a grayscale release environment from four aspects: server preparation, code preparation, grayscale policy formulation and implementation. The core of grayscale release is to distribute traffic by modifying Nginx config files. The content is quite simple, but the whole process from zero to one is rather cumbersome.
In addition, this demo is only the simplest one. In the real DevOps development process, other operations such as compilation and build, code check, security scanning, and automated test cases need to be integrated.






Top comments (0)