Originally published on the BigCommerce Developer Blog, January 5, 2019
Developing locally makes it fast and easy to test changes as you work, but no network access has its disadvantages. You might run into situations where you need a publicly accessible URL while you’re still in the development phase. Maybe you want to show your work to a colleague or client, or you need a secure, publicly available callback URL to interact with a web service. You could go ahead and upload your app to a hosting platform like Heroku, but then every time you make an update, you’d have to push those changes to your host server…not great.
Luckily, there’s ngrok. Ngrok is a handy tool that creates a secure, publicly accessible tunnel URL to an application that’s running on localhost. You can share the tunnel URL so others can view your work, or you can create publicly accessible routes to do things like complete an Oauth handshake.
In this tutorial, we’ll build a super simple Node app for BigCommerce and demonstrate how you can use ngrok to retrieve an Oauth token from the BigCommerce auth service and install the app in your store, all while still working locally. Consider this your comprehensive guide to testing, running, and authenticating BigCommerce apps locally.
What Is ngrok?
Ngrok is a free program that exposes a process running on your localhost to the public internet. When you start up ngrok, you specify which port your local server is running on and ngrok creates a secure tunnel URL to make the local application publicly accessible. Visit the ngrok URL and you’ll see the same thing you see when visiting http://localhost:myport.
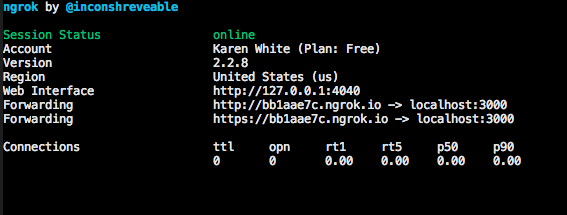
When you start ngrok, you’ll see a printout like this in your terminal:
Notice those two forwarding addresses? Ngrok provides both an https and an http version of the URL that points to localhost. Ngrok also provides a Web Interface dashboard that prints out details on any http traffic that’s going through your tunnel. This can be extremely useful during app development, especially when dealing with webhooks.
By default, ngrok generates a random subdomain every time you start it up. That’s fine for testing, but it can be a pain if you’re working on a project over a span of time and have to keep updating the URLs in your project every time you restart ngrok. If you sign up for a paid plan, ngrok allows you to designate a custom subdomain, so you’ll have the same URL every time.
Really, the best way to explain how ngrok works is to show you. Let’s download ngrok and spin up a quick app to run on localhost to demonstrate.
How To Set Up ngrok
Ready to get started? You can install ngrok using npm (my preferred method) or you can install manually.
Install with npm
Be sure you have Node.js installed on your computer. Run the following terminal command to confirm Node is installed and check your version:
node -vRun
npm install -g ngrokto install ngrok globally. You can now run ngrok commands from any directory.
Install manually
Head to https://ngrok.com/download and download the package that corresponds to your operating system.
Unzip the file somewhere easy to access, like the root folder.
You can either navigate to the folder where you unzipped ngrok to run it, or if you want to run ngrok from any location, you can move it to a directory which is in your $PATH, usually /usr/local/bin.
Start ngrok
Open a terminal window and navigate to the location where you unzipped ngrok. If you’ve installed ngrok globally or moved it to your $PATH, you can go ahead and run ngrok from any directory.
Run the following command to start ngrok and create a tunnel to localhost port 3000:
ngrok http 3000Press Ctrl + C to stop ngrok.
Create an Express App
Express is a framework for creating skeleton Node.js apps. It’s a great way to quickly create the file structure for your app.
Install the express generator command line tool with the following terminal command:
npm install express-generator -gCreate the app. We’re specifying that the app should use the handlebars view engine and be created in a folder called myapp:
express — view=hbs myappNavigate into the myapp folder:
cd myappInstall the dependencies:
npm installStart the app with the following command:
npm start
Tunnel ngrok to localhost
Time to put the pieces together. We’ve installed ngrok and created a skeleton app using Express. Now, we’ll start the application and ngrok to see the tunnel URL in action.
Open a terminal window and navigate to your myapp directory. Run
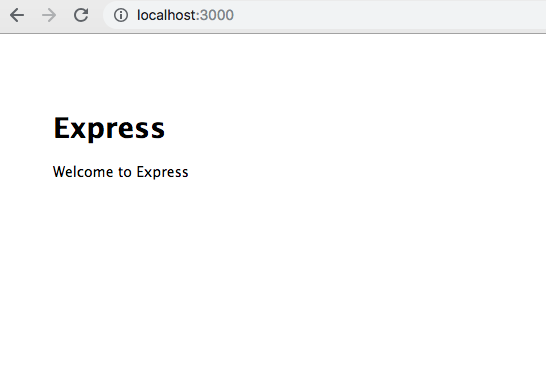
npm startto start the app. By default, Express generator apps start the server on localhost:3000. If you want to change the port, it’s defined in the app’s bin/www file on line 15, but we’ll leave it on port 3000 for now.Open a browser window and navigate to http://localhost:3000. You should see the Express app home page:
Open a new terminal window (leave the first terminal window running) and start ngrok on port 3000:
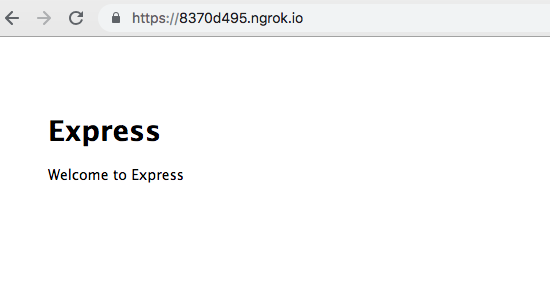
ngrok http 3000Copy the https forwarding URL from the terminal and paste it into a new browser tab. You should see the same Express app homepage that you saw on your localhost URL:
Hooray! This may not look like much yet, but we’ve already demonstrated a powerful feature of ngrok. You could email your ngrok forwarding URL to a friend, and they’d see the same Express app homepage (as long as you’ve got ngrok running in your terminal). That’s pretty cool, but next we’ll show how you can use ngrok to do even more. We’ll create a forwarding URL that will allow us to create publicly accessible routes within the app so we can complete the Oauth flow necessary to install the app in a BigCommerce store.
BigCommerce App Authentication
Before we move on, it helps to have a little background on BigCommerce app authentication, to illustrate why ngrok is needed to install an app that’s still hosted locally.
BigCommerce apps use Oauth to programmatically generate an API token against a store during installation. Once an app has received an API token for a store, the app can save the token in a database for reuse when calling the API.
The process to receive an Oauth token requires a little back and forth between BigCommerce and the app host. First, the app needs to request a temporary auth code from BigCommerce. When BigCommerce sends the temporary token, it sends along a couple of other pieces of information as well: the scopes that have been authorized for the API token and the hash, or identifier, for the store that’s installing the app.
Next, the app posts back a response containing a series of claims that let the BigCommerce auth service know it’s okay to return a real Oauth token. Those claims include the temporary auth token received previously from BigCommerce, the store hash, the scopes, and a Client Id and Client Secret that were provided during app registration. If everything checks out, the BigCommerce auth service sends back a permanent Oauth token and the app shows ‘Installed’ in the store control panel.
All of these network requests need to happen over publicly accessible URLs. When testing app installation and authentication, we either need to host the app on a server, or a platform like Heroku, or use a tool like ngrok to create tunnel URLs from localhost.
Register the App
To install an app in a BigCommerce store, you’ll need, not surprisingly….a store. Sign up for a free trial at https://www.bigcommerce.com/.
Then, sign up for a Dev Tools account at https://developer.bigcommerce.com/ by clicking Create Account in the top right corner. Be sure to use the same email address that you used to sign up for your trial store. Using the same email address links your trial store and your Dev Tools accounts, so any apps that you create in Dev Tools will be available for installation in the Draft Apps area of your store’s control panel.
Dev Tools is the workspace for creating BigCommerce apps. It’s where you go to register a new app and manage app listing details if you’re a vendor in the App Marketplace. For now, we’ll just do the minimum steps to register a new app and get a Client Id and Client Secret.
Log in to Dev Tools and click the orange Create an app button.
Enter a name for your app. This could be anything — My Test App, Node App, whatever you’d like.
Click Create App.
Click the Edit App icon on the app you created.
On Step 1, you can skip filling out the profile form. This just collects information that BigCommerce needs for developers who want to submit their app to the App Marketplace. It’s not required, but I do like to go ahead and upload an image to the App summary area at the bottom. The image will show on the card for your draft app in the control panel. Again, not required, but it does look nicer.
Skip Step 2: App Details and proceed to Step 3. App details are required only for developers who want to submit an app to the Marketplace.
On Step 3, fill in the Callback URL fields, replacing example.com with your https forwarding URL from ngrok. For example:
Auth: https://4022ffe4.ngrok.io/auth
Load: https://4022ffe4.ngrok.io/load
Uninstall: https://4022ffe4.ngrok.io/uninstallClick Next until you reach Step 6, then click Update and Close.
Create Routes in Express
During app registration, we defined three callback URLs: Auth, Load, and Uninstall. These URLs tell BigCommerce: when someone installs, loads, or uninstalls my app, here’s where you should send the http request for that action. Next, we’ll create those routes in the Express app to handle the authorization, load, and uninstall requests from BigCommerce.
A route listens for an http request, a GET or a POST, to a particular path and then does something, like running a function or calling a response method, when the http request happens.
Create the Auth route:
Install the BigCommerce Node Client by running npm install node-bigcommerce in your myapp directory. This package was written by the developers at Conversio, and is used to authenticate with and call the BigCommerce API.
Create a new file in the routes directory called auth.js.
Paste the following into the file contents:
const express = require('express'),
router = express.Router(),
BigCommerce = require('node-bigcommerce');

const bigCommerce = new BigCommerce({
clientId: 'your Client Id from app registration',
secret: 'your Client Secret from app registration',
callback: 'https://your-ngrokURL/auth',
responseType: 'json'
});

router.get('/', (req, res, next) => {
bigCommerce.authorize(req.query)
.then(data => console.log(data))
.then(data => res.render('auth', { title: 'Authorized!' })
.catch(err));
});
module.exports = router;
Here, we’re requiring the Express router and BigCommerce Node Client at the top of the file and instantiating a new BigCommerce config object.
Take a look at the function below the BigCommerce config object. With router.get(‘/’, (req, res, next), we’re telling the router, when you receive a GET request to this path (this path is /auth, because we’re in the routes/auth.js file), call the authorize function from the Node Client dependency.
The authorize function returns a data object from BigCommerce containing the store hash, the user’s email address (to identify the user), and the Oauth token associated with the store. If we were to develop this app further, we’d want to save that information to a database for reuse.
Once we return the Oauth token, we call res.render to render a view called ‘auth’ that passes in the text “Authorized!”
Replace the values for your Client Id, your Client Secret, and your ngrok tunnel URL.
Create the ‘auth’ view by creating a new file in your Views folder called auth.hbs.
Paste the following into the file contents:
<h1>{{title}}</h1>
Create the Load route:
Create a new file in your Routes folder called load.js
Paste the following into the file contents:
const express = require('express'),
router = express.Router(),
BigCommerce = require('node-bigcommerce');
const bigCommerce = new BigCommerce({
secret: 'your Client Secret',
responseType: 'json'
});

router.get('/', (req, res, next) => {
try {
const data = bigCommerce.verify(req.query['signed_payload']);
console.log(data);
res.render('welcome', { title: 'Welcome!'});
} catch (err) {
next(err);
}
});

module.exports = router;
Replace the value for ‘secret’ with your Client Secret. Similar to the /auth route we created, we’re specifying a callback function to execute after a GET request to the /load route. We’re calling the verify function which validates that the request came from BigCommerce and identifies the store and user. When that’s successful, we console log the data object and render the view called ‘welcome.’
Create the ‘welcome’ view by creating a new file in your Views directory called welcome.hbs.
Paste the following into the file contents:
<h1>{{title}}</h1>
Create the Uninstall Route:
Create a new file in your Routes directory called uninstall.js
Paste the following into the file contents:
const express = require('express'),
router = express.Router(),
BigCommerce = require('node-bigcommerce');
const bigCommerce = new BigCommerce({
secret: 'Your Client Secret',
responseType: 'json'
});

router.get('/', (req, next) => {
try {
const data = bigCommerce.verify(req.query['signed_payload']);
console.log(data);
} catch (err) {
next(err);
}
});

module.exports = router;
- Replace the value for ‘secret’ with your Client Secret. In the /uninstall callback, we’re using the verify function to decode the signed payload sent from BigCommerce and logging the payload identifying the user who uninstalled the app. We’re not rendering a view in this case, because any HTML sent back to BigCommerce wouldn’t be rendered by BigCommerce.
Load Router Modules in App.js
Before we can use the route modules we’ve created, we need to mount the router modules on a path in the main app file.
- Add the following near the top of your app.js file:
var auth = require(‘./routes/auth’);
var load = require(‘./routes/load’);
var uninstall = require(‘./routes/uninstall’);
- Locate these lines, near the middle of the app.js file:
app.use(‘/’, index);
app.use(‘/users’, users);
Beneath them, add:
app.use(‘/auth’, auth);
app.use(‘/load’, load);
app.use(‘/uninstall’, uninstall);
Install the App
Now that we have the app wired up to the appropriate route paths, it’s time to install the app in your store.
Start the Express app by running the
npm startcommand in your myapp directory.Open a second terminal window and start ngrok on port 3000:
ngrok http 3000
Be sure to update the ngrok URL in Dev Tools to match the ngrok URL in your current session.
Log in to your BigCommerce store and navigate to Apps>My Apps>My Draft Apps tab.
Click Learn More on your app card and then click Install. You should see your app’s Authorized! Message. The Authorized! view indicates that we’ve successfully received an Oauth token from BigCommerce.
Test the Load route by returning to the My Apps section in the control panel. Now that the app is installed, you’ll see two new buttons: Load and Uninstall. Click the Load button to render the Welcome view.
Now, click the Uninstall button. The app will be removed from the My Apps section. Check your terminal for the auth, load, and uninstall data objects that were logged to the console.
FAQ
I’ve installed ngrok. Why am I getting ‘command not found’ when I try to start it?
You’re likely not running ngrok from the working directory for the executable file. You can either move the file to your $PATH directory, or navigate to the directory containing the ngrok .exe file. For example, if you unzipped ngrok in your root directory, you can run it using:
cd ~
./ngrok http 3000
How can I use ngrok to test webhooks?
Webhooks allow you to listen for events that happen on a third party’s platform. For example, your app might want to receive a notification when a BigCommerce product’s inventory changes so your app can take an action of some kind.
When you register a webhook, you can provide an ngrok tunnel URL as the destination URL. When the webhook event happens, you’ll receive the webhook data object through your tunnel. You can display the details of the data object in your ngrok Web Interface dashboard and handle the event within your app.
For more details on testing webhooks with ngrok, see this tutorial on registering and testing webhooks.
Why do I get a 502 bad gateway error when I visit my ngrok tunnel URL?
Ngrok expects a web server to be running on localhost. If there isn’t a server running, you’ll see a 502 error accompanied by a message that ngrok failed to complete the tunnel connection. By default, Express generator apps start a server on port 3000, so you’ll just want to make sure you start your app before making requests to your ngrok URL.
Summary
In this tutorial, we installed ngrok and used it to tunnel the routes that we registered on our locally hosted app to publicly accessible callback URLs. Great job! You’re now well on your way to building and testing your apps locally — no need to deploy your changes to an app host while you’re still in the development phase.
Use this as a starting point to build out more complexity in your app: save your Oauth token to a database and use it to call the BigCommerce API or create view templates that provide a UI for your app users. Looking for Hello World apps in Python, PHP, or Ruby? Visit the BigCommerce Tools & Resources page for sample apps and API clients in other languages.
Let us know what you’re working on, ask us questions, send us your feedback! Comment below or tweet us @BigCommerceDevs


Top comments (1)
Nice, detailed coverage of ngrok.
Interested devs can also have a look at webhookrelay.com, it's pretty similar in many regards.