this stories is the third part of series Clone FireBase web-ui with React and Bit here the list of previous part
First part: Building a Reusable Firebase Facebook Login Component
Second part: Building a Reusable React Login Component
In this chapter, we will continue with our FireBaseWeb-UI clone in React series and integrate Phone Authentication with OTP into it. In order to understand this tutorial properly, it is recommended to go through previous chapters of this tutorial series. Here, we are going to implement the Phone authentication component with React and FirebaseWeb-UI and push the code to Bit’s cloud where it could be shared, discovered and used by others or even collaborated on.
So, let us begin!
What you’ll learn …?
- How to use Bit.
- How to use Bit along with React.
- How to use React router DOM (Document Object Model).
- How to use Firebase phone authentication.
Requirements
Here’s a complete list of plugins, packages, and services we’re going to need to gain something from this tutorial:
- Nodejs v8.x.x or higher installed along with NPM/yarn.
- VScode or your favorite IDE.
- Bit and Firebase account (free tier).
- React starter boilerplate project using create-react-app command.
Brief summary
Here, we have a summary of steps we are going to perform in order to implement Phone authentication component in our React project:
- Creating React component following bit component guide.
- Implement React router DOM for simple navigation.
- Share the component on Bit.
- Import component from Bit and add new feature, i.e. re-send SMS then push the component back to Bit.
Creating React component
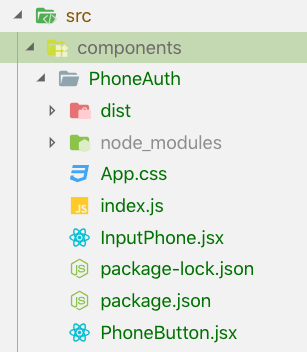
Firstly, we need to create a new component in src/components/PhoneAuth. Then, we need to add App.css CSS file that we got from the previous part of this tutorial series. Next, we need to create three files, an index.js for an entry point, InputPhone.jsx to handle phone number configurations and PhoneButton.jsx to display a phone button that will have the function to navigate to InputPhone component. The overall structure of directory files is shown below:
Activate Firebase Phone Authentication
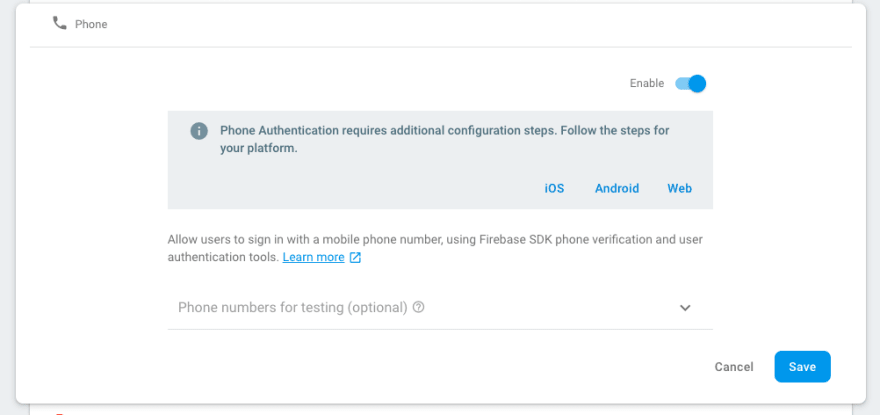
Here, we need to go to the firebase console, Then, navigate to > authentication > authentication method then activate Phone authentication as shown in the console screenshot below:
Now, we can use Phone authentication with Firebase.
Working on component
In this step, we are going to start working on our Authentication component.
Setup react-router-dom
Here, we need to set up the react-router-dom in order to navigate to different files. We are going to use index.js file for the entry point. Then, we register a route to make navigation between PhoneButton to InputPhone components.
Firstly, we need to install react-router-dom package using the command given below:
npm install react-router-dom
Then, we need to activate react-router-dom package eat the main root index.js by importing BrowserRouter component from the react-router-dom package as shown in the code snippet below:
Here, we are importing BrowserRouter component and wrapping the App component using it.
Then, we need to copy the code below and paste to src/components/PhoneAuth/index.js.
Here, we are importing Switch and Route component from the react-router-dom package.
Route component is used to define URL location and Switch component is used as a wrapper to Route component.
Then, we need to define a route for our two-components that we created before, which are PhoneButton and InputPhone components.
For the index route, we are using PhoneButton component.
For the input_phone route, we are using InputPhone component.
Now, we can navigate between these two components.
PhoneButtton.jsx
In PhoneButton.jsx file, we are going to implement a phone button. Then, we are going to use this component to display the phone button and navigate to InputPhone component.
To implement this, we need to open PhoneButton.jsx file and paste the code in the code snippet below:
Here, we are using Link component from react-router-dom in order to create a link to InputPhone Component.
Then, we import our component to App.js file and implement it to render() function as shown in the code snippet below:
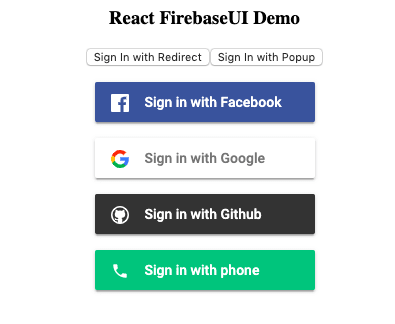
Now, we need to start the server to see the result screen. After starting the server, we will see the following result in our screen:
InputPhone.jsx
Our main work to be done is in InputPhone component. We are going to use this component to handle sending SMS and verify OTP. For this, we need to open src/components/PhoneAuth/PhoneInput.jsx and paste the code given in the code snippet below:
Here, the code given in the code snippet above is used to construct a form and initialize firebase in our project.
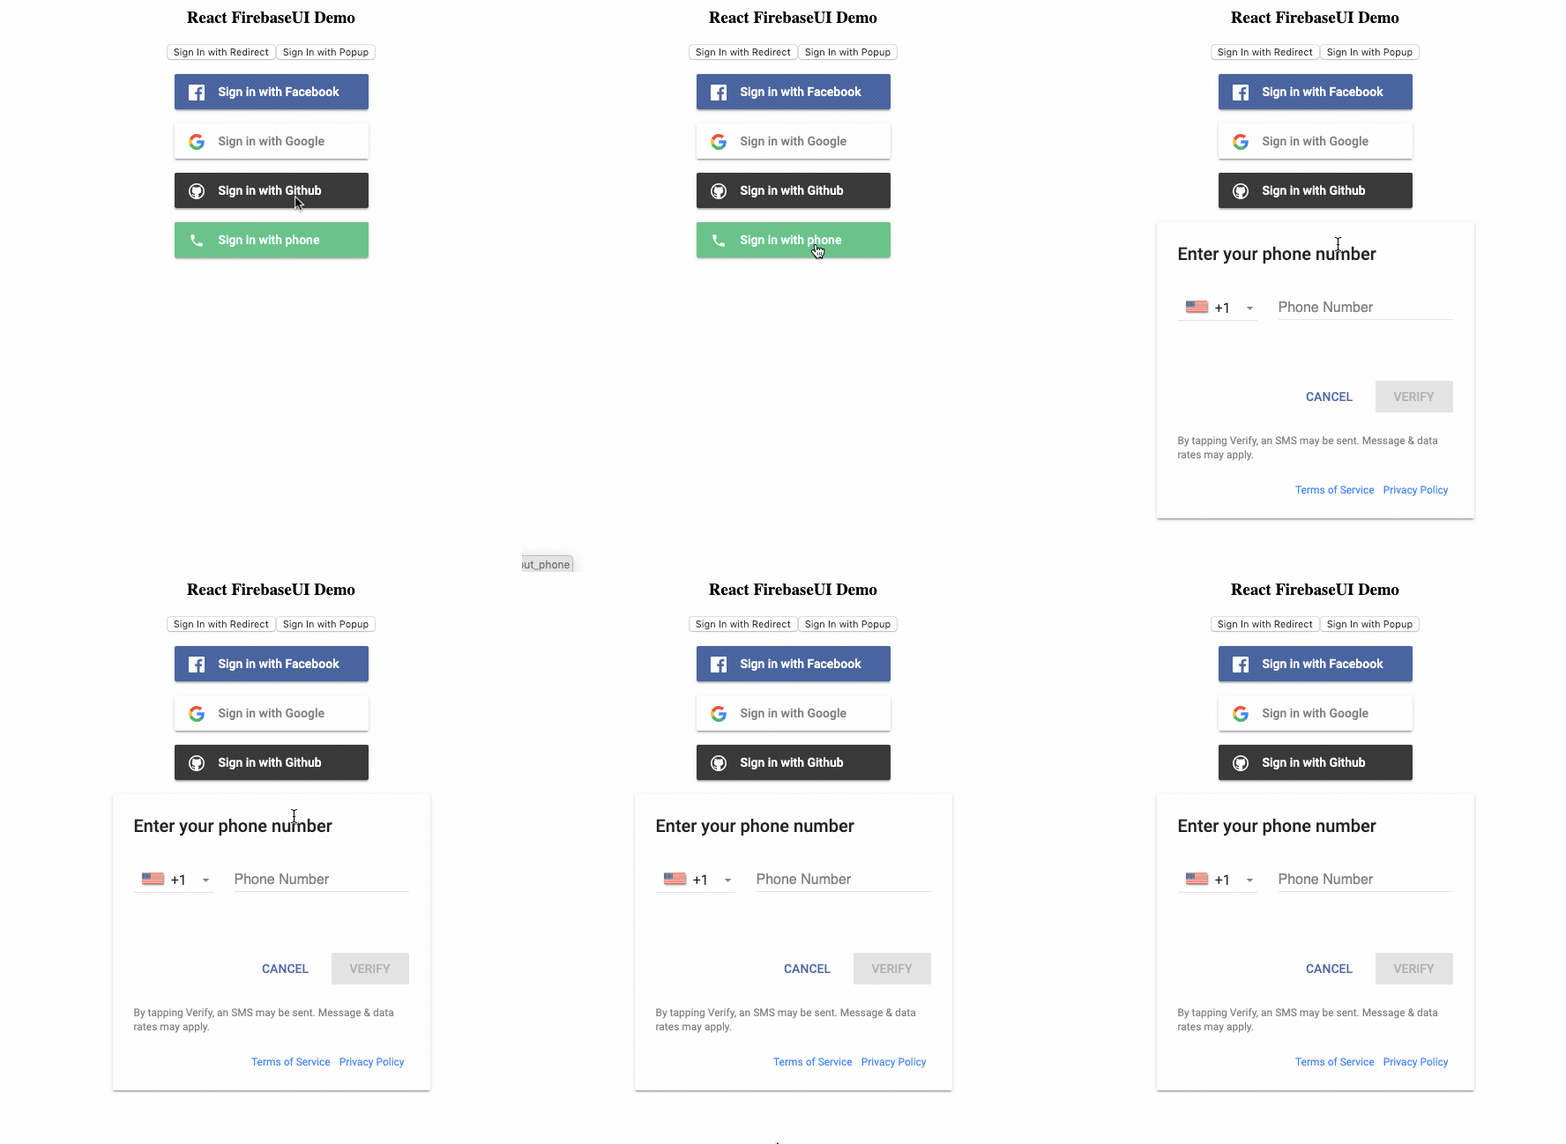
Now, If we restart the server and test the screen buttons, we will get the following result:
Here, when we click on Sign in with phone button, we will get a form and verify button to verify with firebase.
Getting Form Value
In this step, we need to get the form values and set it to the internal state variables.
Here, we need to create an internal state named phone_number then attach it to Input field with this.state.value to set the value of the state.
Then, we need to create a new function named handlePhoneChange() in order to get value from the input field and when onChange event is fired we set a new value to the state variable.
Send SMS with Firebase
Next, we are going to implement ‘send SMS’ feature with firebase. Here, before implementing send SMS feature, we have a requirement to install Recaptcha firebase to prevent fraud and spam on their service.
For this, we need to create componentDidmount and paste the code given in the code snippet below:
Here, we need to set up CSS id named Recaptcha-container to place Recaptcha and define size, callback function with success and error. Then, we need to render on target and last assign object to window object that makes it global, and we can use the object across the function.
Then, we need to place a new divelement to the location that we want to render Recaptcha:
<div id="recaptcha-container" />
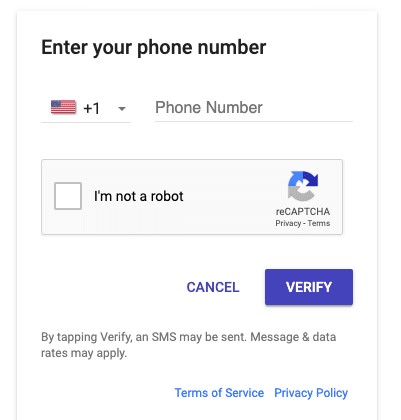
As a result, our form will appear as shown in the emulator simulation below:
For better functioning, we need to disable VERIFYbutton until Recaptcha is verified successfully. We can do this using the following code:
Here, we need to create a new state named isButtonDisabled and toggle the state with Recaptcha callback. Then, we need to place the isButtonDisabled state at the button in the disabled event as shown in the code snippet below:
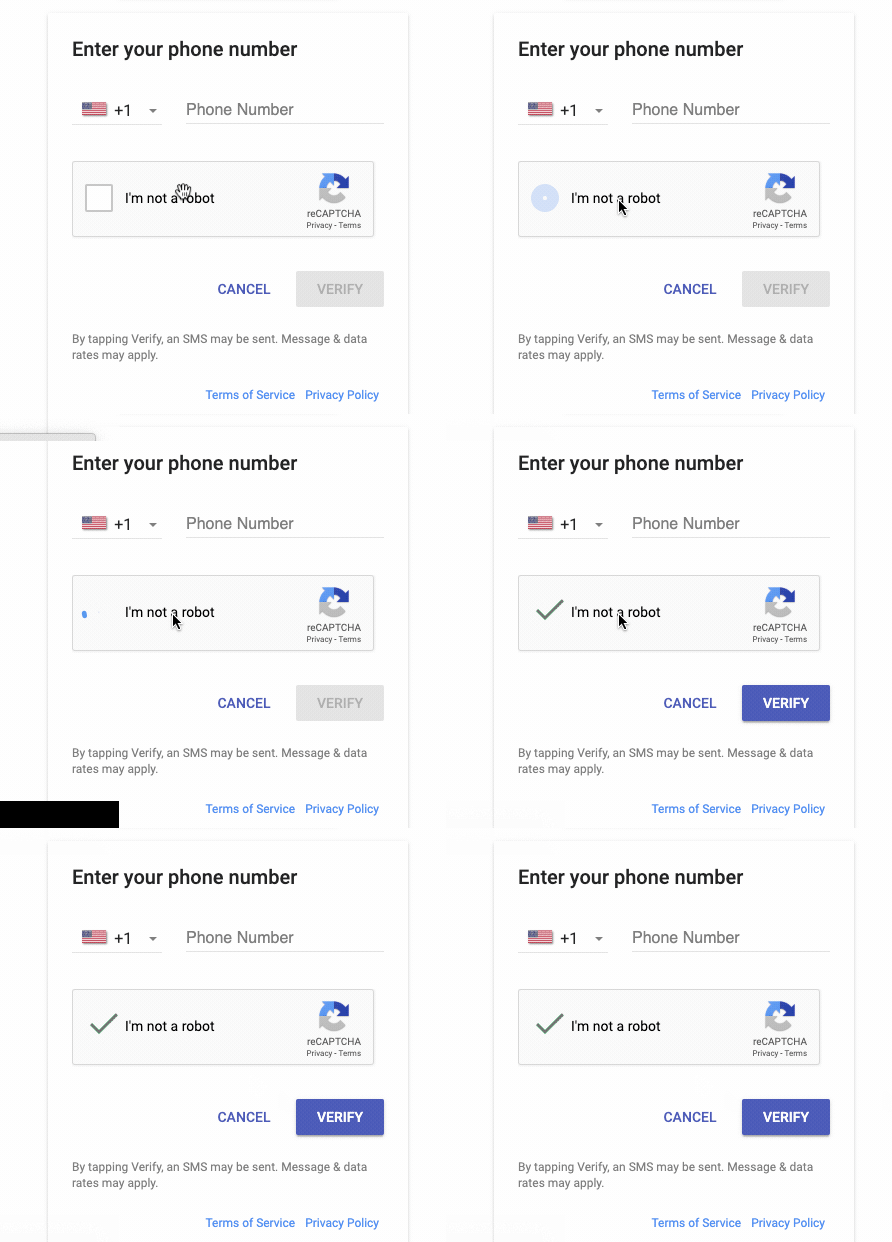
As a result, the VERIFY button remains disabled until the Recaptcha is verified as shown in the emulator simulation below:
Now, we have the Recaptcha that we required for the firebase.
Next, we need to implement Phone authentication.
For this, first, we need to create a new function named handleLogin() as shown in the code snippet below:
Here, we need to grab the Recaptcha object and call signInWithPhoneNumber then pass two required parameter phone_number and ReCaptcha object i.e. appVerifier. On success, we need to print result i.e. conformationResult.
Submit form
Next, we need to implement the functionality to submit the form. But the problem is that the page reloads after we hit the submit button and submit the form. To prevent the form reload, we add function name handleSubmit()and add the function to
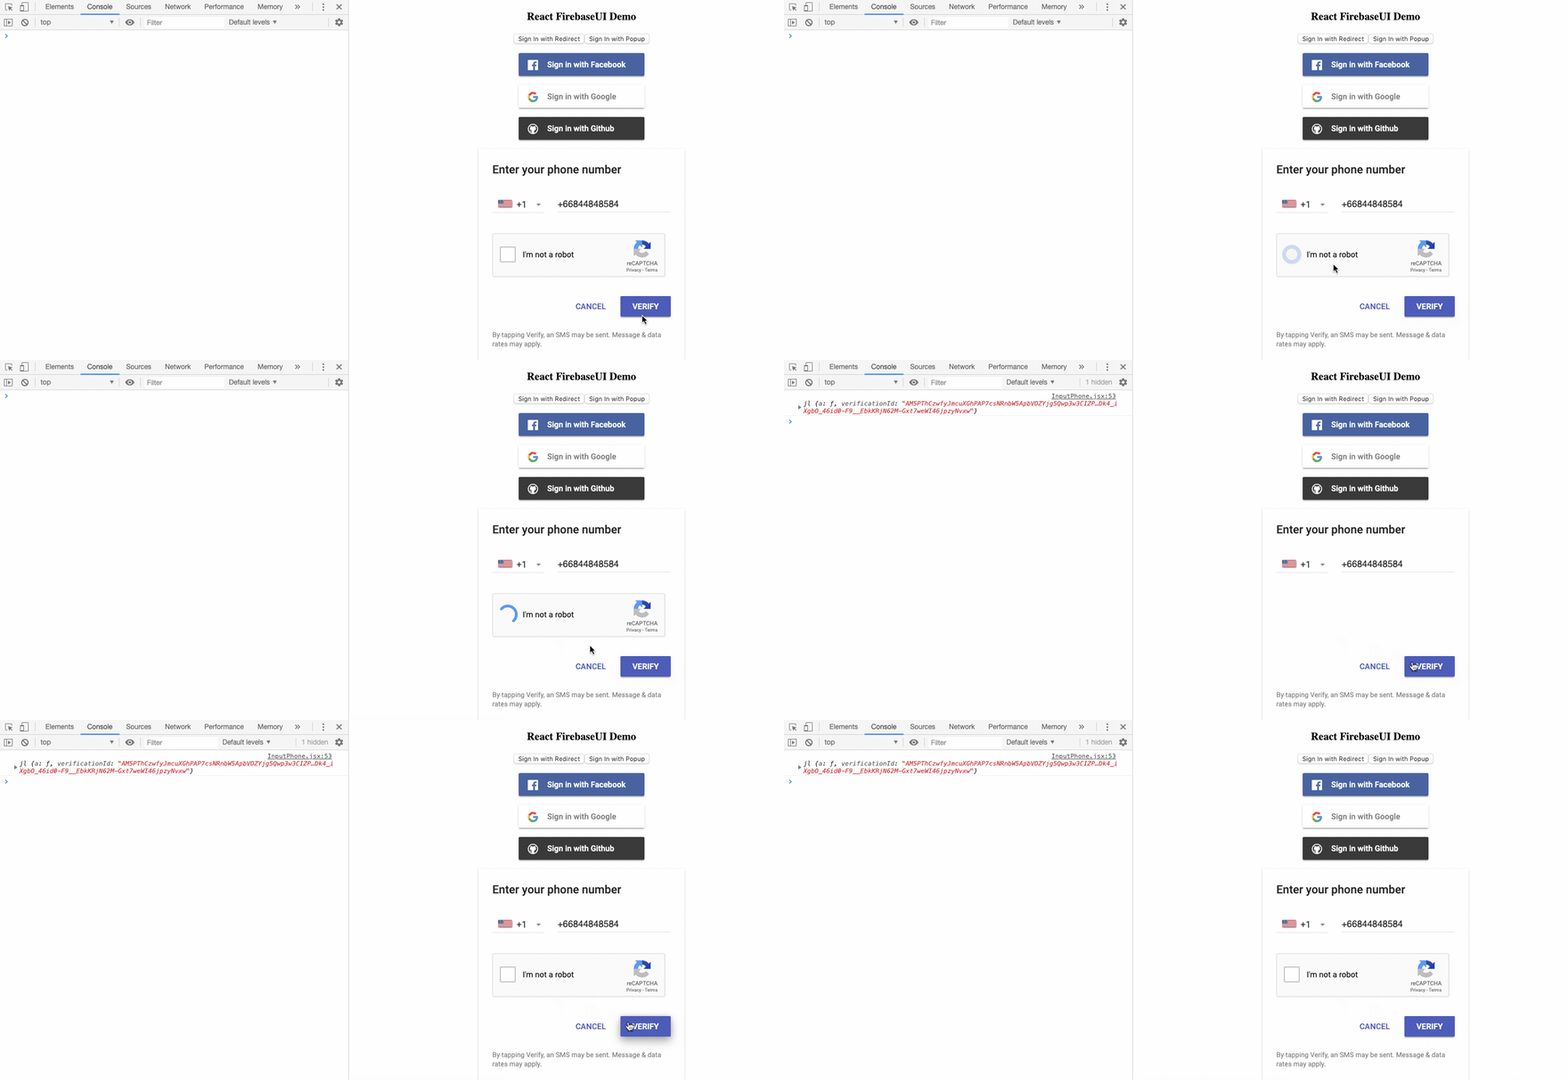
element wrapping the button we implemented before. The code for this is given in the code snippet below:Next, in order to trigger handleLogin function, we need to add onClick event to verify the button. Now, we need to test its functionality. We can see the result of testing the button below in the simulation:
Here, we received a successful result.
Next, we need to implement the verifying process.
Verify OTP
Here, we need to verify the authentication using OTP. First, we need to store a result object to window object which makes it global and we can use the object across the function. Then, we need to set a state variable as sendOTP as shown in the code snippet below:
Here, to verify OTP, we need to create another form in the same component and toggle hide and show using sendOTP state.
For the verification process, we need to do the same on sending SMS process. First, we need to create two new state variables. For this, we can copy the code given in the code snippet below and paste to src/components/PhoneAuth/PhoneInput.jsx.
Here, sendOTP state is used for toggle between “input phone number” form and“ verify SMS” form. The default value of sendOTP state is false.
otp state is used to handle OTP data that we are getting from the form.
handleOTPChange() function is used in order to get form value.
handleOTPCheck function is used to check OTP object that comes from the result of handleLogin function that we mentioned before. Then, we pass OTP value from state and display the result in the console.
Next, we use sendOTP state to toggle display between PhoneInput form and OTP verify form. Then, we need to add the function that we created before to form and button which is same as we did in PhoneInput form.
Now, we have configured everything. Next, we need to check if everything is working properly.
As we can see, we can the expected result in the browser console. Next, we need to check the result in the Firebase console as well.
As we can see in the above screenshot, we get the result as expected in firebase console as well.
Finally, we have successfully implemented the Firebase phone authentication component in React.
Next, we need to push our Authentication component to Bit.
Make it Reusable and Sharable with Bit
Share reusable code components as a team · Bit
To make our code reusable and shareable, we’ll do some restructuring and move all our code to ‘components’ (this is not mandatory but a better practice, when using Bit). Then, we’ll export it (with all its dependencies), to a component collection on Bit’s cloud, to be shared with others and easily reused.
In this step, we are going to push the new component i.e. Phone Authentication component to Bit. We already have our Bit package installed and connected to our Bit account. So, we need to create a collection and start by tracking the component.
Note: The first and second step features an installation of Bit account. These steps can be skipped if you already have a Bit account.
1. Create a collection and initialize Bit on a project
Here, we need to create a new collection on Bit to which we are going to push all our component code. We use the Bit “create collection” configuration page to create a new collection named “firebase-auth-collection”.
First, we need to install Bit CLI
Using NPM,
npm install bit-bin --global
Then, we need to go to the project directory in our Bit CLI and perform the commands bit init and run bit login on Bit CLI
2. Configure a React compiler for our component
When we configure a compiler we tell Bit to capsule the component with it. Capsule components together with their compilers give us the freedom to use, build and test them anywhere. This includes being able to run the code in any of the applications we’d like to use the component in, as well as running it in the cloud to enable features such as the live component playground.
bit import bit.envs/compilers/react --compiler
3. Track components
We need to track our component by using the following command in your command prompt or Bit console:
bit add src/components/PhoneAuth
4. Tag and export to our collection on Bit’s cloud
Here, we are going to set a version to all tracked components, and export to this collection using following bit command:
bit tag --all 0.0.1
Finally, we need to perform following bit command to push our component code to bit collection that we created before:
bit export krissnawat.firebase-auth-collection
Now, our package is live on Bit.
Using Bit Component
To use Bit component, we need to import Bit component using the Bit import command which is given in the code snippet below:
Here, we need to open another project and use the command:
bit import krissnawat.firebase-auth-collection/phone-auth --path src/components/PhoneAuth
Now, all the files imported should be placed in the component directory as shown below:
Now, we can use the component successfully imported from the Bit.
Update component and push back to Bit
In this section, we learn how to update component code and create a new bit component with the feature of resending OTP after 20 seconds.
First, we need to install react countdown package using the command:
yarn add react-countdown-now
Then, we need to create a conditional renderer function with a countdown.
Then, we need to include component to verify form footer.
As a result, we will see the following simulation on the screen:
Now, everything is done. Next, we need to push the new component back to Bit using the command:
bit export krissnawat.test-collection
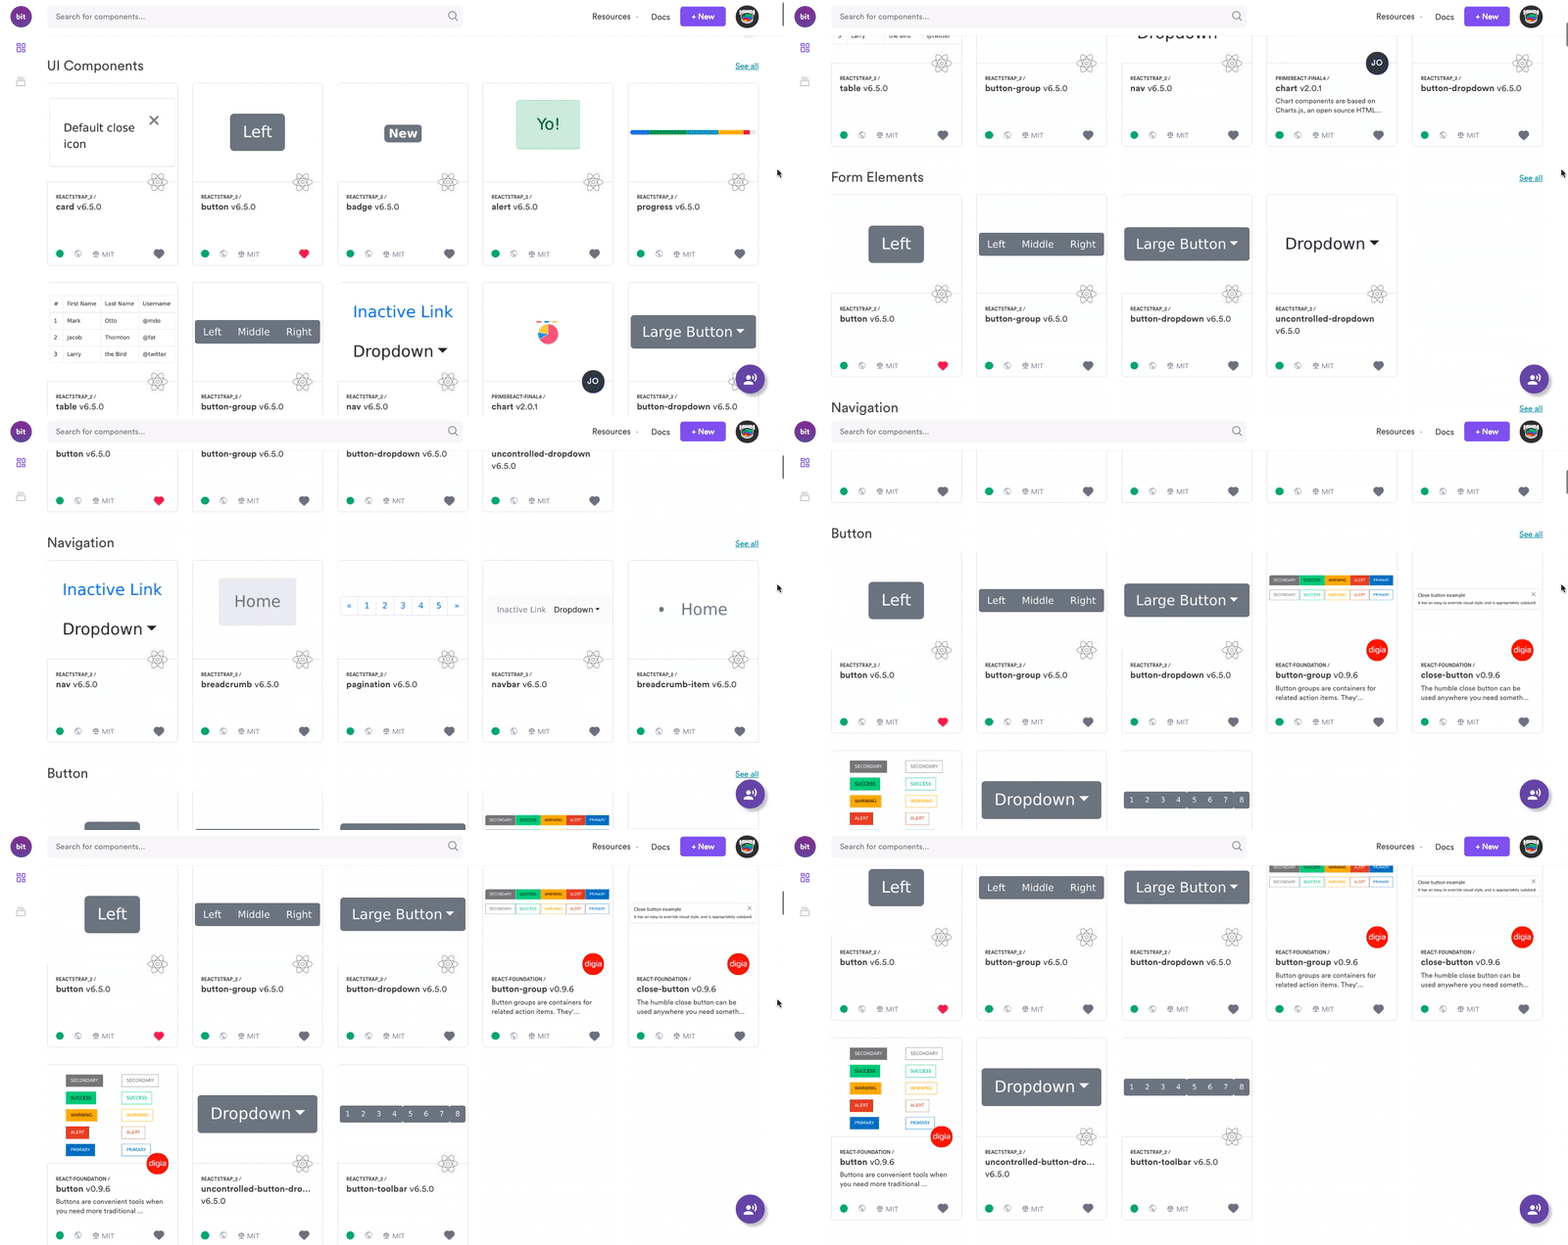
Now, as we can see, our component is live on Bit as shown below:
Recap
In this tutorial, we learned how to implement firebase phone authentication in firebase using react-router-dom along with Recaptcha. We also learned how to using Bit for reusable component and finally implemented the countdown timer. In the next chapter, we are going to implement Firebase email link authentication.
Related Stories
- 5 Tools for Faster Development in React
- 11 React UI Component Playgrounds for 2019
- 9 React Libraries and Tools to Master your Component Workflow
Encapsulates components with Bit to run them anywhere across your projects and applications
Bit encapsulates components in your projects with all their files and dependencies, so they can run anywhere across your applications.
Build faster by making your components reusable out-of-the-box, and collaborate as a team to share and discover components. No refactoring or configurations needed, just share components and build truly modular apps.






Top comments (3)
Can't see any code ?
bit.dev/krissnawat/test-collection...
Great tutorial! Thanks!