Almost any mobile app published to the PlayStore or AppStore should be localizated in different languages in order to get more clients as possible from anywhere in the world.
MvvmCross is a 'MVVM framework' written exclusively to work with Xamarin and provides an easy way to share the localized resources among the different platforms using the same .resx files. In this post I will show you how to share localized resources between an Android and an iOS apps.
Let's localize it!
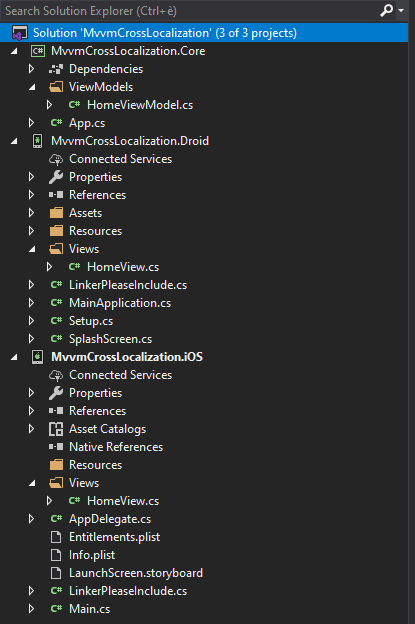
Our starting point is the standard MvvmCross solution structure, with a separate project for each platform and the Core project with the common stuff. I created a single view called HomeView with its view model HomeViewModel on both platforms:
The HomeViews contain only a label in the middle of the screen with the text "Hello". Below the screenshots and the UI definition:
<?xml version="1.0" encoding="utf-8"?>
<androidx.constraintlayout.widget.ConstraintLayout
  xmlns:android="http://schemas.android.com/apk/res/android"
  xmlns:app="http://schemas.android.com/apk/res-auto"
  android:orientation="vertical"
  android:layout_width="match_parent"
  android:layout_height="match_parent">

  <androidx.appcompat.widget.AppCompatTextView
      android:layout_width="wrap_content"
      android:layout_height="wrap_content"
      android:text="Hello!"
      app:layout_constraintStart_toStartOf="parent"
      app:layout_constraintEnd_toEndOf="parent"
      app:layout_constraintBottom_toBottomOf="parent"
      app:layout_constraintTop_toTopOf="parent"/>

</androidx.constraintlayout.widget.ConstraintLayout>
public override void ViewDidLoad()
{
    View.BackgroundColor = UIColor.White;

    base.ViewDidLoad();

    var label = new UILabel { Text = "Hello!" };

    Add(label);

    View.SubviewsDoNotTranslateAutoresizingMaskIntoConstraints();
    View.AddConstraints(
        label.WithSameCenterX(View),
        label.WithSameCenterY(View));

    var set = CreateBindingSet();
    set.Bind(label).ToLocalizationId("Hello");
    set.Apply();
 }
NOTE: For more information on how to setup MvvmCross, refer to the official documentation.
At this point, we must install the NuGet package MvvmCross.Plugin.ResxLocalization to the Core project.

Then creates a folder Localization and add a resource file, let's call it AppResources.resx. This file will contain the main language of our app.
Open it and be sure to set the Access Modifier to Public:

Let's add our first localized resource, as per in the screenshot below:

NOTE: the MvvmCross convention uses the string {ViewModelName}.{ResourceName} as key. In our case it is HomeViewModel.Hello.
Now we can proceed adding another resource file containing the translations for another language of our choices - Italian in my case. To do this, add a file called AppResources.it.resx still under Localization folder:

Please, note that now the Access Modifer has been set to No code generation. In fact, it's only the main resx file that is going to generate the necessary code.
Close the resx files and go in HomeViewModel and:
- Implement the interface
IMvxLocalizedTextSourceOwner - Define the following property:
public IMvxLanguageBinder LocalizedTextSource =>
            new MvxLanguageBinder("", GetType().Name);
NOTE: For demostration purposes I am doing this in the (only) page's view model, but in a real environment it would be better to add this property to a single base view model since almost every page in our application would need to localize resources.
Register the plugin in the Mvx IoC container at the startup (App.cs in my example):
Mvx.IoCProvider.RegisterSingleton<IMvxTextProvider>(new MvxResxTextProvider(AppResources.ResourceManager));
Now it's time to apply the translation via the binding set exposed by MvvmCross. Even you can do this by UI too, I prefer to set all the resources by code: in case of refactoring or changes, it's definitely easier to keep track of all the changes. Let's see how to do it.
Android
From the definition above, replace the android:text definition with android:id. You can see mine below:
<androidx.appcompat.widget.AppCompatTextView
    android:layout_width="wrap_content"
    android:layout_height="wrap_content"
    android:id="@+id/txtHello"
    app:layout_constraintStart_toStartOf="parent"
    app:layout_constraintEnd_toEndOf="parent"
    app:layout_constraintBottom_toBottomOf="parent"
    app:layout_constraintTop_toTopOf="parent"/>
We need the control's id (txtHello) in the code behind in the next step.
Go in HomeView.cs. Write code to get the reference of the UI control (txtHello) and to bind it to the MvxLanguageBinder instance we defined into the view model through a built-in converter:
protected override void OnCreate(Bundle bundle)
{
    base.OnCreate(bundle);
    SetContentView(Resource.Layout.home_view);

    var textView = FindViewById<AppCompatTextView>(Resource.Id.txtHello);

    var set = CreateBindingSet();

    set.Bind(textView)**.ToLocalizationId("Hello");**

    set.Apply();
}
Now your app is ready to rock! This is what you see if you press F5:
Then go to Android's settings and change the language to Italian. Then open the app again:
Urrah! 🎉🎉
iOS
In iOS everything works just as what we did on the Android side.
Creates the Mvx's binding set and apply the binding to the localized resource:
var set = CreateBindingSet();
set.Bind(label).ToLocalizationId("Hello");
set.Apply();
Change the iPhone language to Italian.. and here we go again 🎉

The source code is available on my GitHub


Top comments (0)