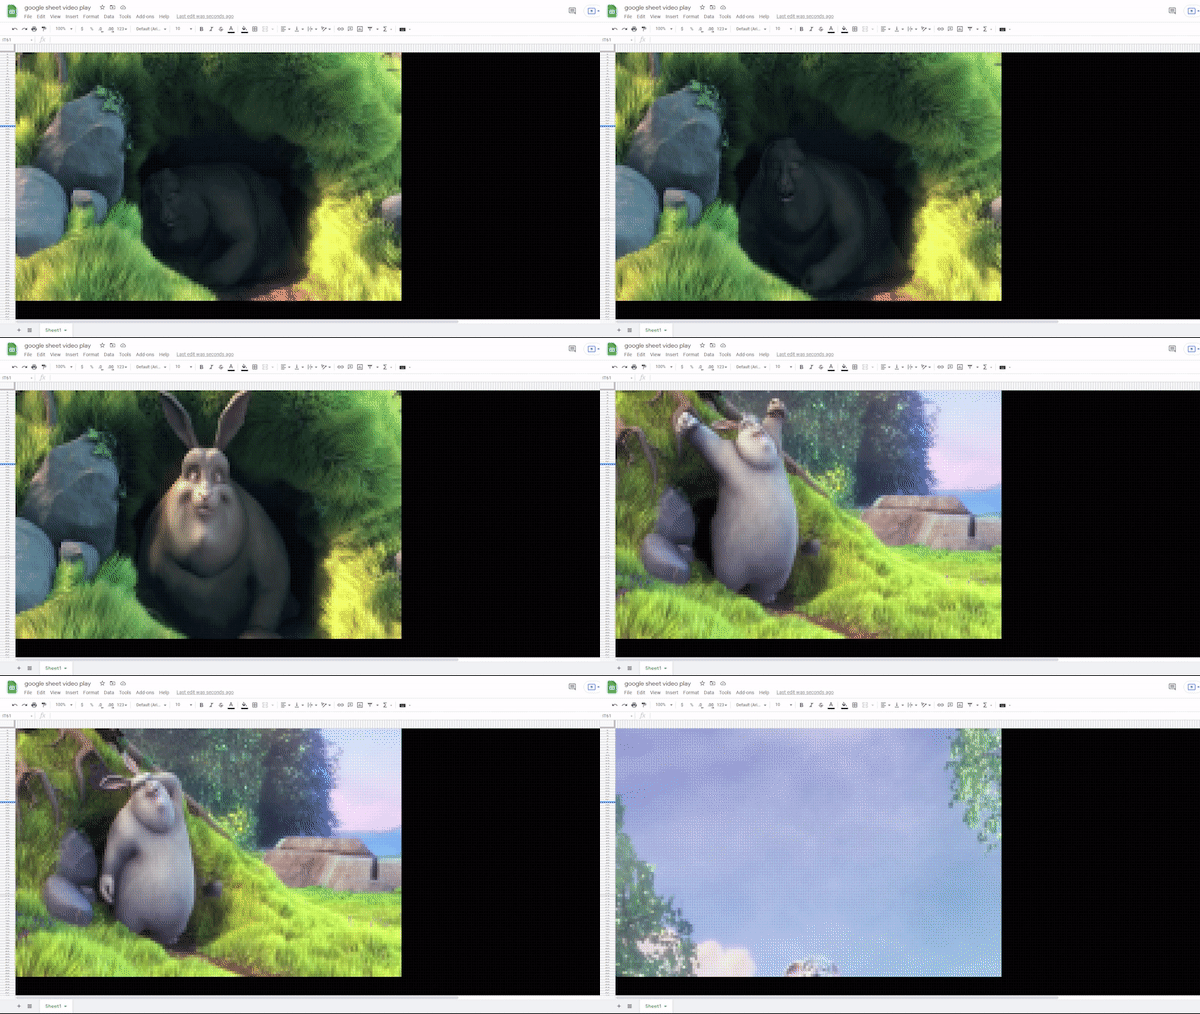
This article is just for my fun. Today I'm playing with Google Sheets API and got an idea I could play a video in a sheet using cells like pixels.
TL;DR This is the final result!😉 (The following video frame refresh is x10 faster than actual. I edited by a video editor.)

How it works
I prepared 160 x 90 cells in a Google Sheet and changed cell colors by using Google Sheets API. The API has a API to change cell colors by one API call in bulk. I called the API for each video frame and played a video.
Step 1: Extract frames from a video
First, I converted the famous video "Big Bunny" to JPG images by using ffmpeg. I used 1 image per second and generated 300 images. According to my experiments, Google Sheets API needs ~3 sec to refresh cell colors by a API call so I selected much less images than video frames. And I resized the image frame from 1280x720 to 160x90 to align with the number of the cells in my sheet. I used Jimp for the resizing.
Sorry for my dirty code lol
const ffmpeg = require("ffmpeg")
const path = require("path")

const FRAMES = 300
const Jimp = require("jimp")

// Extract images and store them in ./images folder
try {
  const p = new ffmpeg(path.join(__dirname, "./video.mp4"))
  p.then(function (video) {
    video.fnExtractFrameToJPG(path.join(__dirname, "./images"), {
      frame_rate: 1,
      number: FRAMES,
      file_name: "%s"
    }, function (error, files) {
      if (!error)
        console.log("Frames: " + files);
    });
  }, function (err) {
    console.log("Error: " + err);
  });
} catch (e) {
  console.log(e.code);
  console.log(e.msg);
}

// Resizing
;(async () => {
  for (let i = 1; i < FRAMES + 1; i++) {
    const image = await Jimp.read(path.join(__dirname, "./images", "1280x720_" + i + ".jpg"))
    image.resize(160, 90).write(path.join(__dirname, "./images", "160x90_" + i + ".jpg"))
  }
})()
Step 2: Apply pixel colors to cells
Google Sheet API's batchUpdate() function is the one I used. The API spec is not clear enough to see what we can do with it. So I recommend you to check the type files of googleapi npm module and estimate how functions work. (That's a reason why I used TypeScript. Type check is helpful to work with unknown libraries.) In the value passed to the batchUpdate(), you see updateCells key, right? That's the property to update cell format. The key points are
- Read pixel colors and create a cell update request for each pixel
- Use n and n + 1 value for startColumnIndex, endColumnIndex to update Nth cell
- Please do not forget specify
fields: "userEnteredFormat"even if the field is optional as the type of TypeScript - RGB colors should be given in the range from 0 to 1
If you're not familiar with setup for using Google Sheets, I recommend to read my another article.
import { google } from "googleapis"
import path from "path"
import Jimp from "jimp"

const SHEET_ID = "your sheet id"
const SERVICE_ACCOUNT_EMAIL = "your service account email"
const SERVICE_ACCOUNT_PRIVATE_KEY = "your private key"

const FRAMES = 300
// Video resolution
const WITDH = 160
const HEIGHT = 90

;(async () => {
  const auth = new google.auth.JWT({
    email: SERVICE_ACCOUNT_EMAIL,
    key: SERVICE_ACCOUNT_PRIVATE_KEY,
    scopes: ["https://www.googleapis.com/auth/spreadsheets"]
  })
  const sheet = google.sheets("v4")
  for (let i = 1; i <= FRAMES; i++) {
    const image = await Jimp.read(path.join(__dirname, "./images/", `${WITDH}x${HEIGHT}_${i}.jpg`))
    const requests: any[] = []
    for (let j = 0; j < WITDH; j++) {
      for (let k = 0; k < HEIGHT; k++) {
        const c = image.getPixelColor(j, k)
        const { r, g, b } = Jimp.intToRGBA(c)
        const req = {
          updateCells: {
            range: {
              sheetId: 0,
              startColumnIndex: j,
              endColumnIndex: j + 1,
              startRowIndex: k,
              endRowIndex: k + 1,
            },
            fields: "userEnteredFormat",
            rows: [{
              values: [{
                userEnteredFormat: {
                  backgroundColor: {
                    red: r / 255,
                    green: g / 255,
                    blue: b / 255,
                    alpha: 1,
                  }
                }
              }],
            }],
          }
        }
        requests.push(req)
      }
    }
    await sheet.spreadsheets.batchUpdate({
      auth,
      spreadsheetId: SHEET_ID,
      requestBody: {
        requests,
      }
    })
  }
})()


Top comments (0)