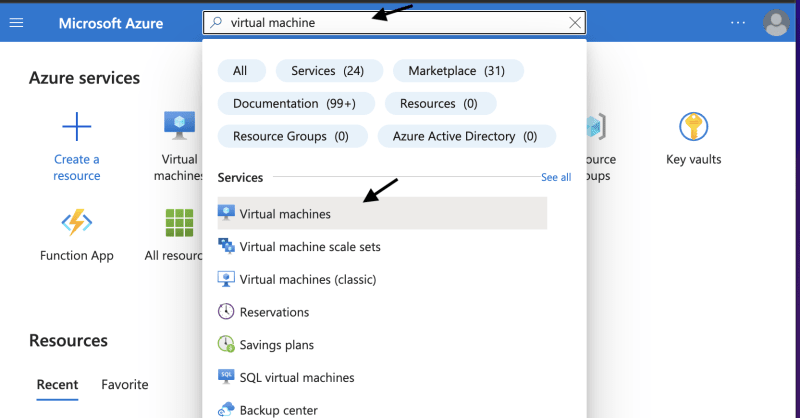
STEP 1
a. On your Azure portal, Go on the search bar and search for "Virtual machine".
STEP 2
a. Click on "Create" and in the options given from the search, choose "Azure virtual machine.

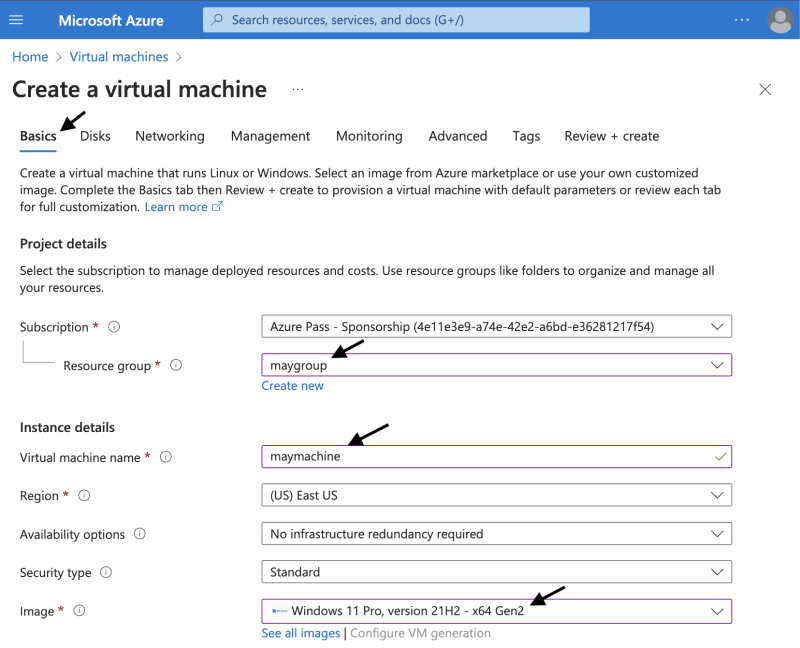
step 3
a. Under BASICS, fill in the required details.
b. Choose your subscription and choose a resource group or create a new one.
c. Give the virtual machine a name.
d. Choose windows 11 server for your image, change the public key to password.
e. Choose a username and password for your administrators account.
f. Select RDP and HTTP(80) for the inbound port and tick your licensing box.

STEP 4
a. Go to MONITORING, disable Boot diagnostics.
b. Click on review+create
C. Once validation has passed, click on create
d. After deployment is complete, click on "Go to resource"
- Your Virtual machine has been created.


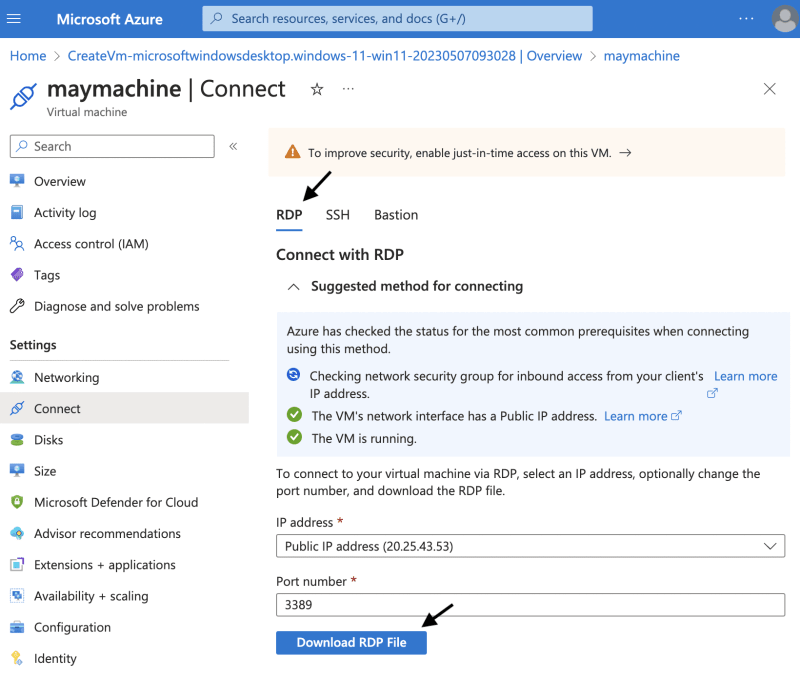
STEP 5
a. Click on connect
STEP 6
a. Choose RDP then click on download to. Download the file.
b. Click on the file you just downloaded to open it.
c. Type in the username and password you used to register your administrators account in Step 3.
d. Click on continue. Once this is done, your virtual machine has been created and connected.

STEP 7 Notice how your vm interphase is different from your systems interphase.
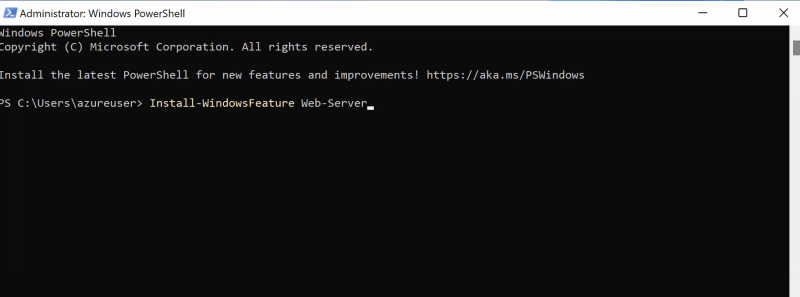
a. On the vm you just created, go on the search bar and type in POWER SHELL, then choose "windows powershell app" from the options to install it.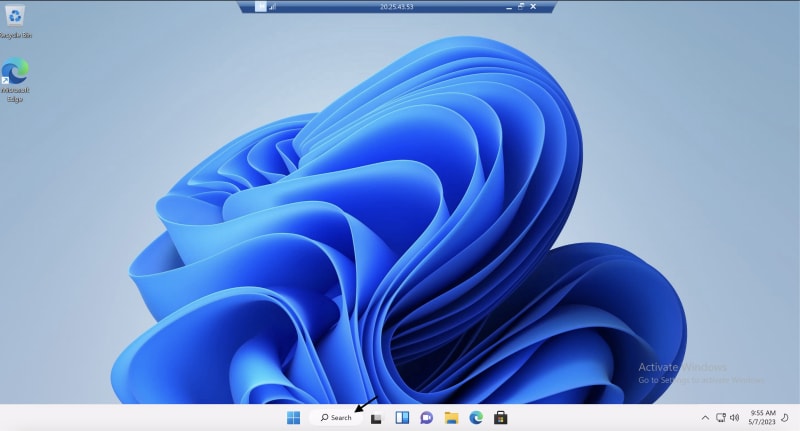

STEP 8
a. Once the powershell has loaded, type in the command Install-WindowsFeature Web-Server
b Click on ENTER to install the web server role. Your web server has been successfully installed.
- To test your web server,Go back to your Azure portal, click on OVERVIEW
b. Copy the public ip address, paste it on your system browser and hit enter to see if the web server is running.
STEP 9
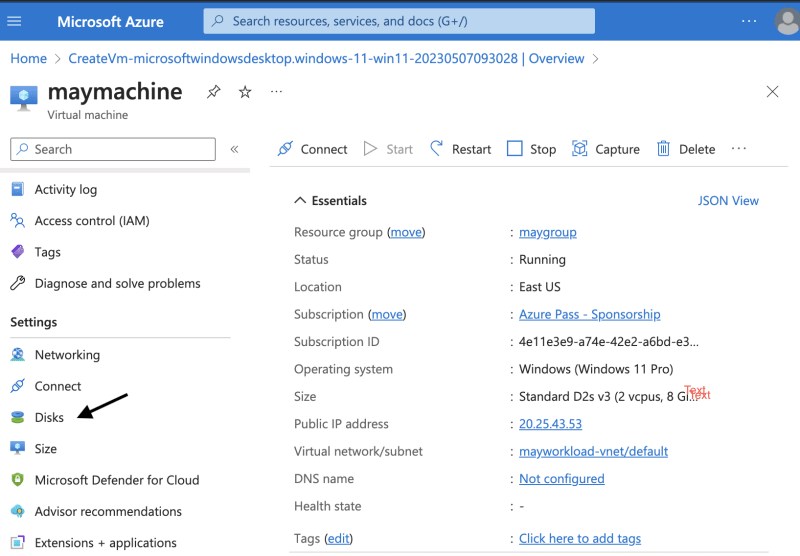
a. Go back to your azure portal page
b Click on Disks
c. Click on "create and attach a new disk"
d. Give the Data disk a name also change the size to a higher Gb
e. Click on "save"
STEP 10
a. Go back to that virtual machine you created so you can format the new disk you just created.
b. Search for Disk on the search bar
c. Choose "create and format hard disk partitions" from the options given.

STEP 11
a. A pop-up "initialize the Disk" will show, click on OK
b. Scroll down to Disk 2.
- Disk 1 is a default disk in a new vm.
c. Click on it, then click on "New Simple Volume" from the options given.

STEP 12
a. Follow through with all the defaults for the next few pages by clicking on "NEXT"
b. Once you reach the "Format partition" page, change the "volume label" to the name you gave your datadisk earlier in step 9
c. Click on "next
d. Click on "finish
- Your Data disk has been added successfully.


Top comments (0)