
Written by Ikeh Akinyemi✏️
Optimizing rendering is crucial for ensuring a smooth and efficient user experience across all your frontend projects. Sluggish webpages can lead to frustration for users, and potentially cause them to entirely abandon your web application. This issue comes up most often in single-page applications (SPAs), where the entirety of your application is loaded within a single webpage, and updates to it are handled dynamically without needing a full reload of the webpage.
Vue.js is a progressive JavaScript framework that enables developers to create interactive and responsive SPAs. However, as your applications grow in features, increasing in complexity, rendering performance quickly becomes a bottleneck. To this effect, Vue offers efficient rendering techniques that you can use to improve rendering performance.
In this article, we'll cover rendering optimization in Vue.js. We'll start by understanding rendering basics and the role of the virtual DOM in Vue's rendering process. Then, we’ll explore directive-based optimization techniques, such as v-once for static content and v-memo for dynamic content. We'll also discuss rendering optimization for lists and conditional content by taking a look at keyed v-for loops and the differences between v-if and v-show. And finally, we'll look into component-level optimization strategies, including lazy loading and best practices for structuring components.
Understanding Vue.js rendering basics
To effectively optimize rendering in Vue.js, we must first understand how Vue updates the DOM, as well as the role of the virtual DOM in this process. This understanding will help us make informed decisions when structuring and updating your Vue components.
How Vue updates the DOM
Vue uses a reactive system — a combination of watchers, dependencies, and a rendering function — that tracks a component’s dependencies during rendering. Whenever a component’s state changes (i.e., a dependency change), a corresponding component watcher that tracks dependencies that affect the component outputs is triggered, causing the component to re-render.
Internally, Vue converts your template of a component into a rendering function, which generates the virtual DOM nodes.
The virtual DOM and its role in optimizing rendering
The virtual DOM is a lightweight abstraction of the actual DOM. To be more exact, this is a JavaScript data structure that represents the DOM’s structure and elements. Whenever the state of your Vue application changes, a new virtual DOM tree is created by performing a “diff” operation. This diffing process compares the new Virtual DOM tree with the previous one, identifies exactly what changed, and applies the minimal possible changes to the actual DOM.
The virtual DOM plays a huge role in optimizing rendering by limiting the number and scope of DOM updates, minimizing direct interactions with the actual DOM. This means that Vue aims to identify a minimum number of changes required to update your UI by batching multiple data changes into a single update cycle.
Directive-based optimization techniques
Vue provides you with several, built-in directives that help optimize rendering performance. We’ll cover two essential directives for this purpose: v-once and v-memo.
Using v-once for static content
The v-once directive tells Vue to render the element or component it’s applied to only once, and then treat it as a static, immutable node. This means that any subsequent changes to the component’s data or prop will not trigger a re-render for the elements marked with v-once.
This directive is particularly useful in scenarios where you have large, static sections of content that don’t need to be re-rendered in your Vue application, such as lengthy legal disclaimers, static documentation, or unchanging user interface elements.
Here is an example of v-once in action:
// Vue.js
<template>
  <div>
    <h1 v-once>Static Page Title</h1>
    <!-- This title will only be rendered once -->

    <p v-once>{{ staticContent }}</p>
    <!-- This paragraph will also only be rendered once -->

    <div v-once>
      <!-- Elements inside this block will be rendered once -->
      <h2>Static Sub-Page Title</h2>
      <p>{{ staticContent2 }}</p>
    </div>
  </div>
</template>

<script>
export default {
  data() {
    return {
      staticContent: 'This is a large static content block that doesn\'t need to be re-rendered.',
      staticContent2: 'This content will be rendered once.'
    }
  }
}
</script>
In the above snippet, we marked the headers and paragraphs directly and indirectly through their parent element, causing them to be rendered only once, reducing the workload on Vue’s reactivity system.
Using v-memo for dynamic content
While v-once is useful for static content, Vue also provides the v-memo directive to optimize the rendering of dynamic content.
The idea is that v-memo only updates the parts of the component that actually need to change. This way, Vue can skip the expensive re-render process and reuse the cached version of your component that didn’t change.
This technique can significantly improve your web app performance, especially where complex components need to be rendered frequently but their dependencies don’t change often.
Let’s see an example showcasing the use of v-memo through an input component:
// Vue.js
<template>
  <div>
    <input v-model="inputText" placeholder="Type here...">
    <p v-memo="[inputText]">You typed: {{ inputText }}</p>
  </div>
</template>

<script>
export default {
  data() {
    return {
      inputText: ''  // Initializes the inputText data property
    };
  }
}
</script>
In our above example, the paragraph displaying the user’s input will only be re-rendered when the inputText data changes. Other parts of this input component, such as static text or images, won’t be re-rendered, and as a result, conserve resources and enhance responsiveness.
Rendering optimization for lists and conditional content
Optimizing the rendering of dynamic data with lists and conditional content is also crucial for ensuring smooth performance in your Vue application. Vue provides directives like v-for, v-if, and v-show to help you optimize frequent changes in lists and conditional content.
Keyed v-for loops
When you want to display a list of items or components in your Vue project using the v-for directive, make sure to give each item a unique key attribute.
key helps Vue keep track of which elements have been added, removed, or rearranged, making updates and re-renders more efficient. This means that Vue can target only the elements that changed and apply the necessary updates, and doing so minimizes the number of DOM operations required.
Here’s an example of using v-for with a unique key:
// Vue.js
<template>
  <ul>
    <li v-for="item in items" :key="item.id">{{ item.name }}</li>
  </ul>
</template>

<script>
export default {
  data() {
    return {
      items: [
        { id: 1, name: 'Item 1' },
        { id: 2, name: 'Item 2' },
        { id: 3, name: 'Item 3' }
      ]
    }
  }
}
</script>
In the above snippet, each li element is bound to a unique identifier, item.id, that helps ensure Vue can efficiently update our list component by reusing elements where appropriate and updating or rearranging others as needed. Note that you should use a more unique identifier like UUIDs, composite keys, or database IDs to avoid a key collision.
Choosing between v-if and v-show
When it comes to conditionally rendering elements or components, we have two directives: v-if and v-show. While both directives serve similar purpose, they have different use cases:
-
v-if: This command selectively displays sections of code. If the condition is not met, the element and its contents are not displayed in the DOM. The initialization and destruction of components are determined by whether the expression linked tov-ifis true or false -
v-show: Thev-showdirective operates differently thanv-if. Instead of completely removing the element from the DOM based on a condition,v-showsimply toggles the visibility of the element by adjusting its CSSdisplayproperty. This means that the element will always exist in the DOM, regardless of whether the condition evaluates to true or false
When deciding between v-if and v-show, it all comes down to your particular situation and the performance factors at play. If you have an element or component with a costly set-up or tear-down process, like retrieving data or setting up event listeners, consider using v-if for conditional rendering. On the other hand, if the element or component is inexpensive to render and you want to prevent unnecessary re-rendering and destruction, opt for v-show instead.
Supposing we have two components, an expensive component (ExpensiveComponent) and a cheap component (CheapComponent), the example below demonstrates the use of v-if and v-show for these components:
// Vue.js
<template>
  <div>
    <button @click="showExpensiveComponent = !showExpensiveComponent">
      Toggle Expensive Component
    </button>
    <div v-if="showExpensiveComponent">
      <!-- Expensive component rendered only when condition is true -->
      <ExpensiveComponent />
    </div>

    <button @click="showCheapComponent = !showCheapComponent">
      Toggle Cheap Component
    </button>
    <div v-show="showCheapComponent">
      <!-- Cheap component remains in the DOM, but visibility is toggled -->
      <CheapComponent />
    </div>
  </div>
</template>

<script>
import ExpensiveComponent from './ExpensiveComponent.vue'
import CheapComponent from './CheapComponent.vue'

export default {
  components: {
    ExpensiveComponent,
    CheapComponent
  },
  data() {
    return {
      showExpensiveComponent: false,
      showCheapComponent: false
    }
  }
}
</script>
In this scenario, we use v-if to conditionally render the ExpensiveComponent in order to prevent the unnecessary rendering and destruction process whenever the condition changes. In contrast, the CheapComponent is conditionally rendered using v-show to keep its state intact and avoid expensive setup and teardown operations, particularly when it needs to be toggled frequently.
These directive-based techniques help ensure that your applications remain responsive and efficient by scaling and handling complex data interactions. In the next section, we’ll discuss component-level strategies that would complement directive-based optimizations, enabling you to achieve greater performance improvements in your web app.
Component-level optimization strategies
The strategies we’ll cover in this section will focus on how components are loaded and structured, promoting efficient resource usage and faster response times.
Lazy loading components
Lazy loading is a method to delay the loading of less important resources when a page is loaded. In Vue.js, it means loading components only when necessary, usually triggered by a user's action, such as visiting a specific page.
This strategy improves your user experience by reducing the amount of data transferred during the loading of only necessary components on the initial page load. As a result, it minimizes the bandwidth usage of your application as only required parts are loaded.
Let’s see a step-by-step guide to implementing lazy loading by using Vue’s built-in support of dynamic imports.
First, define the component asynchronously. Instead of directly importing a component, you have the option to use dynamic importing to asynchronously load the component:
const LazyComponent = import('./LazyComponent.vue')
Second, use the lazy component in your template. In your template, you have the option to integrate the lazy-loaded component in the same way as any other component, using the defineAsyncComponent function specifically designed for managing the asynchronous import process:
// Vue.js
<template>
  <div>
    <h1>My App</h1>
    <Suspense>
      <template #default>
        <LazyComponent />
      </template>
      <template #fallback>
        <div>Loading...</div>
      </template>
    </Suspense>
  </div>
</template>

<script>
import { defineAsyncComponent } from 'vue'

const LazyComponent = defineAsyncComponent(() =>
  import('./LazyComponent.vue')
)

export default {
  components: {
    LazyComponent
  }
}
</script>
Then, as an optional step, you would handle loading states. The <Suspense> component can be utilized to display a backup UI as the lazy-loaded component is being retrieved. It helps in maintaining a seamless user experience and avoiding any rendering problems while the loading is in progress.
Integrating lazy loading into your Vue application can greatly decrease the time it takes for the initial content to load and enhance the overall rendering performance. This is especially beneficial in situations where certain components are not needed right away or are only displayed based on user actions.
Optimizing component structure
Structuring your components in a well-organized and modular manner is essential for ensuring optimal rendering performance in Vue.js applications. Here are some recommended practices to keep in mind:
- Single responsibility: Ensure your components focus on a single responsibility, simplifying your application's comprehensibility and testability
- Small, specialized components: Dividing intricate components into smaller, reusable parts really helps in segregating your application’s functionality, facilitating easier debugging and optimization
- Managing props and events: Clearly specifying props and efficiently managing events can reduce unnecessary re-rendering and data processing
Conclusion
This guide covers different methods for enhancing rendering speed in Vue.js apps. We explored optimizations like v-once and utilizing key attributes at the directive level, along with rendering enhancements for lists and conditional content through techniques such as keyed v-for loops and deciding between v-if and v-show directives. Additionally, we looked at practices at the component level like lazy loading and effective component structuring.
When you use these optimization techniques, you can create top-notch Vue.js apps that offer amazing user experiences, even in challenging situations.
Just keep in mind that optimization is a continuous task that needs constant monitoring and adjustments based on your app's unique requirements. Vue.js has strong rendering optimization features that let you make interactive and enjoyable user interfaces. Embrace these methods to unleash the full power of your Vue.js apps.
Experience your Vue apps exactly how a user does
Debugging Vue.js applications can be difficult, especially when there are dozens, if not hundreds of mutations during a user session. If you’re interested in monitoring and tracking Vue mutations for all of your users in production, try LogRocket.
LogRocket is like a DVR for web and mobile apps, recording literally everything that happens in your Vue apps, including network requests, JavaScript errors, performance problems, and much more. Instead of guessing why problems happen, you can aggregate and report on what state your application was in when an issue occurred.
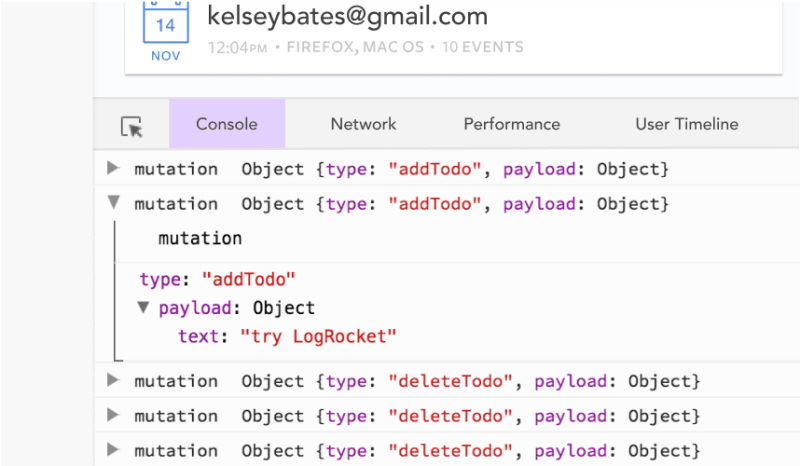
The LogRocket Vuex plugin logs Vuex mutations to the LogRocket console, giving you context around what led to an error and what state the application was in when an issue occurred.
Modernize how you debug your Vue apps — start monitoring for free.


Top comments (0)