
Written by Peter Ekene Eze✏️
Users sometimes open a separate window alongside the main browser window to multitask or focus on specific content. For example, when we’re using a certain page and need to look up some related detail, we might open a new browser tab.
Unfortunately, repeating this behavior often leads to loss of focus, difficulty switching contexts, managing shared information between multiple tabs, and so on. To address these issues, modern web browsers offer APIs for creating always-on-top windows within the same session.
The Picture-in-Picture (PIP) API was initially designed to keep videos visible while users interact with other content on the page. However, it's limited to one video with minimal browser-generated controls. Chrome’s new Document Picture-in-Picture (DPIP) API expands the capabilities of the existing PIP API.
While PIP is limited to displaying a single video element in a floating window, DPIP empowers developers to present any arbitrary HTML content within the window. The flexibility to add any HTML content in a PIP window unlocks a wider range of use cases beyond video playback.
For instance, users could leverage DPIP for tasks like real-time text editing, note-taking, managing to-do lists, or messaging and chatting while using other apps on their devices. Imagine a web app where users can watch a tutorial video in the main browser window while taking notes within a DPIP window on the same page.
To better exemplify the DPIP feature and demonstrate how easily we can use it in a frontend project, let’s create a new React application and use the native browser DPIP API to add the picture-in-picture functionality. You’ll need some basic React knowledge and access to Chrome 116 and above to get the most out of this tutorial.
We’ll start with a quick comparison between the Picture-in-Picture API and the Document Picture-in-Picture API. If you prefer, you can jump straight to the tutorial below. You can also find the source code for our demo app here to follow along.
Comparing the Picture-in-Picture API vs. the new Document Picture-in-Picture API
The PIP web API allows developers to display a video element in a separate, always-on-top window. This allows users to continue watching a video while interacting with other applications on their devices.
Implementing PIP is relatively straightforward. Developers use the requestPictureInPicture() method on a video element to enter PIP mode. This opens the video in a separate, resizable window that floats on other browser windows.
Some of the limitations of PIP include:
- PIP can only display video elements. Other types of content, like text, images, or interactive elements, are not supported
- The user experience in PIP mode is basic. There are limited controls beyond play/pause and closing the window
DPIP (Document Picture-in-Picture) is a newer web API that builds upon PIP by allowing developers to display arbitrary HTML content in a separate, always-on-top window. This opens up a wider range of possibilities for user interaction.
Implementing DPIP is slightly more complex than PIP. Developers use the window.documentPictureInPicture.requestWindow() method with options specifying size and content.
Using the DPIP API involves creating a separate HTML document or dynamically manipulating the DPIP window's content using a library like React. Luckily, developers have started creating handy npm packages that allows developers to easily use this API as a zero-dependency React component.
The Document Picture-in-Picture API allows for displaying a wider variety of content compared to the PIP API, including text, images, buttons, and interactive elements. Other advantages include:
- Users can leverage DPIP for tasks like real-time editing, note-taking, managing to-do lists, or even facilitating messaging and chat functionalities while interacting with other applications.
- Developers have greater control over the appearance and functionality of the DPIP window
However, DPIP has some limitations you should be aware of:
- Only Chrome, Opera, and Edge fully support DPIP as of June 2024
- DPIP may require additional development work to ensure proper accessibility for users with disabilities
Now, let’s see how to use the Document Picture-in-Picture API in a React application.
Setting up a React app to use the DPIP API
Open your terminal and run the following command to generate a new React application:
npx create-react-app docpip
The above command will create a React application named docpip for you.
Next, navigate to the App.js file inside the src folder of your new React application and update it with the following code:
import React, { useRef } from "react";
import ReactDOM from "react-dom/client";
import "./App.css";
function App() {
  const videoRef = useRef(null);
  const openWindow = async () => {
  };
  return (
    <div className="App">
      <button onClick={openWindow}>Open DocumentPIP</button>
    </div>
  );
}
export default App;
In the code above, we render a button that will open the DPIP window and set its onClick event to the openWindow() function, which currently does nothing.
Run npm start and navigate to http://localhost:3000 to see the live application: 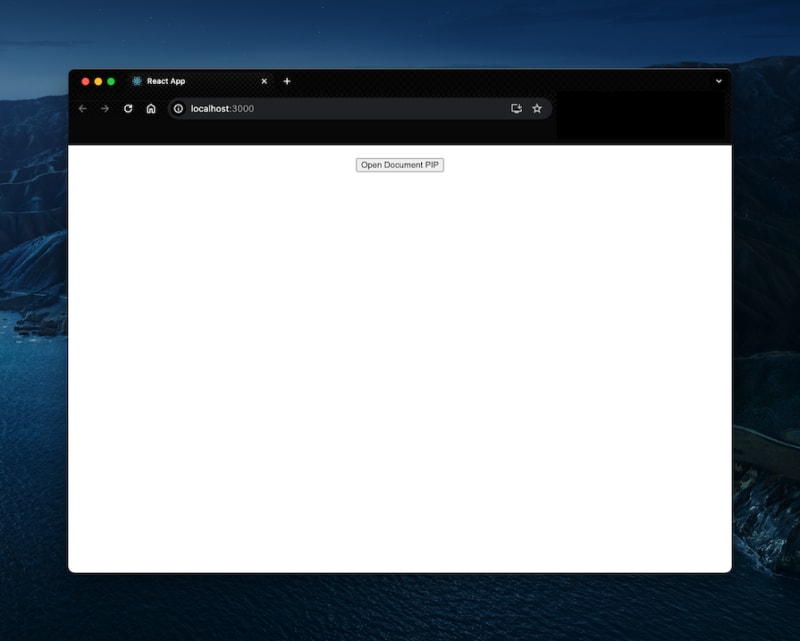
Adding open functionality to the DPIP window
Now, let’s implement the openWindow() function to open the DPIP window:
//src/App.js
const openWindow = async () => {
    try {
      const dpip = await window.documentPictureInPicture.requestWindow({
        width: "500",
        height: "500",
      });
    } catch (error) {
      if (error) {
        console.log(error);
      }
    }
  };
Here, we set up an asynchronous function to open the DPIP window with specified width and height values. Back in the browser, if we click the Open Document PIP button, it will open up an empty new window with our specified dimensions:
Displaying content in the DPIP window
Next, let’s show some content in the new DPIP window. In the try section of the openWindow() function, add the following snippet right below the existing code:
//src/App.js
try {
// existing code
      const pipDiv = dpip.document.createElement("div");
      pipDiv.setAttribute("id", "pip-root");
      dpip.document.body.append(pipDiv);
      const pipRoot = ReactDOM.createRoot(
        dpip.document.getElementById("pip-root")
      );
      pipRoot.render(<WindowContents />);
}
Here, we:
- Created a new
divelement on the DPIP window using thecreateElement()method - We used
ReactDOMandcreateRoot()methods to create a root element using thedivwe created earlier. The root element will help us display React components inside a browser DOM node - Lastly, we used the
render()method to render theWindowContentscomponent, which we will create next on the DPIP window
Now, let’s create the WindowContents component. Add the following snippets before the openWindow() function inside the App component:
//src/App.js
import React, { useRef } from "react";
import ReactDOM from "react-dom/client";

  const WindowContents = () => {
    return (
      <div className="App">
        <h2>Puppy's day out 🐶</h2>
        <video ref={videoRef} controls id="pip-object" height={"400"}>
          <source src="/puppy.mp4" />{" "}
        </video>
        <button onClick={() => window.documentPictureInPicture.window.close()}>
          Close
        </button>
      </div>
    );
  };
In the snippets above, we set up a <WindowContents/> component that returns a video. We could have any arbitrary HTML content here, but I’ve decided to show a video and a button to close the DPIP window for the purposes of this demonstration. Note that the DPIP come with its own close functionality.
Now when we click the open document PIP button, our DPIP window will open with our contents, including a title, a video, and a Close button: 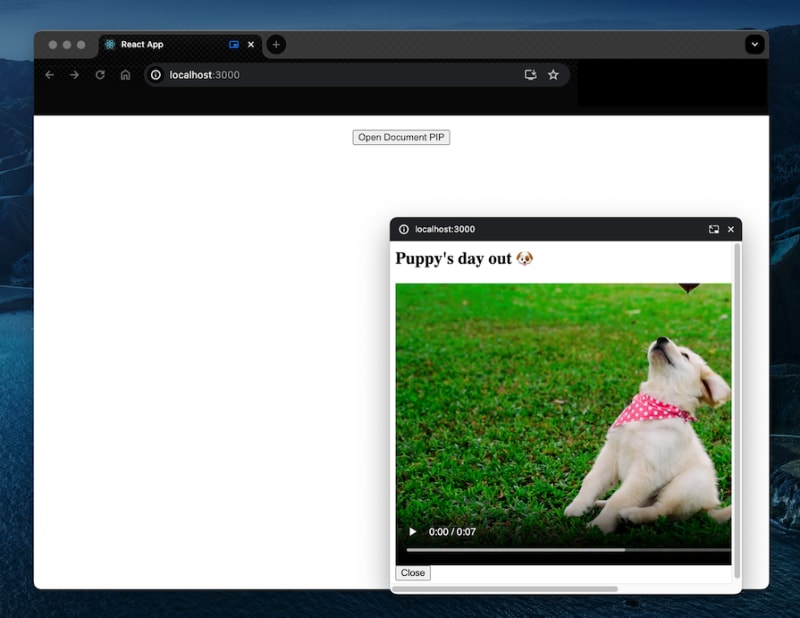 We have created a functional DPIP window in a React application, and we can add as much HTML content as we want. We can further extend the DPIP functionalities with other methods, like:
-
documentPictureInPicture.onenter— Executes when the DPIP window is opened -
pagehide— Executes when the window is closed
You can check out the source code for this tutorial in this GitHub repo.
Conclusion
The Document Picture-in-Picture API in Chrome offers significant advantages for React applications, particularly regarding enhancing user experience and enabling innovative functionalities.
In this post, we discussed how to implement a DPIP window in a React application. We also saw the advantages of the new DPIP API over the existing PIP API, along with some limitations of DPIP that you should know before getting started with it.
Get set up with LogRocket's modern error tracking in minutes:
- Visit https://logrocket.com/signup/ to get an app ID.
- Install LogRocket via NPM or script tag.
LogRocket.init()must be called client-side, not server-side.
NPM:
$ npm i --save logrocket

// Code:

import LogRocket from 'logrocket';
LogRocket.init('app/id');
Script Tag:
Add to your HTML:

<script src="https://cdn.lr-ingest.com/LogRocket.min.js"></script>
<script>window.LogRocket && window.LogRocket.init('app/id');</script>
3.(Optional) Install plugins for deeper integrations with your stack:
- Redux middleware
- ngrx middleware
- Vuex plugin


Top comments (1)
Great tutorial. This definitely deserves more traction! Thanks for the tutorial. Great stuff!