I'm continuing with our series of articles about deploying a react app in the cloud in 2023. in the previous articles that you can read here, we learned to deploy a React application on Vercel, in this article, we will discuss deploying on AWS Amplify.
So, we had our starter project that you can find here, you could also use your own react project, all we need is to push it into the cloud. I strongly recommend you take a look at the previous articles.
The world of web development has evolved over the years. There are now more and more tools and services that make development easy and reduce the time it takes to deploy a modern web app on the internet.
Like many other services for deploying a web app, AWS Amplify is free to use, whereby you connect your GitHub repo from your Amplify console dashboard.
Follow those steps to deploy your react app on AWS amplify:
Clone the starter project from my GitHub account (or use your project),
Open the project in any editor of your choice (VsCode),
install the dependencies :
npm install
- Run the project :
npm start
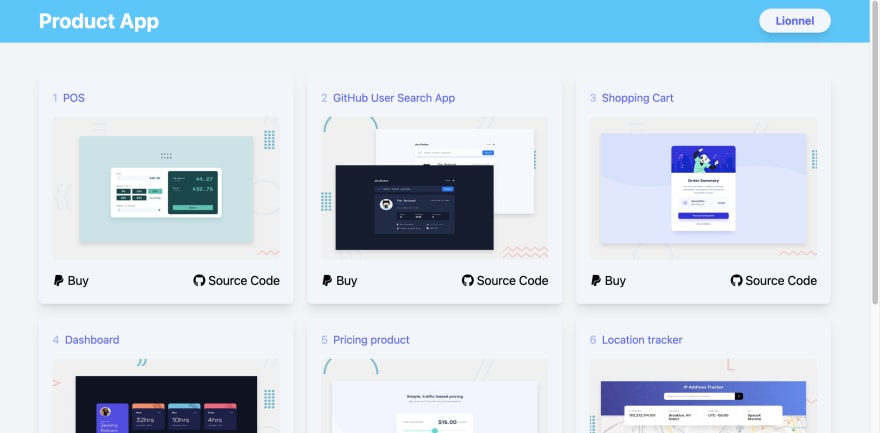
- You should see the app in the browser:
- Now that you have the app, it's time to create your repository and push the app on GitHub, if you followed me in the previous article, you don't need to create a new repository, you will use the same that you created before and your app should still be there unless you removed it. And if you get stuck when creating a repository or you can't push your project on GitHub, let me know in the comment below or my Twitter account, and I'll be happy to assist you.
So go ahead and create a new repository on GitHub if needed,
Now go to the official website of Amazon Web Services:
https://us-east-1.console.aws.amazon.com/
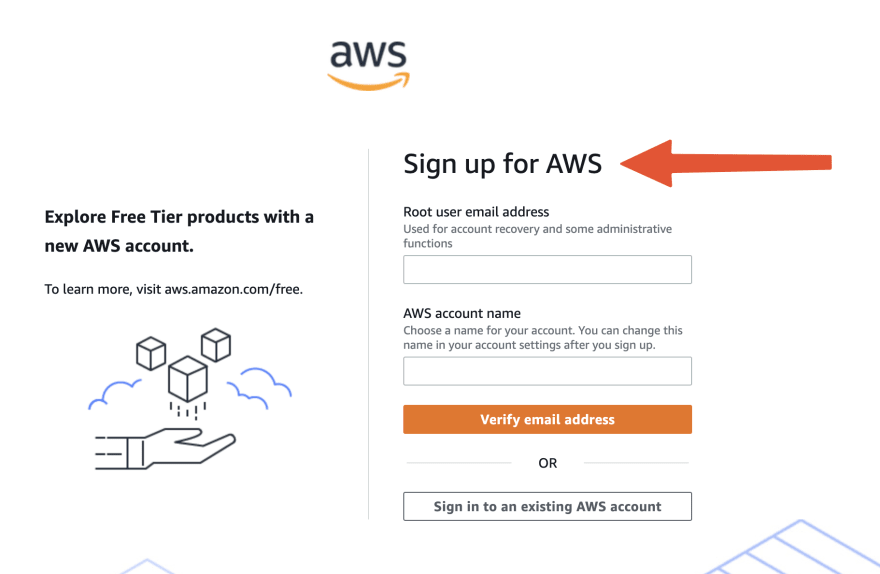
The first step is to create a new AWS account if you don't have one (You can login if you already have an account) :
Provide all pieces of information needed :
After confirming your address,you will see something like this on your browser:
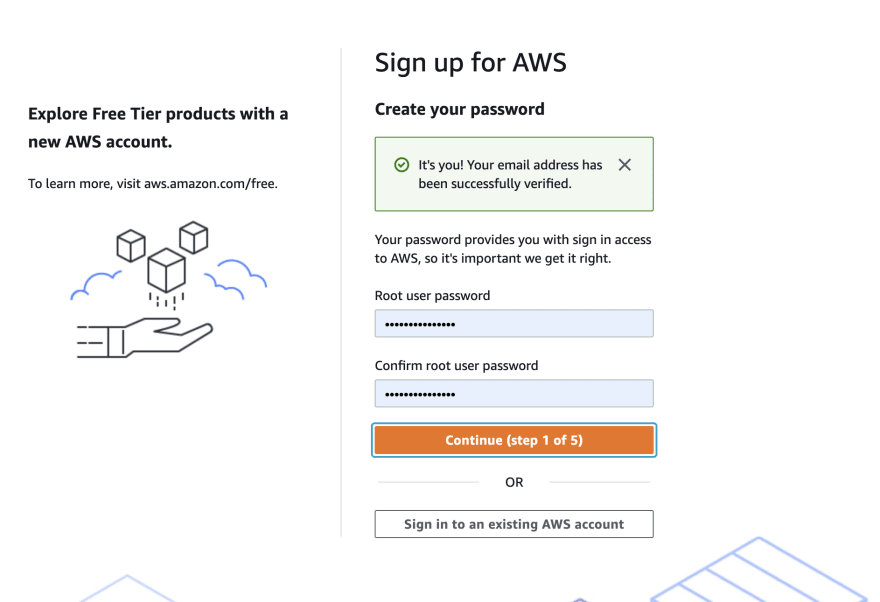
The next step is to provide your personal information:
Next, you have to register your bank card:
Note that AWS will not take your momney, they just want to certify that you can pay their service in the future,that is why they say:
We will not charge you for usage below AWS Free Tier limits. We may temporarily hold up to $1 USD (or an equivalent amount in local currency) as a pending transaction for 3-5 days to verify your identity.
Now go ahead and fill in all your information, once you are done, you should be able to access the AWS console :
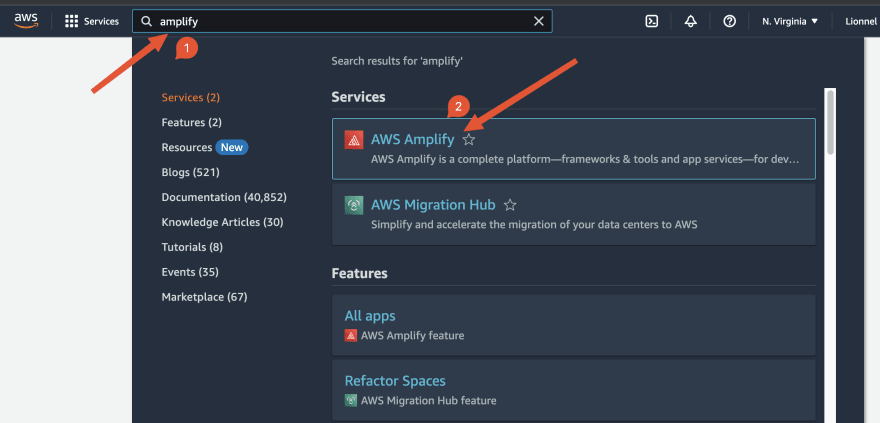
Type Amplify in the search bar , then click on Amplify:
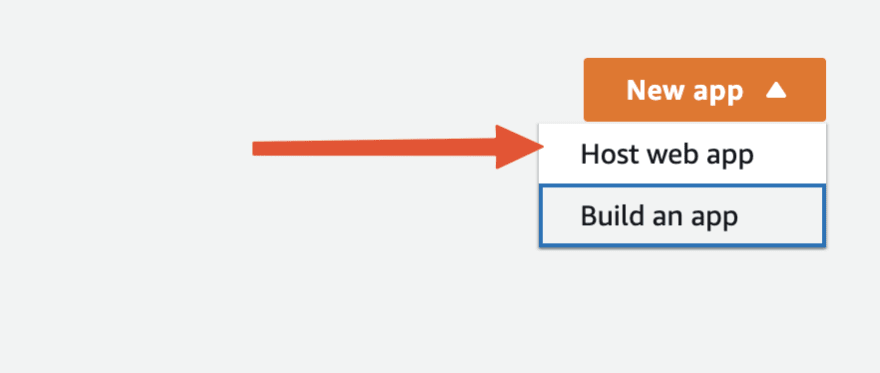
Then, you will see two options on the right side of your dashboard, select the appropriate option as shown in this screenshot:
Next, select your source, and click on GitHub:
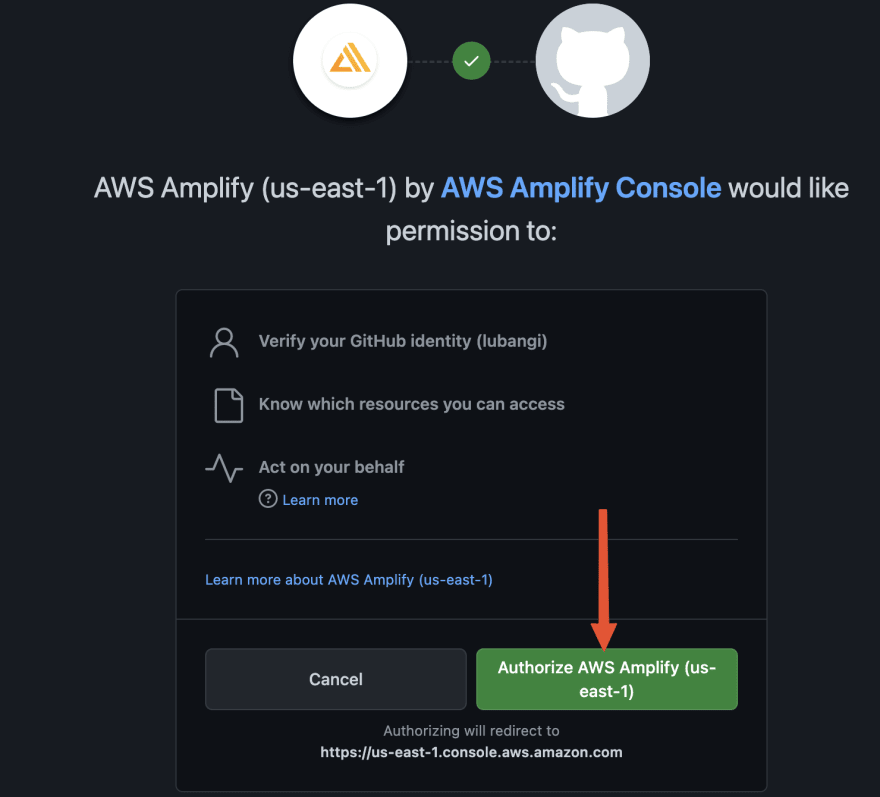
Next, authorize the connection to your GitHub account :
Next, select the repository from your GitHub account in the dropdown menu :
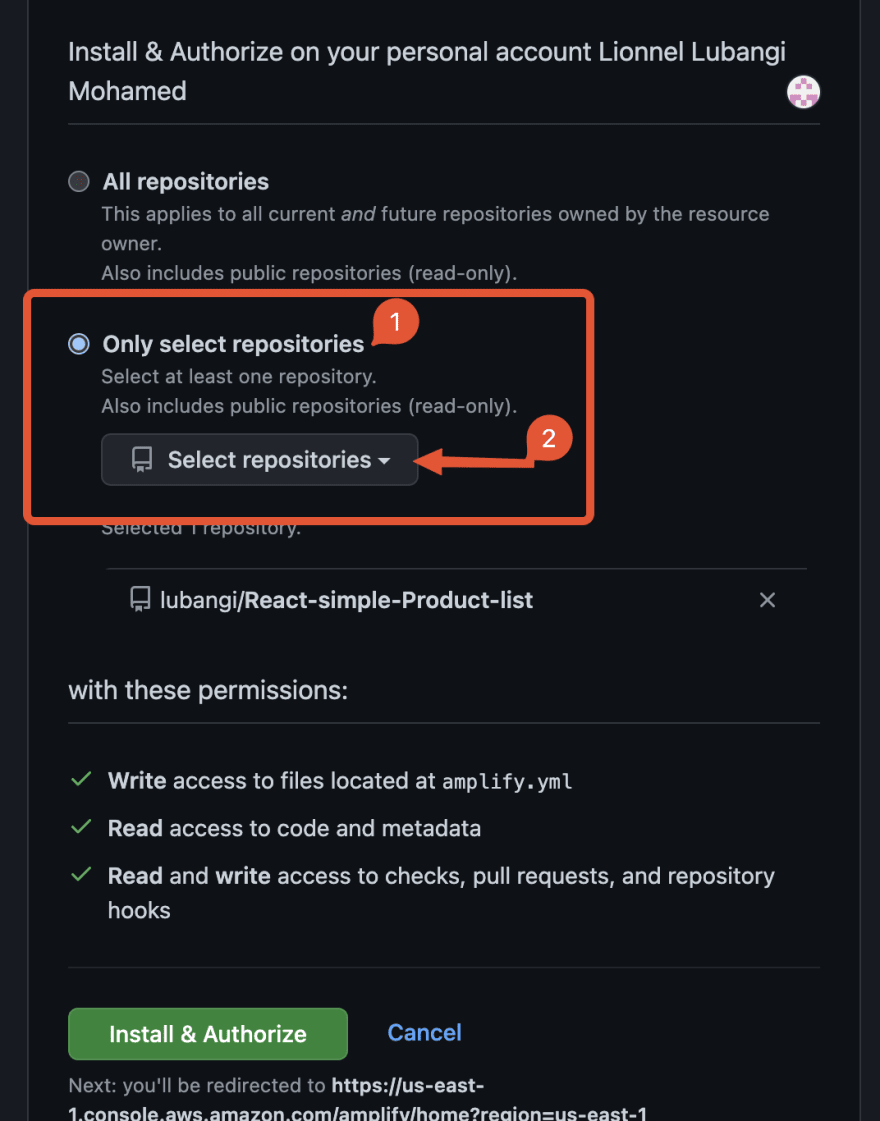
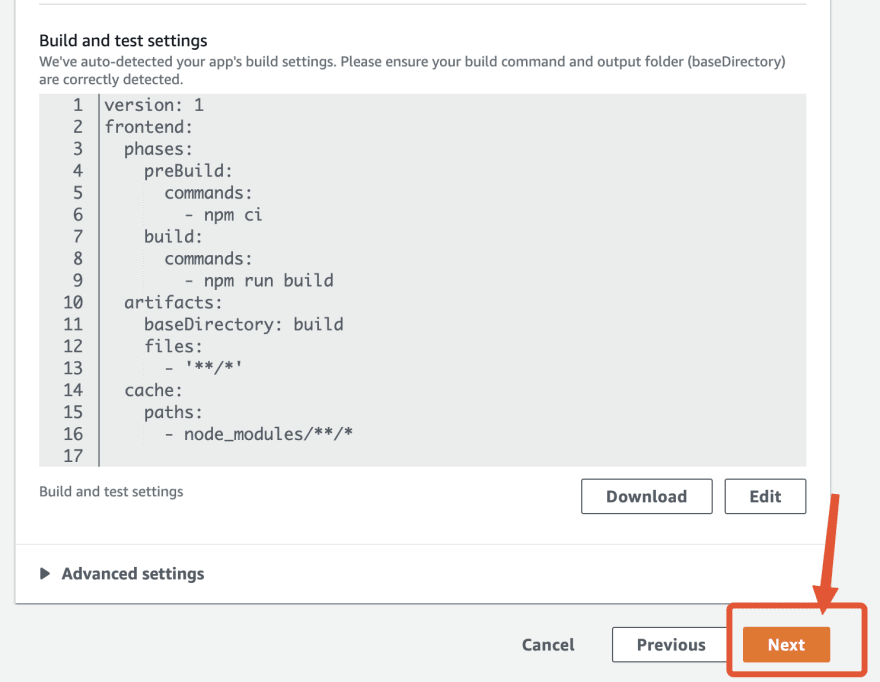
Next Amplify will be building your app, click on Next to continue:
Next, click on Save and Deploy to deploy your app :
Finally, your application is in the cloud, click on the link you see at the bottom to view your application in the browser and share your link with whoever you want.
In the real world, you could associate your app with a custom domain such as asdf.com or asdf.net or anything else,this guide could help you.
So dear friends, thank you for reading, I will meet you in the next article of our series when we will learn to deploy the same app using AWS S3 and CloudFront.
Lionnel Lubangi , Developer.

![Cover image for Learn different ways of deploying your React app in the cloud in 2023 [Part 2]](https://media2.dev.to/dynamic/image/width=1000,height=420,fit=cover,gravity=auto,format=auto/https%3A%2F%2Fdev-to-uploads.s3.amazonaws.com%2Fuploads%2Farticles%2F3borc1xt19f15z8nxq6e.png)






Top comments (0)