We all wanted to have this superpower of controlling anything from anywhere, but that's not possible yet! (maybe someday in the future...) But today I am joyful to showcase my first ever dev.to hackathon project, which doesn't open the doors to rule every single thing, but certainly SSH / Remote Server over WhatsApp.
While I was doing my internship, I used to SSH into EC2 many times a week, and to do that I always needed to have my laptop handy. This is not a thing to be worried about. But... when you seriously need to access your remote server for some important update which cannot be postponed and you realize that your laptop is resting at your home. That "oh No!" moment hurts a lot...
So, then I started to look for alternatives for accessing my EC2 without leaning towards my laptop always. Then eventually, my internship came to an end, but that "search for alternatives" was still hanging in my mind.
Recently, I started learning NodeJS and this is when I also came across #twiliohackathon tag on dev. I had no idea about Twilio until I had a look at their wide range of APIs and cool web services offered by them.
After digging deep into Twilio's services. Finally, that "search for alternatives" got a slight spark.
So, What I built?
I built a Nodejs application integrated with Twilio's API for WhatsApp, which could be installed and configured on any remote server(dead simple to setup!, trust me 🙌) or computer(with UNIX based OS), results in gaining access to it remotely and execute shell commands over WhatsApp.
Category Submission
Exciting X-Factors
Demo
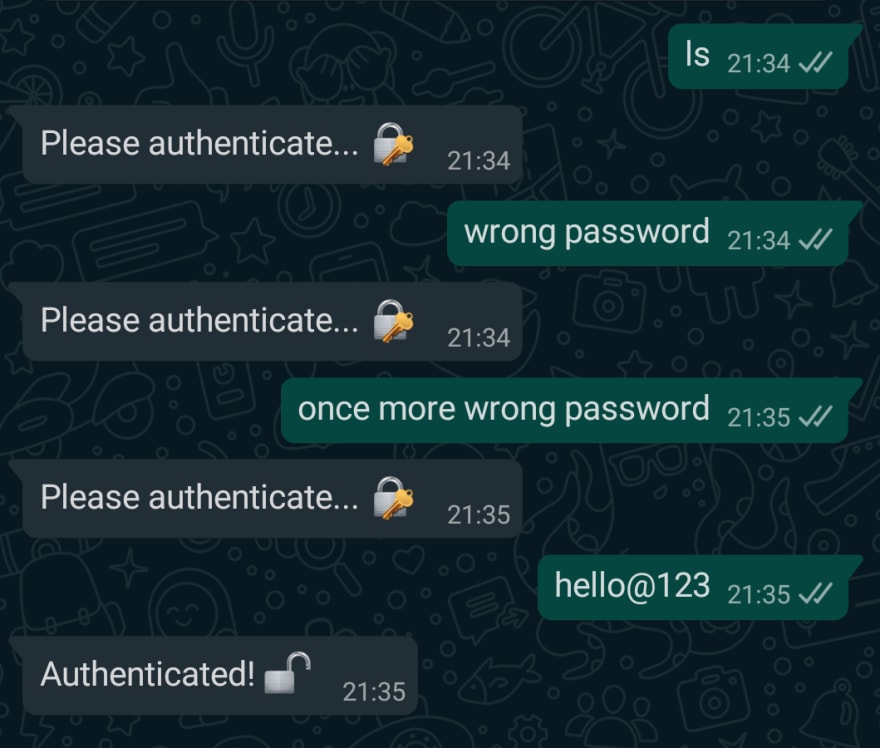
✅ Custom Authentication
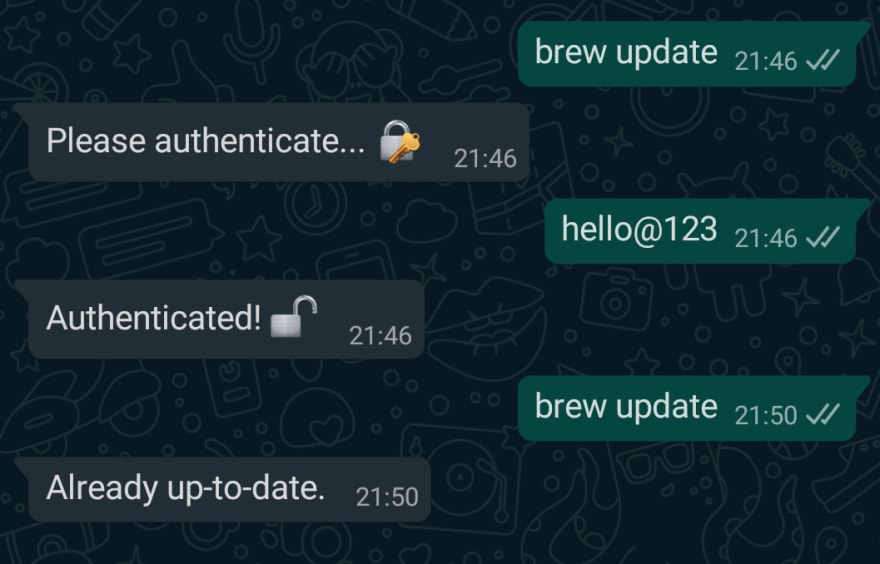
✅ brew-update over Whatsapp
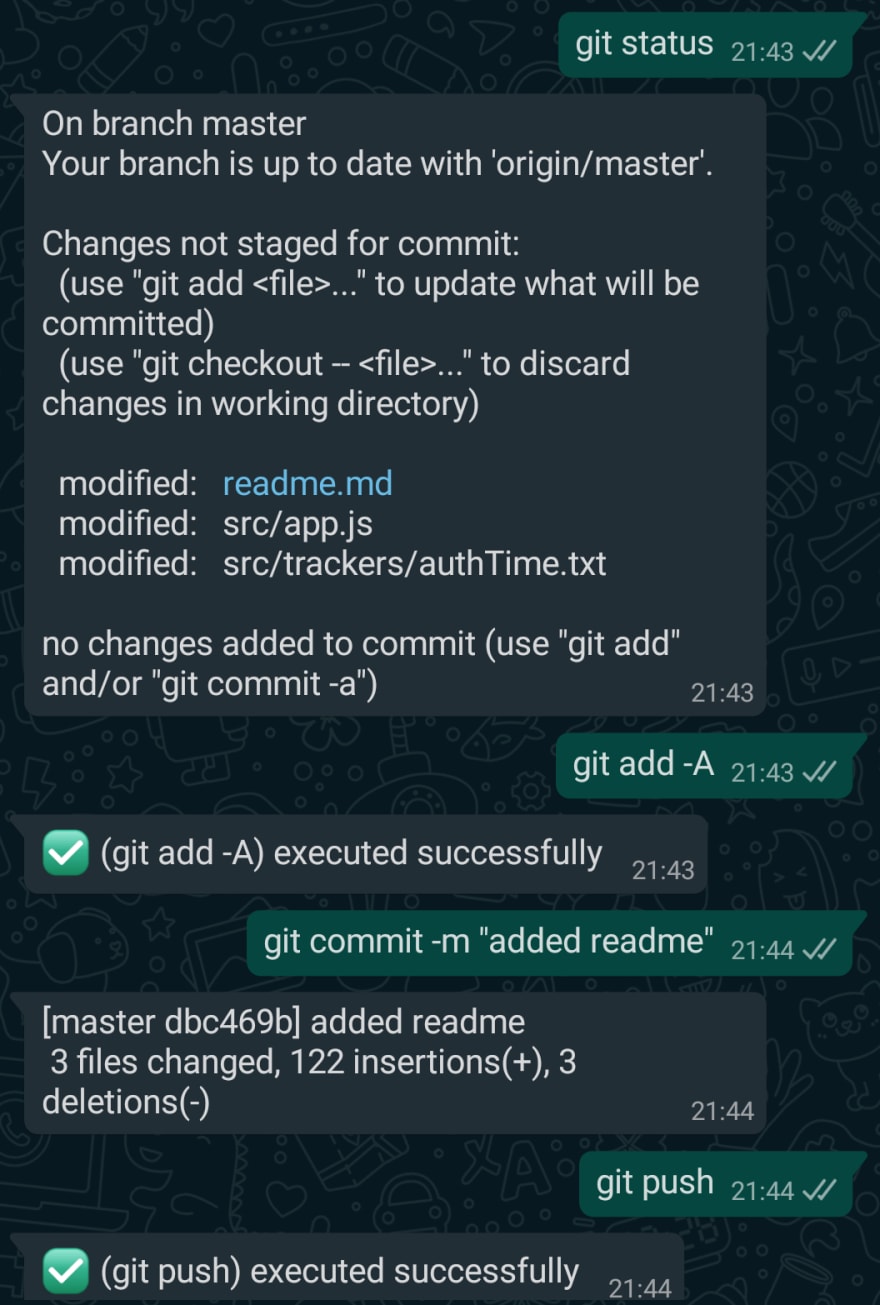
✅ Executing git commands
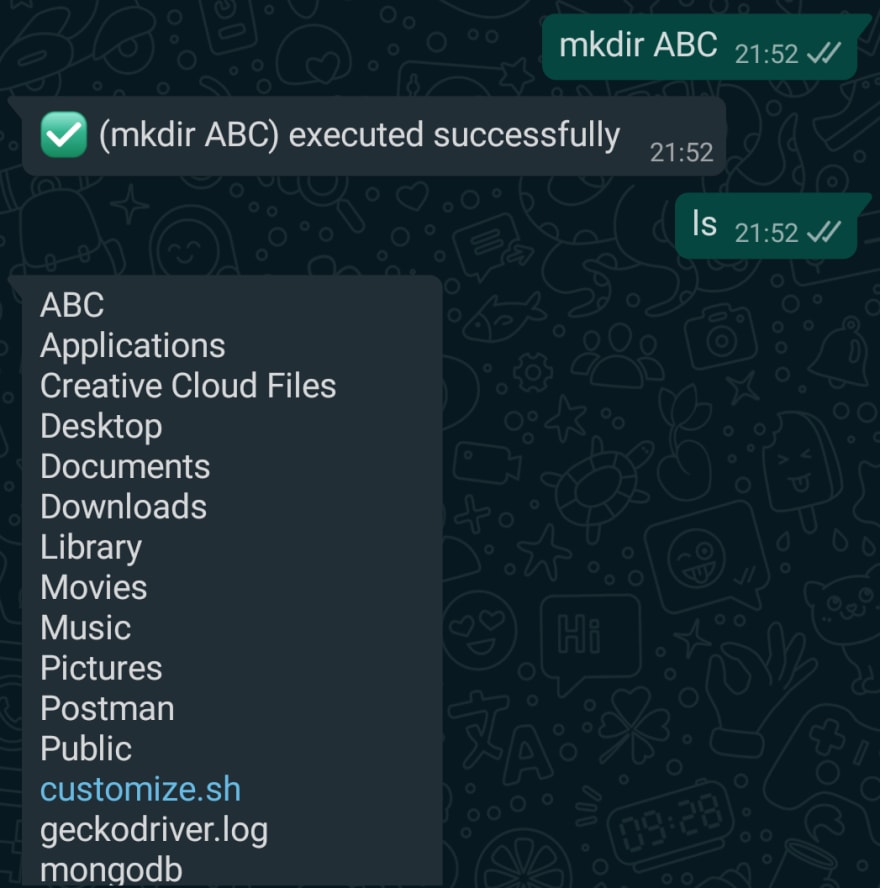
✅ mkdir over whatsapp
✅ executing Python script
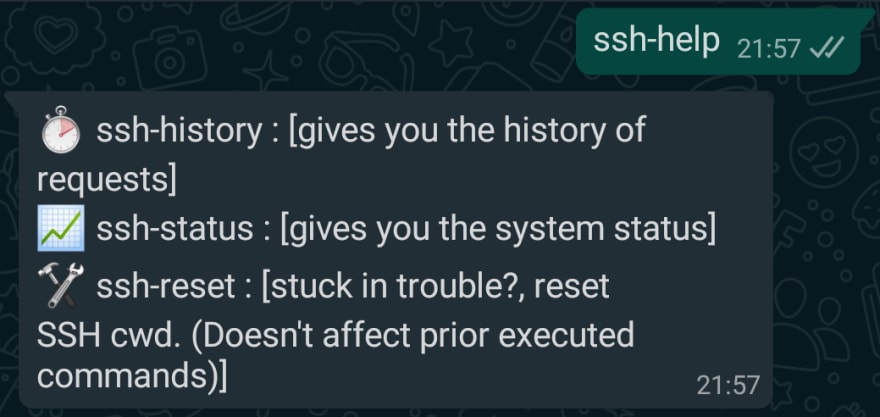
✅ Demonstrating custom command ssh-help
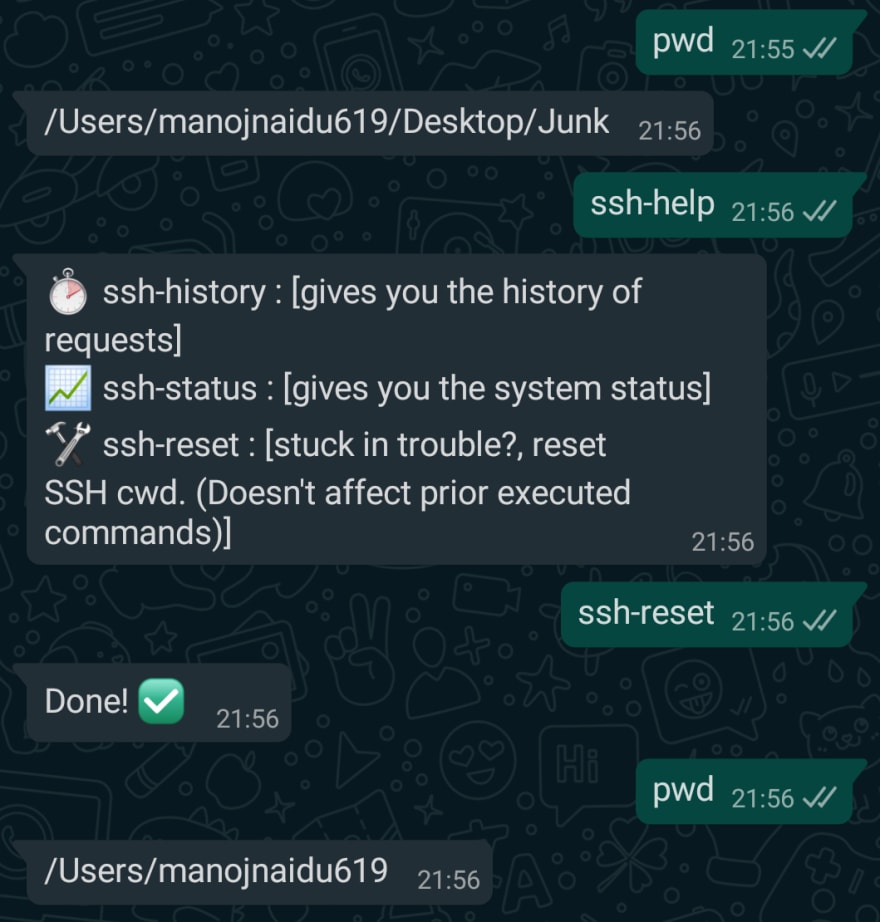
✅ Demonstrating custom command ssh-reset (to reset the working directory)
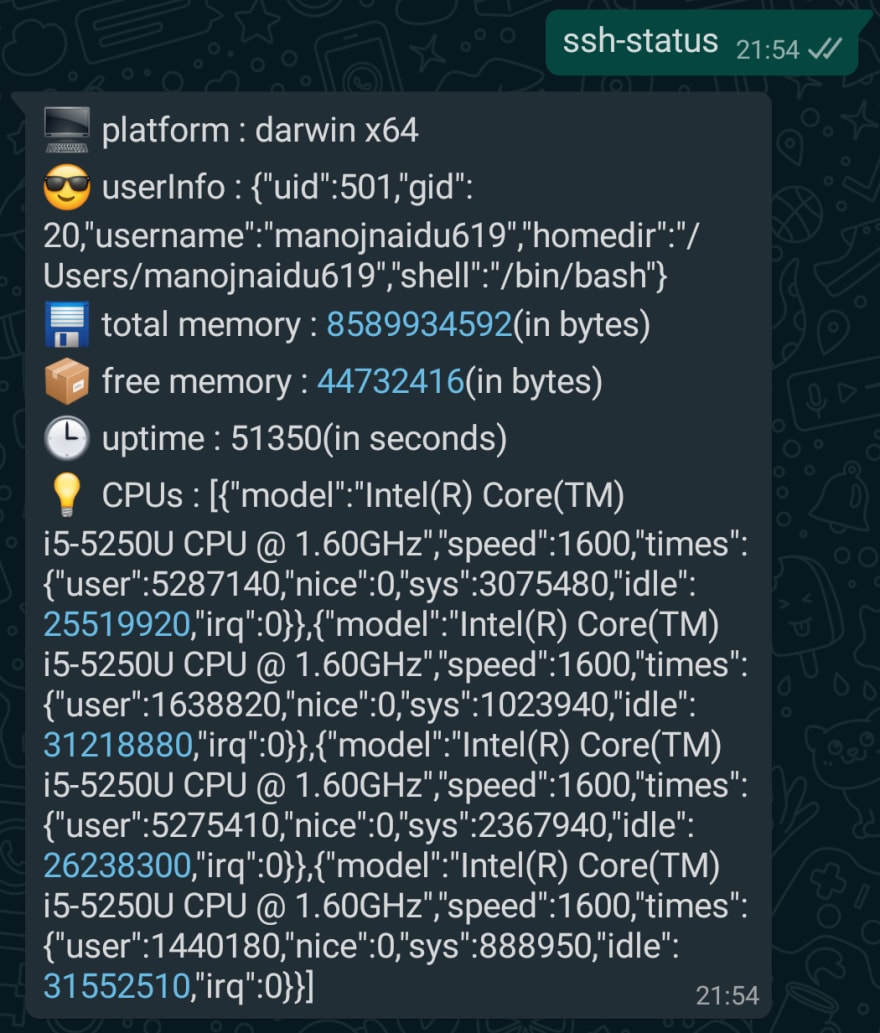
✅ Demonstrating custom command ssh-status (to retreive system status and extra info)
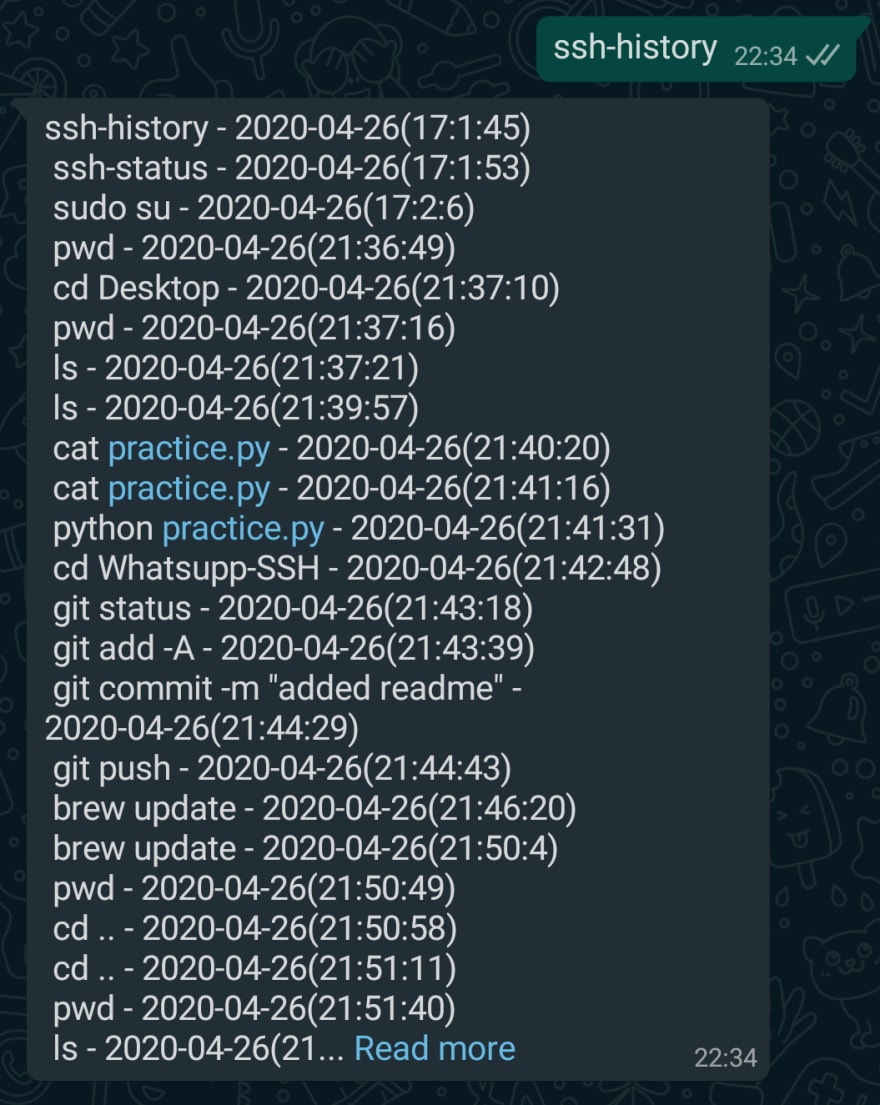
✅ Demonstrating custom command ssh-history (alias version of history bash command. But here it lists the commands executed over Whatsapp)
How does it work?
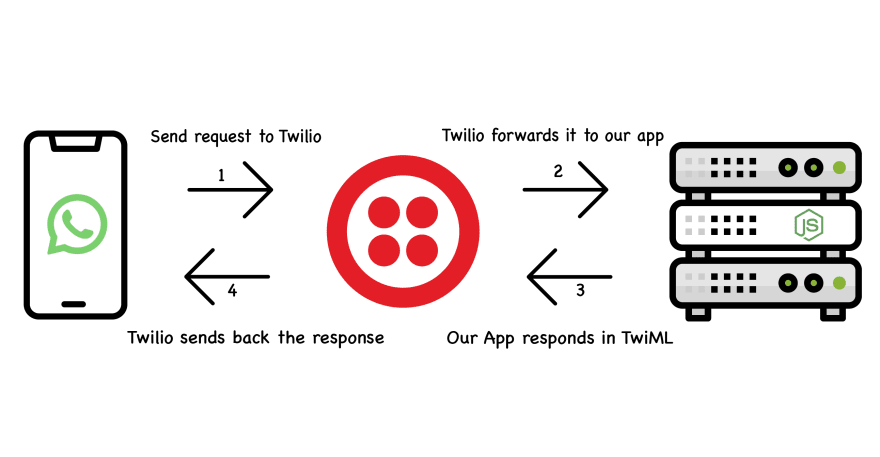
PHASE-1 ➜ The command which we need to execute on the server is sent to Twilio.
PHASE-2 ➜ Twilio forwards the request to our app. For this particular action to work, we need to setup a webhook inside twilio console...(We will talk about this in Setup section of this post).
PHASE-3 ➜ After receiving the request from Twilio, Our app first verifies that the request is actually being sent by Twilio. Otherwise, the request would be rejected. Then, it executes the command entered by the user and sends back the output/response in the format which is understood by Twilio (Twilio Markup Language(TwiML))
PHASE-4 ➜ Once Twilio receives back the TwiML response from our app, it sends it back to the user.
What's the Stack?
- Pure NodeJS
📍 But, to setup and get started we need...
Valid Twilio account
A remote server/ computer (on which we could execute shell commands, I am using AWS EC2)
How to Setup?
The setup process is really simple, you just have to follow these four steps...
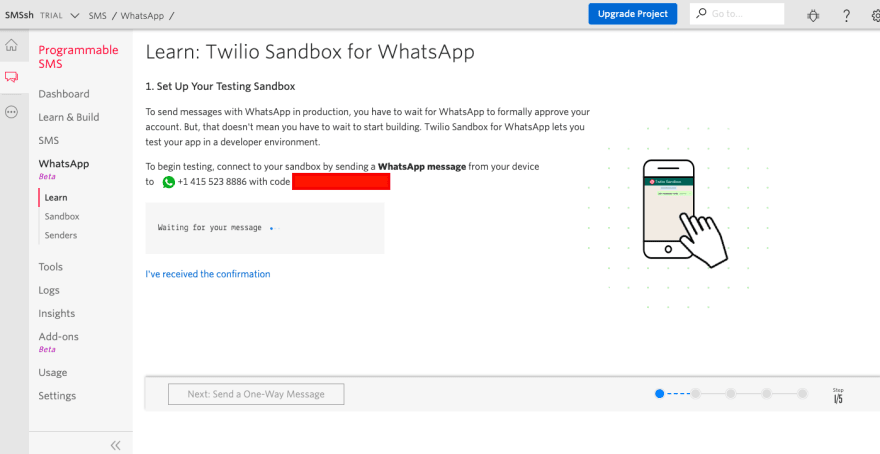
✏️ STEP-1. Signup for a Twilio Account and join the Twilio Whatsapp sandbox.
- Signup for an account here
- Now, login and join the sandbox by doing as directed on screen and complete all 3 steps. Don't share your sandbox code with anyone (The red block covers my sandbox code)
- One final thing needs to be added into Twilio. We will see that later...
✏️ STEP-2 Configure port on the server/ computer.
If you are setting up in the local computer, then you are free to skip to STEP-3.
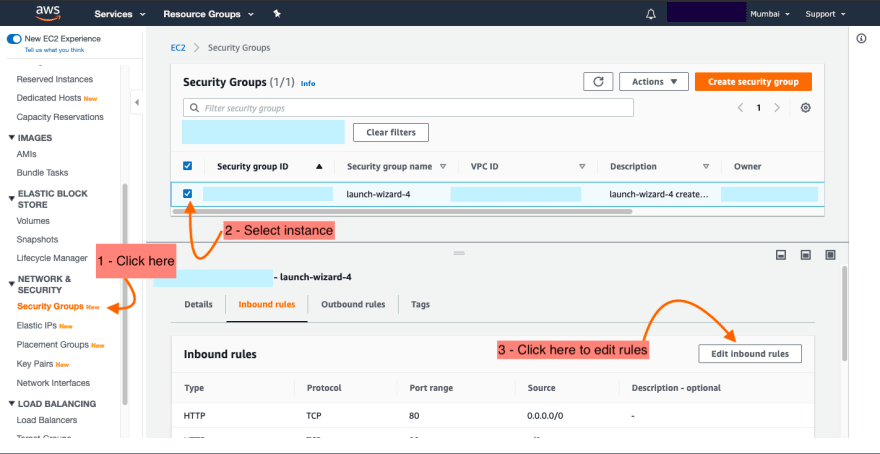
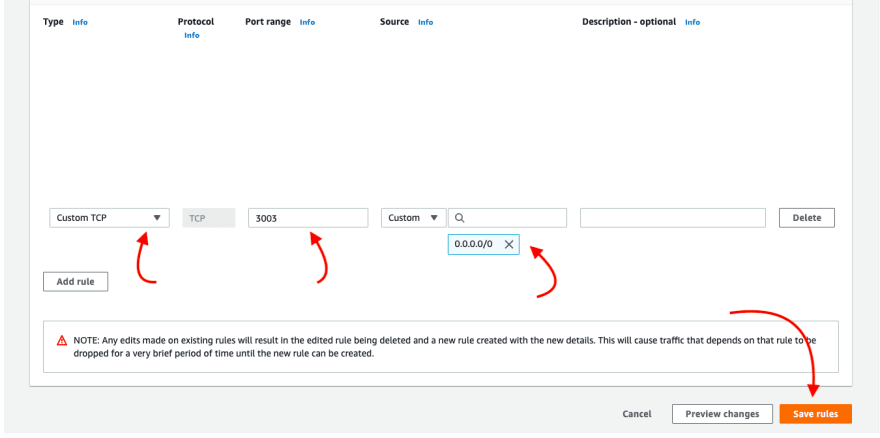
If setting up in a remote server, then you need to configure the instance/ droplet to open port 3003 for incoming requests.
📌 port 3003 is where Twilio would be forwarding the requests to...
If using AWS EC2 then you need to add a new rule inside Security Groups -> Inbound rules of a particular instance.
- Then add a new rule like so...
📌 If using other than EC2, then refer to official docs.
✏️ STEP-3 Let's move towards our computer/ server.
📌 All the actions from now are performed inside the terminal.
cdinto the directory where you want to clone the app.Now, clone the project repo.
 manojnaidu619
/
Whatsupp-SSH
Access your SSH over Whatsapp
$ sudo git clone https://github.com/manojnaidu619/Whatsupp-SSH.git
-
cdinto the project folder and runsudo npm install
$ cd Whatsupp-SSH/

$ sudo npm install
- As we are logging the requests into a log file, we need to give appropriate permissions to the app directory and the folders inside it. (The path to project must be absolute)
$ sudo chmod -R a+rw ~/home/Whatsupp-SSH
- Now adding
envvariables, which our app relies on. Make sure the key is same as mentioned below.
📌 Here, I am considering Ubuntu as the OS.
$ sudo nano /etc/bash.bashrc
scroll down to the bottom of the file and add these lines by replacing the values.
export SSH_PSWD=YOUR_DESIRED_PASSWORD
export TWILIO_URL=http://PUBLIC_IP_OF_SERVER:3003/Whatsupp-SSH
export TWILIO_AUTH_TOKEN=YOUR_TWILIO_AUTH_TOKEN
then source the bash.bashrc file by typing.
$ source /etc/bash.bashrc
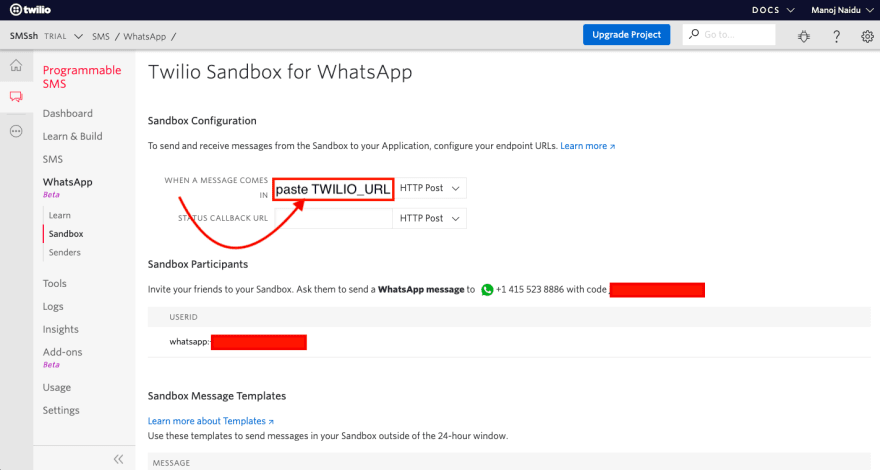
- Now, copy the same TWILIO_URL that was added to
bash.bashrcfile.
📌 Remember that we had one last thing to add to Twilio sandbox configuration... It's time to do that.
head to twilio console -> programmable SMS -> Whatsapp -> Sandbox
After adding that, scroll down and hit Save.
✏️ STEP-4. Head to your server/computer and run these final commands.
- install
pm2.
$ sudo npm install pm2 --global
- Now, run
pm2 startupto initialize startup scripts. So, whenever the server reboots/ crashes, our node app would also be picked up automatically.
$ pm2 startup
Now copy-paste the command given by pm2 (the one outlined by red border) and hit enter.
- Now, to save them all run
pm2 save.
$ pm2 save
- just one final command left, you have successfully setup the app. Now let's start the
pm2server.
$ pm2 start ABSOLUTE_PATH_TO_WHATSUPP-SSH/src/app.js
Hurray! 🙌 your app is now up and running, get started by sending a simple command to your Twilio sandbox over Whatsapp.
What are all the Unique features?
Apart from executing traditional shell commands, our app supports and has cool features built-in. Here they are...
- in-app user authentication. Before executing any command, the user has to authenticate himself by entering the correct password. He can continue, only if the authentication is successful.
📌 The execution thread gets locked automatically every 5 minutes(once after the user is authenticated), even if no operations were performed.
The user has to re-enter the correct password to continue...This is to stay safe from non-auth users. The lock interval could be modified insrc/utils/validators/authValidator.js
Helper commands.
ssh-helpis the command to view the list of built-in helper commands.ssh-historygives the history of remotely executed commands. The log file is saved in logs/requestLogs.log
❗️ Make sure to frequently clear the file. (By setting a cronjob or by doing it manually).
-
sudo rebootcan also be executed, which reboots the system and our node server gets automatically picked up during bootup(as we are using pm2 to manage our node server).
📌 Our node app starts automatically, even if there was a sudden system crash/ Unexpected error occurs.
How secure is it?
It could be explained in different layers...
- Layer-1
Webhook Validation. This is technically validating the incoming request and making sure it was sent by Twilio. It is done by verifying x-twilio-signature passed in request headers by Twilio and with different parameters like (authToken, x-twilio-signature, webhookUrl, req.body). More info on this could be found here
- Layer-2
in-app authentication. After the request is validated in layer-1, the user needs to enter the correct password to get authenticated and the user's authStatus would be reset every 5 minutes.
Challenges came across
Managing change in directory state. This was very challenging because once the command is executed by the child-process, it gets killed and the further executing process has no idea about the prior change in the working directory.
Custom Authentication. I've talked about it earlier, it was hard to manage the state of the user and to validate each request by also keeping an eye on the last login time.
Error Handling. Needed to take care of different scopes of errors and process/ child-process crashes.
Async code handling. As
fsandchildProcessmodules provide mostly async functions, these needed to be handled carefully.
What I learned along the way?
The development process was just amazing, every day I got to try something new and different. I would say "Learn and Code Explore" had been my mantra throughout the flow. Learned a lot about spawning a new process and dealing with child processes. Got my hands on file-system, custom middlewares, startup scripts/ init.d scripts, systemctl, etc...
Limitations
Currently does not support multiple commands execution at once like...
cd Sample && touch hello.txtDoes not know how to react for interactions like when critical commands with
sudoare executed.






Top comments (2)
This is really neat! Great Job
May I suggest for complex real-time data display like htop, the app would take a screenshot of the ssh output and send it over to whatsapp as an image file?
Just a suggestion but I think this is really cool. I'm definitely testing this out soon
Thanks! ✌️, I really appreciate your suggestion and it sounds great. I will look into it👍.