For the last few days, I've been working with @paulasantamaria on a side-project called Research Pal. It's a simple yet powerful Chrome extension that will let you organize your research sessions in the browser.
Prototypes come first
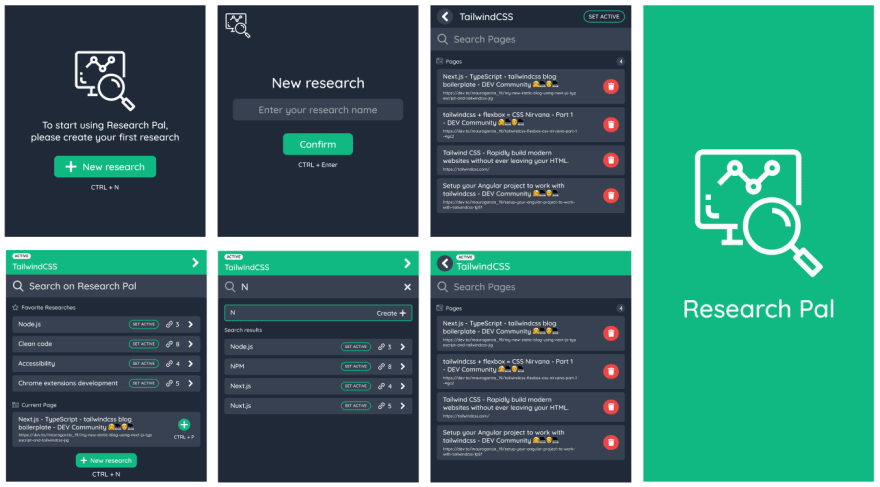
As part of the building process, we decided to create a few prototypes using Figma.
If you want to know more about the benefits of prototyping, I wrote an article about that a long time ago.
After a couple of hours of working, we end up with the following result:
From prototypes to Svelte components
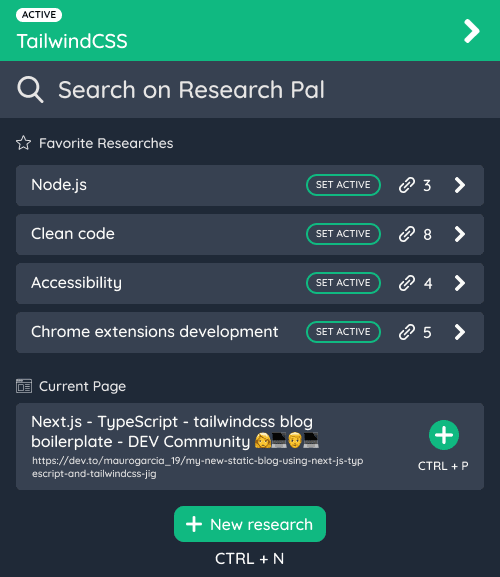
Before we started coding our app, we needed to choose which screen we wanted to tackle first. The home page is the first screen that the user will see after clicking the extension button within the browser, so we thought it was the perfect candidate:
We could create a Home.svelte component and start coding the entire screen there, but we would end up with hundreds of lines of code, with probably dozens of properties and methods to handle different things🤢. Building small and reusable components has many benefits (we could write a whole new post about it), but for now, let's say that an app without using small components will be very difficult to maintain.
To get a clean and easy to read app, you'll need to:
- Identify components.
- Write your ideal screen skeleton.
- Fill the skeleton.
- Replace hard-coded data.
Identifying components
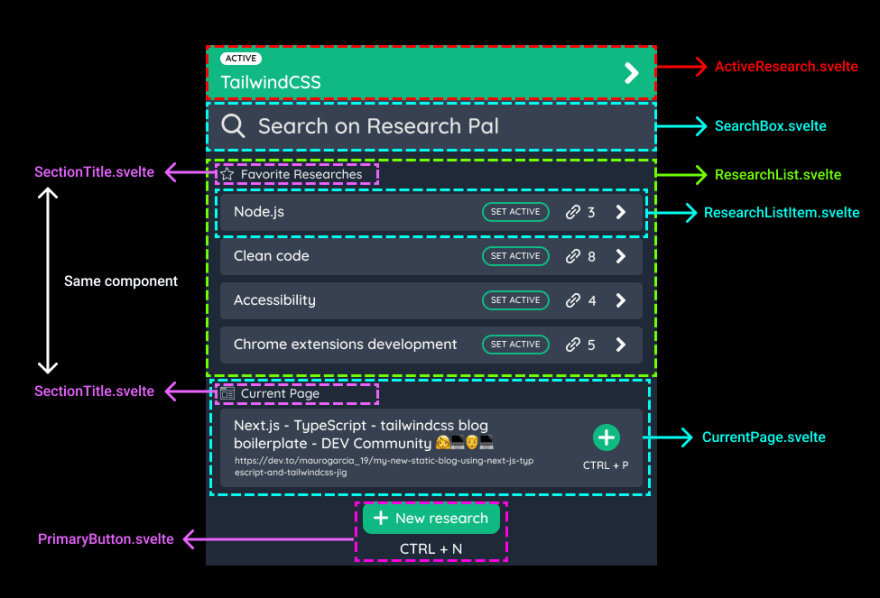
As I said before, our goal is to get a list of small, reusable components that will send and receive data through properties.
After some digging, we end up identifying the components listed in the image below. If it's required, we could create smaller components later. For example, our ResearchListItem.svelte component could include an ActiveButton component. But for now, these are the components we'll be working with:
Write your ideal screen skeleton 💀
I usually like to build a skeleton for each screen. That way, I can rest assured that my screen will remain semantic and easy to read for other devs. Once the skeleton is complete, I start creating each component included in my skeleton. Let's build the skeleton for our Home.svelte component:
<script>
</script>

<div class="container">
    <ActiveResearch />
    <SearchBox />
    <ResearchList />
    <CurrentPage />
    <PrimaryButton text="New Research" icon="plus" />
</div>

<style>
    .container {
        display: flex;
        flex-direction: column;
        align-items: center;
    }
</style>
Fill the skeleton
We'll need to create each component using the same name defined in our skeleton. Here are some examples of how our components may look like:
<!-- SearchBox.svelte -->
<script>
    let searchText = "";
</script>

<div class="container">
    <img id="search-icon" src="images/search.png" alt="" />
    <input
        type="text"
        bind:value={searchText}
        id="search-input"
        placeholder="Search on Research Pal" />
    {#if searchText !== ""}
        <img src="images/close.png" alt="" />
    {/if}
</div>

<style>
    .container {
        background-color: var(--cool-gray-700);
        padding: 13px 16px;
        display: flex;
        align-items: center;
    }
    #search-icon {
        margin-right: 14px;
    }
    #search-input {
        font-size: 24px;
        border: none;
        color: var(--cool-gray-200);
        background-color: transparent;
        flex-grow: 1;
    }
    #search-input:focus {
        outline: none;
    }
</style>
<!-- ResearchList.svelte -->
<script>
    import ResearchListItem from "./ResearchListItem.svelte"
    import SectionTitle from "./SectionTitle.svelte"
    // Replace this array with real data
    let researches = [
        {
            name: "Node.js",
            active: false,
            pages: 3
        },
        ...
    ]
</script>

<div id="container">
    <SectionTitle title="Favorite Researches" icon="star"></SectionTitle>
    {#each researches as research}
        <ResearchListItem {...research}></ResearchListItem>
    {/each}
</div>

<style>
    #container {
        padding: 16px;
    }
</style>
Replace hard-coded data
Finally, review each component and replace the hard-coded arrays or objects with real data fetched from an API or any other source.
Final thoughts
When you prototype first, you'll avoid inconsistencies between different screens of your app. On the other hand, you will discover opportunities to reuse the same component in multiple places.
- Identify components.
- Write your ideal screen skeleton.
- Fill the skeleton.
- Replace hard-coded data.
You'll end up with a clean and easy to maintain application.
What's the first thing you do when starting a new project?
Did you try prototyping? Let me know in the comments below 👇


Top comments (0)