I have decided to document this as I know this is going to come up again and again at least for me, but if it helps someone else in the process then that’s a win!
The goal here is to either create a new PAT or it is to replace an expired PAT, PAT = Personal Access Token.
The kicker here or the reason why everyone is moving over to PAT instead of a password to authenticate with GitHub is because of password authentication being removed as of August 2021. A welcomed change in security policy that will affect all desktop git applications that integrate into GitHub services. Users that already use OAuth will be unaffected, However I was relying on username and password to connect GitHub with Git, so I need to make that switch.
For the purposes of the post, I am using a dummy PAT. Not that I don’t trust you, but the internet is a dark place and not everyone is friendly. In this post we will walk through how you switch from username/password authentication to PAT.
Creating your Personal Access Token
Head on over to github.com and sign into your account, then head to the top right corner and hit your little profile picture.
From this menu hit settings, notice the nice Dark High Contrast preview feature I have in my profile. anyway, back to the post.
Next up we need “Developer Settings” as highlighted below.
Then we want “Personal Access Token”
Ignore my tokens and the expiration date, nothing to see here. Move on. Hit “Generate new token” notice though if you are using Windows and WSL with say Ubuntu which is what we have here as well as an additional Ubuntu Laptop you have to create a token for each, well you could use the same one, but I want to treat it as a separate machine, maybe wrong of me, but these tokens don’t cost you anything so why not. But I probably should add some expiry to them one day…
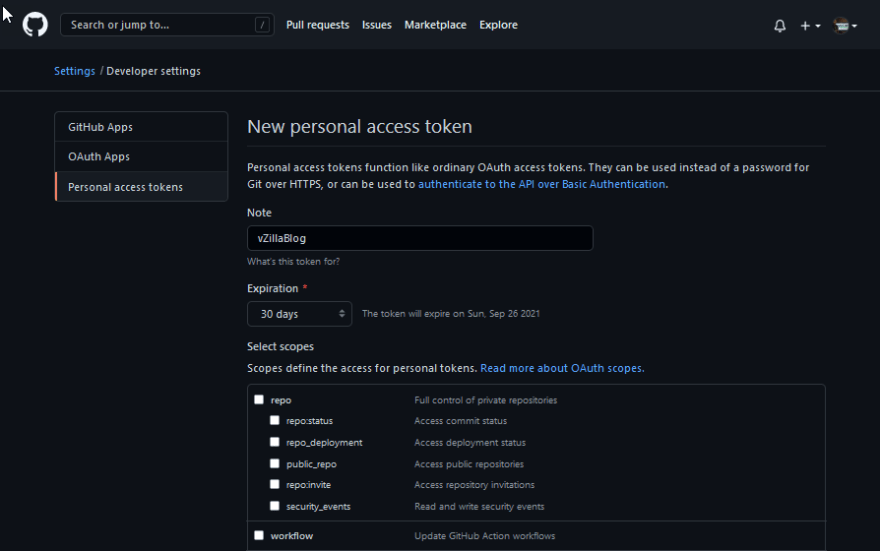
Here we can create our new token, be cautious of setting that expiry, that will involve coming in here again and walking through the same process. But then also spend some time on the scopes, my GitHub is a playground and portfolio of private projects and it is just me that has access to it but if you have multiple users and a team that are contributing you might want to give specific access. Once you have defined the Name / Note of your token, Expiration and scopes then hit the green generate token button at the bottom of the page.
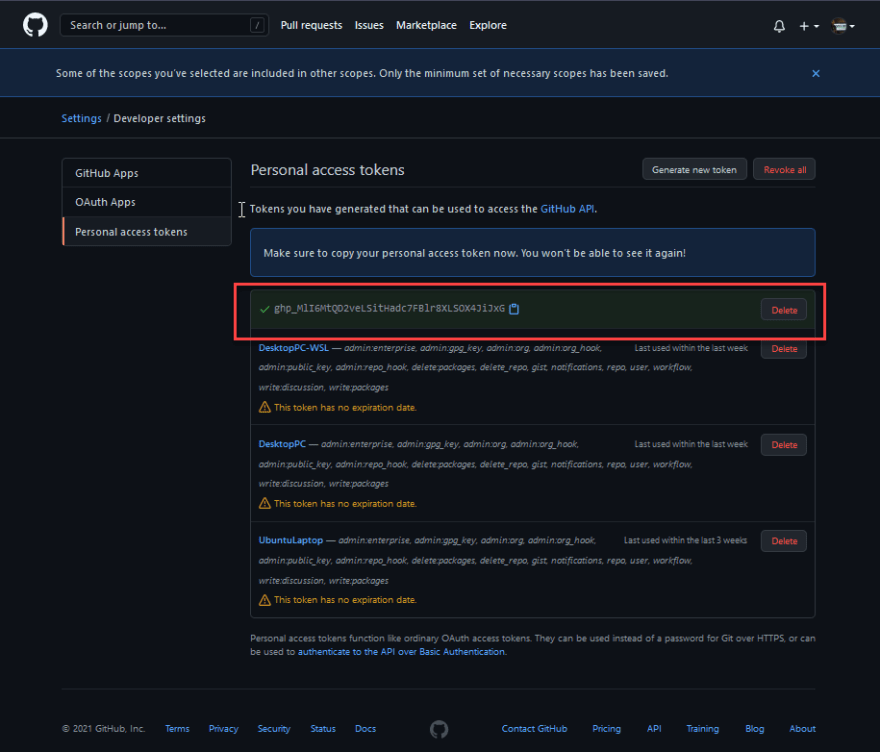
You will then see the following screen, and I am sure we have all once before possibly closed the browser or not taken a note of the token key displayed here. We need to take a copy of that to use later. I generally open a notepad and drop it in there for the time being, no saving of the notepad but its there as a clipboard extension.
Setting up Git with the new token
For my machine to store the credentials we need to install Git-Credential Manager Core on our system, I had previously already completed the task of changing over to PAT on my Windows machine as this is built into Git. In this process we are using WSL / Ubuntu so we chose the install instructions for our distribution from here – https://github.com/microsoft/Git-Credential-Manager-Core#linux-install-instructions
curl -sSL https://packages.microsoft.com/config/ubuntu/21.04/prod.list | sudo tee /etc/apt/sources.list.d/microsoft-prod.list
curl -sSL https://packages.microsoft.com/keys/microsoft.asc | sudo tee /etc/apt/trusted.gpg.d/microsoft.asc
sudo apt-get update
sudo apt-get install gcmcore
git-credential-manager-core configure
When I ran through the above I did it line by line rather than copying the block of code, I am not sure if everyone has this same experience with WSL but when I am copying code from Windows to my Ubuntu terminal it will add the odd character mostly ~ which is super annoying and even more annoying when you are in the middle of a live demo at KubeCon… but that is why I have moved over to the Ubuntu laptop for most of my daily tasks.
Next, we must configure GCM and to do this in my instance I used the 3. Gits built in credential cache, but other alternatives can be found here – https://github.com/microsoft/Git-Credential-Manager-Core/blob/main/docs/linuxcredstores.md
As you can see I have done some work and I am now wanting to push this back into the repo on a system that has not been authenticated yet. I run a git add and commit prior to this and then a git push and I am questioned how I would like to authenticate. (I assume web browser is there for OAuth?) genuine question if anyone is actually reading this and knows then let me know. We will obviously choose option 2.
With that we then add in our token, I know you have seen the one in the screen shot above but I did not use that here. This was the real one.
And then once that is done we are able to push our changes to our repository from our WSL Ubuntu instance in this case but obviously git can be configured in many different places.
And then this was just a final flex to show another test after the fact because that PAT is going to be stored in GCM like we mentioned at the beginning of this section.
Now I expect that it might only be referencing this as many people have already written similar walkthroughs which I am ok with but the fact I have written my own will help me in the future I am sure. However, if it helps one other person that is the reason we put this content together and share it within the community. If I have missed anything or you have some feedback that could help me out then please let me know in the usual places, generally twitter, LinkedIn or just below in the comments.


Top comments (0)