In this tutorial I am going to show you how to add badge with count to any UIBarButtonItem. Which is not as easy as it might seem, since we can add badges to tab bar items pretty easily like so:
tabBarItem.badgeValue = "\(5)"
And we can also show badges over the app icon, assuming user gave us permission to do so.
However showing badges over UIBarButtonItem is not natively supported.
We have to do it the manual way. Which means adding subview to the button.
The first necessary step is to use UIButton inside UIBarButtonItem otherwise this won’t work. You can drag the plain UIButton over the UIBarButtonItem position in your storyboard and Xcode will create UIBarButtonItem with custom view which will be the UIButton. We will then remove its title and set icon to something we want.
Prepare button
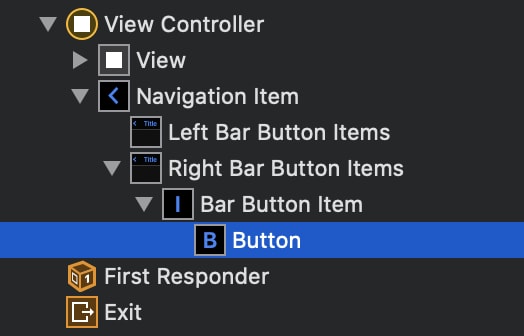
Let’s start by adding UIButton to the navigation bar. The end result should look like this in the document outline:
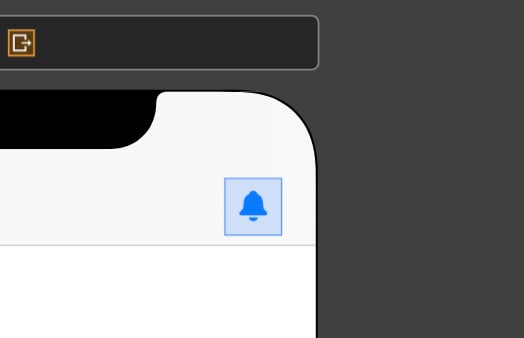
Make sure to select the UIButton and not UIBarButtonItem, then delete its title and set image to bell.filled for example. It is available for iOS 13+ as a SF Symbol.
While you are in the storyboard, change button size in the Size inspector to be width of 34 and height of 44.
I have no idea why this is needed but without it, the badge would sometimes change position after navigating back to the view controller with badge..🤷
We can move on to code and create @IBOutlet for the button.
@IBOutlet var notificationsButton: UIButton!
One again, make sure to connect the UIButton and to the UIBarButtonItem 🙂
Just to be sure, I also set constraints in viewDidLoad:
NSLayoutConstraint.activate([
            notificationsButton.widthAnchor.constraint(equalToConstant: 34),
            notificationsButton.heightAnchor.constraint(equalToConstant: 44),
        ])
Creating the badge
The actual red badge with number will be just plain UILabel we can add to the button in code.
Let’s start by creating method that will return configured UILabel we can use later.
let badgeSize: CGFloat = 20
let badgeTag = 9830384

func badgeLabel(withCount count: Int) -> UILabel {
        let badgeCount = UILabel(frame: CGRect(x: 0, y: 0, width: badgeSize, height: badgeSize))
        badgeCount.translatesAutoresizingMaskIntoConstraints = false
        badgeCount.tag = badgeTag
        badgeCount.layer.cornerRadius = badgeCount.bounds.size.height / 2
        badgeCount.textAlignment = .center
        badgeCount.layer.masksToBounds = true
        badgeCount.textColor = .white
        badgeCount.font = badgeCount.font.withSize(12)
        badgeCount.backgroundColor = .systemRed
        badgeCount.text = String(count)
        return badgeCount
    }
It is bit longer but nothing complicated. We first create the UILabel and make sure to specify width and height via frame so rounding corners with half the height will work. The tag is used to find the badge later and remove/modify it as needed. masksToBound is needed for the rounded corners.
We will be creating AutoLayout constraints in code hence the setting translatesAutoresizingMaskIntoConstraints to false.
Showing the badge
Our badge is ready. We can add it to the button.
func showBadge(withCount count: Int) {
        let badge = badgeLabel(withCount: count)
        notificationsButton.addSubview(badge)

        NSLayoutConstraint.activate([
            badge.leftAnchor.constraint(equalTo: notificationsButton.leftAnchor, constant: 14),
            badge.topAnchor.constraint(equalTo: notificationsButton.topAnchor, constant: 4),
            badge.widthAnchor.constraint(equalToConstant: badgeSize),
            badge.heightAnchor.constraint(equalToConstant: badgeSize)
        ])
    }
I found these constants to look best, but you can modify them as needed. The badge could theoretically be set just with frame but I found out that when switching between view controllers it would jump into another positions and couldn’t be animated. With this setup you can provide little animation for the bell button without badge causing issues.
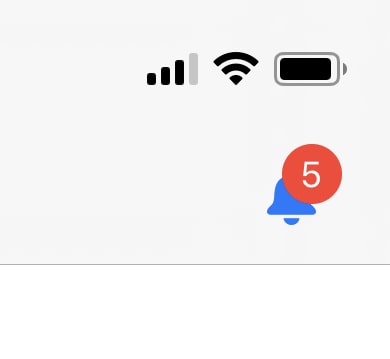
Let’s check how the result looks:
Just like the system ones 🙂
Removing the badge
What about hiding the badge? We can simply remove it like so:
func removeBadge() {
        if let badge = notificationsButton.viewWithTag(badgeTag) {
            badge.removeFromSuperview()
        }
}
If you want to have the same notifications/badge button on multiple screens in your app (maybe using TabBarController) check out my post about NotificationCenter which can help you keep the badge count synchronized. 👍

iOS: How to notify parts of app about changes and send data in loosely coupled way
Filip Němeček ・ Feb 15 '20 ・ 3 min read
Thanks for reading!
Is anything not clear? Do you want more information? Ask in the comments and I will do my best to help you.
--
Need to focus on your iPhone? Get free WebBlock app for scheduled website blocking from the App Store!


Top comments (0)