This is from a series of articles I’m putting together for FlutterCamp 2018. Read more about it in the first article of the series here.
At this point, I am assuming you have just arrived at a FlutterCamp event (in person) or learnt about Flutter (online). So where do you go next?
2a. Get Flutter SDK set up.
If you haven’t already done so, follow these instructions to get the Flutter SDKinstalled in your development platform. I use MacOSX and I found the process fairly painless.
2b. Verify Flutter SDK set up.
Once installed, run flutter doctor to verify your development environment is ready. You should see recommendations to fix any missing dependencies if not. If, like me, you had installed an earlier version of flutter (e.g., alpha), run flutter upgrade and you should be set.
For reference, this is my current flutter setup:
$ flutter doctor
Doctor summary (to see all details, run flutter doctor -v):
[✓] Flutter (Channel beta, v0.4.4, on Mac OS X 10.13.4 17E199, locale en-US)
[✓] Android toolchain - develop for Android devices (Android SDK 28.0.0-rc1)
[✓] iOS toolchain - develop for iOS devices (Xcode 9.4.1)
[✓] Android Studio (version 3.1)
[✓] IntelliJ IDEA Ultimate Edition (version 2018.1.4)
[!] VS Code (version 1.24.1)
[✓] Connected devices (1 available)
I currently have an issue with flutter doctor incorrectly reporting VSCode missing a Dart extension (hence the “!” on that line) but otherwise you should see something similar, customized to your development platform.
2c. Get Target Platform support set up.
Flutter can be used to develop apps for both Android and iOS devices. Have at least one of these environments available — see these instructions for iOS setup and these instructions for Android setup.
This includes ensuring that the required development SDKs are installed, but also setting up virtual targets for these environments — e.g., the iOS simulator and the Android emulator.
In my case, since I am on MacOS I elected to get both setup. For quick prototyping and testing, I elect to use the iOS simulator using_open -a Simulator _to run it from the command line.
To test against both devices, I have been switching over to the Android Studio IDE and using that to launch Android emulators — however, I am currently exploring VS Code. I will update this section with insights when done.
2d. Configure Editor.
The Flutter docs page will identify Android Studio and VS Code as the two top-level tabs for editors. If you open the Android Studio tab, you can also find instructions for using the IntelliJ IDEA editor. I’ve used all three; IntelliJ IDEA and Android Studio are similar; no surprise — they’re both from JetBrains.
The Android Studio and IntelliJ IDEA installs were routine. The VS Code install also was effortless. However I am currently facing an issue with flutter doctor that needs resolving in context. Watch this space.
Note: you don’t need all these editors installed. Just pick one.
Technically, you can get away with using just the Flutter CLI (comes with their SDK) and any text editor (no IDE needed). However the IDE provides visual tools (e.g., Flutter widget inspector) that simple text editors don’t. Tradeoffs are in speed vs. capability. Pick your lane. It’s fairly painless to switch between lanes at any point so you don’t risk much with your decision.
2e. Your First Test App
The Flutter docs provide instructions for Android Studio, VS Code — and also simple text editor + CLI. I have used both the first and last options multiple times with no issues — so just jump in if you want to go that route.
I am currently getting my feet wet with VS Code so all my notes/observations here will reflect usage of that editor.

Create the App (VS Code)
View-Command Palette.
Type flutter.
Pick Flutter:New Project Action
Enter project name. Lower-case, separate by underscores if needed.
Select destination folder; wait for build to finish. You’ll get a “Your Flutter project is ready” notification at bottom right.
Run the App. Check there to see if device is selected. I had iOS Simulator already running.
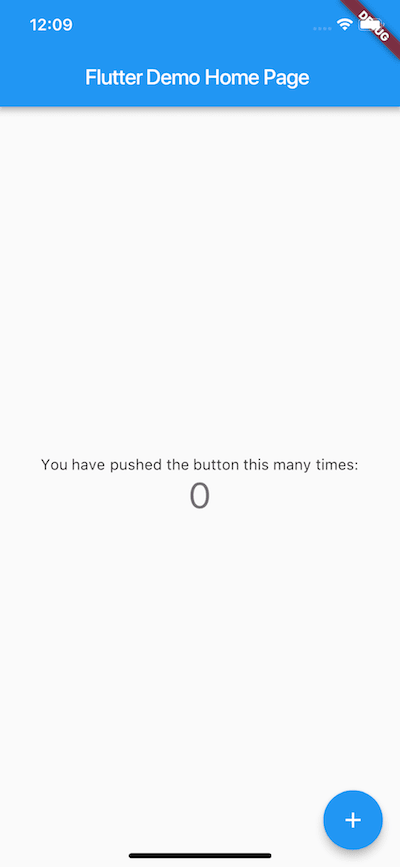
Press F5 to launch app in that device. You should see a screen like the one shown here.
Try Hot Reload.
Make a change to some aspect of the code e.g., the color value in “primarySwatch:Colors.blue”. Then just save the change to trigger hot reload. You can also click the green refresh button at top of editor) — demonstrates hot stateful reload of Dart/Flutter.
At this point, take a deep breath and go drink some coffee. You are now ready to start exploring other tutorials, codelabs and ideas. Your environment is ready!


Top comments (2)
Helpful article! Thanks! If you are interested in this, you can also look at my article about Flutter templates. I made it easier for you and compared the free and paid Flutter templates. I'm sure you'll find something useful there, too. - dev.to/pablonax/free-vs-paid-flutt...
everyone can understand this super useful flutter article. Thanks for this and expect a lot more from you.