We are very excited to announce our support for Playwright with our new plugin @nx/playwright.
This blog will show you:
- What is Playwright
- How to create a new Nx workspace with Playwright support
- How to add Playwright to an existing Nx workspace
What is Playwright?
Before we start, let’s answer this question: what is Playwright and why should we use it?
From playwright.dev, it says: “Playwright is end-to-end testing for modern web apps”. It sounds good, what does it do for us developers? What developer experience does it provide?
Multiple Browsers
It is easy to run e2e test suites across multiple browsers. Playwright supports all modern rendering engines including Chromium, WebKit, and Firefox. It also supports branded browsers and mobile viewports. For example, we can simply add the below code to the playwright configuration file to run the same test across these browsers:
import { defineConfig, devices } from '@playwright/test';

export default defineConfig({
  projects: [
    /* Test against desktop browsers */
    {
      name: 'chromium',
      use: { ...devices['Desktop Chrome'] },
    },
    /* Test against mobile viewports. */
    {
      name: 'Mobile Chrome',
      use: { ...devices['Pixel 5'] },
    },
    /* Test against branded browsers. */
    {
      name: 'Google Chrome',
      use: { ...devices['Desktop Chrome'], channel: 'chrome' }, // or 'chrome-beta'
    },
  ],
});
Auto Waiting
Playwright automatically waits for the relevant checks to pass, then performs the request action. What does it mean? For example, let's say we have a sign-up form where:
- while the app checks that the user name is unique, the submit button is disabled.
- after checking with the server, the submit button becomes enabled.
How do we write tests in the Playwright? Playwright performs a range of actionability checks on the elements before making actions to ensure these actions behave as expected. So we don't need to wait for the button to be enabled. Playwright will check it. We can simply write:
await page.getByTestId('submit-button').click();
HTML Test Report
Playwright creates a nice HTML test report that allows filtering tests by browsers, passed tests, failed tests, skipped tests, and flaky tests.
Clicking on the individual test shows more detailed errors along with each step of the test:
It also has other features like recording screenshots and videos, test generation, and visual comparisons. Read more about Playwright at playwright.dev.
Next, let’s write and run some Playwright tests.
Create a new Nx Workspace with Playwright
In this example, we will create a React app using Playwright as its end-to-end testing framework. In the terminal, run the below command:
npx create-nx-workspace

✔ Where would you like to create your workspace? · nx-react-playwright
✔ Which stack do you want to use? · react
✔ What framework would you like to use? · none
✔ Integrated monorepo, or standalone project? · standalone
✔ Which bundler would you like to use? · vite
✔ Test runner to use for end to end (E2E) tests · playwright
✔ Default stylesheet format · css
✔ Enable distributed caching to make your CI faster · No
We get a standalone Nx React app named nx-react-playwright:
What is a standalone application? It is like an integrated monorepo setup but with just a single, root-level application. The repo has the same file structure as an app created from Create-React-App, but we can still leverage all the generators and executors and structure your application into libraries or submodules.
Run E2E
The default e2e test is located in e2e/src/example.spec.ts:
import { test, expect } from '@playwright/test';

test('has title', async ({ page }) => {
  await page.goto('/');
  // Expect h1 to contain a substring.
  expect(await page.locator('h1').innerText()).toContain('Welcome');
});
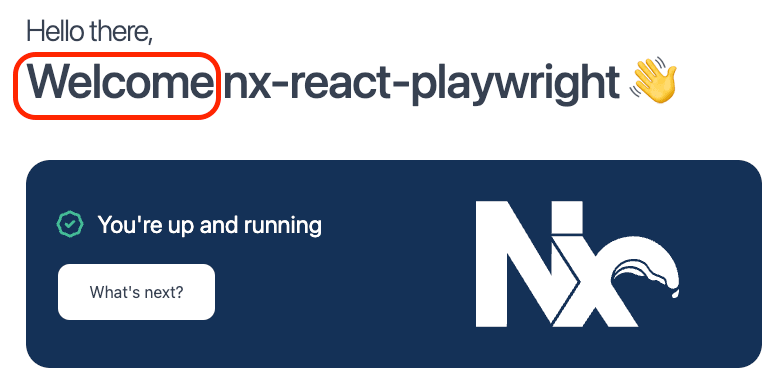
The test verifies the h1 header contains the text Welcome:
To run the e2e tests, run the below command:
npx nx e2e e2e
In the terminal, it shows the following log:
> nx run nx-react-playwright:serve:development
  ➜  Local:   http://localhost:4200/
  3 passed (11.8s)
To open last HTML report run:

  npx playwright show-report dist/.playwright/e2e/playwright-report
So the test passed and it also generated a report at dist/.playwright/e2e/playwright-report/index.html:
Add Another Test
Let's add another test to check the Documentation button works:
In src/app/nx-welcome.tsx, we need to add a test id to the link:
<a
  href="https://nx.dev/getting-started/intro?utm_source=nx-project"
  target="_blank"
  rel="noreferrer"
  className="list-item-link"
  data-testid="documentation-link"
>
Then in e2e/src/example.spec.ts, the test file will become:
import { test, expect } from '@playwright/test';

test.describe('navigation', () => {
  test.beforeEach(async ({ page }) => {
    // Go to the starting url before each test.
    await page.goto('/');
  });

  test('has title', async ({ page }) => {
    // Expect h1 to contain a substring.
    expect(await page.locator('h1').innerText()).toContain('Welcome');
  });

  test('should go to documentation site', async ({ page, context }) => {
    await page.getByTestId('documentation-link').click();
    // Opening a new tab and waiting for the page to render
    const pagePromise = context.waitForEvent('page');
    const newPage = await pagePromise;
    await newPage.waitForLoadState();
    expect(await newPage.title()).toContain('Intro to Nx');
  });
});
Now run npx nx e2e e2e, the test would still pass:
> nx run nx-react-playwright:serve:development
  ➜  Local:   http://localhost:4200/
  6 passed (3.1s)
To open last HTML report run:

  npx playwright show-report dist/.playwright/e2e/playwright-report
Now we have created a new Nx workspace with Playwright. However, if you already have an Nx repo, how do you add Playwright E2E configuration to an existing app?
How to add Playwright to an existing Nx workspace
For this example, I am going to add Playwright e2e tests to the below repo:
 nrwl
/
nx-examples
Example repo for Nx workspace
NxExample
This project was generated using Nx.
🔎 Powerful, Extensible Dev Tools
Quick Start & Documentation
30-minute video showing all Nx features
Adding capabilities to your workspace
Nx supports many plugins which add capabilities for developing different types of applications and different tools.
These capabilities include generating applications, libraries, etc as well as the devtools to test, and build projects as well.
Below are our core plugins:
-
React
npm install --save-dev @nx/react
- Web (no framework frontends)
npm install --save-dev @nx/web
-
Angular
npm install --save-dev @nx/angular
-
Nest
npm install --save-dev @nrwl/nest
-
Express
npm install --save-dev @nrwl/express
-
Node
npm install --save-dev @nrwl/node
There are also many community plugins you could add.
Generate an application
Run nx g @nx/react:app my-app to generate an application.
You can use any of the plugins above to generate applications as well.
When using Nx, you can create multiple applications and libraries in…
We are going to focus on the cart app in this example. In the terminal, run npx nx serve cart and it should serve up the app at http://localhost:4200/cart.
Install @nx/playwright
To install, run:
#npm
npm install @nx/playwright --save-dev

#yarn
yarn add @nx/playwright --dev

#pnpm
pnpm i -D @nx/playwright
Apply Playwrightt Configuration
There are 2 ways to apply the E2E Playwright configuration.
1. Apply directly on the cart app
We can set up Playwright directly on the cart app:
npx nx generate @nx/playwright:configuration --project=cart ---webServerCommand="npx nx serve cart" --webServerAddress="http://localhost:4200"
It adds:
- an e2e target in
apps/cart/project.json - an e2e folder at
apps/cart/e2econtaining e2e tests - playwright.config.ts containing Playwright configuration
Let's update the default test apps/cart/e2e/example.spec.ts to check whether the header exists:
import { test, expect } from '@playwright/test';

test('has title', async ({ page }) => {
  await page.goto('/cart');

  await expect(page.locator('nx-example-header')).toBeVisible()
});
Now we can run npx nx e2e cart and it should pass.
2. Add a separate E2E Project
The second way is to create a separate E2E project folder and apply configuration there.
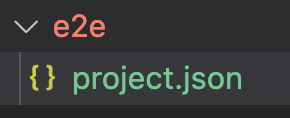
Create a folder e2e at the workspace root and a project.json file inside it:
Add name in e2e/project.json:
{
  "name": "e2e"
}
Now apply the Playwright configuration to the e2e project:
npx nx generate @nx/playwright:configuration --project=e2e ---webServerCommand="npx nx serve cart" --webServerAddress="http://localhost:4200"
Now I created an e2e folder at the workspace root:
Now we can run npx nx e2e e2e to run the Playwright e2e tests.
Summary
In this blog, we have:
- Created a new Nx react repo with Playwright
- Written our own Playwright tests
- Used Nx to run Playwright tests
- Set up a Playwright configuration for an existing Nx app
Hopefully, this gives you good insight into how to get started with Playwright. The Playwright configuration in this example is pretty simple, to learn more about @nx/playwright plugin, check out the Nx documentation: https://nx.dev/packages/playwright.


Top comments (0)