Hello reader, I am sure you might be one of those people who are trying to figure out, How do we connect the React client with the backend?! I assure you by the end of this post you will be able to grasp the basic stuff you need to know in-order to build your own FullStack react web application.
In this post, I wouldn't be focusing much on the design aspect. Much emphasis will be given to the concept.
I am assuming that you are quite familiar with the structure of a react client repo. Firstly, you must have the react boilerplate code which can be created using the create-react-app package by npm.
create-react-app client
cd client/
Inside the client repo, create another folder called server.
mkdir server
cd server/
Initiate the package.json using the below code segment.
npm init -y
With the package.json file available in the server directory, we are ready to add some dependencies which will be useful in setting up the backend.
npm install express body-parser cors mongoose
Let us have an idea about what each of the above package does:
- Express: Express is a light weighted web framework of Node.js. This acts as our main server and has many compatible middleware to perform almost any kind of function in web development.
- body-parser: It is a middleware used to parse the posted data from the client side.
- cors: Cross-origin resource sharing (CORS) is a mechanism that allows restricted resources on a web page to be requested from another domain outside the domain from which the first resource was served. And cors is the Node.js package which performs the above function for us.
- mongoose: mongoose is an object modelling tool for MongoDB. It helps us access MongoDB in an object oriented way.
Then, we must also install a package called nodemon.
npm install -g nodemon
Nodemon is a utility that will monitor for any changes in your source and automatically restart your server. Nodemon is used to run our Node.js server.
After this, we need to install MongoDB. In MacOS, we van install and run Mongo by the following commands.
brew install mongodb
mkdir -p /db/data
mongod
After the mongo shell opens:
use todos
The above command will create a database named todos.
If you face any problem with the Mongo installation, you can refer to the official website. It is quite clear there about the installation process of mongodb.
With this we have installed all the packages we need for the server side.
Configuring the server and connecting the database
Let us first create a file called server.js inside the server folder.
touch server.js
Also create a directory called db inside the server and create a file called index.js inside it. This file will handle the connection of the database to the server.
mkdir db
cd db/
touch index.js
The index.js file inside the db directory is given below.
With the above code, we are creating an express server and we are binding the cors and body-parser middleware to the app object.
We make use of the mongoose library inside the index.js file of the db directory to connect the database. We are loading the database in the into the server.js file to complete the connection of MongoDB with the express server.
Also, note that the server listens to the port 3000.
To run the server:
nodemon server.js
Creating a mongoose schema
Create a models folder inside the server. Inside the models directory, create a file named todo-model.js.
Mongoose allows us to create a model in an object oriented way.
With the above code, we are ready to access the Mongo database using the Todo Schema.
Endpoint implementation
Create two folders inside the server directory, namely, routes and controllers. Inside the routes folder create a file named todo-router.js and inside the controller folder create a file named todo-ctrl.js.
We must first create a router instance inside the todo-router.js. The created router instance will be used to handle the implementations such as adding a Todo item or deleting a Todo item, etc.
const express = require('express')
const router = express.Router()
The above lines will create a router instance.
todo-ctrl.js will have the implementations of the actions like adding a Todo item or deleting a Todo item.
The todo-ctrl.js file has the code for main implementation of adding a todo item and returning all the todo items.
Inside the todo-router.js, we define the method of handling the request using the statement
router.post('/', todoCtrl.createItem)
Here, todoCtrl is the imported version of the todo-ctrl.js inside the todo-router.js and the createItem is the function which is declared and defined inside the todo-ctrl.js which handles the addition of todo item into the database.
We can also see the another route which is used to get all the todo items which we need to display on the browser.
We also must load the routes into the server.js file.
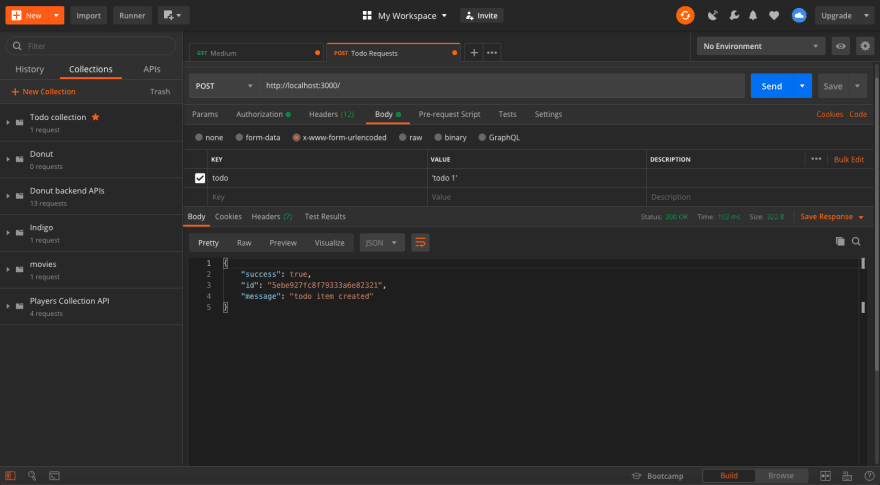
We can test the API's using Postman. Check the images below
With this, we finish the backend implementation of the Todo application.
Client side
We have already created the client side boilerplate code. We then create a components folder inside the src folder. We create a file named Todo.js inside the components folder.
We use axios package of npm for fetching the data from the endpoints.
npm install axios
The clickHandler method is used to post the data to the database. The componentDidMount method is a lifecycle method which gets triggered whenever a component inside the window is altered. So, when the todo item is posted, the endpoint to get all the todos will be hit by the componentDidMount method.
NOTE: It is advisable to use the map function in-order to loop around the todo items. For understanding purpose I have used the for loop.
Make sure that you import the Todo.js inside the App.js and run:
npm start
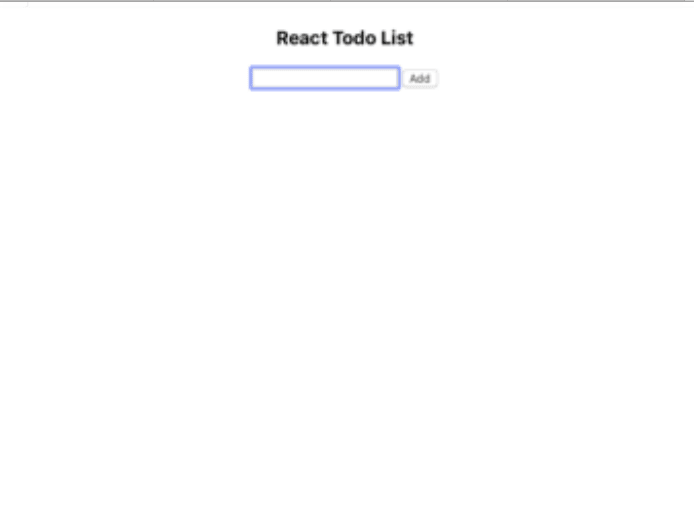
Open your browser and go to http://localhost:3001
As you add the items, the items will be updated.
I also want you to try deleting the todo items from the list. You can also try creating using a good design template.
The repo for the article can be found here
Reach me out on Github and LinkedIn
Enjoy :)


Top comments (5)
Great article but I don't know in what world this is a 5 minute read...
Haha yeah! BTW thank you :)
Thanks good project.
Why didn't you use hooks?
Thanks. Also, there is no particular reason I didn’t use hooks here. You may proceed with hooks too.
Why doesn't calling setState in componentDidUpdate result in an infinite loop?