In this article, we will explore how to deploy a Quarkus application to Elastic Beanstalk, and take a closer look at some of the key benefits and best practices for using these two technologies together. Whether you’re a seasoned AWS user or a Java developer looking to modernize your application architecture, you’re sure to find something of value in this guide.
Application Sample
We’ll create a simple Quarkus application that will call an API to return Chuck Norris jokes 😎
Create Quarkus Application
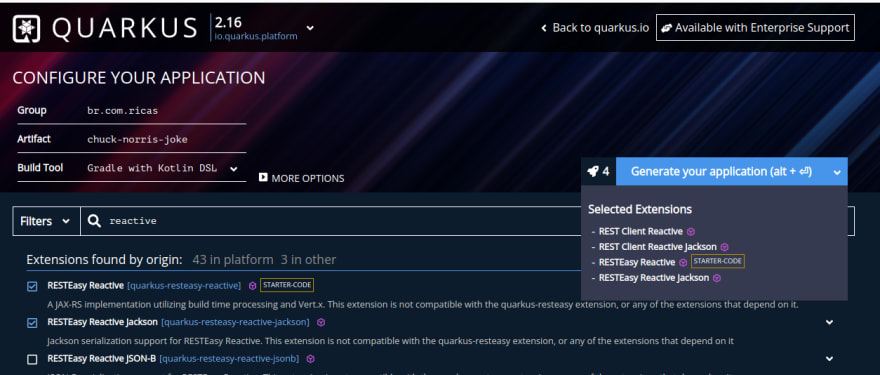
Quarkus is a Java framework designed for building cloud-native applications that are lightweight, fast, and scalable. Let’s create a new project using Quarkus Initializer by clicking here.
Note: After download the project, import it in your IDE
Consuming Chuck Norris Joke API
To query the jokes we will consume this API.
For this, let’s create a class that represents the value that contains the joke.
package br.com.ricas.application.response;
import com.fasterxml.jackson.annotation.JsonIgnoreProperties;

@JsonIgnoreProperties(ignoreUnknown = true)
public class JokeResponse {

  private String value;

  public String getValue() {
      return value;
  }

}
Now, we need to create a interface that will make a call to API:
package br.com.ricas.domain.service;

import br.com.ricas.application.response.JokeResponse;
import org.eclipse.microprofile.rest.client.inject.RegisterRestClient;
import javax.ws.rs.GET;
import javax.ws.rs.Path;
import javax.ws.rs.Produces;
import javax.ws.rs.core.MediaType;

@RegisterRestClient(configKey = "chuck-norris")
public interface ChuckNorrisService {
    @GET
    @Path("/jokes/random/")
    @Produces(MediaType.APPLICATION_JSON)
    JokeResponse getRandomJoke();
}
Note: @RegisterRestClient is a JAX-RS annotation used in Quarkus to register a REST client. It allows you to define an interface that can be used to make HTTP requests to a REST API. The configKey parameter is used to specify the configuration key that points to the base URL of the REST API.
Application.properties
We will change the application port to start the server at port 5000. Also we’ll include the entire url of API and ssl validation:
quarkus.http.root-path=/
quarkus.http.port=5000
quarkus.rest-client.disable-ssl-validation=true
quarkus.rest-client.chuck-norris.url=https://api.chucknorris.io
Web Resource
Now, lets create our Resource that will respond in /api path:
package br.com.ricas.application.web;
import javax.ws.rs.GET;
import javax.ws.rs.Path;
import javax.ws.rs.Produces;
import javax.ws.rs.core.MediaType;
import br.com.ricas.domain.service.ChuckNorrisService;
import org.eclipse.microprofile.rest.client.inject.RestClient;

@Path("/api")
public class ChuckNorrisJokeResource {
    @RestClient
    ChuckNorrisService chuckNorrisService;
    @GET
    @Produces(MediaType.TEXT_PLAIN)
    public String getJoke() {
        return chuckNorrisService.getRandomJoke().getValue();
    }
}
Note: The above code we inject a @RestCLient reference to an instance of the ChuckNorrisService interface and use it on getJoke() method. The Path annotation is used to specify the base URI path for the resource class, which is "/api" in this case.
Creating HTML file
Inside the resource folder, create an index.html file:
<!DOCTYPE html>
<html>
<head>
    <title>Chuck Norris Jokes</title>
    <meta charset="utf-8">
    <meta name="viewport" content="width=device-width, initial-scale=1">
    <link rel="stylesheet" href="https://maxcdn.bootstrapcdn.com/bootstrap/4.5.2/css/bootstrap.min.css">
    <link rel="stylesheet" href="style.css">
</head>
<body>
<div class="container-fluid">
    <div class="row justify-content-center">
        <div class="col-sm-8">
            <div class="card mt-5">
                <div class="card-body">
                    <h3 class="card-title text-center mb-4">Chuck Norris Jokes</h3>
                    <p class="card-text text-center" id="joke"></p>
                    <button class="btn btn-warning btn-block mt-3" style="background-color: #f7dc6f; color: #4a4e4d;" onclick="getRandomJoke()">New Joke</button>
                </div>
            </div>
        </div>
    </div>
</div>
<script src="https://ajax.googleapis.com/ajax/libs/jquery/3.5.1/jquery.min.js"></script>
<script src="https://maxcdn.bootstrapcdn.com/bootstrap/4.5.2/js/bootstrap.min.js"></script>
<script>
        function getRandomJoke() {
            $.get("/api", function(response) {
                $("#joke").text(response);
            });
        }
</script>
</body>
</html>
Note: The script section at the bottom of the HTML file defines a JavaScript function called getRandomJoke() that uses jQuery's $.get() method to make an AJAX request to the /api URI and get a random Chuck Norris joke. When the response is received, the function updates the text of the p element with an id of joke to display the joke text
Creating Css file:
Inside the resource folder, create an style.css file:
.card {
 max-width: 600px;
 margin: 0 auto;
 box-shadow: 0 4px 8px 0 rgba(0,0,0,0.2);
 transition: 0.3s;
 background-color: #4a4e4d;
 border-radius: 10px;
}

.card:hover {
 box-shadow: 0 8px 16px 0 rgba(0,0,0,0.2);
}

.card-title {
 font-size: 2.5rem;
 color: #fff;
 font-weight: bold;
 text-shadow: 2px 2px 2px rgba(0,0,0,0.2);
}

.card-text {
 font-size: 1.5rem;
 color: #000;
 text-align: justify;
 padding: 20px;
}

.btn-primary {
 background-color: #f7dc6f;
 border-color: #000;
 font-size: 1.5rem;
 font-weight: bold;
 text-transform: uppercase;
 letter-spacing: 2px;
 padding: 15px 50px;
}

.btn-block {
 padding: 1rem;
 font-size: 1.5rem;
}

body {
 background-image: url('https://e0.pxfuel.com/wallpapers/472/940/desktop-wallpaper-chuck-norris.jpg');
 background-size: cover;
 background-repeat: no-repeat;
}
Running Application
Navigate until root folder and run:
$ ./gradlew quarkusDev
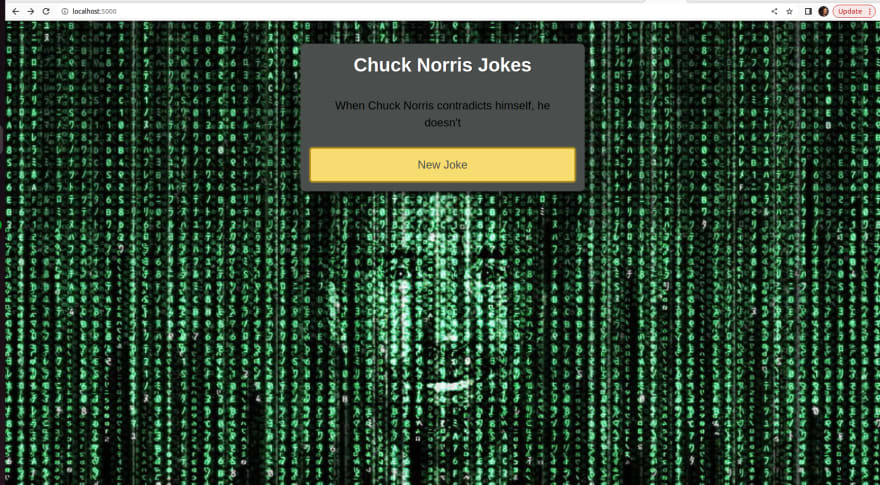
Now, just open http://localhost:5000 and see the result:
Generating the application JAR
Now that we already have our application working, we will generate a JAR to upload it to Elastic beanstalk. To do this, we will run the following command:
$ ./gradlew build -Dquarkus.package.type=uber-jar
All right! 😀
Navigate until build folder to get the generated chuck-norris-joke1.0.0-SNAPSHOT-runner.jar that we will use in the next step:
What is AWS Elastic Beanstalk?
Elastic Beanstalk is a popular platform-as-a-service (PaaS) offering from Amazon Web Services (AWS) that allows developers to easily deploy, manage, and scale web applications. In other words, you only care about uploading your code and leave control of the infrastructure to Elastic Beanstalk.
There are some features offers such as:
- Allows quick deployment of applications
- Reduces management complexity
- Supports a large range of platform (Java, Node.js, Python)
- Load Balance, Database
Note: Elastic Beanstalk itself is free to use. You can create, deploy, and manage your applications on Elastic Beanstalk without any additional charges. However, you will be charged for the AWS resources that your application consumes, such as EC2 instances, load balancers, and data transfer.
Get started
Create an AWS account: If you don’t already have an AWS account, you can create one for free by clicking here.
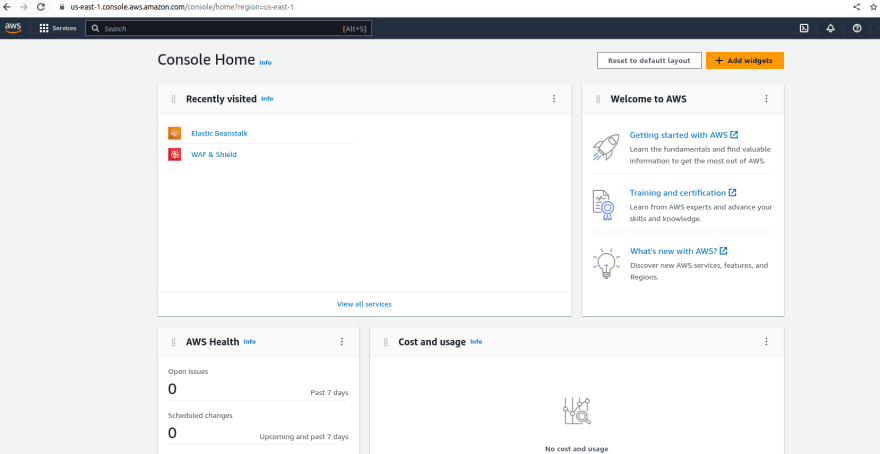
Next, access the console of AWS and search for Elastic Beanstalk:
Web server environment
A web server environment is a fully managed and scalable platform that allows you to run web applications in the cloud. We are going to create our Environment and Application and deploy our web Java application.
Create Application
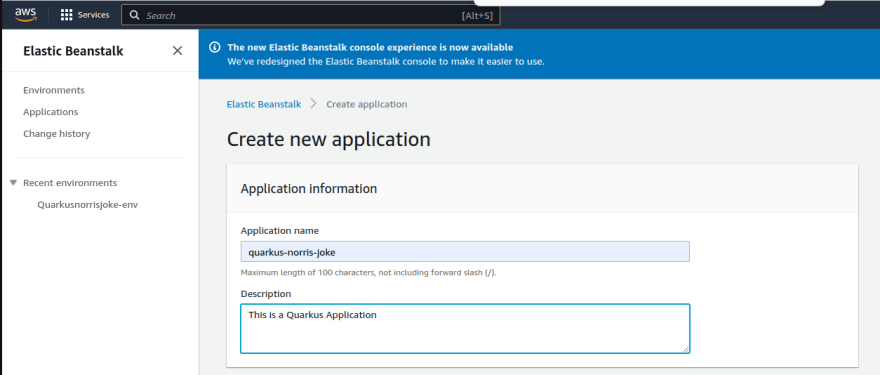
An application is a collection of components that work together to create an environment for your web application. Let’s select menu Applications and create a new one like this:
Create environment
An environment can include one or more Amazon Elastic Compute Cloud (EC2) instances, along with an optional Amazon RDS database instance, an Amazon S3 bucket for storage, and other AWS resources.
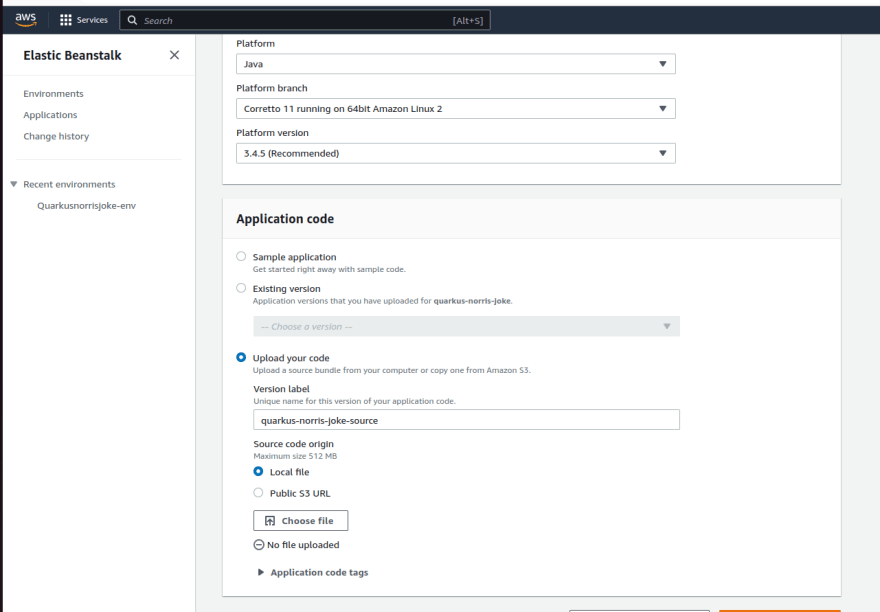
In this step, we will upload our generated chuck-norris-joke1.0.0-SNAPSHOT-runner.jar. We need to set Java as Platform and click on Upload your code option to select our file:
After that we just click on create environment for the process to complete
Last configurations
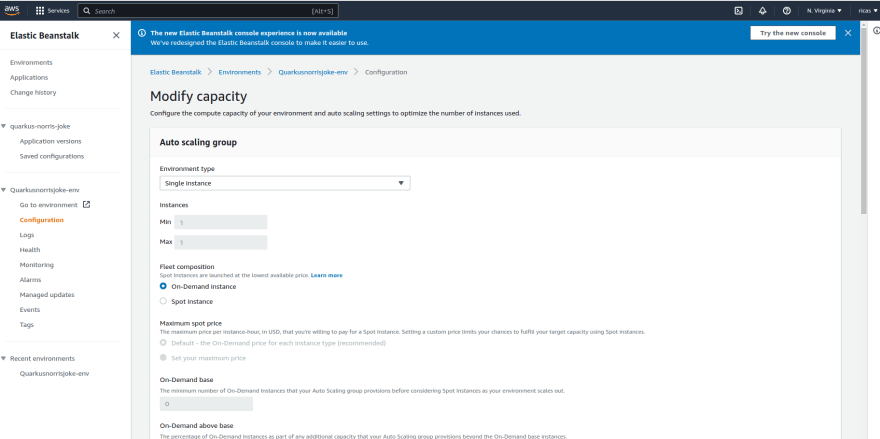
I decided to disable auto scaling by setting it to the single instance option to prevent AWS from scaling new instances and incurring costs for me. Feel free to configure it however you like, but keep in mind that high resource usage may result in extra charges on your account
Conclusion
Hosting the application on AWS Elastic Beanstalk simplified the deployment and scaling of the application in the cloud, allowing us to easily make it accessible to anyone with an internet connection. This exercise demonstrates the ease and flexibility of cloud computing for deploying and scaling simple web applications built with open-source technologies like Quarkus.
Well done guys, the whole project is available at my gitHub.
Thanks ❤️









Top comments (0)