Travis Yaml Configuration
- First we will tell the Travis we need a copy of docker running.
- Now, we need to build the image based on the Dockerfile.dev which is the Dockerfile used for development purpose.
- Next we write some script which guides Travis how to run our test suite.
- If we are hosting our code to AWS, we also tell Travis to do so (which I do not cover now)
language: generic

# required super user access
sudo: required

# services thhat are required
services:
  - docker

# series of steps ran before the test
before_install:
  - docker build -t rohithvazhathodiyil/docker-react -f Dockerfile.dev .

# triggering travis ci to run this script to have the test
script:
  - docker run -e CI=true rohithvazhathodiyil/docker-react yarn test
After pushing the .travis.yml file to the respective repository, our test triggers and Travis CI will do the test for us.
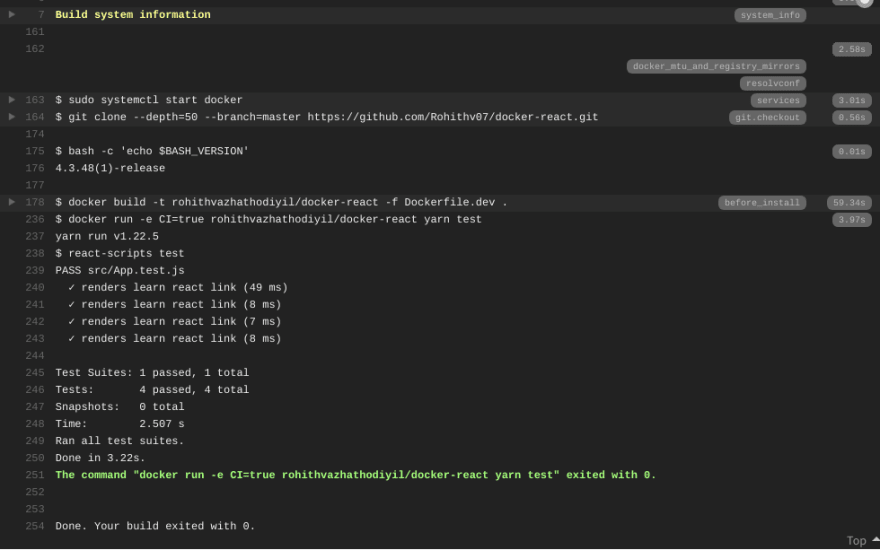
If we head towards our Travis CI dashboard, we can see the job log as
It says, The command "docker run -e CI=true rohithvazhathodiyil/docker-react yarn test" exited with 0.
Done. Your build exited with 0.
Getting Started with Create React App
This project was bootstrapped with Create React App.
Available Scripts
In the project directory, you can run:
yarn start
Runs the app in the development mode.
Open http://localhost:3000 to view it in the browser.
The page will reload if you make edits.
You will also see any lint errors in the console.
yarn test
Launches the test runner in the interactive watch mode.
See the section about running tests for more information.
yarn build
Builds the app for production to the build folder.
It correctly bundles React in production mode and optimizes the build for the best performance.
The build is minified and the filenames include the hashes.
Your app is ready to be deployed!
See the section about deployment for more information.
yarn eject
Note: this is a one-way operation. Once you eject, you can’t go back!
If you aren’t satisfied…


Top comments (0)