The Issue
Recently I’ve started to use Visual Code as my editor on Mac OS X, and using it with my GitHub Repos. It’s pretty cool! However I noticed that when I submit a commit via code, I do not see the verified badge.
The Cause
When I look at my global git config on my Mac OS X machine, I can see that I’ve configured the settings so that my user details are passed to GitHub as an author of the repository.
git config --global --list
The Fix
We need to setup a GPG public key to be used by git on our machine when interacting with GitHub.
- First we need to install GPG, if you do not have it already, it is not installed on Mac OS X by default.
- Secondly in my GitHub account, I want to get my no-reply email address as I have email privacy turned on. Meaning my personal email will not be exposed in commits.
- Go to settings > emails > find your ” no reply email under the “primary email address” header
Note: If you are happy to expose your email address used with GitHub, then just use your actual email address in the relevant sections.
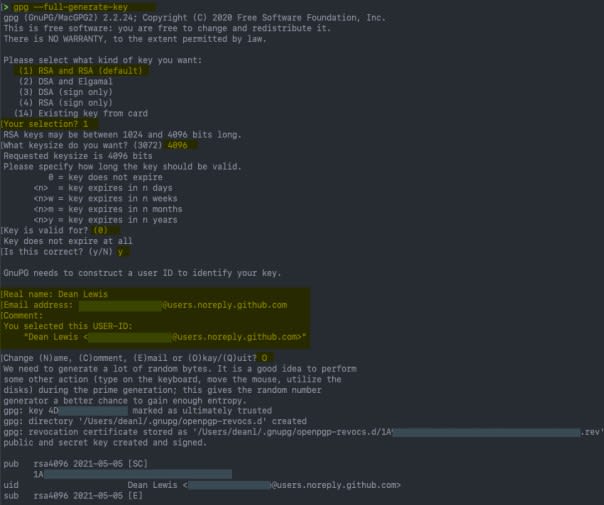
Open up terminal on your Mac OS X machine and run the following command and provide the details as necessary;
gpg --full-generate-key
- Select “RSA and RSA (default)”
- Set your key size to 4096
- Set your expiry
- Add your Real User Name logged with GitHub
- Enter your no-reply email.
- Set a comment about the GPG key if you need to.
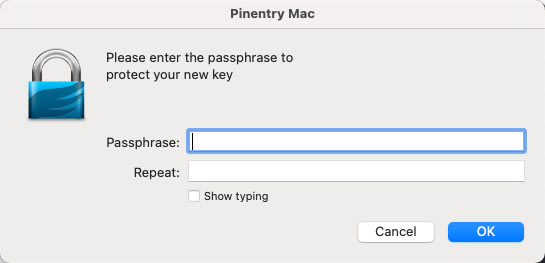
- Enter a passphrase in the dialog box that appears
You can now view your key details by running the following and get your Key ID in this example below, the Key ID is “3AA5C34371567BD2”:
$ gpg --list-secret-keys --keyid-format LONG
/Users/hubot/.gnupg/secring.gpg
-----------------------------------------
sec 4096R/3AA5C34371567BD2 2016-03-10 [expires: 2017-03-10]
uid Hubot <hubot@example class="com">
ssb 4096R/42B317FD4BA89E7A 2016-03-10</hubot@example>
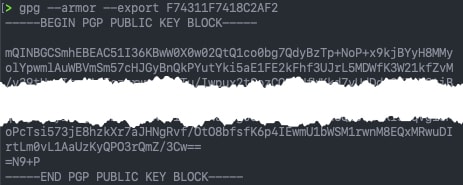
Now we need GPG ID in ASCII Amour Format:
gpg --armor --export {Key_ID}
Copy your GPG key,
Beginning with:

----------BEGIN PGP PUBLIC KEY BLOCK-----

And ending with:

----------END PGP PUBLIC KEY BLOCK-----
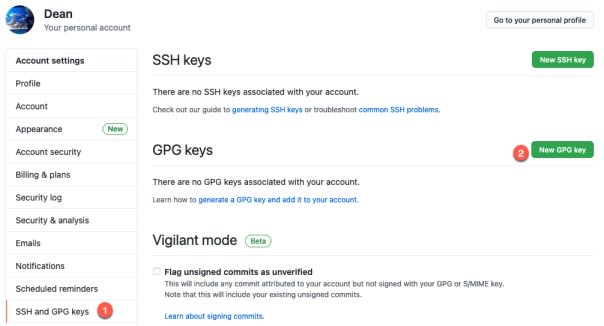
And we’ll now add this to our GitHub account.
- Go to Settings > SSH and GPG Keys > New GPG Key
- Paste in your PGP output and save. Confirm your password
- You will now see your key has been added
Now we all have to tell Git to use our GPG key for signing those commits when they are pushed by our system and Visual Code.
Within terminal using the key ID we found earlier:
# Reminder on how to get your Key ID
gpg --list-secret-keys --keyid-format LONG

# Configure git to use the Key ID and sign our commits

git config --global user.signingkey {Key_ID}
git config --global commit.gpgsign true
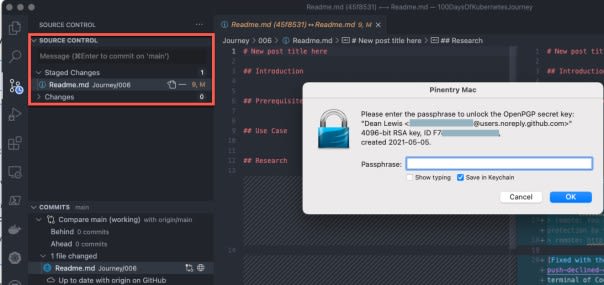
Let’s now test this. I’ve made a change to a file in a repo, and I’ve staged the commit. Which now triggers me to provide my GPG passphrase. I will select to save it in Apple Keychain so I don’t have to keep re-entering it.
And one I push the commit, I can see I am now verified on GitHub again.
Resources
- GitHub Docs – Managing commit signature verification
- Getting Verified badge next to your GitHub commits in VS Code on Microsoft Windows
Regards
The post Getting the GitHub Verified commit badge when using Visual Code on Mac OS X appeared first on vEducate.co.uk.






Top comments (0)