Originally published Mon Sep 21 2020 at https://medium.com/@simon.aubury/pi-peripheral-5e738bc24dfc
Pi Peripheral
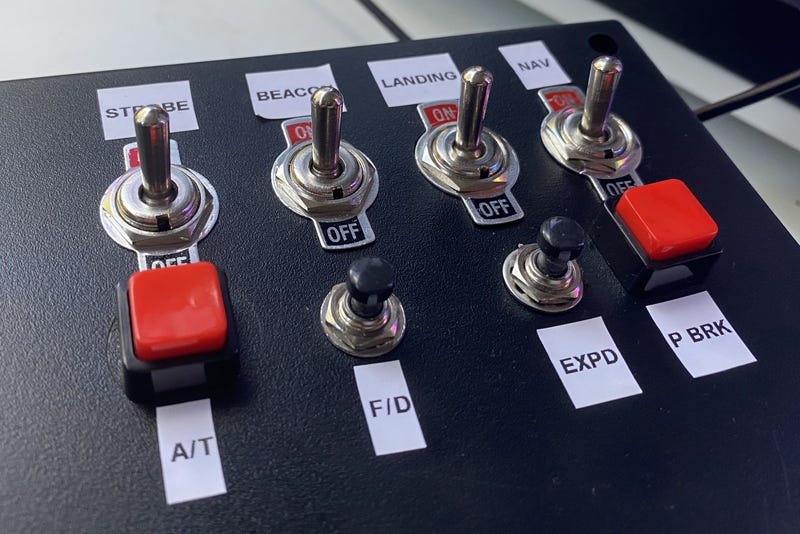
Landing gear down and strobe lights active. How to add physical buttons, switches and dials to control computer actions with a $10 Raspberry Pi Zero.
Why would you want to do this? Well you might want to add some additional buttons or switches to your favorite game. Or maybe you can streamline your video production but switching cameras with a foot pedal. For me, I wanted to add tactile controls to Microsoft Flight Simulator 2020. Switches for the landing gear, beacons and lights.
Project code at — https://github.com/saubury/pi-peripheral/
 Animated GIF showing box in usage
In short, Pi Peripheral can be used to control close to any keyboard activated activity — anywhere where physical controls are preferable to using a keyboard.
Pi Peripheral — Hardware
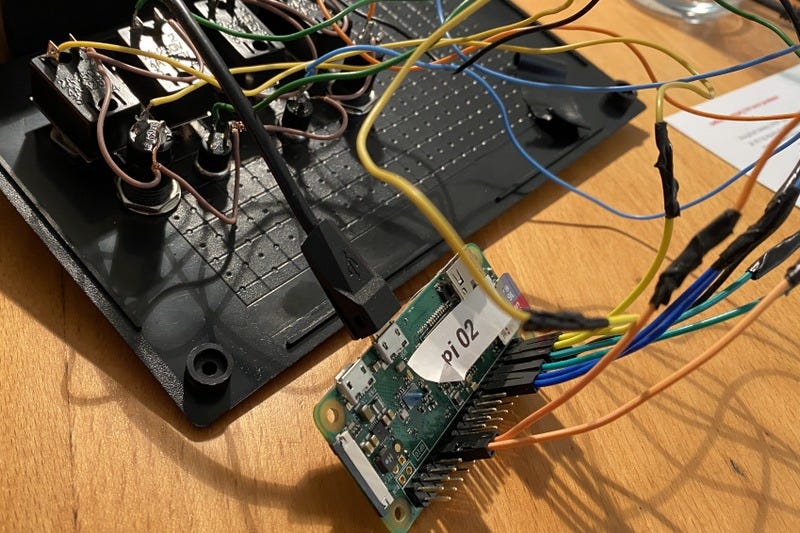
A Raspberry Pi Zero board acts as a HID (Human Interface Device) device — pretending to be a USB keyboard. Python code generates key-presses when GPIO events are triggered. With basic wiring, the Raspberry Pi has 28 GPIO pins suitable for controlling actions.
Wiring
The Raspberry Pi is very easy to wire up to switches and push buttons. Each only requires a single connection to a spare GPIO pin, and a common ground. Software will configure the GPIO pin as an input. There is no need to a physical pull up resistor — this can be configured in software.
Power
Both power and USB host (USB OTG) are provided by a single micro-USB port. Use the port labeled “USB” (not the one labeled “Power”).
Box Enclosure
You can be creative here — I just picked a generic project box which was easy mount the switches and push buttons.
Pi Peripheral — Software
Configure Raspberry Pi Zero as a USB Keyboard
The first software task is configure the Raspberry Pi Zero to act as a USB Keyboard (HID input device.) These steps have largely been inspired from randomnerdtutorials which has more detailed steps should you run into problems.
echo "dtoverlay=dwc2" | sudo tee -a /boot/config.txt
echo "dwc2" | sudo tee -a /etc/modules
echo "libcomposite" | sudo tee -a /etc/modules

sudo cp scripts/isticktoit_usb /usr/bin
sudo chmod +x /usr/bin/isticktoit_usb
Add this line to the second-last line of /etc/rc.local (just before the line containing exit 0)
/usr/bin/isticktoit_usb # This line new

exit 0
Installing the Pi Peripheral on your PC
All going well, you can not connect the Pi Peripheral and it should be identified as a keyboard. This will work for Windows, Mac or Linux. Here’s what it looks like in Windows 10.
Configuring Key Presses
The piperipheral.py Python code places events against each GPIO input. An event is fired when either the circuit is completed (button is pressed or the switch is flicked on) or when the circuit is disconnected (button is released or the switch is off).
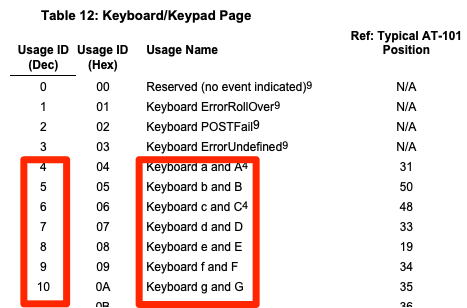
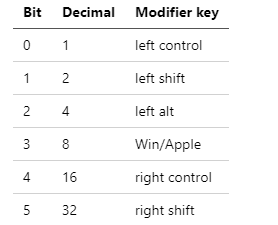
A keypress is composed of a keyboard code (which represents a key on a keyboard) and a modifier (such as the Shift or control key). To produce a capital B, we would need to send the key code of 5 (for the letter b) and a modifier value of 00000010 (left Shift).
For the entire mapping look at usb.org
Keyboard Modifiers
GPIO to key mappings
The GPIO line to key mapping is held in a Python collection
# Key mapping in the form

*# GPIO_ID, (press-key,press-key-modifier, release-key,release-key-modifier) *

GPIO_BUTTON_1 = 6

KEY_B = 5

gpio_button_map = dict([

    (GPIO_BUTTON_1, (KEY_B,MOD_ALT, KEY_B,MOD_L_CNTR))


  ])
Installing the Pi Peripheral Service
Now the Raspberry Pi is acting like a USB Keyboard, we need to send some key commands. The Pi Peripheral is a Python programmed installed as a service
sudo cp piperipheral.service /lib/systemd/system

sudo systemctl daemon-reload

sudo systemctl enable piperipheral.service

sudo systemctl start piperipheral.service
Game control binding
This will be specific to your game or program. In Microsoft Flight Simulator 2020 you can customize controls with this setup window.
Code
Get the code at — https://github.com/saubury/pi-peripheral/
Closing
A few dollars and a bit of configuration and you can have your own Pi Peripheral


Top comments (0)