
Thrilled to have you back as we continue our journey into the exciting world of Jest testing in Next.js. In Part 1, we laid a solid foundation by exploring the fundamentals of Jest, setting up our testing environment, and diving into writing effective tests for Next.js applications.
Now, in Part 2, we're going to take our testing skills to the next level. Get ready to discover advanced testing techniques, optimize your workflow, and gain a deeper understanding of Jest's capabilities in the context of Next.js development.
Without further ado, let's dive into the world of advanced Jest testing. Shall we?
Enhancing Your Testing Workflow:
In this section, we will explore various strategies to optimize your testing workflow and ensure that your tests are not only efficient but also an integral part of your development process. A smooth testing workflow can significantly contribute to the reliability and maintainability of your Next.js projects.
1. Running Specific Test Suites:
Jest allows you to run specific test suites or individual test cases, enabling you to focus your testing efforts precisely where you need them. This feature is particularly helpful when you have a large codebase with numerous tests, and you want to narrow down your testing scope.
Let's say you have a Next.js application with multiple test suites, including one for user authentication and another for product listings. To run only the tests related to user authentication, you can use the --testNamePattern flag:
jest --testNamePattern="Authentication"
This command will execute all test suites with "Authentication" in their names.
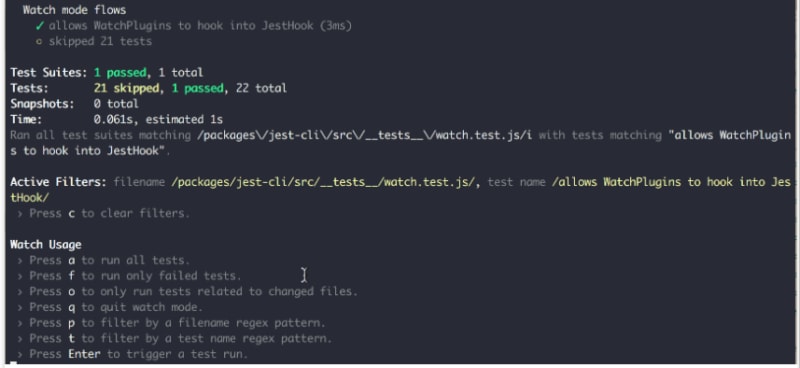
2. Watch Mode:
Jest's watch mode is a valuable tool for continuous testing during development. It automatically monitors your project for code changes and re-runs relevant tests as soon as you save a file. This near-instant feedback ensures that you catch regressions or issues early in the development process.
Running Jest in watch mode is as simple as executing:
jest --watch
Anytime you make changes to your code or tests, Jest will automatically re-run the affected tests, providing real-time feedback in your terminal.
Screenshot:
3. Parallel Test Execution:
Jest inherently runs tests in parallel by default, which significantly improves the speed of test execution, especially for large test suites. However, you can further optimize this by configuring the maxWorkers option in your Jest configuration file. This option determines the maximum number of worker processes that can run concurrently.
In your jest.config.js file, you can set the maxWorkers option to control the level of parallelism:
// jest.config.js
module.exports = {
  // Other Jest configuration options
  maxWorkers: 4, // Adjust the number based on your system's capabilities
};
Increasing the number of workers can significantly reduce the time it takes to run your tests, especially on multi-core processors.
4. Test Reporting:
While Jest provides detailed test reports in the terminal by default, you can enhance your test reporting by using custom reporters or integrations with test reporting tools. Tools like Jest HTML Reporter can generate HTML reports with visual representations of test results, making it easier to identify issues at a glance.
After configuring Jest HTML Reporter, running your tests will generate an HTML report in the specified directory. This report includes information on test suites, passing and failing tests, and coverage metrics, all presented in a visually appealing format.
Screenshot:

By incorporating these workflow enhancements into your Next.js testing practices, you can streamline your development process, catch errors early, and maintain the reliability and quality of your applications. This will empower you to confidently ship your Next.js projects with the assurance that they are thoroughly tested.
Troubleshooting Common Testing Issues:
In this section, we will delve into common issues that developers often encounter when testing Next.js applications with Jest. We will provide practical solutions and debugging techniques, along with real-world examples to illustrate these solutions.
Mocking External Dependencies:
Issue: Testing components or functions that rely on external APIs, databases, or modules can be challenging, as you don't want to make actual requests or connections during testing.
Solution: Jest provides powerful mocking capabilities. Let's say you have a function that fetches data from an API. You can mock the API response for testing like this:
// Example function to fetch data from an API
async function fetchDataFromApi() {
  const response = await fetch('https://api.example.com/data');
  const data = await response.json();
  return data;
}

// Mocking the API response in a test
jest.mock('node-fetch'); // Mock the 'node-fetch' library
const fetch = require('node-fetch');

test('fetchDataFromApi returns expected data', async () => {
  fetch.mockResolvedValue({ json: () => ({ message: 'Test data' }) });
  const data = await fetchDataFromApi();
  expect(data).toEqual({ message: 'Test data' });
});
Asynchronous Testing Pitfalls:
Issue: Asynchronous code can lead to unreliable tests if not handled properly. For example, if a test completes before an asynchronous function, it might pass even if there are errors.
Solution: Use Jest's async/await features to ensure that asynchronous code is properly tested. For instance, if you have an async function, you can test it like this:
// Example asynchronous function
async function fetchData() {
  return new Promise((resolve) => {
    setTimeout(() => {
      resolve('Test data');
    }, 1000);
  });
}

// Testing asynchronous code
test('fetchData resolves with expected data', async () => {
  const data = await fetchData();
  expect(data).toBe('Test data');
});
Test Environment Conflicts:
Issue: Conflicts between your development and testing environments can lead to unexpected test failures. For example, environment variables may differ between environments.
Solution: Ensure consistent environment variables for your tests. You can create a separate environment file for testing and load it using tools like dotenv. Here's an example:
// Load environment variables for testing
require('dotenv').config({ path: '.env.test' });

// Example test with environment variables
test('environment variable is set correctly', () => {
  expect(process.env.TEST_ENV_VAR).toBe('test_value');
});
Component Rendering Errors:
Issue: Rendering React components in tests can lead to errors related to missing props, state, or unexpected component behavior.
Solution: Ensure that your components receive the necessary props and have the expected initial state. Here's an example:
// Example React component
function Button({ label }) {
  return <button>{label}</button>;
}

// Testing a React component
test('Button renders with correct label', () => {
  const { getByText } = render(<Button label="Click me" />);
  const button = getByText('Click me');
  expect(button).toBeInTheDocument();
});
Integration Testing Challenges:
Issue: Integration testing can be complex, especially when dealing with data management and API authentication.
Solution: For integration testing, you may need to set up test data and handle authentication. Here's an example of testing an authenticated API route:
// Example API route with authentication
import { getSession } from 'next-auth/client';

export default async (req, res) => {
  const session = await getSession({ req });
  if (!session) {
    res.status(401).json({ message: 'Unauthorized' });
  } else {
    res.status(200).json({ message: 'Authenticated' });
  }
};

// Testing an authenticated API route
test('Authenticated API route returns 200', async () => {
  const session = { user: { name: 'John' } };
  getSession.mockResolvedValueOnce(session);
  const response = await request(app).get('/api/authenticated-route');
  expect(response.status).toBe(200);
});
Advanced Jest Configuration:
In this section, we'll explore advanced Jest configuration options that allow you to fine-tune your testing environment and optimize your testing workflow.
Setting up Code Coverage Reports:
Issue: Understanding the code coverage of your tests is crucial for identifying untested code and ensuring comprehensive coverage.
Solution: Configure Jest to generate code coverage reports. Here's how you can do it:
// In your jest.config.js file
module.exports = {
  // Other Jest configuration options
  collectCoverage: true,
  collectCoverageFrom: ['src/**/*.js'], // Specify the source files to include
};
Running your tests with this configuration will generate coverage reports that highlight which parts of your codebase are covered by tests and which are not.
Custom Matchers and Matchers Libraries:
Issue: Jest's built-in matchers cover common use cases, but there are scenarios where custom matchers can make your tests more expressive and readable.
Solution: Define custom matchers or leverage popular matcher libraries like @testing-library/jest-dom to enhance your assertions. Here's an example with custom matchers:
// Define a custom matcher
expect.extend({
  toBeEven(received) {
    const pass = received % 2 === 0;
    if (pass) {
      return {
        message: () => `Expected ${received} not to be even`,
        pass: true,
      };
    } else {
      return {
        message: () => `Expected ${received} to be even`,
        pass: false,
      };
    }
  },
});

// Use the custom matcher in a test
test('The number 4 is even', () => {
  expect(4).toBeEven();
});
Global Setup and Teardown Scripts:
Issue: Sometimes, you need to perform setup or cleanup tasks that are common to all your tests, like initializing a database or starting a server.
Solution: Jest allows you to define global setup and teardown scripts. These scripts run once before and after all tests, ensuring consistent test environments. Here's an example:
// In your jest.config.js file
module.exports = {
  // Other Jest configuration options
  globalSetup: './tests/setup.js', // Path to your global setup script
  globalTeardown: './tests/teardown.js', // Path to your global teardown script
};
In your setup and teardown scripts, you can perform actions like setting up a test database or closing a server connection.
Real-World Testing Strategies:
In this section, we'll explore real-world testing strategies and best practices that go beyond the basics and can be applied directly to your Next.js projects.
Test-Driven Development (TDD):
Issue: Ensuring test coverage can be challenging, and it's easy to overlook tests when coding.
Solution: Adopt Test-Driven Development (TDD) principles, where you write tests before writing the actual code. This practice encourages comprehensive test coverage from the start. Here's an example:
// TDD example: Writing a test first
test('Adding two numbers', () => {
  expect(add(2, 3)).toBe(5);
});

// Implementing the code to make the test pass
function add(a, b) {
  return a + b;
}
Writing tests before writing code ensures that your codebase remains testable and robust as it evolves.
Testing User Authentication:
Issue: Testing authentication flows can be complex, and verifying user access to specific routes is crucial.
Solution: Implement tests for user authentication and access control. Here's an example:
// Testing user authentication for a protected route
test('Authenticated user can access a protected route', async () => {
  const session = { user: { id: '123', name: 'Alice' } };
  getSession.mockResolvedValue(session);
  const response = await request(app).get('/protected-route');
  expect(response.status).toBe(200);
});
Ensure that your tests cover scenarios for both authenticated and unauthenticated users.
Handling Sensitive Data:
Issue: Testing components or routes that handle sensitive data, such as user profiles or payment information, requires special care.
Solution: Implement tests that account for sensitive data handling. Ensure that data is handled securely and that your tests cover edge cases. For example, when testing a payment processing component, you can use test payment data and assertions to validate its behavior.
Optimizing Tests for Performance:
Issue: As your project grows, your test suite may become slow to run.
Solution: Optimize your test suite for performance by running tests in parallel or configuring Jest's test concurrency. Additionally, consider using test runners like jest-runner-groups
Case Studies and Examples:
In this section, we will explore real-world case studies and practical examples to demonstrate how Jest is applied effectively in Next.js projects. Each case study will highlight specific scenarios, challenges faced, and how Jest testing played a pivotal role in addressing these challenges.
Case Study: Testing a Next.js E-commerce Website:
Scenario: You're building an e-commerce website using Next.js, and you want to ensure a flawless shopping experience. This case study will cover how Jest tests are used to validate product listings, cart functionality, and user authentication.
Example Test: Testing the shopping cart functionality:
test('Adding an item to the cart updates the cart contents', async () => {
  // Simulate adding an item to the cart
  await addToCart('Product123');

  // Check if the cart contains the added item
  expect(getCartContents()).toContain('Product123');
});
Case Study: Testing Server-Side Rendering (SSR) for a Blog Application:
Scenario: You're building a blog application with Next.js, leveraging server-side rendering for SEO benefits. This case study will explore how Jest is used to validate SSR functionality, including rendering articles and handling search engine bots.
Example Test: Testing server-side rendering for a blog post:
test('Blog post is rendered on the server for SEO', async () => {
  // Render a blog post on the server
  const html = await renderServerSide('/blog/my-article');

  // Check if the HTML contains the article content
  expect(html).toContain('<h1>My Blog Post</h1>');
});
Case Study: Testing an Authentication API with Next.js API Routes:
Scenario: You've implemented user authentication using Next.js API routes. This case study demonstrates how Jest is utilized to test user registration, login, and access control.
Example Test: Testing user registration:
test('User registration adds a new user to the database', async () => {
  const newUser = { username: 'newuser', password: 'password123' };
  await registerUser(newUser);

  // Check if the new user exists in the database
  const user = await getUserByUsername('newuser');
  expect(user).toBeDefined();
});
Conclusion and Next Steps:
In this final section, we'll conclude the article by summarizing key takeaways and guiding readers on their next steps after mastering Jest in Next.js projects.
Recap Key Points:
In this article, we've embarked on a journey through the world of Jest testing in Next.js applications. Let's recap some of the key takeaways:
Testing Matters: Testing is an integral part of modern web development, ensuring that your applications are robust, reliable, and maintainable.
Jest and Next.js: Jest is a powerful and versatile testing framework that pairs seamlessly with Next.js. Its features, including mocking, snapshot testing, and asynchronous testing, make it an ideal choice for testing Next.js applications.
Configuration and Setup: We've covered the basics of setting up Jest in a Next.js project, including configuring Jest via jest.config.js and using Babel for transpiling Next.js code.
Writing Effective Tests: We explored best practices for writing effective tests, including testing components, API routes, and integration scenarios. We've also touched on snapshot testing, a useful technique for capturing UI component snapshots.
Advanced Techniques: Advanced topics like mocking, asynchronous testing, and custom matchers empower you to write more comprehensive tests for complex Next.js applications.
Workflow Enhancements: We've seen how to optimize your testing workflow with specific test suite execution, watch mode for real-time feedback, and parallel test execution.
Now that you've gained a solid understanding of Jest in Next.js, it's time to put your knowledge into practice. Consider the following steps:
Apply Testing to Your Projects: Incorporate Jest testing into your current or upcoming Next.js projects. Start with small, manageable tests and gradually expand your test coverage.
Create Sample Projects: If you don't have a project to test, create sample Next.js projects specifically for testing practice. Experiment with different test scenarios and explore Jest's capabilities.
Further Learning:
To continue your journey with Jest and testing in general, here are some resources and references:
Jest Official Documentation: Explore Jest's official documentation for in-depth information on all aspects of Jest testing.
The Testing Library: The Testing Library offers guidance on best practices for testing user interfaces effectively, with a focus on user-centric testing.
Advanced Jest Features: Dive deeper into Jest with advanced features like custom matchers, manual mocks, and module system configurations.
Online Courses and Books: Consider enrolling in online courses or reading books on testing and Jest to further enhance your skills and knowledge.
The field of web development is constantly evolving. To ensure your testing practices remain current, stay updated with the latest developments in Jest and Next.js. Be open to exploring new testing techniques and tools that can further improve your testing workflow and the quality of your Next.js applications.
With your newfound expertise in Jest testing within the Next.js ecosystem, you're well-equipped to develop robust, bug-free applications that meet the highest standards of quality and reliability. Happy testing, and may your Next.js projects thrive with the power of Jest!
Thank you for joining on this journey through Jest and Next.js testing.


Top comments (1)
@shuvotdr
can you please share code, this is very nice for others to know! :)