In my previous post I showed how easy it is to start or deallocate machines using C# and Azure Functions.
Azure VirtualMachines can be handy but very costly if you forget to turn them off∗ and leaving them running for 24/7.
But, what if you have dozens of existing VMs and are looking for a quick way to schedule the on/off times for those machines to save money?
In this post I will show a very simple script to use with Azure Automation that enables you to get this up and running, literally within the hour.
Note: I would advise to use Azure DevTest labs if you have development virtual machines. That will give you the opportunity to reuse, claim or share VMs within a group of users.
* In this blogpost I will use the word Stop in code and comments, but in fact that will Deallocate the machines, and will stop incurring costs.
Calculating costs
First of all, lets take a quick look at how much you can actually save with the instructions in this blogpost. If we take a D4s v3 machine and let it run for 24/7, it will cost approximately 260 euros a month (in West Europe). If you have a team of 8 developers, that adds up to more than 2000 euros a month.
For sake of this blogpost, let us state the actual working hours are (monday to friday) from 7 AM until 7 PM. This brings the hours down to 12/5. The running costs of one machine will be lowered to approximately 92 euros a month. For a team of 8 developers, this will save over 1300 euros a month , each month, with the use of a simple script.
Azure Automation
I will not explain how to setup Azure Automation, as that is pretty simple to setup using the Azure Portal. I’ll jump right into importing and creating runbooks. We start in the Azure Automation blade in the portal:
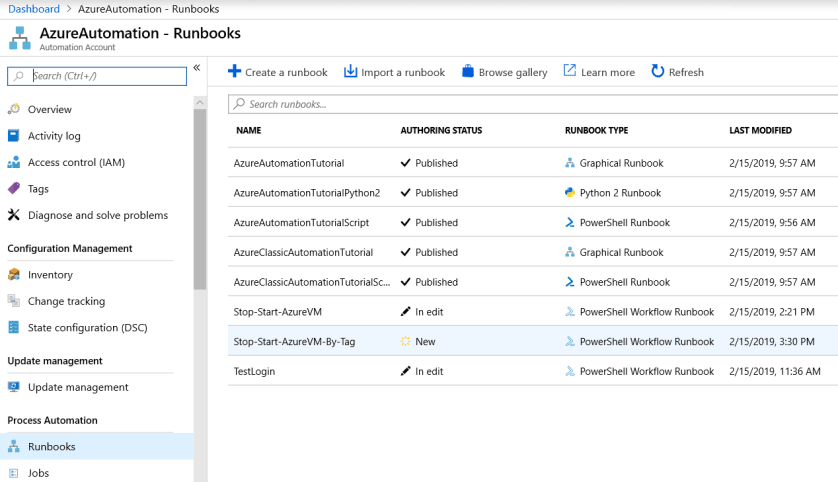
Click on ‘Runbooks’ in the left pane, and you’ll see some predefined runbooks added by the system.
After downloading my script, you can click on ‘Import runbook’ in the menu bar of the blade.
After importing, the runbook will have the status ‘New’:
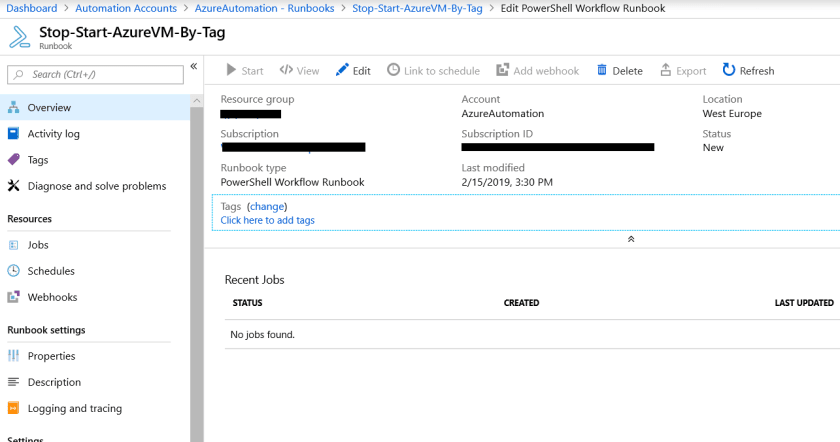
To start using the runbook, click on the ‘Stop-Start-AzureVM-By-Tag’ runbook. In the next screen, click on ‘Edit’:
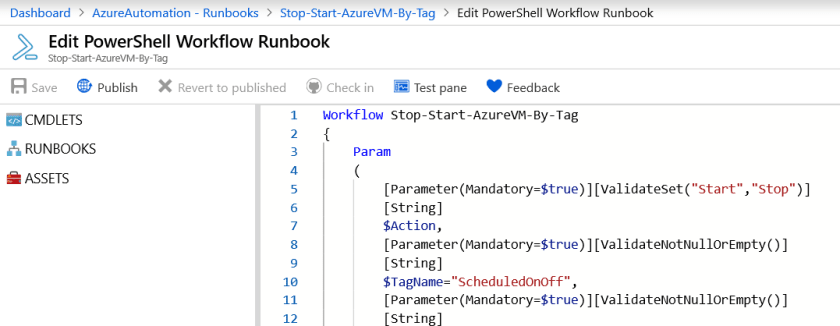
This will open up the actual runbook script, and show all the PowerShell code. In here you can adjust the code to your liking if you want to add logic or change parameters:
Now, click on ‘Publish’ and you can run your first runbook!
Tagging your VMs
Obviously you do not want to manually click to start or stop the machines. In my simple code example, I’ve filtered on a specific tag name and tag value. Tags can be set programmatically or manually. For playing around with this script, simply go to a VM, and make sure the tags are set up like this:
The tagname is ‘ ScheduledOnOff ‘ and the value is ‘ Yes ‘.
Scheduling your runbook
At this moment the runbook is not automated. There is no schedule attached, but you could manually trigger the runbook to start or stop your machines.
To create a schedule, go back to the runbook, and select ‘Schedules’:
Creating a new schedule is easy; I’ve created one schedule to start at 07.00 at weekdays:
The final step is to setup the parameters. In my predefined script, using the default parameters, we only have to set ‘Start’ in the action field:
The same setup should be followed to deallocate the VMs, creating a schedule with the ‘Stop’ action at the preferred time of day.
Conclusion
This blog explains how to save resources and reduce costs in a very quick and effective way. This can be seen as a patch or temporary solution, because if some user deletes or changes the tags, the script will not work for that specific VM anymore.
Nonetheless it is a very handy, quickly implemented solution to fix your long-running-always-on dev or test machines!


Top comments (0)