
Post Series
- How to fine tune BERT for real time sentiment analysis
- How to run BERT on AWS (this post)
Table of Contents
- Introduction
- Prerequisites
- How to run BERT Overview
- Testing the BERT model worker
- Sending a test message to our SQS queue
- Checking the test run results
- Conclusion
Introduction
Last time on part 1 of this post series on how to do sentiment analysis using BERT, we ended up with an output model configuration we can pass to a newly created BERT model instance. This blog post will continue where part 1 left off, and we will show how to run a BERT model within a container. Most of the resources we are creating we will do manually through the AWS Console.
Prerequisites
Use an x86 machine or EC2 instance
We are going to assume you are working on an x86 machine. The reason why is that as of time of building the model, Tensorflow officially only supported x86 machines. For explaining why we are mentioning that, our pre-trained BERT model from Hugging Face is implemented with Tensorflow. If you do not have an x86 machine - no worries! We will also cover how to follow along using a decently powerful EC2 instance with an x86 AMI (that will require creating and adding a service IAM role, which we'll also cover). Specifically a c5.4xlarge instance for this tutorial. We're going to save this docker image by pushing to our ECR repository.
To begin with, create an aws account. Next, we need to create a user with an IAM role with sufficient permissions to allow us to read from an S3 bucket, an SQS queue, an ECR repository, and write to a DynamoDB table
Create an AWS role
Next, let's create a role for our EC2 instance to be able to access the resources we need to work with. But before we can do that, we need to create a policy to attach to this new user. We can do that from the AWS console.
Click on "Policies" from the IAM dashboard. You should see this screen, of where to create a policy. Then click "Create Policy":

We want to create a policy for our new user, that has enough (but not too much) permissions for the sake of this tutorial. I took the liberty of making a custom policy for this tutorial that you can just copy and paste (after you click on "JSON" for the JSON policy view) that gives enough access to our ECR, SQS, S3 and DynamoDB resources:
{
  "Version": "2012-10-17",
  "Statement": [
    {
      "Effect": "Allow",
      "Action": [
        "ecr:GetAuthorizationToken",
        "ecr:BatchCheckLayerAvailability",
        "ecr:GetDownloadUrlForLayer",
        "ecr:GetRepositoryPolicy",
        "ecr:DescribeRepositories",
        "ecr:ListImages",
        "ecr:DescribeImages",
        "ecr:BatchGetImage",
        "ecr:GetLifecyclePolicy",
        "ecr:GetLifecyclePolicyPreview",
        "ecr:ListTagsForResource",
        "ecr:DescribeImageScanFindings"
      ],
      "Resource": "*"
    },
    {
      "Action": ["sqs:*"],
      "Effect": "Allow",
      "Resource": "*"
    },
    {
      "Effect": "Allow",
      "Action": ["s3:Get*", "s3:List*"],
      "Resource": "*"
    },
    {
      "Effect": "Allow",
      "Action": [
        "dynamodb:BatchGetItem",
        "dynamodb:BatchWriteItem",
        "dynamodb:ConditionCheckItem",
        "dynamodb:DeleteItem",
        "dynamodb:DescribeTable",
        "dynamodb:GetItem",
        "dynamodb:GetRecords",
        "dynamodb:GetShardIterator",
        "dynamodb:PutItem",
        "dynamodb:Query",
        "dynamodb:Scan",
        "dynamodb:UpdateItem"
      ],
      "Resource": "*"
    }
  ]
}
Copy and paste that into the empty area in the JSON tab view, and then click "Next: Tags":

We don't need to add any tags, so we can click "Next: Review". This leads us to the "Create Policy" page. Simply give this custom policy a new name and click "Create policy". Then you will be directed to the "Policies" IAM page, then we need to click "users" before we can create a user and attach this custom policy for this tutorial
And click save. We have now created a custom policy we can attach to our role we will create next. To the astute reader, these permissions are pretty broad for these resources, but I am erring on the side of simplicity for this tutorial.
Click on "Roles" from the IAM dashboard. You should see this screen, of where to create a role from. Then click "Create Role":

Next you should see this screen. Here, we want to leave "AWS service" selected, but now select "EC2" under "Common use cases".

Click "Next" to get to this screen, then search for "running-bert-tutorial":

Here, we can attach the policy we created earlier, that we called "running-bert-tutorial-permissions-policy". Click the checkmark next to this permission policy, then click "Next".
This screen is the final step for creating a role. Give the role a name you'll remember (like "running-bert-ec2-instance-role" for example) for attaching to the EC2 instance we'll create later.

Scroll down and make sure "running-bert-tutorial-permissions-policy" IAM policy has already been added to this new role.
If everything looks good, then click "Create role".
Create an AWS user
If you are working from local, one way we can give our local machine access to our AWS account's resources is to create an IAM user. This will allow us to create an authorized user, with API keys we can authenticate our local machine with.
Go to the IAM dashboard, and click "Users" then click "Add Users":

Give the user a name like "demo-user". Click the "Access key - Programmatic access" checkmark then click "Next: Permissions":

On this page, now search for the name of the policy we just created, then click the checkmark next to the name of our new custom policy. Then click "Next:Tags"

We aren't adding any tags, so feel free to click "Next: Review" on this page. If this looks good, then click "Create User".
Now we are taken to a screen where we see the access key id, and the secret access key. We will only be able to see this secret access key once, so be sure to copy it and save it somewhere you can access it safely. What we are going to do with these credentials is to set the AWS credentials file locally and located at ~/.aws/credentials to end up looking like this:
[default]
aws_access_key_id=YOUR_AWS_ACCESS_KEY_ID
aws_secret_access_key=YOUR_AWS_SECRET_ACCESS_KEY
This file sets the AWS profile (default or named) that gives the machine access through the AWS SDK to access the resources this user is allowed to access. The access key id and the secret access key identify and authorize a user holding these credentials.
If you are on a local machine (that is x86 based) and not an EC2 instance, you need to install the AWS CLI and then run:
aws configure
And pass the saved credentials from when we created these credentials (the access key id and the secret access key). Now, the machine is correctly configured to allow boto3, the official python AWS-SDK package to access permitted resources.
Create an SQS queue
We need to setup an SQS queue. Simply go to the SQS dashboard and then click "Create queue" to create a "Standard" queue:

The default settings here are fine, and let's name the queue "tutorialMiningQueue" then click "Create queue" (may need to scroll down):

Create an S3 Bucket
We will need to create an S3 bucket to store our test social media raw data that our model will be told to read from. This is pretty easy to do, and for the sake of this tutorial we can keep the permissions simple on the S3 bucket by making it public. Go to the S3 dashboard, click "Create bucket", give it a name (remember this name for when we run the model container) and uncheck the "Block all public access" checkmark. We have named the bucket tutorial-mining-bucket for this tutorial, but feel free to name it whatever you'd like. Then click "Create bucket" now at the bottom of the create bucket form page. We will be uploading our test_message.json here, and sending an SQS queue with the name of this bucket object when we test the model worker container.
Upload this JSON as a json file (named test_social_media_data.json) to our new tutorial-mining-bucket:
{
  "timestamp": "2022-09-15T00:00:40",
  "posts": [
    {
      "content": "This is some really cool post content about Bitcoin. I love Bitcoin. This is an amazing invention, BTC is!",
      "title": "Why Bitcoin is Amazing"
    },
    {
      "content": "Dogecoin is the worst coin in existince. I lost everything because of DOGE. I hate dogecoin, the worst coin in existence.",
      "title": "Dogecoin is terrible"
    }
  ]
}
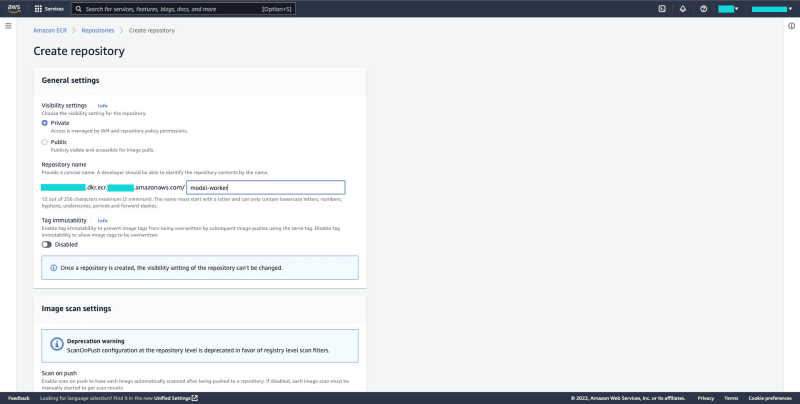
Create an ECR repository
Go to the ECR Repository dashboard, then click "Create repository" then give the new repository a name. We're using "model-worker" as the name of our ECR repository for this tutorial. We can leave the other options alone, then scroll down and click "Create Repository" on this form page.
Create a DynamoDB table
The very last resource we need to setup is a dynamodb table, that our docker container will write to. Just go to the dynamodb dashboard:

And then let's name the table "tutorialSentimentData", the partition key (PK) as "dateMonth", as a string and the sort key (SK) "timestamp", also as a string. The default settings are fine for this tutorial:

Then click "Create table" (may need to scroll down here).
How to run BERT Overview
From a high level, we have a docker container running in an EC2 instance that instantiates an SQS listener (written in Python) listening to an SQS queue for raw social media data to process that, once processed, we write to a DynamoDB table that through AppSync we give client applications (web and API) access to.
Once we receive a message with raw social media data (that is, post content and titles), we pass the data from the SQS listener to our process_message function. The process_message function does very simple "entity recognition" for separating posts by cryptocurrency for separate model processing. This "entity recognition" is nothing fancy, just finding a mention of one of the coins we are tracking, and separating those posts for a separate model run. This gives us sentiment data by coin for the given social media data input.
Docker container directory structure
To begin a little bit deeper dive, this is the directory structure of our running docker container:

We won't cover how to generate fine_tuned_model or fine_tuned_model_tokenizer data directories. This is directly coming from output from our fine-tuning of the BERT model to work with social media data. Check out part 1 to learn how to generate BERT model configuration, then come right back!
The model worker module
First, let's write the model_worker.py module. We'll share the code first, then break it down:
import tensorflow as tf
from transformers import BertTokenizer, TFBertForSequenceClassification

# instantiate the BERT tokenizer and model instances outside of the model_worker function
tokenizer = BertTokenizer.from_pretrained("fine_tuned_model_tokenizer")
model = TFBertForSequenceClassification.from_pretrained("fine_tuned_model")

def model_worker(text_input_arr):
    try:
        print('model_worker running...')
        tf_batch = tokenizer(text_input_arr, max_length=128, padding=True, truncation=True, return_tensors='tf')
        tf_outputs = model(tf_batch)
        tf_predictions = tf.nn.softmax(tf_outputs[0], axis=-1)
        results = tf.argmax(tf_predictions, axis=1)
        numpy_arr = results.numpy()
        converted_value = getattr(numpy_arr, "tolist", lambda value: value)()
        # attempt mapping 0 (negative) to -1, so if "most posts are negative" we don't lose magnitude of negative sentiment
        # vs summing 0s - it's still 0
        converted_value = map(lambda x: 1 if x == 1 else -1,converted_value)
        return list(converted_value)
    except Exception as model_error:
        print('model_worker failed:', model_error)
        raise RuntimeError('Failed to parse input in model_worker:') from model_error
There's a couple of things to point out about the model_worker function. First, we pass the raw text content (plus title) of a post to the BERT tokenizer, from the text_input_arr parameter:
tf_batch = tokenizer(text_input_arr, max_length=128, padding=True, truncation=True, return_tensors='tf')
The result is our tokenized input that we can pass directly to the model instance and using the softmax activation function to get an output softmax layer, implemented by Tensorflow: tf.nn.softmax. We can then pass tf_predictions to the argmax function to finally get our sentiment data. We use the argmax function because in sentiment analysis can be thought of as a classification problem: is the social media user positive (1) or negative (0) about a given cryptocurrency?
tf_outputs = model(tf_batch)
tf_predictions = tf.nn.softmax(tf_outputs[0], axis=-1)
results = tf.argmax(tf_predictions, axis=1)
Now with the results final model output value, we can convert it to a numpy type. Then, we convert the numpy type ultimately into a list that we can use more directly without either Tensorflow or numpy after we return this value, cast to a list. Since we have a classification problem, we would expect output to be either a 1 (positive) or 0 (negative). However, we've decided to transform the 0 output to a -1 instead. The reason why we do this, is so that we don't lose what we're calling a "magnitude" of the social media sentiment by keeping the 0 instead. We're going to simply "sum" these sentiment scores across posts found in the given raw social media data fetch to create a "total" sentiment value, by all social media posters, in the given timeframe (from what we are inputting).
numpy_arr = results.numpy()
converted_value = getattr(numpy_arr, "tolist", lambda value: value)()
# attempt mapping 0 (negative) to -1, so if "most posts are negative" we don't lose magnitude of negative sentiment
# vs summing 0s - it's still 0
converted_value = map(lambda x: 1 if x == 1 else -1,converted_value)
return list(converted_value)
We return the output of list(converted_value) to app.pys process_method function. Going over the app.py in the next section.
The app module
The app.py module gets kicked off when the docker container starts. First, we need to import the packages we are using and read our Python environment variables for the Python AWS SDK:
import os
import datetime
from sqs_listener import SqsListener
from model_worker import model_worker
import boto3
import json
import functools

QUEUE_NAME = 's3-data-upload'
AWS_REGION = 'us-east-1'
SENTIMENT_DATA_TABLE = 'sentimentData'

if "QUEUE_NAME" in os.environ:
    QUEUE_NAME = os.environ['QUEUE_NAME']

if "AWS_REGION" in os.environ:
    AWS_REGION = os.environ['AWS_REGION']

if "SENTIMENT_DATA_TABLE" in os.environ:
    SENTIMENT_DATA_TABLE = os.environ['SENTIMENT_DATA_TABLE']

session = boto3.session.Session()
s3 = session.resource('s3', region_name=AWS_REGION)
dynamodb = session.resource('dynamodb', region_name=AWS_REGION)
table = dynamodb.Table(SENTIMENT_DATA_TABLE)
Next, a small helper function, write_to_db that will handle writing to the dynamodb table:
class DBConnectionError(Exception):
    """Raised when something goes wrong with DynamoDB connection handling"""
    pass

def write_to_db(output_data):
    try:
        # adding unique key to each document because dynamoDB doesn't
        print('attempting to connect to db...')
        result = table.put_item(Item=output_data, ReturnValues='ALL_OLD')
        print(result)
        if result['ResponseMetadata']['HTTPStatusCode'] != 200:
            raise DBConnectionError
    except Exception as err:
        print('ERR insert failed:', err)
Nothing fancy, just a small bit of abstraction over writing to a dynamodb table.
Moving on to the process_message function. This function is passed the SQS message (discussed in a later section) via the body parameter, which contains anywhere between 40-80KB of social media post data per minute, that process_message will, well, process every minute. The process_message function:
def process_message(body, attributes, message_attributes):
    try:
        message = json.loads(body['Message'])
    except:
        # already JSON, use as is
        message = body['Message']
    records = message['Records']
    for record in records:
        # defining all the coins we lookup, here
        s3_data = record['s3']
        bucket = s3_data['bucket']
        bucket_name = bucket['name']
        object_data = s3_data['object']
        object_key = object_data['key']
        # transform object_key back to a valid timestamp
        print(f'bucket_name: {bucket_name} object_key: {object_key}')
        start_time = datetime.datetime.now()
        # get data file from s3 bucket
        s3.Object(bucket_name,object_key).download_file(f'{object_key}')
        f = open(f'{object_key}')
        data_file = json.load(f)
        f.close()
        # done with file now delete it or else the container's
        os.remove(f'{object_key}')
        # do some cleanup
        bitcoin_posts_arr = []
        ethereum_posts_arr = []
        dogecoin_posts_arr = []
        chainlink_posts_arr = []
        polkadot_posts_arr = []

        bitcoin_mention_count = 0
        ethereum_mention_count = 0
        dogecoin_mention_count = 0
        chainlink_mention_count = 0
        polkadot_mention_count = 0

        timestamp = data_file['timestamp']

        for post in data_file['posts']:
            # run through model
            # Try "joining" title and content (if content) to one string array?
            content = post['content']
            title = post['title']
            post_text_content = (title + ' ' + content).strip().replace('\n', '')

            # our very simple "entity recognition" - did the content mention the coin, if so separate it accordingly
            if any(x in post_text_content for x in ["Bitcoin" , "bitcoin" ,"BTC", "btc"]):
                bitcoin_posts_arr.append(post_text_content)
                bitcoin_mention_count += 1
            if any(x in post_text_content for x in ["Ethereum" , "ethereum" ,"ETH", "eth", "ether"]):
                ethereum_posts_arr.append(post_text_content)
                ethereum_mention_count += 1
            if any(x in post_text_content for x in ["Dogecoin" , "dogecoin" ,"DOGE", "doge"]):
                dogecoin_posts_arr.append(post_text_content)
                dogecoin_mention_count += 1
            if any(x in post_text_content for x in ["Chainlink" , "chainlink" ,"LINK"]):
                chainlink_posts_arr.append(post_text_content)
                chainlink_mention_count += 1
            if any(x in post_text_content for x in ["Polkadot" , "polkadot","DOT", "dot"]):
                polkadot_posts_arr.append(post_text_content)
                polkadot_mention_count += 1

        if (len(bitcoin_posts_arr) > 0):
            bitcoin_results = model_worker(bitcoin_posts_arr)
        else:
            bitcoin_results = [-1]
        if (len(ethereum_posts_arr) > 0):
            ethereum_results = model_worker(ethereum_posts_arr)
        else:
            ethereum_results = [-1]
        if (len(dogecoin_posts_arr) > 0):
            dogecoin_results = model_worker(dogecoin_posts_arr)
        else:
            dogecoin_results = [-1]
        if (len(chainlink_posts_arr) > 0):
            chainlink_results = model_worker(chainlink_posts_arr)
        else:
            chainlink_results = [-1]
        if (len(polkadot_posts_arr) > 0):
            polkadot_results = model_worker(polkadot_posts_arr)
        else:
            polkadot_results = [-1]

        # sum these results into a single "score" for this timestamp to graph while preserving both post frequency (as a magnitude)
        # overall sentiment (higher the score, the more positive, since positive = 1 and negative = -1)
        bitcoin_aggregate_score = functools.reduce(lambda a, b: a+b, bitcoin_results)
        ethereum_aggregate_score = functools.reduce(lambda a, b: a+b, ethereum_results)
        dogecoin_aggregate_score = functools.reduce(lambda a, b: a+b, dogecoin_results)
        chainlink_aggregate_score = functools.reduce(lambda a, b: a+b, chainlink_results)
        polkadot_aggregate_score = functools.reduce(lambda a, b: a+b, polkadot_results)

        model_run_coin_data = [
            {
                "name": 'bitcoin',
                "ticker": 'BTC',
                "score": bitcoin_aggregate_score,
                "timestamp": timestamp,
                "mentionCount": bitcoin_mention_count,
            },
            {
                "name": 'ethereum',
                "ticker": 'ETH',
                "score": ethereum_aggregate_score,
                "timestamp": timestamp,
                "mentionCount": ethereum_mention_count,
            },
            {
                "name": 'dogecoin',
                "ticker": 'DOGE',
                "score": dogecoin_aggregate_score,
                "timestamp": timestamp,
                "mentionCount": dogecoin_mention_count,
            },
            {
                "name": 'chainlink',
                "ticker": 'LINK',
                "score": chainlink_aggregate_score,
                "timestamp": timestamp,
                "mentionCount": chainlink_mention_count,
            },
            {
                "name": 'polkadot',
                "ticker": 'DOT',
                "score": polkadot_aggregate_score,
                "timestamp": timestamp,
                "mentionCount": polkadot_mention_count,
            },
        ]

        end_time = datetime.datetime.now()
        print('process_message run time:', (end_time - start_time).total_seconds())

        print('OUTPUT:')
        convert_date_month = datetime.datetime.strptime(timestamp, "%Y-%m-%dT%H:%M:%S")
        date_month = convert_date_month.strftime("%Y-%m")
        output_data = {
            "dateMonth": date_month,
            "raw": model_run_coin_data,
            "timestamp": timestamp
        }
        print(json.dumps(output_data, indent=2))
        # write model output to dynamodb
        write_to_db(output_data=output_data)
A very important point to make: the JSON file in the S3 bucket we download should look exactly like this:
{
  "posts": [
    {
      "title": "SOME POST TITLE",
      "content": "SOME RAW POST TEXT"
    },
    {
      "title": "SOME POST TITLE",
      "content": "SOME RAW POST TEXT"
    },
    {
      "title": "SOME POST TITLE",
      "content": "SOME RAW POST TEXT"
    }
  ],
  "timestamp": "SOME_UTC_TIMESTAMP"
}
*In our data mining cluster, we have a dedicated lambda function that is responsible for getting raw data from various social media APIs for processing by our model. Ultimately, how you get social media data is completely up to you, and you can use this code exactly as is, if your JSON data file looks exactly like the above as well!
Last, we initialize an SQS listener. We are using this sqs_listener python package This is a long-lived listener process that we will expect to stay alive as long as we have the docker container running.
We implement the handle_message method from inheriting the SqsListener class in order to call our process_message method passing the body parameter, wrapped with a try .. except block. The body argument contains the contents of the SQS message we received, which is all the posts we've found from using a social media API SDK:
class ModelListener(SqsListener):
    def handle_message(self, body, attributes, messages_attributes):
        try:
            process_message(body, attributes, messages_attributes)
        except Exception as error:
            print('process_message failure')
            print(error)

listener = ModelListener(QUEUE_NAME, region_name=AWS_REGION)

if __name__ == "__main__":
    print('initializing SQS listener...')
    listener.listen()
The init Python file
The __init__.py file designates a directory as being a Python package. We aren't using this file directly, so we've kept it blank.
The Dockerfile
Now that we've talked about all of the Python modules in our model worker container, let's go over the Dockerfile:
FROM tensorflow/tensorflow:latest

COPY . ./

RUN pip install transformers
RUN pip install tensorflow
RUN pip install boto3
RUN pip install pySqsListener
RUN pip install python-decouple

# The EC2 instance type we are using, c5.4xlarge, does not have have CUDA installed, and we aren't using it
ENV CUDA_VISIBLE_DEVICES="-1"
# Sets Python output to not be buffered, so model-worker process logging is real time and not delayed due to buffering
ENV PYTHONUNBUFFERED="1"

ENTRYPOINT ["python", "app.py"]
This is a pretty simple Dockerfile: we're just using an official base docker image from Tensorflow, and installing the Python packages we need, and setting the ENTRYPOINT of our container as the command python app.py.
Testing the BERT model worker
Now with the explanation of of the code we are using, we can move onto the next step, which is to start a docker container and send a test message through our SQS queue to check that our docker container is running correctly.
We'll explain in the following sub sections starting and building the docker container either locally (assuming an x86 machine) or remotely on an EC2 instance based on x86 (we are using c5.4xlarge EC2 instances rather than the cheaper t2.large instances just so we have access to higher bandwidth for transferring our relatively large model configuration files, in a later step for the remote setup).
Local setup
Running the docker container locally is pretty straightforward, but we need to still set a few runtime environment variables, and make sure our local AWS config file (located at ~/.aws/credentials) is set to the same AWS user we added permissions for in this section on creating an AWS user. For this tutorial, we are using the default AWS profile that is created initially, so make sure your ~/.aws/credentials file looks like this:
[default]
aws_access_key_id=YOUR_AWS_ACCESS_KEY_ID
aws_secret_access_key=YOUR_AWS_SECRET_ACCESS_KEY
And your ~/.aws/config file looks like this (or at least has the region setting):
[default]
region=YOUR_AWS_REGION
Assuming that worked, now we have configured our local machine to have the permissions of the AWS user we created earlier to allow the model worker docker container to access the AWS resources we need to use.
Next, we need to clone the github repo for this tutorial:
git clone git@github.com:stephenc222/running-bert-tutorial.git
Running locally
Make sure you have the model configuration located at the root. See our tutorial on fine-tuning bert for directions. Running locally from the root repo directory:
install dependencies locally first:
pip install transformers tensorflow boto3 pySqsListener python-decouple
Then start the python script locally:
QUEUE_NAME=tutorialMiningQueue SENTIMENT_DATA_TABLE=tutorialSentimentData AWS_ACCOUNT_ID=YOUR_AWS_ACCOUNT_ID AWS_REGION=YOUR_AWS_REGION python app.py
Now, the model worker python process should have initialized correctly, and is ready to receive messages from our SQS queue.
The last thing we need to do from local is to build the docker image and push it to the ECR repository. First we build and tag the docker image:
docker build . -t model-worker && docker tag model-worker:latest YOUR_AWS_ACCOUNT_ID.dkr.ecr.YOUR_AWS_REGION.amazonaws.com/model-worker:latest
then we login to ECR:
aws ecr get-login-password --region YOUR_AWS_REGION | sudo docker login --username AWS --password-stdin YOUR_AWS_ACCOUNT_ID.dkr.ecr.YOUR_AWS_REGION.amazonaws.com
then finally push the image:
docker push YOUR_AWS_ACCOUNT_ID.dkr.ecr.YOUR_AWS_REGION.amazonaws.com/model-worker:latest
Feel free to skip the next sections on getting the remote setup and running the model worker remotely.
Remote setup on EC2
The docker container setup process is similar for setting up our model worker remotely, but there are a few differences that we'll go over in this section.
First, we'll need to create an EC2 instance (to keep this part simple, we'll be using the AWS Console and not the AWS CLI).
On the EC2 dashboard, click "Instances" then click the "Launch instances" button:

Now on the create ec2 instance page, keep most of the default settings, and select the c5.4xlarge instance type (will need to scroll from here a bit). There is only one setting in particular we need to adjust. We need to set the EBS volume much higher than 8 GiB (to store our docker image). A good number to work with here would be 30 GiB, set inside the "Configure storage" section on the EC2 Launch Instance form.

Setting the higher EBS volume storage size:

In addition, make sure to select the SSH key (or create an AWS SSH key) to allow you to remotely access over SSH your EC2 instance.

Now click "Launch instance" and you should be taken back to the EC2 instance dashboard, and see the EC2 instance initializing.
Next, we need to attach the EC2 instance role we just created, to allow our docker container (through the EC2 instance's role permissions) to use the required resources. Click on the EC2 instance id, then click the "Actions" dropdown menu, then the "Security" menu option:

Click on "Modify IAM role", then select the "running-bert-tutorial-ec2-instance-role" IAM role we created earlier, then click "Update IAM role":

This change should succeed near immediately, and now our EC2 instance has the correct permissions through the role we've attached to our EC2 instance.
We can proceed now to connecting to our EC2 instance remotely through SSH. Click on the EC2 instance id for the instance we just created in the EC2 instance list to navigate to the EC2 instance details.
From here, we can get the public ip4 address that AWS exposes for public facing EC2 instances (this is part of the default configuration we allowed when creating this EC2 instance):

And now using its public ip address and our SSH key we used when creating this EC2 instance, we can connect to it with a command like this and using the ec2-user EC2 instance user account (more info on EC2 user accounts here):
ssh -i "YOUR_SSH_KEY.pem" ec2-user@YOUR_EC2_PUBLIC_IP_ADDRESS
If that command succeeds, then we have successfully connected with our EC2 machine and have an interactive terminal we can run commands from on the machine.
Next, we want to update our system packages and install docker:
sudo yum update -y && sudo yum install docker
Right after that, we want to install git and clone the public GitHub repository for this tutorial (from the SSH terminal session):
sudo yum install git && git clone git@github.com:stephenc222/running-bert-tutorial.git
Start the docker daemon:
sudo systemctl start docker
Before we can build the docker image to run, you will need our fine-tuned model configuration. We covered how to create the Hugging Face BERT model configuration in our tutorial on how to fine tune BERT.
You'll need to copy both the fine_tuned_model directory and the fine_tuned_model_tokenizer from that tutorial into the root of wherever you clone this repository. After creating this model configuration from our tutorial on how to fine tune BERT, you will need to copy the model configuration files to the ec2 instance for building our docker image(assuming you've downloaded locally the model configuration after fine-tuning on a GPU-enabled cloud provider - we used Lambda Labs).
Use rsync (from local, where you have the downloaded model configuration) to upload them to our running EC2 instance:
rsync -Pav -e "ssh -i YOUR_SSH_KEY.pem" fine_tuned_model fine_tuned_model_tokenizer ec2-user@YOUR_EC2_PUBLIC_IP_ADDRESS:~/running-bert-tutorial/
Note that uploading these relatively large model configuration files can take 20-30 minutes, even on the C5.4xlarge EC2 instance type we are using.
Make sure after cloning the git repo and copying the model configuration your directory looks like this (from the root of your directory):
Now, the model configuration is in an accessible spot, and we can now successfully build the model worker docker image:
docker build . -t model-worker
Since we now have a runnable docker image compatible with x86 machines, we should further tag this docker image, and push it up to our ECR repository named "model-worker":
tagging the docker image:
docker tag model-worker:latest YOUR_AWS_ACCOUNT_ID.dkr.ecr.YOUR_AWS_REGION.amazonaws.com/model-worker:latest
pushing the docker image up to our ECR image repository:
docker push YOUR_AWS_ACCOUNT_ID.dkr.ecr.YOUR_AWS_REGION.amazonaws.com/model-worker:latest
Running on the remote
Finally, we can run it in the foreground (while on the EC2 instance) to make testing and verifying it's output a tiny bit simpler and obvious, and see it process in real time as soon as we run our test SQS message in our section on testing the model worker:
On the remote EC2 instance:
sudo docker run \
  -e AWS_REGION=YOUR_AWS_REGION \
  -e QUEUE_NAME=YOUR_AWS_MINING_QUEUE \
  -e SENTIMENT_DATA_TABLE=YOUR_AWS_DYNAMODB_SENTIMENT_DATA_TABLE \
  model-worker
Sending a test message to our SQS queue
At this point we are going to begin testing our model-worker docker container that we have running. If you are using the remote EC2 instance setup, you'll still need to configure your machine locally to be able to send messages to the SQS queue we are using. We can use the same AWS IAM user credentials on your local machine. This assumes that you have the aws cli installed:
aws configure
Once configured, in a separate terminal (from our running EC2 instance) we can send a test message to our SQS queue:
aws sqs send-message --queue-url https://sqs.YOUR_AWS_REGION.amazonaws.com/YOUR_AWS_ACCOUNT_NUMBER/tutorialMiningQueue --message-body file://./test_message.json
Note: this command assumes that test_message.json is a local JSON file, in the same directory as where you run this script.
Our example test_message.json file:
{
  "Message": {
    "Records": [
      {
        "s3": {
          "object": {
            "key": "test_social_media_data.json"
          },
          "bucket": {
            "name": "tutorial-mining-bucket"
          }
        }
      }
    ]
  }
}
Assuming that we don't see any obvious errors, we can move onto the very final section, checking the test run results.
Checking the test run results
We're on the home stretch! At this point we've successfully sent an SQS message and see locally how the model worker was able to process the raw social media data and transform it into quantifiable sentiment data using BERT. All that's left is to check the dynamodb table for what should be the only document in the table.
The easiest way to check the dynamodb table is one final command, which will scan our dynamodb table, limit set to one, and stream to a JSON file for inspection:
aws dynamodb scan --table-name sentimentData --limit 1
The output JSON should look like similar to this as a result of our test message JSON:
{
    "Items": [
        {
            "dateMonth": {
                "S": "2022-09"
            },
            "raw": {
                "L": [
                    {
                        "M": {
                            "name": {
                                "S": "bitcoin"
                            },
                            "score": {
                                "N": "1"
                            },
                            "ticker": {
                                "S": "BTC"
                            },
                            "mentionCount": {
                                "N": "1"
                            },
                            "timestamp": {
                                "S": "2022-09-15T00:00:40"
                            }
                        }
                    },
                    ...
                    {
                        "M": {
                            "name": {
                                "S": "dogecoin"
                            },
                            "score": {
                                "N": "-1"
                            },
                            "ticker": {
                                "S": "DOGE"
                            },
                            "mentionCount": {
                                "N": "1"
                            },
                            "timestamp": {
                                "S": "2022-09-15T00:00:40"
                            }
                        }
                    },
                    ...
                ]
            },
            "timestamp": {
                "S": "2022-09-15T00:00:40"
            }
        }
    ],
    "Count": 1,
    "ScannedCount": 1,
    "LastEvaluatedKey": {
        "dateMonth": {
            "S": "2022-09"
        },
        "timestamp": {
            "S": "2022-09-15T00:00:40"
        }
    }
}
The higher the "score" value, the more positive the sentiment was. As you can see, the text was "positive" on bitcoin, so we have a "1" score, and "negative" on dogecoin so we have a "-1" score for dogecoin. The "mentionCount" is a raw total of all the posts where the coin the sentiment is being processed for was mentioned. We have a "1" for "mentionCount" because we are only working with 1 post each for bitcoin and dogecoin. We aren't using a more advanced way of "entity recognition" than just picking up if a coin's name or symbol was found directly in the text input.
Conclusion
In this blog post we've covered how to run a fine-tuned BERT model both locally and remotely on AWS EC2, and how to test the docker container with a test message from SQS. When you are done testing, be sure to destroy all of the resources (especially the EC2 instance!) we used in this tutorial, or else you'll continue to accrue AWS charges.
If you found this tutorial helpful let me know and feel free to connect on Twitter and LinkedIn!
Thanks for making it to the end! Here's all the code discussed in this post, also available on this post's GitHub repository:
The model-worker docker container:
directory structure:
The Dockerfile:
FROM tensorflow/tensorflow:latest

COPY . ./

RUN pip install transformers
RUN pip install tensorflow
RUN pip install boto3
RUN pip install pySqsListener
RUN pip install python-decouple

ENV CUDA_VISIBLE_DEVICES="-1"
# Sets Python output to not be buffered, so model-worker process logging is real time and not delayed due to buffering
ENV PYTHONUNBUFFERED="1"

ENTRYPOINT ["python", "app.py"]
This __init__.py is also empty, but designates this directory as a Python package
The fined_tuned_model and fined_tuned_model_tokenizer directories are directly output as a result of our fine tuning in part 1
Last but not least, the model_worker.py and app.py:
The model_worker.py module containing our BERT model instance:
# This will "read in" the output configuration created by fine-tuning
# To run in production 24/7
import tensorflow as tf
from transformers import BertTokenizer, TFBertForSequenceClassification

# instantiate the BERT tokenizer and model instances outside of the model_worker function
tokenizer = BertTokenizer.from_pretrained("fined_tuned_model_tokenizer")
model = TFBertForSequenceClassification.from_pretrained("fined_tuned_model")

def model_worker(text_input_arr):
    try:
        print('model_worker running...')
        tf_batch = tokenizer(text_input_arr, max_length=128, padding=True, truncation=True, return_tensors='tf')
        tf_outputs = model(tf_batch)
        tf_predictions = tf.nn.softmax(tf_outputs[0], axis=-1)
        results = tf.argmax(tf_predictions, axis=1)
        numpy_arr = results.numpy()
        converted_value = getattr(numpy_arr, "tolist", lambda value: value)()
        # attempt mapping 0 (negative) to -1, so if "most posts are negative" we don't lose magnitude of negative sentiment
        # vs summing 0s - it's still 0
        converted_value = map(lambda x: 1 if x == 1 else -1,converted_value)
        return list(converted_value)
    except Exception as model_error:
        print('model_worker failed:', model_error)
        raise RuntimeError('Failed to parse input in model_worker:') from model_error
The root app.py module:
import os
import datetime
from sqs_listener import SqsListener
from model_worker import model_worker
import boto3
import json
import functools

QUEUE_NAME = 'tutorialMiningQueue'
AWS_REGION = 'us-east-1'
SENTIMENT_DATA_TABLE = 'tutorialSentimentData'

if "QUEUE_NAME" in os.environ:
    QUEUE_NAME = os.environ['QUEUE_NAME']

if "AWS_REGION" in os.environ:
    AWS_REGION = os.environ['AWS_REGION']

if "SENTIMENT_DATA_TABLE" in os.environ:
    SENTIMENT_DATA_TABLE = os.environ['SENTIMENT_DATA_TABLE']

session = boto3.session.Session()
s3 = session.resource('s3', region_name=AWS_REGION)
dynamodb = session.resource('dynamodb', region_name=AWS_REGION)
table = dynamodb.Table(SENTIMENT_DATA_TABLE)

class DBConnectionError(Exception):
    """Raised when something goes wrong with DynamoDB connection handling"""
    pass

def write_to_db(output_data):
    try:
        # adding unique key to each document because dynamoDB doesn't
        print('attempting to connect to db...')
        result = table.put_item(Item=output_data, ReturnValues='ALL_OLD')
        print(result)
        if result['ResponseMetadata']['HTTPStatusCode'] != 200:
            raise DBConnectionError
    except Exception as err:
        print('ERR insert failed:', err)

def process_message(body, attributes, message_attributes):
    try:
        message = json.loads(body['Message'])
    except:
        # already JSON, use as is
        message = body['Message']
    records = message['Records']
    for record in records:
        # defining all the coins we lookup, here
        s3_data = record['s3']
        bucket = s3_data['bucket']
        bucket_name = bucket['name']
        object_data = s3_data['object']
        object_key = object_data['key']
        # transform object_key back to a valid timestamp
        print(f'bucket_name: {bucket_name} object_key: {object_key}')
        start_time = datetime.datetime.now()
        # get data file from s3 bucket
        s3.Object(bucket_name,object_key).download_file(f'{object_key}')
        f = open(f'{object_key}')
        data_file = json.load(f)
        f.close()
        # done with file now delete it or else the container's
        os.remove(f'{object_key}')
        # do some cleanup
        bitcoin_posts_arr = []
        ethereum_posts_arr = []
        dogecoin_posts_arr = []
        chainlink_posts_arr = []
        polkadot_posts_arr = []

        bitcoin_mention_count = 0
        ethereum_mention_count = 0
        dogecoin_mention_count = 0
        chainlink_mention_count = 0
        polkadot_mention_count = 0

        timestamp = data_file['timestamp']

        for post in data_file['posts']:
            # run through model
            content = post['content']
            title = post['title']
            post_text_content = (title + ' ' + content).strip().replace('\n', '')

            # Simplistic "entity recognition" until we find a more sophisticated entity recognition method
            if any(x in post_text_content for x in ["Bitcoin" , "bitcoin" ,"BTC", "btc"]):
                bitcoin_posts_arr.append(post_text_content)
                bitcoin_mention_count += 1
            if any(x in post_text_content for x in ["Ethereum" , "ethereum" ,"ETH", "eth", "ether"]):
                ethereum_posts_arr.append(post_text_content)
                ethereum_mention_count += 1
            if any(x in post_text_content for x in ["Dogecoin" , "dogecoin" ,"DOGE", "doge"]):
                dogecoin_posts_arr.append(post_text_content)
                dogecoin_mention_count += 1
            if any(x in post_text_content for x in ["Chainlink" , "chainlink" ,"LINK"]):
                chainlink_posts_arr.append(post_text_content)
                chainlink_mention_count += 1
            if any(x in post_text_content for x in ["Polkadot" , "polkadot","DOT", "dot"]):
                polkadot_posts_arr.append(post_text_content)
                polkadot_mention_count += 1

        if (len(bitcoin_posts_arr) > 0):
            bitcoin_results = model_worker(bitcoin_posts_arr)
        else:
            bitcoin_results = [-1]
        if (len(ethereum_posts_arr) > 0):
            ethereum_results = model_worker(ethereum_posts_arr)
        else:
            ethereum_results = [-1]
        if (len(dogecoin_posts_arr) > 0):
            dogecoin_results = model_worker(dogecoin_posts_arr)
        else:
            dogecoin_results = [-1]
        if (len(chainlink_posts_arr) > 0):
            chainlink_results = model_worker(chainlink_posts_arr)
        else:
            chainlink_results = [-1]
        if (len(polkadot_posts_arr) > 0):
            polkadot_results = model_worker(polkadot_posts_arr)
        else:
            polkadot_results = [-1]

        # sum these results into a single "score" for this timestamp to graph while preserving both post frequency (as a magnitude)
        # overall sentiment (higher the score, the more positive, since positive = 1 and negative = 0)
        bitcoin_aggregate_score = functools.reduce(lambda a, b: a+b, bitcoin_results)
        ethereum_aggregate_score = functools.reduce(lambda a, b: a+b, ethereum_results)
        dogecoin_aggregate_score = functools.reduce(lambda a, b: a+b, dogecoin_results)
        chainlink_aggregate_score = functools.reduce(lambda a, b: a+b, chainlink_results)
        polkadot_aggregate_score = functools.reduce(lambda a, b: a+b, polkadot_results)

        model_run_coin_data = [
            {
                "name": 'bitcoin',
                "ticker": 'BTC',
                "score": bitcoin_aggregate_score,
                "timestamp": timestamp,
                "mentionCount": bitcoin_mention_count,
            },
            {
                "name": 'ethereum',
                "ticker": 'ETH',
                "score": ethereum_aggregate_score,
                "timestamp": timestamp,
                "mentionCount": ethereum_mention_count,
            },
            {
                "name": 'dogecoin',
                "ticker": 'DOGE',
                "score": dogecoin_aggregate_score,
                "timestamp": timestamp,
                "mentionCount": dogecoin_mention_count,
            },
            {
                "name": 'chainlink',
                "ticker": 'LINK',
                "score": chainlink_aggregate_score,
                "timestamp": timestamp,
                "mentionCount": chainlink_mention_count,
            },
            {
                "name": 'polkadot',
                "ticker": 'DOT',
                "score": polkadot_aggregate_score,
                "timestamp": timestamp,
                "mentionCount": polkadot_mention_count,
            },
        ]

        end_time = datetime.datetime.now()
        print('process_message run time:', (end_time - start_time).total_seconds())

        print('OUTPUT:')
        convert_date_month = datetime.datetime.strptime(timestamp, "%Y-%m-%dT%H:%M:%S")
        date_month = convert_date_month.strftime("%Y-%m")
        output_data = {
            "dateMonth": date_month,
            "raw": model_run_coin_data,
            "timestamp": timestamp
        }
        print(json.dumps(output_data, indent=2))
        # write model output to dynamodb
        write_to_db(output_data=output_data)

class ModelListener(SqsListener):
    def handle_message(self, body, attributes, messages_attributes):
        try:
            process_message(body, attributes, messages_attributes)
        except Exception as error:
            print('process_message failure')
            print(error)

listener = ModelListener(QUEUE_NAME, region_name=AWS_REGION)

# initializes the SQS listener, similar-ish to initializing like a REST API
if __name__ == "__main__":
    print('initializing SQS listener...')
    listener.listen()


Top comments (0)